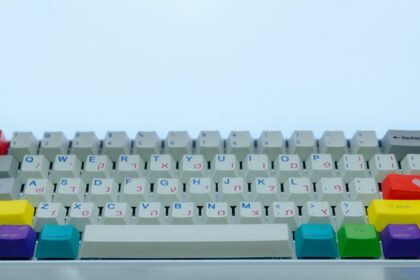
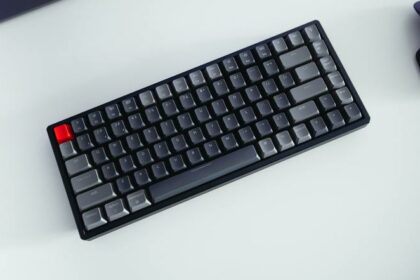
A mechanical gaming keyboard is not just a great investment because of the performance advantages that they can offer, but because they last longer and are repairable. For example, it is possible to fix sticky keys on a mechanical keyboard with relative ease.
While the right to repair is great and all, prevention is always the best medicine.
Taking a few simple measures can enhance the life of your mechanical keyboard and prevent problems. Perhaps the best measure you can take is to regularly clean your keyboard.
Cleaning any part of your PC, for example your graphics card, leads to increased and prolonged performance.
Cleaning a keyboard is actually not that difficult, and can be done with a few basic items. However, the process may be different depending on the situation.
Below, I’ll show you how to clean a mechanical keyboard with two different methods for a quick tidy up or a deep clean.
Everyday Cleaning for a Mechanical Keyboard

Most of the problems with your mechanical keyboard can be avoided as long as you clean your keyboard regularly. It does not need to be a thorough cleaning, it just needs to do enough to keep your keyboard in tip-top shape.
The following method should be used to clean your keyboard once or twice a week.
All you will need is a handheld vacuum cleaner and a couple of microfiber cloths.
Make sure that your keyboard is unplugged at the time of cleaning.
To begin, use the handheld vacuum cleaner and remove dust both on top of the keycaps and in the areas between them. Having a vacuum with a brush attachment at the end is a great way to make sure that you get all of the dust and the particles out of your keyboard. Note that there is no need to remove your keycaps here.
Once you are done with the vacuum, use a slightly damp microfiber cloth to rub the mechanical gaming keyboard. This will remove all finger oils and gunk from the keycaps. Remember that the cloth must only be slightly damp, as a wet cloth may lead to water entering the key switches and cause damage once the keyboard is turned on.
Lastly, use a dry microfiber cloth to dry the keyboard. Remember that you should only use a microfiber cloth (or a hand towel) to dry the keyboard. Otherwise, you risk particles falling off the cloth and back onto the keyboard, making it dirtier in the process.
Can I Use Compressed Air Instead of a Vacuum Cleaner?
A lot of guides on the internet advise against using compressed air to clean a mechanical keyboard.
The reason behind it is the fact that compressed air is cold, so it may cause condensation on the parts. The other reason is compressed air often ends up only moving the dirt about and not removing it.
When it comes to condensation, it does not matter. No matter how much compressed air you use, you will not damage the parts of your keyboard.
However, the compressed air may not be too useful if you still have your keycaps on.
If you have removed the keycaps, then you can use compressed air without worry. However, if you are cleaning with the keycaps, using a vacuum cleaner is much better.
Deep Cleaning a Mechanical Keyboard

Deep cleaning a mechanical keyboard is extremely important if you want to maximize its lifespan. while you don’t need to deep clean your keyboard very often, cleaning it once a month or once every two months is a great idea.
Deep cleaning a mechanical keyboard is not that difficult. Once again, you are going to need a couple of microfiber cloths, a vacuum cleaner, a keycap puller, dish soap, a towel, and a bowl. If you want to make sure that you clean everything, getting some Q-tips and isopropyl alcohol is also a good idea.
Remove the Keys
In order to properly deep clean your mechanical gaming keyboard, you will need to remove the keys. The easiest method to do this is using a keycap puller. There are two kinds of keycap pullers, plastic ones, and wire ones. Both of them do the same job, so just use the one that you prefer.
Simply slide the keycap puller until it is underneath the key. Then, gently pull on the tool until the key comes off. If you don’t have a keycap puller, there are multiple methods that you can use to remove keys from a mechanical keyboard.
Soak the Keys
Once all the keycaps have been removed, you need to soak them to properly clean them. Take the bowl and mix some dish soap and water in it. Then, place the keys in the bowl and leave them to soak.
Eventually, all the dirt and the bacteria will be cleaned off. You should usually leave the keycaps in the bowl while you clean the rest of the keyboard. In total, you should soak the keys for at least a couple of hours.
Remember that when you take the keys out of the bowl, you must make sure that they are completely dry before you reattach them to the board. It is a good idea to dry them thoroughly with a towel, and then leave them in the open air for a few minutes before reattaching them.
Clean the Plate/PCB
Certain keyboards have the switches mounted on a plate, while others have them mounted on the PCB itself. Whatever the case may be for your keyboard, the process for cleaning them is the same.
You should start by turning the keyboard upside down and shaking out as much of the dust, hair, and other particles as you can. After that, simply use the handheld vacuum cleaner and use it to clean the entire keyboard.
Remember that you should never apply a significant amount of force when using the vacuum cleaner, as it may damage the switches. Once you are done with the vacuum, you can use a slightly damp microfiber cloth to clean any excess grime. However, we would recommend using isopropyl alcohol with Q-tips instead.
Even the slightest amount of water inside the switches may damage them when you turn your keyboard on. Isopropyl alcohol is perfect for cleaning tech products as it eliminates all bacteria and evaporates quickly.
Regardless of whether you use a microfiber cloth with water or a Q-tip with isopropyl alcohol, you should dry the plate with another microfiber cloth before you begin reattaching the keycaps.
Reassemble the Keyboard
Once the keycaps are extremely dry (once again, make sure they are dry), it is time to put everything back together. Simply reattach all of the keycaps to the plate/PCB and plug in your keyboard once again.
Advanced Cleaning of a Mechanical Gaming Keyboard
Advanced cleaning is not usually necessary. While there are numerous websites that suggest advanced cleaning, chances are that it won’t really impact the lifespan of your keyboard in any major way. Still, we are going to go through the process over here.
Many suggest using ultrasonic cleaners to clean the keycaps. While that is a good idea, ultrasonic cleaners won’t really have a noticeable impact on your keycaps compared to dish soap and water. As such, it is not extremely important that you purchase one.
What you need to do is to unscrew the parts of the keyboard. Usually, a keyboard has a frame, a PCB, and a plate. It is important that you do not lose any screws during the cleaning process, so keep them in a safe place.
Once again, you will use a vacuum to clean all of the parts, with a brush soaked in a dish soap solution to wipe away dirt and grime that is stuck to the surface. However, remember that you must not rub any of the electronics (including switches) on any of the parts. A safer method is to use a Q-tip or a microfiber cloth with isopropyl alcohol instead, even though it will take a lot longer.
Once everything has been cleaned and dried, you need to reassemble the keyboard by screwing all the parts back in. In the end, reattach the keycaps and plug in your keyboard.
Cleaning a Mechanical Keyboard with Liquid Spills

The last thing we are going to look at is how to clean a keyboard that has liquid spilled on it. If you were using the keyboard when the spill occurred, you must immediately unplug the keyboard. Allowing a keyboard to run when it is waterlogged will almost certainly damage the keyboard and leave you with no option but to repair or replace it.
Once the keyboard has been unplugged, you need to take certain emergency measures. Remember that if you spilled something like water or coffee (a standard coffee, not a sugary coffee-flavored drink), chances are that you will be able to recover the keyboard and continue using it with minimal damage. However, a sugary drink like soda will almost certainly damage the keyboard beyond repair.
As soon as the water enters the keyboard, unplug it and turn it upside down. Then, shake it a little bit to get all of the water out of the keyboard.
After that, you need to deep clean the keyboard. However, do not use a damp microfiber cloth (for obvious reasons). Instead, use a dry cloth to make sure that the keyboard is completely dry. After that, you need to let the keyboard dry for a further period of about two days. It might help to place the keyboard in a warm room so that the liquid can evaporate faster.
If you spilled something other than water on your gaming keyboard, chances are that the evaporating water will leave a residue behind. This is where an advanced cleaning would come in handy. However, you should be able to get by with a deep clean as well.
In the end, plug your keyboard back in. It is extremely important that you make sure the port that will connect your keyboard to your PC is completely dry. Otherwise, you risk damaging your PC itself. Test the keyboard to see if it is working properly.
If you are someone who is prone to spilling liquids on their equipment, opt for a water-resistant keyboard.
Keyboards are rarely completely waterproof, but water-resistant models have mechanisms for protecting important parts of the keyboard and ensuring all the water drains away once spilled.


