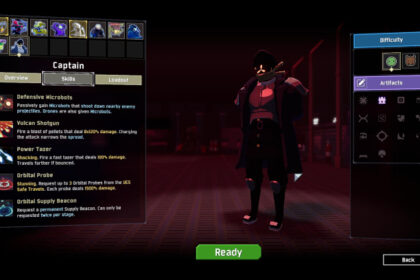
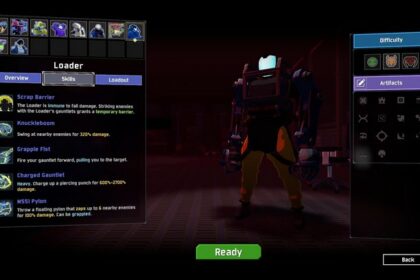
MUL-T is new survivor in the Risk of Rain universe. MUL-T has the most flexible skill set compared to other survivors because of his Retool ability and his Multifunctional passive. This guide will explain how the builds are used to help you unlock all the skills for MUL-T.
MUL-T Best Builds to Use
MUL-T’s build is a mix between Commando’s Double Tap and Captain’s Vulcan Shotgun. His Auto-Nailgun can be used to land multiple on-hit effects like the Double Tap but the only difference is that the Auto-Nailgun is limited by its range but can deal more damage in a shorter range compared to the Double Tap. Every time you stop to refire the Auto-Nailgun, it sends a blast of multiple pellets like the Vulcan Shotgun. Which gives the Auto-Nailgun the option to switch between rapid firing and bursting.
There are also builds around the Rebar Puncher which can be good and unique because of its extremely high multiplier. It scales well with attack speed unlike Artificer’s Charged Nano-Bomb.
Lens-Maker’s Glasses, Predatory Instincts, Harvester’s Scythe and Brilliant Behemoths
This build focuses on using the Auto-Nailgun as the primary skill. It gives a slight boost to damage with the Lens-Maker’s Glasses because the Auto-Nailgun’s multiplier is quite low. It is used primarily to activate the Predatory Instincts and Harvester’s Scythe while giving ample damage boost to the Blast Canister.
The Harvester’s Scythe will keep your health up as you deal damage and it is best paired with an Aegis which can increase your survivability by giving you a thick shield from your Harvester’s Scythe. Adding a few Backup Magazines can help you with more crowd control by applying area of effect stuns with the Blast Canister. It deals big damage too because of the Lens-Maker’s Glasses.
The Brilliant Behemoth is the icing on the cake. It gives another damage boost by adding an explosion damage on every tick of damage from your Auto-Nailgun. With every increase in attack speed, the more the Brilliant Behemoth scales. Brilliant Behemoths are stackable and will add an additional explosion damage for every item.
Tri-Tip Daggers, Shatterspleen and Soldier’s Syringe
This item combination can be added to other builds for MUL-T. Shatterspleen will deal most of the damage with the added bleed stacks that also makes everything explode. This combination is extremely powerful with abilities that have high procs such as Double Tap and Auto-Nailgun.
This is not as powerful as Commando’s Double Tap build because of how short the range is and the low accuracy from the Auto-Nailgun. This is why MUL-T has a Retool skill where he can swap his Auto-Nailgun for the Rebar Puncher which is better for long range fights. This bleed debuff strategy will not work well with the Rebar Puncher.
Build mobility on MUL-T to get you closer to enemies at all times. Being close to enemies will make you use your Auto-Nailgun more and that will be your objective when fighting enemies. Focused Crystal will be a great addition for this playstyle too. The Soldier’s Syringe should add additional procs and stack bleeds to even triple digits if the enemy manages to survive long enough.
Get at least one Wax Quail and one Hardlight Afterburner to improve your movement speed by getting a higher up time on your Transport Mode utility skill. Add a few Paul’s Goat Hoof and Energy Drinks for better strafe mobility when kiting. MUL-T is already durable and damage negation items will work great with him because of his high effective HP.
Crowbar, Backup Magazine, Lens-Maker’s Glasses, Alien Head and Soldier’s Syringe
This build is centered more on the Rebar Puncher and Blast Canister. Both abilities have crazy multipliers and these items capitalizes on improving that with the Crowbar. This playstyle requires you to have more precision with your aim apart from just holding your left mouse button and spamming it to enemies.
The Lens-Maker’s Glasses will scale better with these skills being used and attack speed can also help you throw more Rebar Punchers. Predatory Instincts can be good too but since you are building on Crowbars, common items might be more scarce because of all the common items you need. This means that you will not be getting a full 10 stack on your Lens-Maker’s Glasses anytime soon.
You can build on equipment with your uncommon items. MUL-T is the only unique survivor in the game that can carry 2 equipment at a time because of his Retool skill. Fuel Cells and Warhorn are great uncommon items that can compliment your equipment. Preon Accumulator and Disposable Missile Launcher are the two best offensive equipment you can go for.
You can also opt for adding a Volcanic Egg for mobility which can help you reach higher places because MUL-T can have trouble going up to cliffs. Warhorn will be better with the Disposable Missile Launcher because of the lower cooldown.
How to Unlock Scrap Launcher
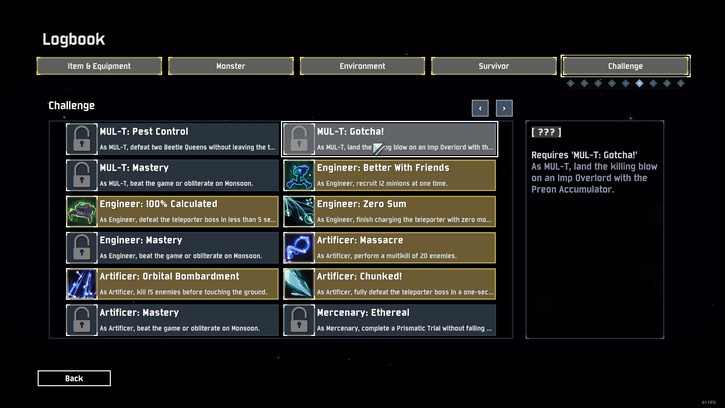
To unlock the Scrap Launcher alternate skill, you need to finish the “MUL-T: Pest Control” achievement. It is completed by defeating two Beetle Queens without leaving the teleporter zone. There are certain conditions to be met to spawn two Beetle Queens because they are boss monsters that only spawn with the teleporter.
The Artifact of Swarms will be the best method in finishing this achievement. When Artifact of Swarms is active on the playthrough, monsters spawns will double and their health will be halved. The word “monsters” here applies to all the monsters and not just regular enemies. This means that elite monster spawns will double as well as teleporter bosses and unique bosses.
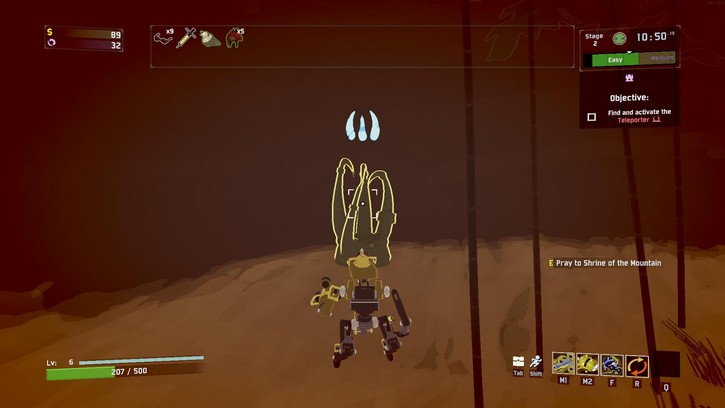
Without the Artifact of Swarms active, your best bet is to find Shrine of the Mountains within the stage and activate it. The Shrine of the Mountains increases the number of teleporter bosses that spawn during the stage. There can be multiple shrines available if you are lucky enough to encounter them in a single stage.
Your next option is to find other players to play with as the number of bosses increases with the size of the party. It can be easier and you will not have to land the killing blow on the Beetle Queens to get credited for the achievement. Your party members can go ham on them if they wish as long as you stay within the teleporter zone the whole time until the Beetle Queens are defeated.
If you are doing it with the Artifact of Swarms method, you can use the Auto-Nailgun build for this because the Beetle Queens have an enormous hit box. Auto-Nailgun will shred this boss so fast with a semi-complete build and it is also perfect because you will need to be in close range to maximize its potential which you will be doing because of the teleporter zone.
How to Unlock Power-Saw
To unlock the Power-Saw alternate skill, you need to finish the “MUL-T: Gotcha!” achievement. It is completed by landing a killing blow on an Imp Overlord with the Preon Accumulator. This can be difficult because getting the Preon Accumulator without the Artifact of Command active will be a challange. It can only be acquired by reaching Rallypoint Delta where there is a time gated chest that will need to be opened before the 10 minute mark.
Just activate the Artifact of Command to make it easier to acquire. The Imp Overlord will only spawn as a teleporter boss which is one of the spawns in the Rallypoint Delta environment. It will take luck to get it on the first try and you should keep trying instead of resetting the run if it does not spawn. The Imp Overlord can spawn on multiple environments.
When it spawns, you can bring him down to at least 30% to 40% HP before trying to use the Preon Accumulator. It is worth noting that the tendrils from the Preon Accumulator blast will not count towards the kill so if you bring the Imp Overlord to extremely low HP, the tendrils might kill it instead of the blast.
Another tricky part here is how the Imp Overlord teleports and weaves around you. You should keep kiting and wait until he finishes his teleports. He sometimes teleports consecutively and once he finishes, that will be the window where you can try to hit him with the Preon Accumulator. You can telegraph his movement and you can notice that he rarely teleports when you are already near him.
MUL-T Tips and Tricks
- The most underrated ability of MUL-T is the Multifunctional. It gives MUL-T an additional equipment slot that doubles the effectiveness of Fuel Cells and Soulbound Catalysts. This makes MUL-T the best survivor to experiment equipment builds with.
- Charging your Rebar Puncher will not get cancelled when you sprint after holding the charge
- You will not be able get the Fuel Array as MUL-T and completing the Power Plant achievement to unlock REX is not possible with MUL-T
- Cooldown reduction items work well with MUL-T as well as his equipment when you interchange them
Conclusion
MUL-T has multiple builds to choose from and that is what separates him from other survivors the most. His alternate skills are easy to unlock but there are a few conditions in finishing the the Scrap Launcher. For that, it can take some time to finish because you will need to unlock the Artifact of Swarm or find a party to play with.

