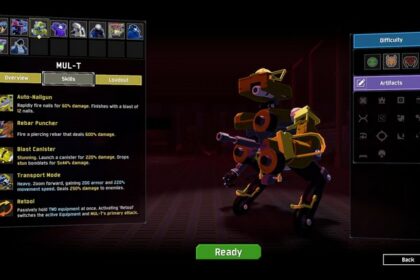
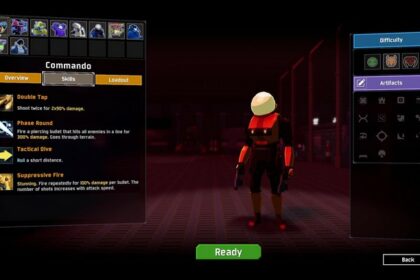
Artificer is the mage-type survivor in Risk of Rain 2 that has a colorful kit to work with. It can be hard to unlock all the skills for Artificer because of the difficulty of the achievements.
This guide will run you through the best strategies and builds you can use to finish all these achievements and unlock all the skills as fast as possible for Artificer so you can beat the game.
Artificer Best Builds to Use
Artificer is a survivor that has insane damage output with high multipliers. His multiplier is similar to The Captain and have somewhat similar builds. Mobility is also a weakness and only has the ENV Suit passive, which makes Artificer float in air and negate fall damage, to make up for it.
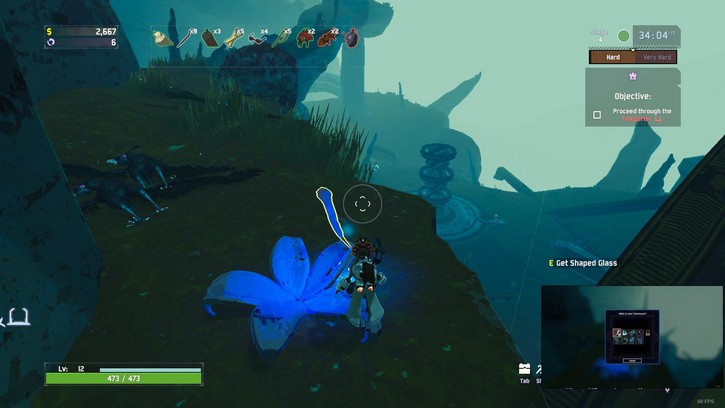
Crowbar, Lens-Maker’s Glasses and Shaped Glass
This build is a common glass cannon build for characters with high multipliers. Artificer has one of the highest multipliers in the game and this build should be his bread and butter. It kills almost everything with his primary and secondary skill with the latter being used for stronger enemies because of its higher damage output.
You could accompany this build by adding a few Old Guillotines to easily take care of enemies who manage to live through your burst damage. You can also add an Aegis, a Harvester’s Scythe and a Tougher Times for sustainability to compensate for the Shaped Glass. In fact, it is necessary to add these sustain items to the build.
Soldier’s Syringe, Alien Head, Backup Magazine and Bandolier
This build is more unconventional and turns Artificer into a semi-support character. His Charged Nano-Bomb deals a ton of damage but its stun is vastly underrated. The Alien Head, Backup Magazine, and Bandolier all help keep Artificer’s skill up at all times. The Soldier’s Syringe allows you to charge the Nano-Bomb faster so you can keep up with the increased uptime of the charges.
You can add a few Stun Grenades, Shattering Justice, and Tri-Tip Daggers for debuffs and control. An item like the Death Mark will be useful for any player in the party when there are enough debuffs on the enemies at all times.
Alien Head, Shatterspleen and Tri-Tip Dagger
These three item combinations will solely rely on the Flamethrower skill. The Flamethrower is extremely powerful because of the number of procs it deals with. It deals damage at 22 different instances which allow on-hit effects to become exponentially better.
This build uses the bleed stacks you can get from multiple Tri-Tip Daggers and make enemies explode for area of effect damage with Shatterspleen. Alien Head is used to keep the Flamethrower skill up as much as possible. Bandolier can also help with that while you look for Alien Heads. Bandolier is not as effective as the build above because you will not be able to stack charges on the Flamethrower skill with Backup Magazines or Hardlight Afterburners.
How to Unlock Plasma Bolt
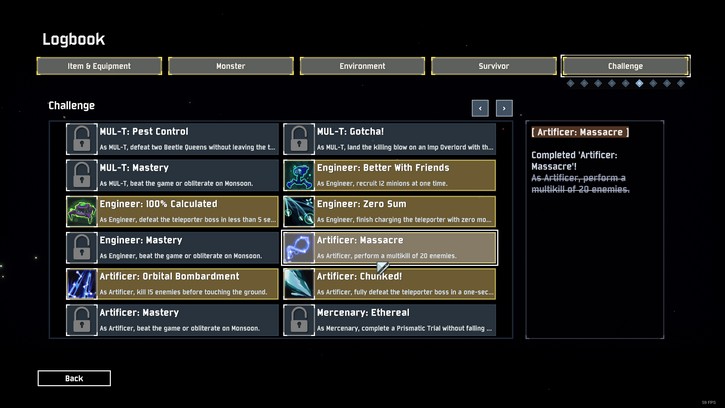
The Plasma Bolt is unlocked by finishing the achievement called “Artificer: Massacre”. To finish the achievement, you will need to kill 20 enemies in one blow. It might take a few tries but it should be relatively easy with the proper build. The trick here is getting the Primordial Cube equipment to clump up all the enemies for the kill.
I used the first build mentioned above and just combined the Primordial Cube equipment to clump everyone up during the teleporter. The strategy here is to first complete the build or secure enough Crowbars and a Primordial Cube with a Fuel Cell. Once you have these items, go to a teleporter and activate it.
Kill the boss immediately and keep kiting all the other monsters around the teleporter. As the teleporter progresses, more enemies will continue to spawn so do not worry about trying to lure more enemies outside the teleporter because the spawns from the teleporter should be enough.
Fuel Cell adds one more charge to your equipment and it will help you clump up the enemies more. You can add more Fuel Cells if you want to be absolutely sure that all monsters keep getting sucked into the black hole at all times.
Do not use any other skill outside of the Charged Nano-Bomb. It is because you need to kill them all in a single blow so throwing all your skills in the black hole will be pointless because all your skills deal damage. With the Crowbar build, skills such as the Snapfreeze and the Flame Bolt will one-shot everything too and you would want the skill, Charged Nano-Bomb, with the highest area of effect to clean out the 20 enemies.
How to Unlock Nano-Spear
The Nano-Spear is unlocked by completing the achievement called “Artificer: Chunked!”. It is completed by killing the teleporter boss in a single second. This means that you will have to kill it the moment it spawns because once it gets hit by anything small and you still get to kill it instantly, it will not complete the achievement and unlock the skill.
The Preon Accumulator is required here because it adds at 4000% damage of burst that can easily be synchronized with your Charged Nano-Bomb skill. Make sure you have enough Crowbars for this one-shot build and the playthrough should be time-sensitive as well because the monsters scale extremely fast. Once you hit your peak at around Very Hard and Insane level, you should start doing the combo for the teleporter boss at every stage.
The type of monster is also a big deal because a Magma Worm teleporter boss will be almost impossible to kill because of the Preon Accumulator charge up time. Avoid activating Shrines of the Mountain because it will add another boss to the teleporter and working with two bosses to kill in a second is also impossible.
The video above shows the perfect example of a good kill. Take note of how long the charge-up of the Preon Accumulator has been and adjust accordingly to how far you are from the boss. Once you start charging up the Preon Accumulator, you can start charging up the Charged Nano-Bomb as well. The Charged Nano-Bomb’s projectile moves twice as fast as the Preon Accumulator and the charge up for the skill depends on your attack speed.
With a higher attack speed, you will have more leeway to charge up your skill to synchronize with your Preon Accumulator. For the type of bosses that spawn, it was quite lucky that it was the Blazing Greater Wisp boss that spawned because they usually have lower hitpoints compared to other bosses. You will have numerous chances to spawn easier bosses to fight so keep trying until the bosses have outscaled your damage output which will force you to restart your run.
There is also a small chance of trying to find a Preon Accumulator with an equipment chest at the start of stage 1. Achievement runs mostly require the Artifact of Command for more precise building which can get you a Preon Accumulator early. Once you find an equipment chest for a Preon Accumulator in stage 1, it is possible to finish this achievement on the first teleporter boss.
You have to act extremely fast and finish the boss before the first tick of the difficulty found on the upper right portion of your screen. That tick signifies the difficulty scaling and gives a huge chunk of hitpoints for enemies at the start. If you get to farm enough gold and open an equipment chest with enough time remaining, it is a good sign that you can do this strategy.
Keep an eye out for the teleporter at all times. There will be red flakes or orbs floating around the vicinity where the teleporter is located and that is a good indication of assessing which part of the stage is the teleporter located.
How to Unlock Ion Spear
The Ion Spear is unlocked by completing the “Artificer: Orbital Bombardment” achievement. It is completed by killing 15 enemies before touching the ground. This is the easiest skill and achievement to unlock from Artificer and is also doable with the same build used to unlock the other skills mentioned above.
The achievement is finished easier once your build is doing good and the enemies spawn faster. Find a cliff or any towering area where you can jump off and hold the jump button to float down slower. You will have ample time to kill 15 enemies during this time if the enemies spawn quickly.
With the Crowbar build, you should be able to one-shot everything before touching the ground. You can even use a Volcanic Egg equipment to propel yourself higher into the air and just float down again. Make sure you are at a far enough stage that enemies actually spawn quicker so you have more targets coming at you instead of you trying to find them.
Artificer Tips and Tricks
Artificer has really low mobility. While his passive saves him from fall damage and helps him kite enemies in the air, he still moves slowly and does not have any ability where he can dodge incoming damage. This means that you will always need a certain amount of sustainability for every stage to survive.
Always add a single Wax Quail for mobility. This changes your playstyle with your movement pattern by hopping instead of running around. This is a cheaper alternative to getting multiple Paul’s Goat Hoofs and Energy Drinks. This will give you more mobility and help you complete your builds faster.
Artificer’s Flamethrower deals damage 22 times which allows crazy combos with on-hit items. It is also worth noting that if the first proc crits with a Lens-Maker’s Glasses, the whole duration of the Flamethrower crits as well.
Conclusion
Artificer has two difficult achievements to unlock but all of them could be cleared in one great run. You will have the best chances of doing them all in one run with the Crowbar, Lens-Maker Glasses and Shaped Glass build. This is also the only build that can finish the “Artifiicer: Chunked!” achievement so it is best to go with this build. Once you have unlocked all the skills for Artificer, you can discover new builds with his other skills and experiment on them. That is what makes this game fun.

