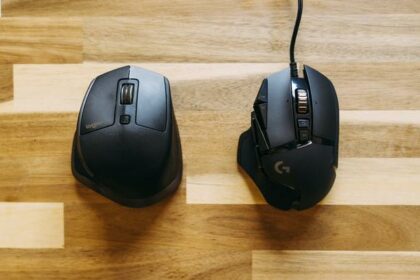
Modern gaming mice come with a whole host of features to make PC gaming more intuitive.
The ability to change DPI settings, LED colors and ergonomic design make it extremely necessary for every gamer. The best gaming mice also come with a multitude of buttons that a normal mouse does not have.
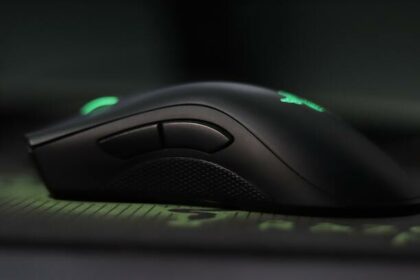
Along the sides of many modern gaming mice, you can find buttons embedded that can be accessed with the thumb and ring fingers.
These buttons, when used in a game, can save you precious milliseconds by allowing you to quickly perform a function that usually is assigned to an obscure button on the keyboard or worse, a combination of buttons.
Reloading, viewing score, weapon switching, camera angle selection, aiming down the sight, voice chat or melee attacks, these buttons can be programmed to do a whole host of functions, freeing up your keyboard hand to focus on movement and strafing. This improves your in-game speed and ability to string together better plays that can propel you to a higher skill tier.
But, it is not easy to program these buttons when you first connect them to the PC. The extra buttons on the sides of the mouse are often unassigned to any particular task and need to be assigned functions to perform when clicked in-game.
In this guide, we’re going to teach you exactly how to program a gaming mouse.
Most of the high-end, modern-day gaming mice with massive DPI ranges come with their own applications that will allow you to customize the buttons. But, for us bargain-lovers, quality game mice at the low price spectrum might not have this luxury. The gaming mice, though of high quality, might not come with it’s own program to customize the buttons.
Fret not, as for everything, there are programs on the internet to aid you with this. And it is absolutely free.
Download and Install X-Mouse Button Control
The first thing you’ll want to do is get X-Mouse Button Control which is totally free.
Make sure you download the version compatible with your version of windows (if you run a Windows 32-bit download the 32-bit version, if you run a 64-bit Windows, download the 64-bit version of the software).
Before you install the software, make sure your mouse is connected to the PC. This step makes it easier for you to open the software and immediately get to programming functions for the mouse buttons.
After you download the software, run the installer and install it. It’s a quick install.
How to Program Gaming Mouse Buttons?
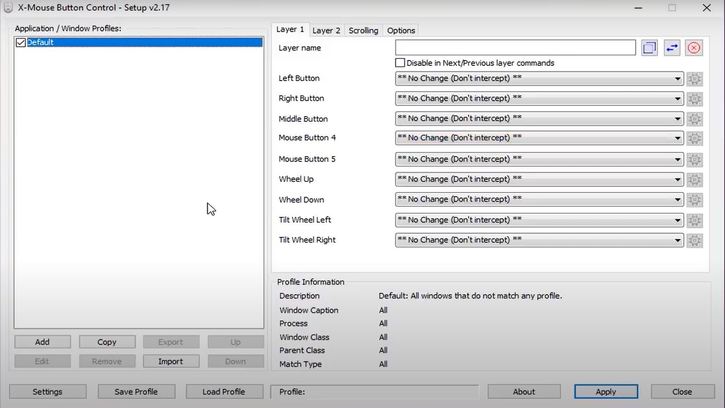
Once you are in the software and it has recognized the mouse you want to program, you will see the screen as shown in the image. Here, you have to select the default checkbox on the left panel and this will bring up a whole host of programmable buttons on the right-hand side.

Select the ‘Layer 1’ tab on the top of the right panel. Here is where you will do most of your programming and reprogramming work on your mouse. You will find the usual left click, right click and mouse wheel buttons assigned to their primary roles. Do not change the settings to these (unless you want to).
You will find options labelled mouse button 5 and mouse button 4 which indicate the extra buttons on your mouse.
To find out which option corresponds to the buttons of your mouse, you have to simply click them. Clicking the extra buttons on your mouse lights up the corresponding tab on the application. This shows you where to assign functions to each extra key on the mouse.
Now, there are two ways you can assign functions to these keys.
The first one is just to use the drop down menu to choose one of the many common keys or functions provided by the application. You can find commonly used commands like back, forward and refresh (for browsers) and also Numpad keys, home, pg up, pg dn, etc.
But in all probability, gamers will not find commonly used keys like the LShift, LCtrl or Tab. To find these, you need to click the drop down menu and select the Simulated Keys (undefined) option.
This will open up a pop-up with a box that reads – Enter the custom key. Here you will have to program in particular commands or keys that the mouse buttons can perform.
There are a whole host of modifier tags right below this box that give you specific commands for commonly used keys.
Copy and Paste them in the box. For example, if you want to assign one of your mouse buttons to the Tab key (used commonly in PC games to switch between weapons), you have to type in {TAB} into the box. Several other key tags and Toggle Key codes are provided right below which you can use as a reference.
You can then also choose how these keys can function. In the drop down next to the line that reads ‘How to send the simulated keystrokes,’ you can assign different kind of inputs the PC will read. The key can behave as a sticky key, can trigger the designated action when the button is clicked, when it is released, repeatedly when the button is held, etc.
After this, you just have to save your settings.
You also have the option to add layers in the primary screen of the program. If your gaming mouse has more than two extra keys, you can assign a value to all of them by adding multiple layers and customize your mouse to be a lethal addition to your gaming arsenal.
Once you are done assigning particular functions to the many keys and choosing how they response, you are now set to try them in the game. Jump in and try to use your mouse instead of the usual keys to unleash the full potential of you gaming mouse.
Within a few weeks of use, you will intuitively prefer using the mouse because its saves precious milliseconds and increase your in-game performance incredibly.


