The beautiful thing about Age of Empires 2 — other than the fact that it was first released in 1999 and is still going strong — is that the basics of the game are extremely simple.
Like chess, it’s easy to learn what the pieces do.
It’s much more complicated, however, to figure out the right move at the right time and be able to remember the really fine details when the pressure is on.
This guide is going to teach you a huge amount about Age of Empires 2 strategy and includes hundreds of tips throughout. It’s long.
I’m fairly confident what you’re reading is the most detailed strategy guide to Age of Empires 2 ever created in one place.
What I’m sharing is not my advice.
Instead, every bit of information included here is a mix of mathematically-proven strategies, along with effective tactics utilized by the top pros playing the game today, such as The Viper, Hera and Daut.
We also hired top-200 ranked 1v1 player and Twitch streamer Survivalist to fact check and provide additional expert insight.
We’re going to focus on winning Ranked multiplayer matches as that’s the truest test of skill in my opinion, but you can take everything I say and apply it to beating the AI if that’s your jam.
You’ll find this guide useful whether you’re a total noob to the game or even if you already possess intermediate-level skill. It contains all of the information you need to eventually become a consistent, above-average player.
Fundamentals
Game of Math
In its most basic form, Age of Empires has always been a numbers game. The game is won and lost on economy; how you build it and how you use it.
You must grow your own eco as quickly as you can whilst trying your hardest to prevent your opponent from growing their’s.
However, resources get less valuable over time.
OK, they don’t get less valuable in a literal sense, they get less valuable relative to the game — relative to your economy and your opponents economy.
200 wood is a lot of wood at the start of a game. Later in games, you’ll be earning 200 wood multiple times over every minute.
This means that whilst you want a rapidly increasing income of resources, you don’t ever want to accumulate a bank balance.
The best use of resources is to spend them. Spend them as an investment on Villagers to grow your own economy, and on an army to damage your opponent’s economy.
Relatively speaking, resources continuously decrease in value — until the whole map has ran out of them — and this means that you need to be continually investing your resources. You don’t ever want to be “floating” resources, or stockpiling them, because money in the bank doesn’t earn you anything.
You have to spend resources to accumulate them faster than your opponent does. This way, you can grow the biggest economy and amass a bigger army faster than they can.
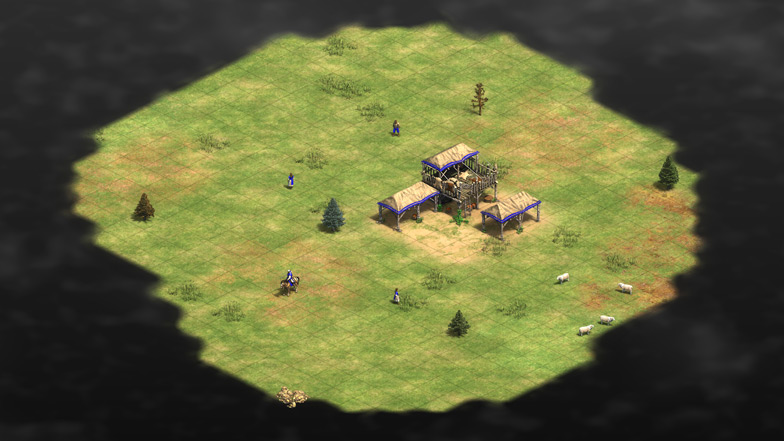
At the start of the game you have 200 food (with most Civilizations, or Civs for short) but you have no food income, therefore it costs 25% of your total food resource to produce a single Villager.
Later in the game, you should have so much food income that the cost of a Villager is virtually nothing, relatively speaking.
You should use your resources to earn more resources, or use them to damage the Eco of your opponent and force them into an early resignation.
It’s surprisingly easy to damage your opponent’s Eco in a way that is profitable.
It costs 180 food and 60 gold to create 3 Militia — the most basic infantry unit.
If you went on an early attack with 3 Militia and manage to take out one Villager, but your 3 Militia die, how much did you lose compared to your opponent?
Well…it depends.
It’s nowhere near as simple as saying that you lost 180 food and 60 gold whereas they lost 50 food (the cost of a Villager), that’s for sure.
What if, despite only getting one kill, you managed to attack and distract 5 Villagers for 45 seconds? Not only has this cost your enemy 50 food to replace the Villager that you wiped out, you’ve also prevented an additional 4 Villagers from collecting resources whilst your own Villagers will have been collecting resources the entire time.
You also have an extra Villager in your population compared to your enemy — as long as you kept creating them — meaning you’re now collecting resources at a slightly faster rate to them.
Berry-foraging Villagers collect around 0.31 food per second. This means your distraction led to your enemy missing out on 55.8 food. It also cost them 50 food to replace that Villager, costing the enemy 105.8 food in total. You also have to factor in the time of the new Villager walking to berries, which probably takes about 10 seconds, so another 3.1 food, totaling 108.9.
You also have a one Villager lead now meaning that you’re constantly earning additional resources over your opponent for a potentially infinite amount of time.
Overall, it cost you 180 food and 60 gold whilst costing the opponent 108.9 food directly and a decreased Eco income going forward compared to your Eco.
Not quite a breakeven play?
Well, now you have to factor another couple of things in:
Because it’s the start of the game and you’ve prevented them from collecting food, you’ve probably stopped them from having enough food to continually produce Villagers. You’ve given them idle time at their Town Center where they weren’t able to do anything. Or, you’ve at least distracted them and kept them from realizing that their Town Center was idle.
This increases your economical advantage further, as you’re continuing to invest at a faster rate than your opponent.
On top of this, you’re the aggressor. Your opponent needs to focus on defending and clearing up their base, giving you time to wall up your own base to protect yourself from future attacks.
A lot of the time, early attacks only exist to give you time to get your own base defended because the value of doing so can pay for itself later on.
Finally, your army of 3 is hopefully still alive. This means you can continue distracting and harassing the enemy villagers and build your momentum even further.
The important takeaway here is that it’s not always about how much your units cost, but how much damage you can do to your opponent’s eco or their strategy with them.
It Always Depends
It’s a bit of a meme in the Age of Empires scene but at the same time it’s absolutely true: it depends. Everything always depends.
What is the best unit for you to make? It depends on the match-up of the Civs or which units your enemy has produced. It depends on the type of map you’re playing on. It depends on your Eco.
What’s the Age of Empires 2 best strategy to go for? It again will likely depend on the match-up of the Civs, or which strategy your opponent appears to be going for (if you’ve managed to scout effectively).
There are always factors to consider that mean there is never any one-size-fits-all solution to winning a game.
I’m not saying this to make things sound complicated.
The trick is to understand why it depends and this will allow you to figure out — on the fly — what you need to do to win. This Age of Empires 2 guide will help you understand these situations to win more often.
Returning to another chess analogy: everyone knows the Queen is the best piece on the board. That doesn’t mean it can’t be taken by a mere pawn if you’re not using it correctly.
Knowledge is Power, But Skill is Important
Knowing as much as you can about the game is extremely important.
If you have reliable build orders then you can execute the most efficient openings to build a stronger Eco than your opponent and let that snowball into a huge resource advantage.
If you know which units are the best to use in specific situations, or you know which upgrades you should prioritize over others, you have a strong advantage over a large percentage of users in the Ranked playlist.
However, knowledge can only get you so far in this game.
Mechanical skill — the ability to multitask, use hotkeys and micro your units — is what will separate those with equal knowledge. We rounded up the best gaming keyboards that might help with your use of hotkeys.
Sometimes, those with greater mechanical skill will be able to defeat more knowledgeable players. Vice versa, those with more knowledge can often beat someone that simply has raw technical skill. But if you have more knowledge and more skill, you’ll almost always come out victorious.
In this Age of Empires 2 strategy guide, we’re going to start by focusing on knowledge-related information before then moving onto tips for improving your skill.
This is also known as ‘macro’ and ‘micro’ in Real-Time Strategy (RTS) games like AoE.
‘Macro’ refers to your strategic decisions such as build orders, Eco management and army composition. ‘Micro’ is used to describe your control over specific units, such as dodging arrows, blocking opponents or quick-walling.
Build Orders
Having reliable and repeatable build orders allows you to start every game as efficiently as possible. The more efficient you are, the quicker your Eco grows and the quicker you can begin pressuring your opponent with attacks.
The strategy you wish to deploy for a game will determine your build order. We’ll talk all about strategies (like Archer rush, Fast Castle and more) in the next section.
Fortunately for us, smart people have already run the numbers and calculated the perfect build orders for executing specific plans. Having a set build order can mean that you advance to the Feudal Age — and even the Castle Age — without ever having any idle time if everything goes smoothly.
To keep things simple, let’s say you’re playing a 100% land map (no water, no docks).
A very popular strategy, especially at very low levels, is the Fast Castle. Essentially, you’re looking to reach the Castle Age as quickly as possible with a strong Eco behind you.
The build order for most Civs opting to Fast Castle looks a little something like this:
- Villagers 1 & 2 build a house
- Villager 3 builds another house
- Villagers 1-3 then move to sheep
- Villagers 4-6 also go to sheep
- Villager 7 builds a lumper camp then chops wood
- Villagers 8 & 9 also chop wood at the lumber camp
- Villager 10 builds a house
- Villager 10 then lures a boar and harvests it with the sheep farmers (7 Villagers total harvesting the boar)
- Villagers 11 & 12 chop wood at the lumber camp
- Villager 13 builds a mill at the berries & collects berries
- Villagers 14 & 15 also collect berries
- Villager 16 lures a second boar and harvests with other boar/sheep farmers (8 Villagers total on boar/sheep)
- Villager 17 builds a house
- Villager 17 then collects berries
- Villagers 18 & 19 also collect berries (6 Villagers total collecting berries)
- Villager 20 builds a house
- Villager 20 then builds a second lumber camp & chops wood
- Villagers 21-24 also chop wood at the second lumber camp
- Villager 25 builds a mining camp and mines gold
- Villagers 26 & 27 also mine gold
- Research Feudal Age
- Create a barracks with one lumber camp Villager when you’re approximately 60% of the way to Feudal, then return to chopping wood
- Villagers 28 & 29 mine gold (5 Villagers total mining gold)
- Create a blacksmith and a stable or market using three Villagers from berries
- Research Castle Age
- Research Double-bit Axe at a lumber camp & Horse Collar at your mill
The Fast Castle build order is an excellent example of how the benefits of investing into your Eco can multiply. Remember, this is a numbers game.
It’s possible to advance to the Feudal Age much more quickly than at the ’28 Pop’, or 28 population, shown in the build order above (27 Villagers and 1 Scout). However, by staying in the Dark Age for longer and working on Eco, you can move to the Castle Age more quickly overall.
Depending on your Civ, the Fast Castle build order may differ from the above. For example, shepherds for the Britons work 25% faster, meaning they collect food more quickly. The Huns don’t even need to build houses. On a map where walling up to defend is important, you’ll have to assign at least one Villager to build palisade walls.
This shows that even the build order for an identical strategy might not always be the same.
It depends, remember.
Needless to say, if you want to opt for a different strategy, your build order will need to adapt accordingly.
You should also note that a pure Fast Castle strategy does not really work even as low as 700 ELO in 1v1 due to the risk of early aggression from your opponent, unless you’re playing a map like Arena where your base is protected with stone walls from the beginning.
Usually you’ll be able to find a suitable build order for any strategy if you search online, though the vast majority of build orders will usually involve the first 5-6 Villagers going to food and the next 3-5 going to wood.
If you paid close attention to the build order above, you’ll have noticed that a total of zero Villagers were allocated to mine stone.
This is because you don’t need stone until you’re in the Castle Age unless you’re opting for a Tower Rush strategy, also known as a Trush.
A common mistake for below-average players is to begin mining stone too early, or to put too many Villagers onto gold too early, when the other resources are a much higher priority in the early game for almost all game plans.
The best Age of Empires 2 players utilize build orders in every single game.
Whilst they might not follow a strict, predetermined pattern like the build above, pro players always pay attention to how many Villagers they’re sending to each resource and at what point of the game. They know roughly how many Villagers they need and in what areas to execute their strategy, but they’re able to adapt and improvise to different situations amazingly well.
At low levels, using a build order puts you at a huge advantage. However, whilst having a good build order is a great start, it’s not going to guarantee victory on its own.
Early Game Strategies
Sticking with the chess analogies, there are only so many ways you can start off a game and any surprise you spring is unlikely to be something other players have never seen before. Anyone above beginner level will also have a relatively good grasp on how to deal with your opening play.
Most players are going to opt for one of the following strategies to start off each match, but once battles start to unfold, plans change, adaptations are made and all of a sudden you’re in a unique situation that you need to figure out how to combat.
The opening strategies that you’ll almost always choose to go for — and that you’ll also have to face coming your way — are as follows:
Drush
The Drush is the quickest attack you can mount on Age of Empires — other than recklessly charging forward with your Villagers and Scout — and is considered to be an aggressive play.
Editor’s note: we’re about to highlight a 3 Militia Drush as an example. In more recent times, a 2 Militia drush has been popularized as it allows you to attack faster and get to Feudal Age faster.
Short for Dark Age Rush, the strategy here is to build a barracks, create 3 Militia and pressure your opponent as quickly as you can.
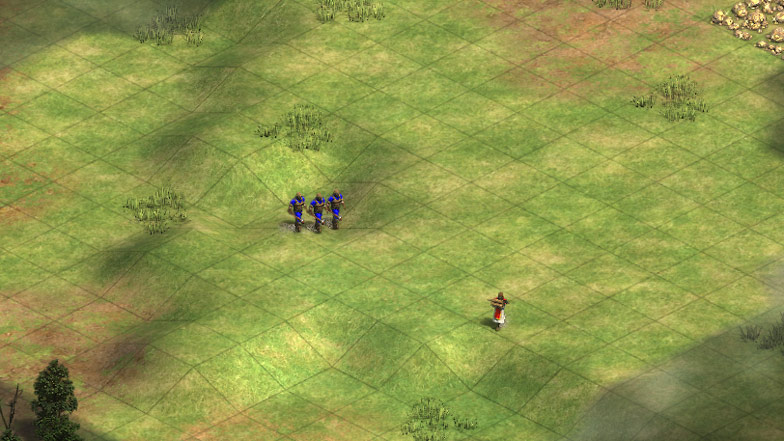
The strategy with a Drush is to delay or disrupt your opponent’s Eco as much as you can. If you can eliminate a Villager or two then that is a great result, but your primary focus should be to take them away from their tasks as much as you can so that you can start to build an Eco lead.
A Drush is never going to win you the game outright but it can certainly help put you on the front foot.
To Drush, you’re looking to make your Barracks when you have somewhere between 15-18 Villagers.
If you want to be extremely aggressive you can even opt for a ‘pre-Mill Drush’ — which, as the name suggests, is to Drush before you’ve even built a Mill.
Despite this strategy being designed to rush your opponent, it doesn’t mean you totally rush into it yourself. Sure, it’s a fast start, but you still need to get your Eco up and running first — that’s the priority in every game.
This aggression allows you to disrupt your opponent and try to get an Eco lead whilst also giving you important time to wall up your base.
MAA
The Man-At-Arms Rush — or MAA — also uses infantry, but the timing is different and you must set up your economy in a different way.
Instead of sending in Militia to cause early chaos, you’re going to wait until you’ve got two Villagers mining gold to be able to afford the Man-At-Arms upgrade within your Barracks.
You’re also going to wait for the Feudal Age to arrive to be able to research the upgrade.
The strategy is to build your Barracks on the way up to the Feudal Age, make 3 Militia, and upgrade to Man-At-Arms whilst your Militia and Scout make their way over to the enemy’s base.
Some civilizations such as Japanese and Bulgarians will opt for 4 units instead of 3. This is because they get civ bonuses that work well with a MAA rush.
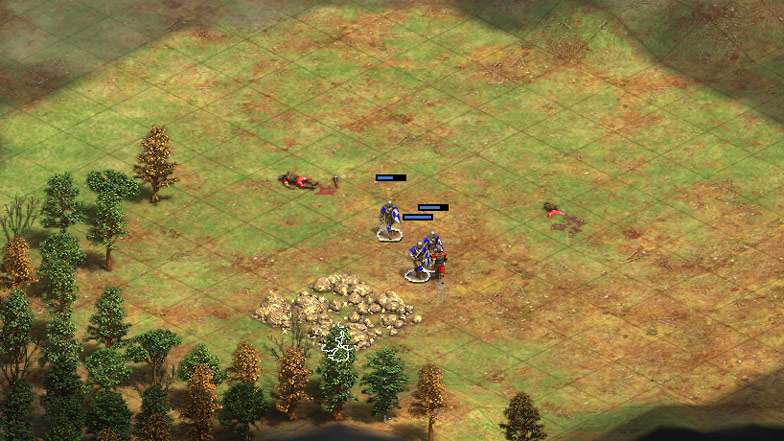
Men-At-Arms do 6 melee damage compared to 4 of Militia and have 5 extra HP too, meaning they cause much more carnage to enemy Villagers and survive a little longer too.
Drush and MAA strategies are designed to put in some early pressure whilst giving you time to ensure your own base is secured.
With a Drush, you must wall up your base whilst you’re dealing damage. Survivalist has a great video on walling that you should check out:
With MAA, you will usually follow it up with an Archer attack, continually piling on the pressure. This means walling at home is slightly less important.
Both Militia and Men-At-Arms are ineffective against archers and cavalry, so the attacks must be launched before those units can be made in the Feudal Age.
Archer Rush
If you are using a strong archer Civ such as Britons or Ethiopians then you might look to favor an archer rush strategy.
To achieve an effective archer rush you’re going to need to achieve a fast Feudal Age time and a stronger, earlier commitment to lumber camps and gold mining compared to a Drush.
Archers cost wood and gold (rather than food like Militia/MAA) but you need food income to click up to the Feudal Age and to keep your Eco progressing.
Once your Feudal Age progression reaches exactly 40%, pull a Villager to build a house.
They will complete the house at exactly 60% and you should immediately build a Barracks with the same Villager.
Then, once you reach Feudal, get them to immediately build two Archery Ranges and begin producing Archers. You should add a second Villager to assist with building the Archery Ranges.
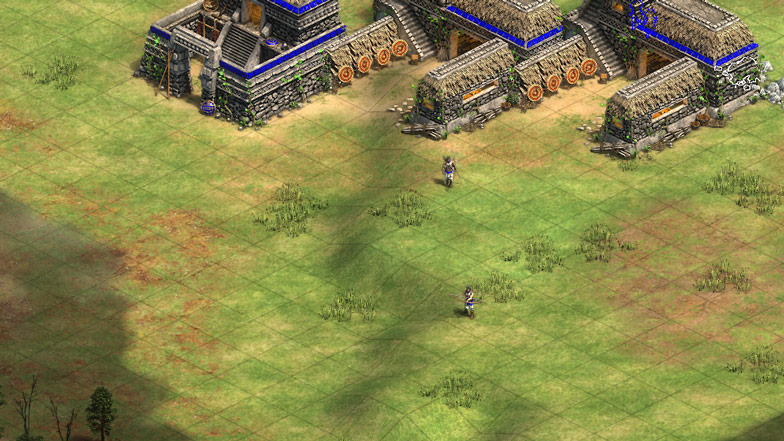
Your next objectives are to build a Blacksmith and to research Fletching within there, though you can go on the offensive before this arrives.
If you’re attacking before Fletching arrives, adding a Spearman to protect your Archers is a sensible idea.
The beauty of an Archer Rush is the fact you can hit enemy wood lines from range — you can potentially attack even if they’re walled up.
Your opponent’s counter to this unit, Skirmishers, can even be fought relatively well until they upgrade their Skirmishers to +1 armor via their Blacksmith.
If your opponent starts making a number of Skirmishers and has +1 armor, your best bet is to add a few Skirmishers of your own. You’ve already got two ranges and Fletching, you may as well put these things to use!
If an enemy mass of Skirmishers gets too large, your best strategy is to get to Castle Age as quickly as possible. Upgrade to Crossbowmen and research Bodkin Arrow from the Blacksmith, and your Archers will be able to do damage again.
Age of Empires 2 is not a race through the ages.
If your only plan is to rush to the Imperial Age in order to create the best units, you’ll probably have been defeated way before you get there by any good player.
Scout Rush
A Scout Rush is, like the strategies above, early aggression in your enemy’s base — but this time with Scout Cavalry units created in a Stable.
One of the main advantages of rushing with Scouts is that it has a much easier build order than MAA or Archer rushes.
This is because Scouts only cost food to create, so you don’t need to send Villagers to gold. Your Villagers will all be going to food or wood with a Scout Rush build order.
With more Villagers on these resources, you’ll be able to advance to the next age faster.
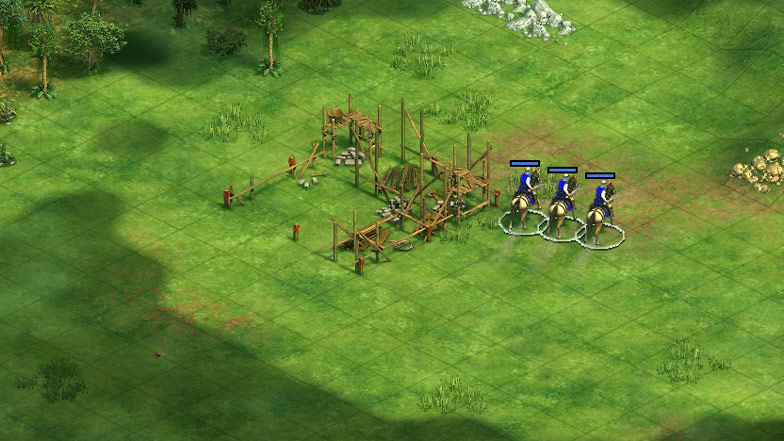
You’ll send just 3 early Villagers to a Lumber Camp — rather than the usual 4-5 — and all other early Villagers will go to foraging or harvesting food.
When your Barracks is being built whilst you’re on the way up to the Feudal Age, you’ll want to pull 4 Villagers away from food and make sure you have 7 Villagers chopping wood.
This should be done at just a single Lumber Camp otherwise you won’t have enough wood for your Stables.
If you have two easily available woodlines, you can also opt for 2 Lumber Camps and 9 Villagers on wood. These 2 additional wood Villagers collect 101.4 wood on the way to Feudal Age, which covers the cost of the additional Lumber Camp. The trade-off is a little less food, but you should still be able to create 3 Scouts with no deer pushing needed.
3 Scouts is usually enough to send over to your opponent’s base to begin attacking.
Unlike with the Archer Rush strategy, avoid creating two Stables. This is because you will only create 3 Scouts regardless of how many Stables you have. Creating 3 farms is a better use of resources than an additional Stable when it comes to a Scout rush.
You will send your Scouts on the offense before getting upgrades like Bloodlines, which is important research to click in the Stable.
Scout rushing is considered a defensive, greedy play that allows you to wall and build up an economy.
Send your 4 Scouts forward (assuming you still have your starting Scout) to harass whilst you wall up at home.
Researching Double-Bit Axe and Horse Collar is essential for a walled-up Scout Rush strategy.
Adding lots of Scouts (i.e. more than 3) is less common, though can be effective on very open maps that are tough to wall.
Researching tech from the Blacksmith is also good if you plan to continue with cavalry, but you need to be mining gold to get this which hinders your Stable and Scout creation times. The upgrade you should prioritize from the Blacksmith is Forging if you’re up against Spearmen and armor if you’re against Archers.
Trush
Probably the most frustrating strategy to deal with, a Trush — or Tower Rush — is when you get aggressive with Villagers and build a Watch Tower, or multiple Watch Towers, next to your opponent’s resources such as wood, berries or gold.
Watch Towers shoot arrows, and they shoot an increased number of arrows if you garrison Villagers or Archers inside them. The same is true for Skirmishers, though they don’t contribute as much. This strategy prevents your enemy from taking resources.
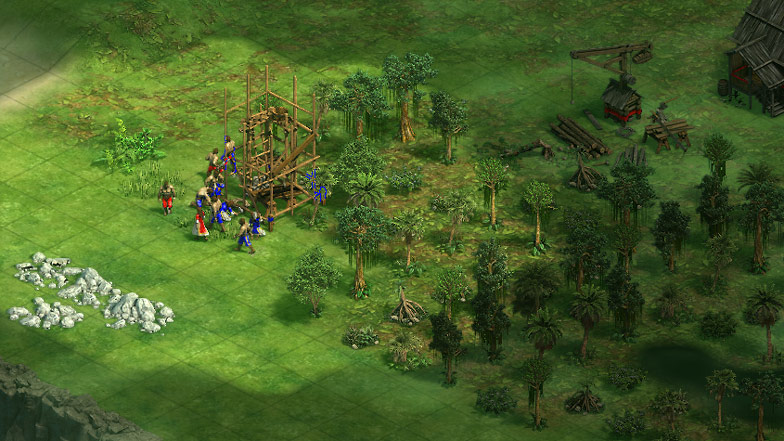
After one tower goes up, you should build another one within range of the first so that your initial tower can provide covering fire for your Villagers as they create the second.
You can also build palisade walls around the base of your tower so it can’t be attacked until siege arrives in the Castle Age.
If your opponent tries to attack your Villagers, garrison them within the tower to keep them protected but also to increase the damage that the tower will do.
You should be mining stone within your base so that you can continue to use your forward Villagers to keep making more and more towers.
This is an extremely tough and frustrating strategy to deal with at beginner and intermediate levels.
If you want to know how to defend against a Trush, it’s not a simple “do this” and it will work.
Instead, the important thing is to remain patient — do not overreact — and then do the following:
- Move your Villagers away from the enemy Tower(s) and to a safer location (but keep them working)
- Where your other Villagers are working, make sure to wall up as quickly as you can so that the Towers can’t hit you from range
- Build a defensive Tower to prevent enemy Villagers from continuously building more Towers and use Villagers to garrison for additional attack and ungarrison to quickly repair
- Get some additional Villagers to mine stone
- Counter attack with Scouts or Archers — their base can’t be well defended as they’ve sent multiple Villagers to attack you
- Ensure you’re building farms so that you can advance to the Castle Age quicker than your opponent and, if you need, use siege units to clean up the towers
As you can see, that’s quite a lot of steps needed to clean up from a Trush. This just emphasises how effective and disruptive they can be if executed effectively.
Another step to dealing with a Trush, especially at lower levels, is to send 8-10 Villagers to batter down the towers.
The opponent will have 5 Villagers forward, so you can try to fight them before towers go up. Villagers do massive bonus damage against towers which can be very effective if they don’t have walls up to protect them.
Fast Castle
The Fast Castle is probably the most popular Age of Empires 2 strategy for beginners — though it’s not necessarily a winning play.
We already covered this approach and build order in detail within the Build Orders section of this guide, but we want to highlight an important factor of the ‘FC’ approach:
You can’t ignore defense.
Many novices will adopt a strategy of trying to reach the Castle Age as quickly as possible and praying that they don’t get attacked. If they don’t get attacked then their build order goes perfectly. If they do get attacked though, it may as well be game over because 100% of the focus goes into the fastest possible build order.
If “pray you don’t get attacked” is your early-game strategy then you’re going to struggle to progress above beginner level. Early pressure is basically a free win if your opponent was simply hoping you didn’t do it.
Instead, if you’re looking to Fast Castle, you should pair it — or chain it together — with a different strategy.
For example, you could ‘Drush FC’, or Drush into a Fast Castle, to put early pressure on, give yourself time to wall up, and work on your Eco to get to Castle Age quickly. We’ll talk more about chaining strategies shortly.
Fast Imp
The best units can be created in the Imperial Age. Is there a better strategy than getting to ‘Imp’ as fast as you can?
Well, yes, there is actually.
Like we said a little earlier, Age of Empires is not a race to progress through the ages.
The Fast Imp can potentially be a viable strategy in team games, particularly if you’re playing “in the pocket” — or in the middle when playing a 3v3 or 4v4 — when you’re flanked by 2 aggressive or very competent teammates that can pick up the initiative on the front lines without much input from your army.
Most of the time however, reaching the Imperial Age in a quick time can be a goal but it is not a strategy you’ll want to employ on its own.
The exception to this rule is if you’re playing on a closed map such as Arena.
The Fast Imp simply gives your opponent far too much time to put pressure on your base — even if your map is fully walled they can have siege rocking up minutes before you can even click to the Imperial Age.
Booming
Booming is where you build a thriving Eco as quickly as you can, amassing resources at a much faster rate than your opponent.
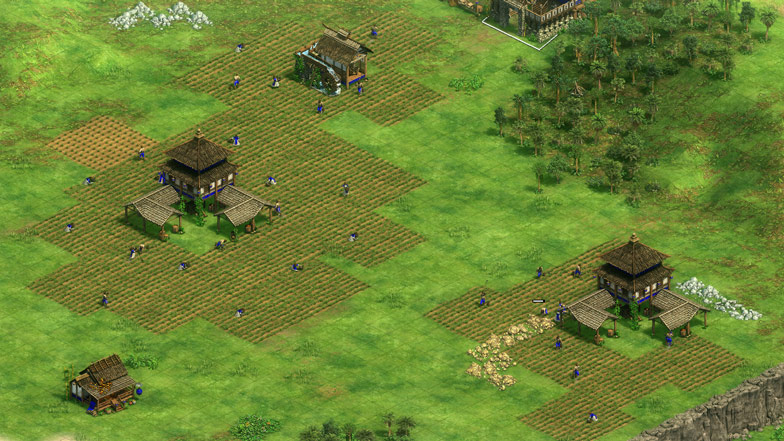
This is most common when you’ve launched an initial attack and your opponent has begun to ‘turtle’ — to heavily defend and wall their base, but in doing so they’ve likely restricted the amount of space they have to work with and hindered their chances of launching a quick counter attack.
If you know that your opponent is turtled up and can’t really attack you, you can begin to boom.
Or, in team games, you might have one member of the team booming if other members of the team are having some success on the front lines.
If you’re booming, you’re always likely to have 3-4 Town Centers in most situations in order to maximize your Villager production.
You want to be walled up when booming, but you don’t need to worry too much about being highly defended with no weak points.
If your enemy does mount an attack at some point after you’ve begun booming, you should have enough space in your base to move your Villagers to somewhere safe and you should have enough military buildings and resource income to defend.
Your first additional Town Center (your second overall) should be built next to a woodline. Your second additional Town Center should be next to gold. This offers your Villagers from protection, or a safe haven, in the event of an attack.
Don’t worry too much if you can’t get an additional TC next to both wood and gold, but it’s certainly a bonus if you can.
If you run out of space when booming, you can always delete walls and expand outside of them as your new buildings essentially become walls of their own.
Scouts Into Knights
The majority of the strategies above should actually be chained together to be most effective, or should be used or adapted in some way that allows you to be creative and surprise your opponent as well as give yourself an Eco advantage.
For example, many players would go for a strategy like ‘MAA into Fast Castle’ or, in this example, we’re looking at the ‘Scouts Into Knights’.
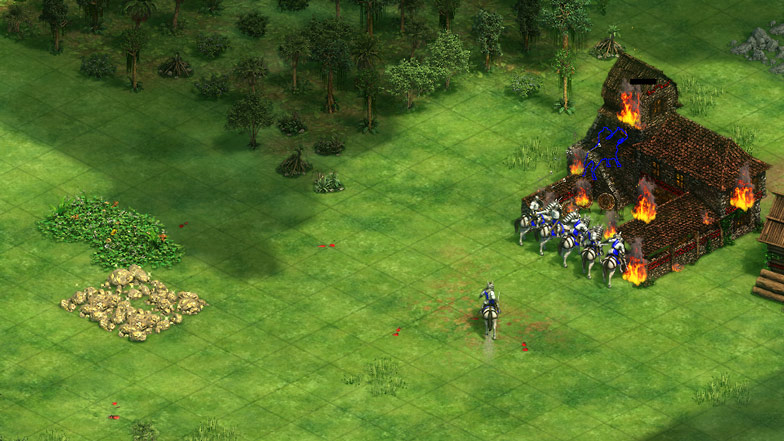
With this, you’re not going to do too much differently to a regular Scout Rush strategy.
However, the idea is that you disrupt your opponent with Scouts and cause as much damage as you can. Whilst doing this, you wall up at home and get to the Castle Age so that you can create Knights.
Where Scouts can be a disruption, Knights can deal the killer blow in terms of giving you an unassailable lead.
The potential to chain or mix-in various strategies allows your openings to go from a small, predictable pool to an arsenal of unexpected attacks.
The issue with Scouts Into Knights is that your opponent might have made Spearmen or Pikemen to defend and if you go on to make Knights, you’ll be countered.
However, professional player Hera argues that Knights counter Pikemen at the start of Castle Age due to the numbers you can attack with.
As the Castle Age goes on, you will need to adapt, expand to take map control and work to progress to the Imperial Age.
The longer each game plays out, the more adjustments you’ll have to make to your strategy.
You should never fully decide on the strategy you’re going to start with until you’ve at least seen the map you’re playing on as where your resources generate could be enough to change your plan.
Maps & Map Control
Understanding maps — and which of the maps you’re playing on in any given game — is an extremely underrated and important factor for beginners or lower-level players.
Even though resource generation is somewhat random on every map (e.g. where your sheep, berries, gold and stone is located), each has specific things to learn and certain things to remember that will massively impact the outcome of your games.
As the Ranked map pool changes on a regular basis, it’s impossible to cover all of them in this guide. However, we will mention some of the more popular or well-known maps and discuss things to look out for.
Arabia is probably the most famous and commonly-played map on Age of Empires 2.
It’s a land map that is very open and doesn’t have huge amounts of trees on it, meaning it can be very easy for your opponent to raid your base or attack your woodlines.
This means you need to place a big focus on early aggression since your opponent won’t be able to wall easily. The best defense is a good offense!
There are a number of maps similar to this where smaller, frequent raids are likely to be more successful.
In stark contrast to this are maps like Arena, where you start with stone walls already built around your base meaning it’s virtually impossible to get rushed, or Black Forest where there are only one or two small entry points for enemies to attack you from and this makes it easy to wall off or defend.
Other maps will always have their own quirks that you’ll need to learn. Some will start with water in the middle or in the corners — or the game may even be primarily played on water.
Even your reliable build orders can get ripped up (or at least heavily adjusted) for water maps.
There’s no point building a Mill with a specific Villager because that’s what a build order tells you to do if you’re playing a water map and you would probably be better off building a Dock (remember, it always depends).
Wood is more important than food in the beginning of a water map because Docks act like a second Town Center. They allow you to create Fishing Boats at the same time your Town Center is creating Villagers. The investment into wood will repay itself in food once your Dock and ships are running.
Within the Ranked playlist you’re able to ban up to three maps (four in team games, if you’re partied up with your teammate).
Banning three maps will allow you to master a smaller map pool much more quickly, or simply remove the map types you don’t perform well on or don’t enjoy playing (this is a game, after all).
If you’ve not mastered build orders, it might be worth banning the more open and complicated maps, such as Arabia or water maps. This will allow you to focus on perfecting your initial Eco efficiency whilst making it a little easier to defend early attacks — but be warned, attacks will still come.
Once you have the basics down with a good amount of practise, you can look to ban the more closed off maps and learn the intricacies of the open ones. If you’re naturally an aggressive or all-action player, open maps will probably be more your cup of tea.
But seeing the name of each map you’re playing on is only part of the picture.
Another important factor is seeing where your resources have spawned once you load in and begin scouting.
If your berries and main gold are at the front of your base, or if your woodlines are quite far away from your Town Center or they’re very difficult to wall, you should be even more aggressive. Being defensive is going to get punished because your map is difficult to play.
Maps aren’t symmetrical — they’re random within certain limitations — so just because your berries and main gold are at the front of your base and are a huge vulnerability for you, your opponent might have been lucky in comparison and had them spawn at the back of their base which makes them much easier to defend.
This means you can only really decide which strategy you’re fully committing to, and how aggressive you can ultimately be early on, once you’ve seen your map generation.
Fortunately, almost all build orders begin with 6 Villagers going to food and at least 3 going to wood immediately after, giving you a minute or two to assess things before determining your plan of attack.
Finally in this section we’re going to look at map control.
Map control is something many low-level players have a basic grasp of — but make fundamental errors in judgement over time and time again.
Here’s a question: What’s better to go for, the gold in your base or the neutral gold between you and your enemy?
The neutral gold can be very valuable because if you secure and defend that you’ll have more gold income than your enemy. However, beginners often put way too much emphasis on taking the neutral resources and then keeping their safer resources as an insurance policy for if things go wrong.
This is inefficient and unnecessarily risky.
You don’t need to expand out of your base until your base is actually established and your Eco is booming. If you play for forward resources too soon, your enemy will have a significant Eco advantage and they’ll find it easy to attack you as a result. With your base spread out across the map, there will likely be more holes or weak points for them to pick off.
Just because you’re mining gold outside the enemy’s base, it doesn’t mean you have map control.
Neutral resources are important for the late game but if you’re not already taking the resources close to your base, you’re making a mistake.
Real map control is when you have the resources, army and positioning to hold power positions.
For example, having a Castle on a hill in the middle of the map can be extremely valuable.
Units, as well as towers and castles, receive a 25% increase in damage when they’re higher up than their opponent (e.g. on a hill). Units also receive 25% less damage from enemy units on lower ground.
Castles are already tricky to deal with and having one that’s even stronger than usual can tip the outcome of a match in your favor.
Having a Castle in a position like this can usually allow you to begin mining neutral gold and stone with a good level of protection.
Castles can also be used to support aggressively-positioned military buildings.
For example, you could have what’s known as a ‘forward Siege’ — a Siege Workshop that’s built way out of your base, close to your enemy — as the Castle will help defend your siege units from infantry or cavalry attacks.
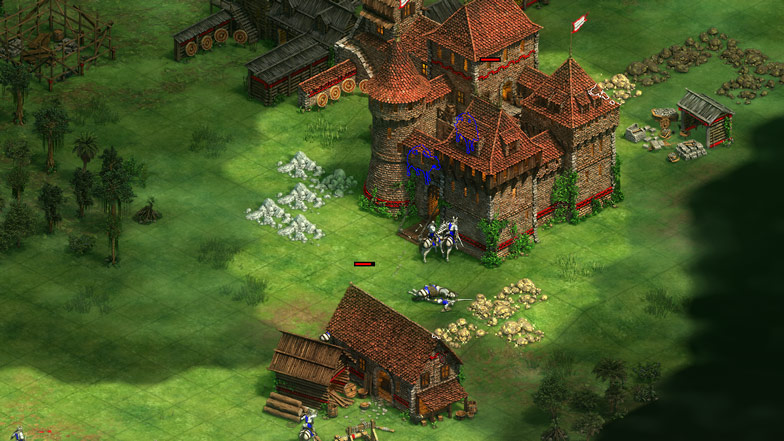
Using a Castle to help take neutral resources or aggressive positions is just one example of map control, and just because you have a Castle in a good position it doesn’t mean you have an overwhelming advantage if the enemy plays things correctly.
Aggressive map control is not a golden ticket to victory.
If you find yourself up against a very aggressive opponent, you may find it wise to play defensive. Turtle up, minimize the damage from their attacks and then go on the counter, sending in raids to damage their Eco whilst they’re focusing too strongly on what’s going on in your base.
Scouting
The final piece of the puzzle when determining your initial strategy is your scouting.
To cover the basics: You should use your Scout to find your sheep and locate your boars, berries, wood and gold.
You should use your initial sheep — other than the one you start harvesting from and one you have queued up to harvest next — to scout the areas close to your base.
Once you’ve found the location of your initial resources you should head over to your opponent’s base to see what they’re up to.
You should not use Auto Scout when scouting.
If you want to improve at the game, manual scouting is important.
You need to find your resources and your enemy player as quickly as possible.
If you’re a lower-rated player and you struggle with scouting, at least do these things before switching Auto Scout on.
Auto Scout is highly inefficient as it prioritizes areas of the map that aren’t overly important — such as the corners — and it recovers ground that you’ve already scouted too.
It can also run too close to the enemy Town Center meaning it gets shot and it won’t react to this. Losing your Scout puts you at a disadvantage.
Using Auto Scout is a bad habit for improving at the game. Manual scouting is more efficient and it also allows you to improve your ability to multitask, and to really process what your opponent is plotting.
Low-level players often tend to think that scouting exists to discover what the whole map looks like. Whilst knowing where resources and Relics are across the map is useful, monitoring your opponent’s build order and their military buildings is crucial to understanding what your in-game strategy is going to be.
If you discover that they’ve built an early barracks, you might need to react by building one of your own, or walling up a little more quickly than you’d originally planned.
If you see they’re mining stone in the Dark Age, you know they’re planning to Trush. If they’re not going to Trush, your economy is already going to be far greater than their’s.
Deciding on your own strategy is important but reacting to your opponent’s — if it’s a solid counter to what you had planned — is even moreso.
As you start to get more used to manual scouting, you will be able to identify where their Town Center is likely situated without needing to actually run past it thanks to clues like berries, gold piles and more.
Idle Time
There are two types of “idle” time; Town Center and Eco.
From the moment the game starts, your Town Center should have Villagers queued (unless you’re Chinese or Mayans, in which case you should start with Loom).
If your Town Center is not queuing up the production of new Villagers, or it’s not researching anything (such as an advancement to the next Age), it is idle.
If you have multiple Town Centers, they all need to be producing or researching or the total amount of idle time you have will multiply.
If your Villager is not working — either building something or collecting resources — that is Eco idle time.
Many players are very aware of their idle time in the early game but lose concentration and focus as the game plays out. You should almost always be producing Villagers until you have a Villager count of around 120.
Even when you have a large army you should usually still have a large Villager population that continue to gather resources as you fight — so that you can continue adding or replenishing military units.
Always remember to make sure that you’re not leaving your TC or Eco idle whilst you’re on the attack.
This meme posted by u/AQSmithzzs on Reddit sums things up perfectly for many players:

To prevent your Villagers from being idle after being created, set your Town Centers to automatically direct them to food, wood, gold or stone and you can pull them away from tasks if you need them elsewhere.
Being Housed
You are ‘housed’ if you’ve reached the maximum population your Houses can currently support.
At the start you have one Town Center and you will almost always build two Houses.
For most Civs this means you can have a maximum population size of 15 as a House supports 5 population and so do Town Centers. Assuming you start with a Scout and 3 Villagers — as most Civs do on most maps — you can produce 11 more units (i.e. Villagers) before being housed.
This means that before you reach the start of the 15th unit being created, you need to begin making an additional house. It takes longer to build a house than create a villager*, so you should be looking to add a house before your population count reaches 14.
*Houses and Villagers both take 25 seconds to create, but you have to factor in walking time of the Villager when building. If you create a House and queue a Villager at exactly the same time, they will complete simultaneously.
If you forget to start building your house whilst you’re still at 13 population, you can add another Villager to speed up the building process. Each Villager adds one third of a Villager’s worth of build speed.
If you are housed, your Town Center becomes idle as Villagers can’t be produced.
When you reach the Castle Age, at lower levels, you can dedicate a Villager to solely build Houses until you can support the maximum population of 200. Slowly add more houses as you need them.
Unit Composition
Another common mistake that low ELO players make is to not have a good composition of units in their army. Instead, players often either tend to do one of two things; make smaller amounts of lots of different types of units, or make a huge amount of a single unit.
When comparing those two things, it’s usually better to lean more towards the second option of creating a huge number of the same unit type. This can win you the game, but if your enemy’s units counter it then it will likely lose you it.
Having a small amount of lots of different unit types would be something the low level AI does when you’re playing Single Player.
Instead, what you should have is a composition of 2 main units.
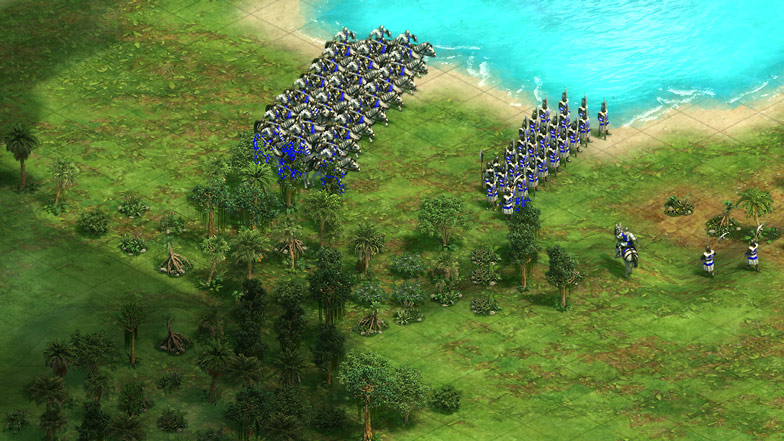
Usually these will be unit types that complement each other quite well, for example you could have Scouts and Archers — meaning you have a mobile hand-to-hand combat unit as well as one that can attack from range.
Later in the game, the same composition would be something like Light Cavalry or Hussars and Arbelesters, or you could have something like Halbediers and Onagers, or Cavalier and Elite Skirmishers instead.
The idea is that you want a frontline and a backline, with siege for pushing buildings. All compositions above will have Trebuchets or Bombard Cannons positioned in the back.
For many Civs that have a unique unit, you’re often (but not always) going to be using that unique unit — assuming they’re a good unique unit such as Huskarls, Chu Ko Nu or Mangudai — along with a complimentary unit in your army composition.
You could then have a third unit that helps defend against potential enemy counters or helps to push you over the finishing line, such as siege.
The important thing here is that only one of the units in your composition should cost gold to create.
The example of Hussars and Arbelesters is good because one (Arbelesters) cost gold whereas Hussars only cost food. This fits the ideal late-game composition of one ‘gold’ unit (that costs gold to create) and one ‘trash’ unit (a non-gold unit in AoE2 lingo).
Importantly, Trebuchets, Bombard Cannons and Monks do not count in this rule. They still cost gold, but the “one gold unit” rule only applies to your main army of infantry, archers, cavalry and siege units.
But despite the above, you need to remember to be adaptable. Just because you’ve mentally committed to a specific composition, it doesn’t mean you have to see it through if you realize it wouldn’t be the best decision.
If the game goes very late and resources become scarce, you might not be able to make your best units in huge quantities. In these scenarios you might have to max out trash units like Hussars or Elite Skirmishers.
Counter Units
Understanding counter units is essential to winning battles in AoE 2.
The game works with a ‘rock, paper, scissors’ system that means there is no best unit overall, but rather units that are strong against some units but weak versus others.
The most obvious reason for needing to understand counter units is if you see your opponent is using a certain strategy. For example, let’s say you see they have a Stable and therefore you know they’re planning to Scout Rush you.
The counter unit to melee cavalry (such as Scouts or Knights) is infantry units like Pikemen, so you know you’d need to make these in order to fend the enemy off.
If you see which units your enemy is making, you know what you need to make to defend them.
The counters are very simple in theory:
- Infantry beats cavalry
- Archers beat infantry
- Cavalry beats archers
- Skirmishers beat archers but lose to melee units
- Melee units beat siege but siege can wipe out large quantities of units in one shot
However, things can be slightly more complex in reality.
For example, there is the existence of Cavalry Archers. These are more akin to Archers than they are to Scouts or Knights, meaning that Knights are very strong against them and so are Skirmishers, and Pikemen are not strong against them at all as they’ll be picked off from distance.
Upgrades also make a huge difference.
If you had fully upgraded Knights attacking non-upgraded Pikemen, you would win with a small numbers advantage.
Quantities of units matters a lot. Just because the enemy has a good counter to you, it doesn’t mean you can’t win the fight by completely outnumbering them. This doesn’t mean you should intentionally make the wrong units, of course.
Research
Researching upgrades within your Blacksmith, University, Town Center and more is extremely important and can definitely be the difference maker in terms of making a slightly lesser-skilled player be able to beat a higher-skilled player.
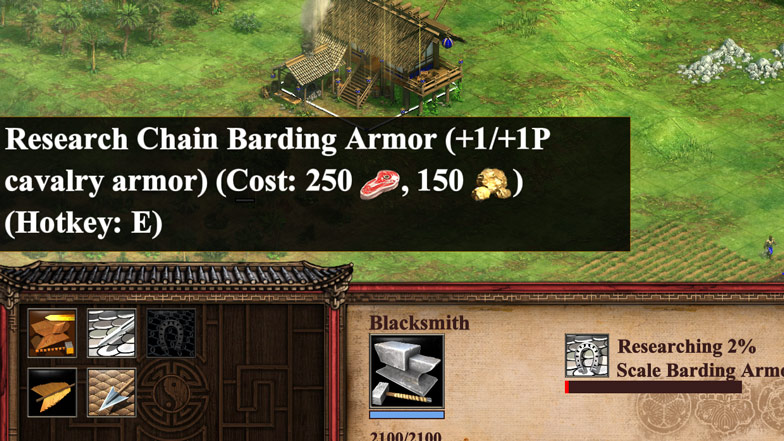
The main thing with research and upgrades is that it’s important to get the right upgrades at the right time. And there’s rarely a correct time for certain research.
Where beginners and low-level players falter is that they research the wrong things, or everything, or nothing. All three of these are examples of a bad use of your resources.
You shouldn’t get every upgrade because you could instead be putting those resources into things that will make a quicker impact on the outcome of the game.
And if you don’t get any upgrades, or you get them at the wrong times, you’re going to way behind in terms of military strength and/or Eco.
So, what are the most important upgrades you need to get?
Well, that depends on the stage you’re at in the game.
Loom is an important upgrade to get in your Town Center early in the game.
When you advance to the Feudal Age, Double-Bit Axe is a very useful upgrade to get within your Lumber Camp. Horse Collar is also good to research at your Mill before you create any farms, or after you’ve only got a very small number of them at the latest.
You often don’t need to get any stone mining upgrades, but there are always exceptions to everything in Age of Empires 2. Gold mining upgrades aren’t quite as important as the food and wood ones, but you should still get them in the Castle Age.
The importance of other upgrades depends on the strategy you’re going for.
If you’re going for Archers, Fletching is the most important Blacksmith upgrade. You’ll also want Bodkin Arrow when you reach the Castle Age and Bracer at the Imperial Age. There’s also Thumb Ring within your Archery Range from the Castle Age if your Civ supports that upgrade within its Technology Tree.
The interesting thing about all of these upgrades is that they improve the damage output of your Archers.
However, if you’re creating infantry or cavalry, you generally want to prioritize the defensive armor upgrades before getting the attacking ones. You would prioritize attack upgrades if you were looking to get through walls or take out Pikemen faster, just as two examples.
Obviously if you’re creating Archers, you don’t need to research upgrades for infantry or cavalry. Your resources can be better spent at this stage on more Eco, more buildings or a bigger army.
The important thing to learn is the upgrades you don’t need to get, rather than the ones you do need.
Supplies is an example of an upgrade that can be researched in the Barracks once you reach the Feudal Age. It costs 75 food and 75 gold to research which, early in the game, is pretty expensive.
This can be useful later in the game if you wish to make Champion units within the Barracks, but is almost always a bad investment early in the game — though not 100% of the time because it always depends.
Murder Holes is another example of research — this one is picked up within your University — that is probably more popular with lower-level players than higher-level.
This isn’t to say it’s a bad thing to research but rather that it might not be the best use of your resources, especially earlier in a game.
Why is it so popular? Because it makes your Castle shoot at units that are close to it. Without Murder Holes, your Castle has a minimum range of 1 tile, meaning if units are within 1 tile they can attack the Castle but can’t be attacked by it.
However, your enemy actually attacking you like this — especially earlier on — is rare.
This is because many units will get mowed down as they approach the Castle from a distance. Your Castle also has a huge amount of HP meaning it takes units a long time to take it down.
If you have your own units such as Archers or infantry beneath your Castle, you don’t need to worry about the base of the Castle being attacked and you’ve saved the 100 stone and 200 food it costs to research.
There are far too many upgrades and things to research to cover everything here, but the important thing to remember is to try to research the right things at the right time for when you need them.
Laming
Laming is a mid-level strategy where you attack, steal or block off your enemy’s starting resources.
Importantly, laming is a controversial strategy.
Some opponents consider it toxic.
However, we’re here to talk about winning more games, and the simple fact is that if you successfully lame your opponent then your probability of winning the game skyrockets.
The most simple example of this is running your Scout forward and finding your enemy’s sheep before they find them, then run them back to your base so that you get the additional food for free and they’re also lacking free sources of food.
Because finding your opponent’s sheep before they do is hard (without sacrificing scouting of your own base), it’s more common to lame an enemy’s boar.
To do this, hit an enemy boar with your Scout twice and then run your Scout back to your base.
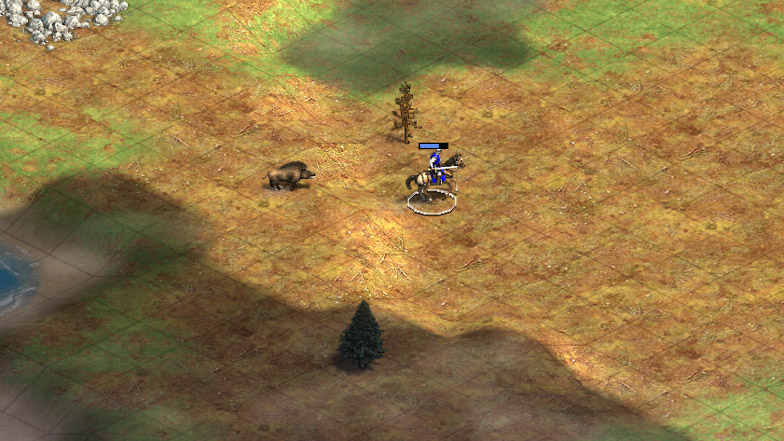
This is actually trickier and requires more skill than it sounds, because you have to ensure your Scout doesn’t run too far away from the boar otherwise it won’t chase you back. You don’t want to run too close to it or you might end up losing the Scout. So, it requires a fair amount of clicking as you run back rather than using waypoints.
If the map you’re playing on has a large amount of deer or similar food sources, you can use military units to simply attack those so that neither of you can get them. You’ll still have your own deer close to your base, after all.
Another laming strategy that’s very annoying to deal with, but might cost you a Villager, is to run your Villager forward and build palisade walls directly around their gold resources or berries.
Civ Match-Ups
We spoke earlier about counter units. Because certain Civs are stronger with specific unit types, it means that naturally some Civs counter other ones quite effectively.
Also, with the way all Civs get unique bonuses, it means that some Civs are especially strong against another at one stage of a game but are also particularly weak against the same Civ at different stages.
The most obvious example of this is with the Berbers.
Berbers are a tricky-to-play early game Civ. The only bonus they get that helps them in the Dark and Feudal ages is faster moving Villagers, which doesn’t help your economy by much.
Berbers start to get strong in Castle Age with cheaper stable units and a very strong Camel Archer and Hussar composition for the late game.
To survive with poor early game civs early on, you have to be creative. For example, Berbers can be quite effective at laming the opponent thanks to their faster moving Villagers.
Many bad Civ match-ups happen where both Civs are good at the same thing, but one Civ is just stronger overall.
And some civs just can’t play well against another at all. Mayans vs Goths is an example of this, with Mayans being a much better civilization overall, but they have no answer to the Goths’ Huskarls as they do not get Hand Cannoneers or good infantry.
We can’t cover which Civs are especially strong against others in this guide due to the fact that various patches, nerfs and buffs happen frequently and there are also far too many Civs to compare. Regular new expansions adds to this complexity.
The important thing for you is to learn 2-3 Civs and practise them over and over, rather than choosing ‘Random’ and learning on the fly.
When learning 2-3 Civs, it helps to pick an archer Civ, a cavalry Civ and then a third Civ that might be unique to use in certain situations.
It’s also important to get a basic understanding of all of the Civs in terms of what they’re best at so that you know what you’re facing up against.
If you’re a cavalry Civ and would like to Scout Rush, but you know you’re playing against a Civ that will likely make lots of cheap infantry including Pikemen, e.g. the Byzantines, you might be better off starting with an Archer Rush before transitioning into Knights.
Scouting matters of course, but allowing yourself to be unpredictable (i.e. doing MAA Into Archers with the Franks — a cavalry civ) whilst also predicting what your opponent might do can give you a huge early advantage.
Micro
Micro is the individual control of units in extremely specific situations, and having good micro — short for micromanagement — can be a huge differentiator at all skill levels.
Importantly, you can actually have less success by miscontrolling your units with bad micro and therefore may actually do less damage, or suffer more damage yourself, by attempting to micro — and doing so poorly — rather than just letting your units fight.
Still, this shouldn’t put you off trying to practise and master the art of microing because it’s so powerful when done right.
The main thing to know and remember when microing — or just when playing in general — is to put your units into ‘control groups’.
You can put up to 60 units in a single control group and this allows you to easily hotkey between them. You could have your melee units in one control group and ranged units in another, and give yourself a method to immediately jump between them.
To do so, select all of the units you want in 1 control group and hit ctrl+1. For another control group, hit ctrl+2, and so on.
To then quick select a control group, you simply have to double hit the number you assigned to them, e.g. press “11” or “22”, or hit the number once followed by the space bar, which is the preferred way of doing things for most players as it’s slightly more efficient.
Archer or Skirmisher micro, or Mangonel micro a little later in a game, is something you’ll likely do at some stage in almost every game you play.
There are a large number of times where you will need to control specific types of units, such as Archers, differently to other units.
The trick with microing range units (units that can attack others from range) is that you want to fire, move, fire, move, at a pace where your fire rate doesn’t change but your units are much harder to hit.
Another example of unit control micro is to attack with infantry or cavalry but then run away so that you lure the enemy into your mass of archers.
Or, if your enemy is trying to attack your siege units, you can run your infantry or cavalry in the way to block and prevent your siege from being destroyed. You can also micro your own units out of the way of siege fire.
Good micro allows allows you to do things like send a small distraction in order to do something bigger somewhere else.
For example, you could intentionally run some military units to disrupt one side of your enemy’s base so that you can build a Tower, or a forward Castle, with Villagers on the other side.
In the early game, if you’re being attacked, you might use your Scout to get between an enemy and your Villager so that you can run it away to the safety of your Town Center.
Formation Changes
A great way to deal with ranged or siege fire is to split your units — usually Archers — by switching between the ‘Line’ and ‘Flank’ formation to dodge projectiles coming your way.
The line formation is the default formation of your units and you can use a hotkey to immediately switch to flank and then another to switch back again.
This separates your units to leave a big gap in the middle where projectiles will usually land before you switch back to your regular formation.
Quickwalling
Quickwalling is something hard to master but it’s something you’ll need to become skilled at in order to quickly defend yourself in tricky situations.
If you notice that your base is being attacked at a time you weren’t anticipating, you might need to use Villagers to quickly wall up certain areas.
You can use Palisade Walls or Gates, Houses and more to quickly wall yourself away from your enemy.
You can even use quickwalling to defend yourself during your own aggressive plays.
For example, if you have a forward Villager that is being chased by multiple units, you can wall them in to a single tile by using 4 pieces of Palisade Wall. It might take a while to set them free, but if the coast is clear then you can delete the walling to allow them to continue on with a different task.
Finally, quickwalling can be used as a trap.
Your enemy might think they’ve made a great play to break into an area of your base, but if it’s closed off at one end and then you quick wall the other, they have nowhere to go. Or, you could quickwall one end and lead them to your army or Town Center at the other.
The important trick to master with quickwalling is that you don’t need to fully build your wall, or your House, or whatever it is you’re using to wall your enemy off. You only need your Villager to hit each piece of the wall (or each building) one time for it to obstruct an enemy — as it will have small amounts of HP.
This means you can quickwall extremely quickly if you learn the hotkeys and rotate gates (using the mouse scroll wheel) effectively.
Hotkeys
You can learn as much as you want about strategy and mechanics but the simple fact is that if you don’t learn and utilize hotkeys then you will never be highly ranked.
This is because people using hotkeys can do everything at a far, far faster speed than you can.
The amount of time you need to spend scrolling to, locating and clicking buildings — even before choosing what you want to create or research — without hotkeys, is staggering.
By using a hotkey you probably save about 3 seconds of time on average. This is an educated guess, sometimes it will be more and sometimes less.
As you will click onto units and buildings hundreds of times throughout a game, the amount of time you save adds up staggeringly.
If you need to click 100 times where you could have used hotkeys instead, which is definitely an underestimate for a standard game on Age of Empires 2: Definitive Edition, that’s 300 seconds — or 5 full minutes — of additional time you’ve spent that you could have saved.
Imagine how easy games would be if you had a 5-minute head start over your opponent.
Using hotkeys and not using hotkeys is like comparing being able to touch type on a keyboard versus using a keyboard for the first time ever; having to search for each letter you want to type over and over again.
There is a hotkey for locating or creating every single building and for producing every unit.
Top players usually use custom hotkey layouts as they don’t find the default options to be good enough, but the default layouts are suitable for most players. I’ve only shared a small number of examples below as you’ll probably want to customize them based on your own preferences.
To memorize the default hotkey layout for building with Villagers you need to be able to memorize the order that buildings are laid out on screen. The hotkeys for creating each building — and each unit within buildings — are laid out in the same way a QWERTY keyboard is.
For example, once you’ve selected a Villager, the first option they have in the top left of their menu is to build Eco-related buildings. The hotkey for this, because it’s top left (picture your QWERTY keyboard here), is Q.
The first option that appears on the next page after hitting Q — displaying in the same place as the icon you needed to click to arrive at this page — is a House. Therefore, the hotkeys needed to build a house is Q, Q.
The option below a House on the Eco buildings page is a farm. The letter that appears on your keyboard below Q is A, and therefore the hotkeys to build a farm is Q, A, then click to place it where you wish.
To access military buildings instead of regular buildings with your Villager — with military buildings being the second option on a Villager’s menu — you need to press W.
To create a Barracks, which is the first option on the military building page, you’d use Q. So, to build a Barracks you’d press W, Q and click to place it.
You’ll also want to make use of hotkeys to set up ‘Select all’ commands, so you can queue units from your military buildings without changing the camera position.
Each building type has a letter assigned to it:
- Archery Range is ‘a’
- Barracks is ‘b’
- Blacksmith is ‘s’
- Castle is ‘v’
And every other building type has a unique letter that you’ll have to memorize.
To jump to a building, hit ctrl + the letter needed, so ctrl+b to jump to your Barracks, for example.
2v2, 3v3 & 4v4
Something many people want to know is Age of Empires 2v2 strategy (and larger team games too).
That makes a lot of sense as playing the game with friends or as part of a team is a lot of fun and adds a whole new dimension to Age of Empires 2 tactics.
However, as this guide is primarily designed to help you learn and improve your overall AoE2 strategy knowledge and gameplay, we’ve focused on Ranked 1v1s above.
That said, the basics of the game don’t change and there are some team game factors that we’ll quickly highlight below.
Build orders, Eco management and everything else we’ve spoken about so far are all still extremely important, as are the strategies that we’ve mentioned too.
The main thing that changes in 2v2 and larger team games is probably your army composition and Civ selection.
Good AoE 2v2 strategy usually involves one player picking a cavalry Civ and the other picking an archer Civ. The most common pairing in the current meta is probably Franks and Britons; a very strong cavalry and archer selection, and both have good infantry units too if they’re needed.
You’ll also usually make up the majority of your team’s army composition of two gold units, e.g. Knights and Arbelesters, with one player controlling the cavalry and the other controlling the archer units.
Generally speaking, you should try to keep the bulk of your military close together — especially in 2v2 — as it’s common to try to team up on a single enemy rather than try to turn the team game into multiple 1v1 scenarios.
In 3v3 and 4v4 you’ll usually have two archer Civs that play on the flanks and a cavalry civ that plays in the “pocket” — the middle.
Communication is key in team games and it helps to be in a call, i.e. on Discord, with your allies. If you’re just in regular in-game text chat, be sure to lay out your plans early on and communicate your moves along with important updates regarding your opponents.
Trading
One major difference once you’ve got a teammate is with market trading and also the concept of “slinging”.
In a 1v1, the placement of your market within your base doesn’t really matter all that much.
In team games you can generate gold via a teammate’s market. To do this, you simply create Trade Carts and then click them onto your ally’s market.
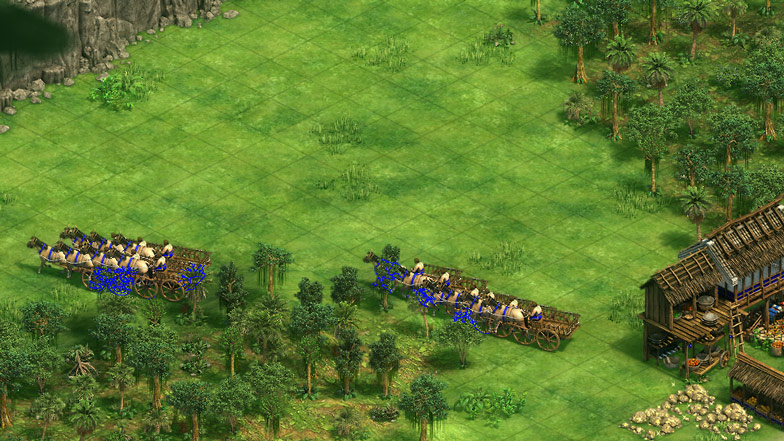
However, in order to make the most amount of gold possible — and to give your Trade Carts the best return on the investment — you need your markets to be as far away from each other as possible. Every tile of extra distance between your’s and your ally’s markets, the more gold you’ll get per trade trip. The back corners of your base are the perfect spots on land maps so that you can travel far but also enjoy the protection of being behind your base.
You can even consider walling off the trade route if things get dicey, though doing this isn’t all that common.
When it comes to raiding your enemies, you now have a new area to consider attacking — it’s not just Villagers that you can hit but now you can destroy Trade Carts. As markets are almost always built in the back corners of bases on team games, you know where to find them.
If you have a military lead, you can even patrol the back corners of the map to try to deny enemy markets from being built.
‘Slinging’ is when you send your teammate resources for via the form of a tribute — and this can be overpowered to the point where it’s often not allowed in competitive play either early on or at all. There is a Tribute tax of 30% to contend with, but this isn’t quite high enough to stop it from still being extremely useful.
If you’re relying on slinging to come out victorious, one player would usually focus heavily on Eco and walling whilst the other would focus on quickly advancing through the Ages and building an army to do quick damage.
Useful Resources
These are some useful resources that I’ve learned from and many of the Age of Empires 2 tips you’ve read here will have originally been picked up from one of these:
Spirit of the Law – A YouTube channel that mainly focuses on the math behind in-game decisions. ‘Spirit’ puts countless hours into testing which units outperform others, calculating which upgrades are worth it and at what stage of the game, and looking at the value of various extremely niche in-game features or bonuses.
Hera’s Guide to 2K – Video tutorial series put together by Hera, who at the time of writing this is the top-rated AoE2 player and boasts the highest ELO rating of all time. Hera’s YouTube channel is great for watching top level gameplay and so is his Twitch stream, but this playlist is especially useful for helping you to improve your skill up to a level of 2K ELO.
Low ELO Legends – Truly hilarious entertainment that is also helpful. Put together by T90Official — who again has a brilliant YouTube channel overall and a very enjoyable stream — Low ELO Legends is a video series that focuses on analyzing the gameplay of low level players. Not only is this funny viewing but it includes lots of genuinely useful tips for those looking to improve from a total beginner level.
Survivalist – A high level YouTuber and Twitch streamer with a heavy focus on coaching. He also has a web app with some handy AoE2 calculations.
AoEZone – A forum where a large number of the Age of Empires community hangs out, which includes news and discussion surrounding gameplay, patches and tournaments. Registration is required to see the posts, but it does edge the r/AoE2 subreddit for quality (though that’s another option should you wish to check it out).
AoE2.net and aoestats – Civ and player stats, leaderboards, lobbies and other things AoE nerds (like me) enjoy looking at.
AoE2 Subreddit – Memes and chatter about Age of Empires 2, what’s not to love?
What’s the Best Gaming Mouse? – This is a guide of ours. If you want to play at a high level, you probably don’t want to be using a regular ol’ office mouse.

