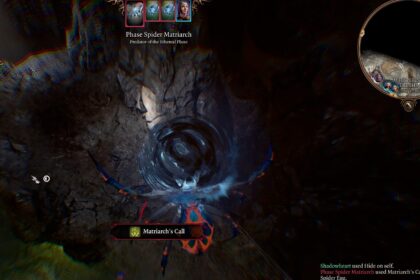
Wizards in Baldur’s Gate 3 are masters of arcane magic, using their intelligence, rigorous study, and spellbooks to cast spells and shape the battlefield to their advantage.
They have a wide range of magical abilities, and their power grows as they level up.
Playing a wizard can be daunting, but we have all you need to build your perfect wizard and make the most out of Gale.
Here’s an in depth class guide to help you understand and optimize your Wizard character in Baldur’s Gate 3.
How to Play a Wizard in Baldur’s Gate 3

Wizards are masters of arcane magic in Baldur’s Gate 3, and they offer a rich and versatile gameplay experience.
No matter which school you choose, the core principles of playing a wizard remain the same.
Embrace Versatility
One of the defining traits of wizards is their spellcasting versatility.
Even though some spells can be better than others, knowing all of them is the way to make sure you are ready to face anything the game throws at you.
Wizards have access to a vast array of spells from various schools, allowing you to adapt to virtually any situation. To maximize your versatility:
- Learn a Diverse Spell Selection: Invest in a variety of spells to cover different scenarios. This includes offensive spells for combat, utility spells for exploration, and defensive spells for protection.
- Prepare Spells Strategically: Take advantage of your ability to prepare a specific set of spells each day. Tailor your spell selection to the challenges you anticipate encountering.
- Experiment with Cantrips: Cantrips are your bread and butter spells that can be cast infinitely. Choose a mix of offensive and utility cantrips to have options for all occasions.
Master the Arcane Schools
Each arcane school offers a unique playstyle and set of abilities. Consider your chosen school when building your character and determine how it aligns with your preferred style of play:
- Abjuration: Specialize in protective magic and warding spells, making you a formidable defensive force on the battlefield.
- Conjuration: Summon creatures and manipulate the battlefield to your advantage. Conjuration wizards excel at crowd control and creating advantageous positions.
- Divination: Harness the power of foresight and control fate with your portent dice, ensuring you and your party make crucial rolls when it counts most.
- Evocation: Embrace raw magical firepower, specializing in spells that deal massive damage. Evocation wizards are formidable blasters in combat.
- Illusion: Manipulate perception and deceive your enemies with illusions. Illusion wizards excel at trickery and subterfuge.
- Necromancy: Control the forces of life and death, raising undead minions and dealing necrotic damage to your foes.
- Transmutation: Alter the physical world around you, transmuting objects, creating alchemical concoctions, and even shape-shifting.
Manage Your Resources
Wizards rely on spell slots for casting spells, which are a finite resource. To optimize your spellcasting:
- Rest Strategically: Take advantage of Long Rests to regain all your expended spell slots. Plan your adventures to ensure you have sufficient resources for challenging encounters.
- Balance Spell Levels: Prepare a mix of spells of different levels to ensure you can handle various threats. Higher-level spells often have more significant effects.
- Use Cantrips Wisely: When you’ve exhausted your spell slots, rely on your cantrips to contribute to combat and utility.
Adapt to Party Dynamics
Baldur’s Gate 3 is a party-based game, and cooperation with your companions is key. To enhance your party dynamics:
- Coordinate with Allies: Communicate with your fellow adventurers to synchronize spells and abilities for maximum impact. Combining spells and effects can turn the tide of battle.
- Fill Needed Roles: Consider the strengths and weaknesses of your party members and choose spells and abilities that complement their abilities. For example, if your party lacks a healer, you might prepare support spells.
- Prioritize Survival: While wizards are potent spellcasters, they are also vulnerable to attacks. Position yourself strategically and use protective spells like Mage Armor and Shield to stay alive.
Explore and Experiment

Baldur’s Gate 3 offers a dynamic and interactive world. As a wizard, you have unique tools for exploration and experimentation:
- Use Utility Spells: Many spells have utility outside of combat. Spells like Mage Hand, Detect Magic, and Feather Fall can assist in solving puzzles and navigating the environment.
- Interact with Objects: Experiment with spells to interact with objects and creatures in the world. Turn invisible to sneak past enemies or transmute an item to unlock new possibilities.
- Uncover Lore: Engage with the game’s rich lore and storyline. Use spells like Identify to learn more about the magical items you discover.
In Baldur’s Gate 3, playing a wizard offers endless opportunities for creativity and strategy.
Experiment, adapt, and use your arcane prowess to shape the fate of your party and the world around you.
Whether you’re a master of elemental destruction or a cunning illusionist, your wizardry will be a driving force in your adventures.
Wizard Initial Features
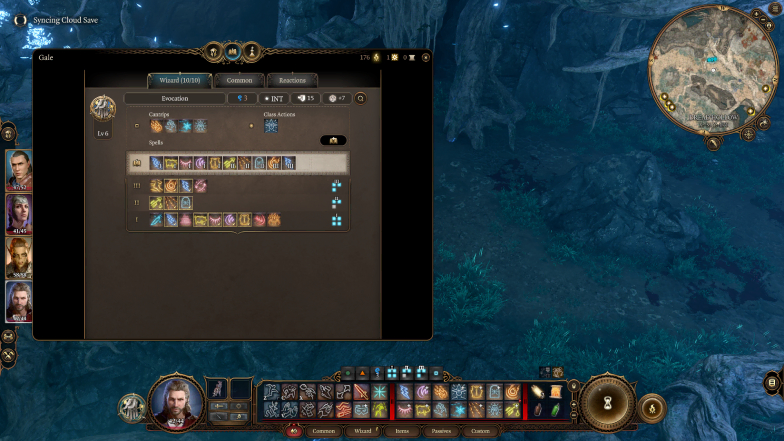
- Saving Throw Proficiencies: Wizards excel in Intelligence and Wisdom saving throws, reflecting their mental prowess.
- Weapon Proficiencies: Wizards are proficient with Daggers, Quarterstaves, and Light Crossbows.
- Arcane Recovery: You can regain expended spell slots during a short rest. This feature allows you to conserve your magical energy.
- Skill Proficiencies: Choose two skills from the following options: Arcana, History, Insight, Investigation, Medicine, Religion.
- Spellcasting: Wizards are known for their spellcasting abilities. They cantrips and spells they can cast depend on their level and Intelligence modifier.
Wizard Class Progression
As your Wizard character levels up in Baldur’s Gate 3, you’ll gain new abilities and options. Here’s a summary of your progression:
| Level | Abilities and Features |
|---|---|
| 1 | Gain Arcane Recovery (recover spell slots during short rests) |
| 2 | Choose your Wizard subclass (unique features and spells) |
| 4 | Choose a Feat from the Feats list (customization) |
| 6 | Unlock subclass-specific features (enhance spellcasting and abilities) |
| 8 | Choose a Feat from the Feats list (customization) |
| 10 | Unlock subclass-specific features (enhance spellcasting and abilities) |
| 11 | Gain an additional spell slot for 6th-level spells |
| 12 | Gain an additional spell slot for 7th-level spells |
The amount of spells that you know, aside from those you learn from scrolls, is also determined by your level progression:
| Wizards Level | Cantrips Known | I | II | III | IV | V | VI |
|---|---|---|---|---|---|---|---|
| Level 1 | 3 | 2 | – | – | – | – | – |
| Level 2 | 3 | 3 | – | – | – | – | – |
| Level 3 | 3 | 4 | 2 | – | – | – | – |
| Level 4 | 4 | 4 | 3 | – | – | – | – |
| Level 5 | 4 | 4 | 3 | 2 | – | – | – |
| Level 6 | 4 | 4 | 3 | 3 | – | – | – |
| Level 7 | 4 | 4 | 3 | 3 | 1 | – | – |
| Level 8 | 4 | 4 | 3 | 3 | 2 | – | – |
| Level 9 | 4 | 4 | 3 | 3 | 3 | 1 | – |
| Level 10 | 5 | 4 | 3 | 3 | 3 | 2 | – |
| Level 11 | 5 | 4 | 3 | 3 | 3 | 2 | 1 |
| Level 12 | 5 | 4 | 3 | 3 | 3 | 2 | 1 |
Wizard Spellcasting

Wizards rely on their spells to shape the battlefield and support their party. Here are some key aspects of Wizard spellcasting in Baldur’s Gate 3:
- Cantrips: At 1st level, choose three cantrips. These are minor spells that you can cast at-will.
- Known Spells: You start with 1 + your Intelligence modifier known spells. As you level up, you’ll learn more spells.
- Spell Slots: Wizards have a limited number of spell slots, which determine how many spells they can cast. Your spell slots increase as you level up.
- Spell Schools: Wizards can specialize in various schools of magic, which grants them access to unique spells and abilities.
Abjuration School
The Abjuration School is one of the specialized paths a Wizard can follow in Baldur’s Gate 3.
Wizards of the Abjuration School are focused on defensive and protective magic, using their spells to ward off harm and shield themselves and their allies from various threats.
Level 2 – Abjuration Savant
Abjuration Savant represents your deep knowledge of protective spells and magical wards. With this feature, you gain the following benefits:
- Reduced Scroll Costs: Learning Abjuration spells from scrolls becomes more cost-effective, costing only 25 gold pieces per spell level. This allows you to expand your repertoire of protective spells without breaking the bank.
Level 2 – Arcane Ward
Arcane Ward is a defining feature of the Abjuration School. It manifests as a protective shield that surrounds you, absorbing damage and keeping you safe. Here’s how it works:
- Warding Magic: The residual magic of your Abjuration spells forms a ward around you, protecting you from harm.
- Ward Intensity: Each time you cast an Abjuration Spell, the ward’s intensity increases by the spell’s level, up to a maximum of twice your Wizard level.
- Damage Absorption: When you take damage, the ward blocks an amount of damage equal to its intensity. For example, if your ward has an intensity of 5 and you take 10 damage, it will absorb 5 damage, leaving you with 5 damage taken.
- Ward Reset: After a long rest, the ward intensity resets and becomes equal to your Wizard level, allowing you to start each day with a fresh protective shield.
Level 6 – Projected Ward
Projected Ward enhances your ability to protect your allies, allowing you to share the benefits of your Arcane Ward. Here’s how it works:
- Protecting Allies: When a nearby ally takes damage and you have an active Arcane Ward, you can choose to sacrifice your ward to reduce the damage they take. This selfless act can be a lifesaver for your party members, making you a valuable support asset.
Level 10 – Improved Abjuration
Improved Abjuration reflects your growing mastery of protective magic and the strengthening of your Arcane Ward. Here’s what it offers:
- Ward Enhancement: Each time you take a short rest, the intensity of your Arcane Ward increases by an amount equal to your Wizard level. This means that after a short rest, your protective shield becomes even more potent, allowing you to endure more damage and better safeguard yourself and your allies.
Arcane Ward Tips and Strategies
- Damage Reduction: Remember that your Arcane Ward reduces damage from each individual damage component of an attack separately. This is especially helpful against attacks with multiple damage types.
- Team Player: Utilize Projected Ward to protect your allies when they’re in danger. Sacrificing your ward to save a teammate can be a game-changer in difficult encounters.
The Abjuration School’s focus on protection and warding.
This school is an excellent choice for players who enjoy supporting their party and keeping themselves and their allies safe.
Conjuration School
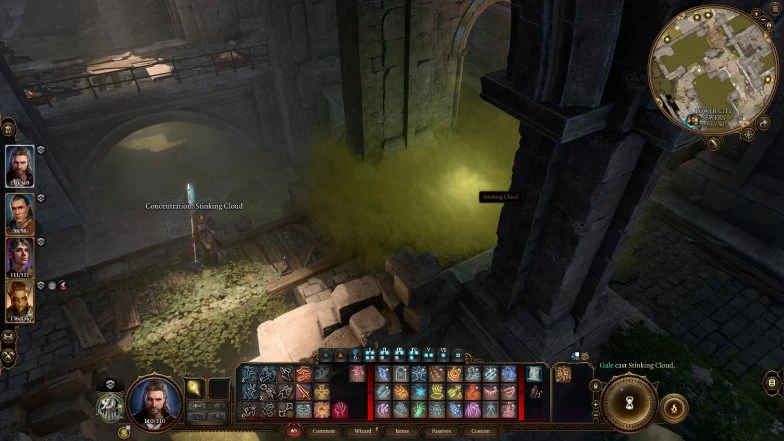
The Conjuration School is a distinct path for Wizards in Baldur’s Gate 3, specializing in summoning and teleportation magic.
Conjuration School Wizards harness the power to bring forth creatures and objects from other planes of existence and move themselves and their allies across the battlefield with ease.
Level 2 – Conjuration Savant
Conjuration Savant showcases your adeptness at mastering the art of conjuring spells. With this feature, you gain the following benefits:
- Reduced Scroll Costs: Learning Conjuration spells from scrolls becomes more affordable, costing only 25 gold pieces per spell level. This cost reduction allows you to expand your repertoire of summoning and teleportation spells without straining your finances.
Level 2 – Minor Conjuration: Create Water
Minor Conjuration: Create Water is a practical and magical ability granted to Conjuration School Wizards. This action-oriented feature allows you to conjure water with specific properties:
- Rainfall: This ability calls forth rain, extinguishing exposed flames, and creating a water surface in the area of effect.
- Range and Radius: It has a range of 9 meters and a radius of 4 meters, making it useful for controlling the battlefield and dealing with environmental hazards.
- Recharge: You can use this feature after a short rest, ensuring you have access to it frequently.
Level 6 – Benign Transposition: Teleport
Benign Transposition: Teleport is a powerful action-based ability available to Conjuration School Wizards. This feature enhances your mobility and tactical options:
- Teleportation: You can instantly teleport to a nearby unoccupied space or swap places with an ally. This ability allows you to reposition yourself strategically on the battlefield.
- Target Restrictions: The targets of this ability must be medium or small in size, limiting its use on larger creatures.
- Cooldown: You can use this teleportation ability once until you take a long rest, making it a valuable tool for both exploration and combat.
Level 10 – Focused Conjuration
Focused Conjuration highlights your unparalleled ability to maintain concentration on Conjuration spells, even in the face of adversity:
- Concentration Mastery: Damage taken while you are concentrating on a Conjuration spell will not break your concentration. This remarkable feat allows you to sustain powerful summoning spells and maintain their effects during intense battles, providing a significant advantage to you and your party.
Conjuration School Tips and Strategies
- Summoning Synergy: Make the most of your Conjuration Savant feature to learn a variety of summoning spells from scrolls, expanding your options for conjuring allies and creatures to aid you in battle.
- Tactical Teleportation: Benign Transposition: Teleport is an incredibly versatile ability. Use it to reposition yourself for better spellcasting opportunities or to save an ally from danger.
- Concentration Spells: With Focused Conjuration, consider concentrating on powerful spells that can change the tide of battle, knowing that you can maintain your focus even when under attack.
The Conjuration School is an excellent choice for players who enjoy summoning allies and using tactical teleportation to control the battlefield, ensuring that they remain a step ahead of their adversaries.
Divination School
The Divination School represents a unique path for Wizards in Baldur’s Gate 3, specializing in the manipulation of fate and the unraveling of the threads of destiny.
Divination School Wizards possess the ability to foresee events, alter outcomes, and gain unique insights into the future.
Level 2 – Divination Savant
Divination Savant signifies your unparalleled expertise in divinatory magic. With this feature, you gain the following advantages:
- Reduced Scroll Costs: Learning Divination spells from scrolls becomes significantly more economical, costing only 25 gold pieces per spell level. This reduced cost allows you to delve deeper into the secrets of foresight and divination.
Level 2 – Portent
Portent is a defining feature of the Divination School, granting you the power to peer into the future and influence the outcome of events. Here’s how it works:
- Dream Insights: Your dreams grant you glimpses of the future, providing you with two random Portent Dice after each long rest.
- Alter Fate: Throughout the day, you can use your reaction to replace the result of any Attack Roll or Saving Throw rolled near you with one of your Portent Dice. This ability allows you to turn the tides of fate in your favor.
- Limited Use: Each Portent Die can only be used once, and any unused Portent Dice are lost at the end of the day. Strategic planning is essential to make the most of this ability.
Level 6 – Expert Divination
Expert Divination showcases your growing mastery of divinatory magic and enhances your Portent abilities:
- Extra Portent Die: You gain an additional Portent Die, further bolstering your ability to shape events.
- Short Rest Recovery: After taking a short rest, you regain any spent Portent Dice. This provides you with more opportunities to influence the outcome of rolls and events based on your foresight.
- Prophecies: After a short rest, you receive prophecies that guide your actions. These prophecies can include tasks such as dealing damage to a specific type of target, assisting an ally with the Help Action, or delivering the finishing blow to an enemy. Depending on the prophecy, you regain Portent Dice immediately or after another short rest.
Level 10 – Third Eye: Darkvision
Third Eye: Darkvision is an action-based ability acquired by Divination School Wizards at level 10. This feature grants you enhanced vision capabilities:
- Darkvision: You gain the ability to see in the dark up to a range of 24 meters, allowing you to navigate in low-light environments and spot hidden threats.
- Duration: This ability lasts until you take a long rest, providing you with extended darkvision capabilities when exploring dark and dangerous places.
Level 10 – Third Eye: See Invisibility
Third Eye: See Invisibility is another action-based ability obtained by Divination School Wizards at level 10. This feature enables you to perceive invisible creatures and potentially reveal them to others:
- Invisibility Detection: You become capable of seeing invisible creatures, granting you the power to uncover hidden threats and assist your party in detecting stealthy opponents.
- Dexterity Saving Throw: This ability may require a Dexterity saving throw in certain situations to detect invisible entities.
- Range: The range of this ability extends up to 9 meters, giving you a decent area of visibility against invisible foes.
Divination School Tips and Strategies
- Precise Planning: Use your Portent Dice judiciously to alter critical rolls, such as saving throws or attack rolls, to ensure success when it matters most.
- Communication: Inform your party about your Portent Dice results and how they can benefit from your foresight.
- Versatile Vision: Leverage your Third Eye abilities to explore dark areas and unveil invisible threats, providing a significant advantage to your party.
The Divination School’s focus on foresight and destiny manipulation makes it an ideal choice for players who enjoy influencing outcomes, providing strategic advantages, and gaining unique insights into the unfolding narrative of Baldur’s Gate 3.
Enchantment School
The Enchantment School offers a distinct path for Wizards in Baldur’s Gate 3, focusing on the art of charming and influencing others with magical persuasion.
Enchantment School Wizards master the subtle power of controlling minds, turning foes into friends and manipulating the battlefield to their advantage.
Level 2 – Enchantment Savant
Enchantment Savant signifies your exceptional proficiency in enchanting spells. With this feature, you gain the following advantages:
- Reduced Scroll Costs: Learning Enchantment spells from scrolls becomes significantly more cost-effective, with the cost reduced to only 25 gold pieces per spell level. This allows you to delve into the secrets of charming and persuasive magic without straining your resources.
Level 2 – Hypnotic Gaze
Hypnotic Gaze is a compelling action-based ability granted to Enchantment School Wizards. This feature allows you to influence the minds of others with your gaze:
- Charming and Incapacitating: You can charm and incapacitate a creature, rendering it unable to attack or take actions against you or your allies. This action can significantly hinder an opponent in combat.
- Duration Extension: You can maintain your Hypnotic Gaze each turn to extend its duration, ensuring that your target remains under your charm.
- Limited Duration: The charm effect lasts for 2 turns but ends if the charmed creature takes damage. This ability offers a unique way to control and manipulate encounters.
Level 6 – Instinctive Charm
Instinctive Charm showcases your ability to influence others, even when they attack you. Here’s how it works:
- Charming Attacker: When an enemy attacks you, you can charm them, compelling them to attack a different target if one is available. This ability provides a form of crowd control and can redirect enemy aggression away from you and your allies.
Level 10 – Split Enchantment
Split Enchantment represents your in-depth understanding of enchantments and your ability to extend their effects. Here’s what this feature offers:
- Double Targeting: You can target two creatures with Enchantment spells that would normally affect only one creature. This expanded reach allows you to influence more individuals simultaneously, making your enchantments even more versatile and powerful.
Enchantment School Tips and Strategies
- Strategic Charm: Use Hypnotic Gaze strategically to control dangerous enemies in combat or to resolve conflicts peacefully through charm and persuasion.
- Protection Mechanism: Instinctive Charm can serve as a defensive tool, redirecting enemy attacks and mitigating damage.
- Versatile Spells: Make the most of Split Enchantment by choosing spells that can impact multiple targets, enhancing your ability to influence and control the battlefield.
The Enchantment School’s focus on charm and manipulation makes it an intriguing choice for players who enjoy using charisma and guile to control situations and sway the course of events.
Evocation School
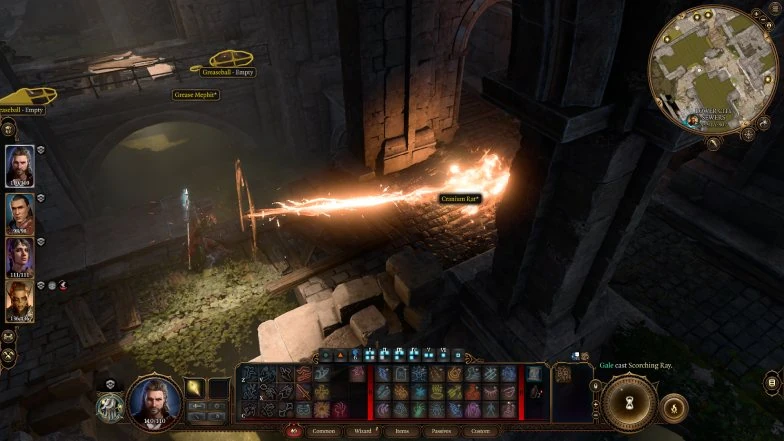
The Evocation School is a compelling choice for Wizards in Baldur’s Gate 3, focusing on the mastery of destructive and evocative magic.
Evocation School Wizards harness the power of raw magical energy to cast potent spells and control the battlefield with devastating attacks.
Level 2 – Evocation Savant
Evocation Savant reflects your unparalleled expertise in evocation spells. With this feature, you enjoy the following benefits:
- Reduced Scroll Costs: Learning Evocation spells from scrolls becomes remarkably cost-effective, with the cost reduced to only 25 gold pieces per spell level. This enables you to expand your repertoire of destructive spells without depleting your resources.
Level 2 – Sculpt Spells
Sculpt Spells is a defining feature of the Evocation School, allowing you to protect your allies while unleashing powerful spells:
- Protective Magic: Within your Evocation Spells, you can create pockets of safety. Allied creatures automatically succeed on their saving throws against your Evocation Spells and take no damage from them. This exceptional ability ensures that your spells harm only your enemies while keeping your comrades unscathed.
Level 6 – Potent Cantrip
Potent Cantrip signifies your mastery of cantrips, making them even more formidable:
- Hard to Evade: Your Cantrips become exceptionally difficult to evade entirely. When a creature succeeds in its saving throw against one of your Cantrips, it still takes half the cantrip’s damage but avoids any additional effects. This feature ensures that your Cantrips remain consistently damaging, even against resilient foes.
Level 10 – Empowered Evocation
Empowered Evocation demonstrates your enhanced control over Evocation magic and its destructive potential:
- Intelligence Modifier Damage: You can add your Intelligence modifier to the damage rolls of any Evocation spells you cast. This ability significantly boosts the damage output of your Evocation spells, making you a formidable force on the battlefield.
Evocation School Tips and Strategies
- Destructive Precision: Use Sculpt Spells to strategically position your area-of-effect spells, ensuring that your allies are unharmed while enemies bear the full brunt of your magic.
- Cantrip Versatility: Leverage Potent Cantrip to deal consistent damage with your Cantrips, regardless of your target’s saving throws.
- Maximize Damage: With Empowered Evocation, focus on spells that deal significant damage, and make sure to capitalize on your Intelligence modifier to maximize the effectiveness of your Evocation spells.
The Evocation School is an excellent choice for players who relish the role of a spellcaster that specializes in dealing massive damage and controlling the battlefield through raw, destructive power.
Necromancy School

The Necromancy School offers a unique and intriguing path for Wizards in Baldur’s Gate 3, specializing in the mastery of life and death.
Necromancy School Wizards command the forces of undeath, harnessing the power to manipulate and raise the deceased to serve their purposes.
Necromancy School Progression
Level 2 – Necromancy Savant
Necromancy Savant reflects your exceptional proficiency in necromantic spells. With this feature, you benefit from:
- Reduced Scroll Costs: Learning Necromancy spells from scrolls becomes cost-effective, with the cost reduced to only 25 gold pieces per spell level. This allows you to delve into the secrets of life and death without straining your resources.
Level 2 – Grim Harvest
Grim Harvest is a unique ability granted to Necromancy School Wizards, allowing them to gain life from death:
- Life from Death: Once per turn, if you kill a creature with a spell, you regain hit points equal to twice the spell slot level used, or thrice if it’s a Necromancy spell. This feature provides a powerful source of healing, making you more resilient in combat. Note that Undead and Constructs are unaffected by this ability.
Level 6 – Animate Dead
Animate Dead is a vital spell for Necromancy School Wizards, allowing them to raise undead minions:
- Create Undead Servants: With Animate Dead, you can create an undead servant from a suitable corpse. This spell is a level 3 Necromancy School spell and provides you with additional tools to control the battlefield.
- Variant Choices: Animate Dead offers two variants: Zombie and Skeleton. You can choose the one that best suits your strategy. Zombies specialize in melee combat, while Skeletons excel in ranged combat.
Level 6 – Undead Thralls: Additional Undead
Undead Thralls: Additional Undead is a feature that enhances your control over the undead:
- Raise More Minions: When you use Animate Dead, you can raise an additional corpse, allowing you to command more undead minions. This feature significantly increases your battlefield presence and strategic options.
Level 6 – Undead Thralls: Better Summons
Undead Thralls: Better Summons empowers your raised minions:
- Enhanced Undead: Creatures created with Animate Dead have additional hit points equal to your wizard level, and your Proficiency Bonus is added to their damage. This makes your undead servants more formidable in combat, further bolstering your control over them.
Level 10 – Inured to Undeath
Inured to Undeath signifies your deep connection with the forces of death:
- Necrotic Resistance: You become resistant to Necrotic damage, making you more resilient against necromantic threats.
- Unyielding Vitality: Your hit point maximum cannot be reduced, providing you with exceptional endurance in the face of life-draining effects.
Necromancy School Tips and Strategies
- Sustainable Healing: Utilize Grim Harvest and Animate Dead to maintain your hit points and create a sustainable source of healing.
- Undead Horde: With the ability to raise additional undead minions and enhance their capabilities, focus on building a formidable undead army to control the battlefield.
- Necrotic Resistance: Leverage your resistance to Necrotic damage to withstand threats that target your life force directly.
The Necromancy School offers a unique playstyle for players who want to explore the darker arts of life and death, commanding the undead and tapping into the power of necromantic magic in Baldur’s Gate 3.
Illusion School
The Illusion School offers a unique and enigmatic path for Wizards in Baldur’s Gate 3, specializing in the art of deception and trickery.
Illusion School Wizards wield the power to create phantoms and manipulate reality, turning the tide of battle through misdirection and illusion.
Level 2 – Illusion Savant
As an Illusion Savant, you possess a deep understanding of illusion spells:
- Reduced Scroll Costs: Learning Illusion spells from scrolls becomes more affordable, costing only 25 gold pieces per spell level. This allows you to expand your repertoire of deceptive magic without breaking the bank.
Level 2 – Improved Minor Illusion
Improved Minor Illusion grants you enhanced control over your illusionary powers:
- Swift Illusions: You can cast Minor Illusion as a bonus action, allowing for quick and seamless illusion creation.
- Sneakily Silent: You can cast this spell even while under the effects of silence, enabling you to weave illusions silently and unnoticed.
Level 6 – See Invisibility
See Invisibility is a valuable spell for Illusion School Wizards, providing the ability to unveil hidden truths:
- Reveal the Unseen: With this spell, you gain the ability to see invisible creatures, potentially exposing them to your allies. This is a Lvl 2 Spell from the Divination school.
Level 10 – Illusory Self
Illusory Self offers a powerful defensive mechanism for Illusion School Wizards:
- Phantom Duplicate: You can magically create an illusory duplicate of yourself in response to an attack, causing the attacker to automatically miss. This defensive maneuver can save you from harm in critical situations.
Illusion School Tips and Strategies
- Deceptive Tactics: Use your illusion spells to deceive and confuse your enemies, manipulating their perceptions and making them question reality.
- Swift Illusions: Improved Minor Illusion as a bonus action allows you to rapidly conjure illusions, creating diversions or hiding your true intentions.
- Counter Invisibility: See Invisibility provides you with the means to counteract invisible foes, ensuring your party remains aware of hidden threats.
- Defensive Prowess: Illusory Self acts as a defensive safety net, granting you a chance to evade attacks when needed most.
The Illusion School offers a captivating playstyle for those who enjoy the art of illusion and subterfuge, allowing you to outwit your enemies and master the art of deception.
Transmutation School
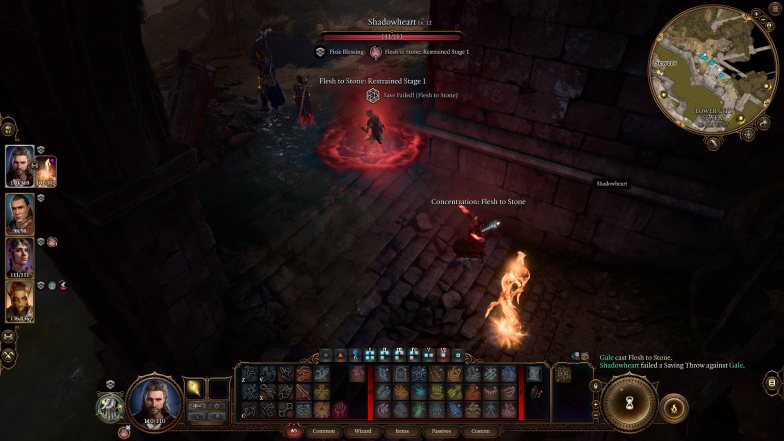
The Transmutation School offers a fascinating and versatile path for Wizards in Baldur’s Gate 3, specializing in the transformation of matter and the manipulation of magical energy.
Transmutation School Wizards possess the unique ability to alter the properties of objects, create alchemical solutions, and even shape-shift into different forms.
Here’s an in-depth exploration of the Transmutation School’s features and progression:
Level 2 – Transmutation Savant
As a Transmutation Savant, you become proficient in the ways of transmutation spells:
- Reduced Scroll Costs: Learning Transmutation spells from scrolls becomes more economical, costing a mere 25 gold pieces per spell level. This allows you to acquire a diverse range of transmutative magic without breaking the bank.
Level 2 – Experimental Alchemy
Experimental Alchemy empowers you to delve into the realm of alchemical solutions:
- Enhanced Alchemy: You can create two alchemical solutions instead of one when combining extracts, provided you pass a DC 15 Medicine check. This additional option expands your utility in both combat and exploration.
Level 6 – Transmuter’s Stone
Transmuter’s Stone grants you the power to imbue magical benefits into a small stone:
- Stone Enhancement: By giving a creature the stone, they gain a benefit of your choosing, making them more resilient or potent in various ways.
- Cooldown Mechanism: After creating a stone, you must cast a Transmutation spell of Level 1 or higher or take a Long Rest before crafting another one. This ensures the ability’s balance and prevents abuse.
Level 10 – Shapechanger
Shapechanger unlocks a remarkable ability for Transmutation School Wizards:
- Metamorphic Transformation: You can transform into a blue jay, gaining the ability to fly. This transformation provides unique tactical advantages and opens up new possibilities for exploration.
- Temporary Transformation: The transformation lasts for 5 turns, after which you revert to your original form with your original hit points if your blue jay form’s hit points drop to 0.
Transmutation School Tips and Strategies
- Economical Spell Learning: Take advantage of reduced scroll costs to learn a variety of Transmutation spells, granting you a wide array of magical abilities.
- Master Alchemical Arts: Use Experimental Alchemy to brew potent alchemical solutions, adapting to different situations as needed.
- Strategic Enhancements: Utilize Transmuter’s Stone to bolster your allies or yourself with tailored benefits, enhancing your party’s capabilities.
- Aerial Advantage: Shapechanger’s blue jay transformation provides mobility and access to otherwise inaccessible locations, making it a versatile choice for both combat and exploration.
The Transmutation School offers a dynamic and adaptable playstyle, allowing you to explore the boundaries of magic and transform the world around you.
Multiclass Options for Wizards in BG3

Playing a wizard in Baldur’s Gate 3 offers unparalleled versatility in spellcasting.
However, multiclassing can enhance your abilities and create unique character combinations.
Here, we explore some multiclass options that work well with wizards, providing you with new strategies and playstyles.
Sorcerer
Combining the arcane prowess of a wizard with the innate magic of a sorcerer creates a potent spellcaster. Consider multiclassing into sorcerer for these benefits:
- Sorcery Points: Sorcerers gain access to Sorcery Points, which can be used to convert spell slots into additional spellcasting flexibility. This can be especially useful for wizards who want to extend their magical resources.
- Metamagic: Sorcerers possess Metamagic options that allow you to modify spells on the fly. Twin Spell, for instance, lets you target two creatures with a single-target spell, effectively doubling your damage output or control capabilities.
- Font of Magic: The Font of Magic feature grants sorcerers extra spell slots, giving you even more spells to cast during encounters.
By combining wizard and sorcerer abilities, you become a spellcaster capable of adapting to various combat situations and maximizing your spellcasting potential.
Cleric
Multiclassing as a cleric adds divine magic to your arcane repertoire, granting you unique advantages:
- Divine Domain: Choose a divine domain that complements your wizardry. For example, the Knowledge Domain enhances your skills and grants additional spells, while the Light Domain provides offensive options and improved visibility.
- Cleric Spells: Gain access to a selection of cleric spells, including healing and support magic. This versatility allows you to fill roles traditionally held by other party members, making you a valuable asset.
- Channel Divinity: Channel Divinity features provide powerful abilities tied to your chosen divine domain. These can be used strategically in combat or exploration.
The combination of wizard and cleric abilities allows you to be both a formidable arcane spellcaster and a divine conduit, providing healing and support when needed.
Warlock
Multiclassing as a warlock introduces eldritch invocations and patron boons to your spellcasting toolkit:
- Eldritch Invocations: Warlocks gain unique invocations that enhance their spells and abilities. Consider options like Agonizing Blast for extra damage with your Eldritch Blast cantrip.
- Patron Features: Each warlock patron offers distinct features and spells. The Archfey patron, for instance, provides fey-related abilities and enchantment spells.
- Short Rest Spell Recovery: Warlocks recover spell slots on short rests, allowing you to regain spellcasting power more frequently.
Combining wizard and warlock abilities lets you harness both arcane and eldritch magic, making you a versatile spellcaster with potent offensive capabilities.
Bard
A blend of wizardry and bardic charm can lead to a powerful support spellcaster:
- Bardic Inspiration: Gain the Bardic Inspiration feature, allowing you to bolster your allies’ abilities with inspiration dice.
- Spellcasting Versatility: Bards have their spellcasting list, which includes spells not typically available to wizards. This expands your magical repertoire and provides unique utility.
- Jack of All Trades: Benefit from the Jack of All Trades feature, which adds half your proficiency bonus to ability checks you aren’t proficient in.
Circle of Spores Druid
Adding the Circle of Spores Druid to your multiclass options provides a unique twist:
- Fungal Mastery: As a Circle of Spores Druid, you manipulate death, necrosis, fungal growth, and sporulation. Your connection to fungi grants you the Halo of Spores reaction and the Symbiotic Entity action, allowing you to deal necrotic damage and gain temporary hit points.
- Fungal Infestation: At level 6, you acquire Fungal Infestation, an action that raises a mold-encrusted zombie from a corpse. This gruesome ability complements your mastery of life and death.


