With all the best games available for download and with a multitude of online features to explore in each one– It goes without saying that having internet access is of utmost importance in order to fully maximize and enjoy your gaming experience.
The following step-by-step guide will teach you how to set up a router for gaming as easily as possible. Start by setting up your router for use with any gaming console, such as a PC, smartphone, PS5, Xbox Series X, or Nintendo Switch.
Step-by-Step Guide To Set Up Your Router

Let us start with the basics. Optimizing your router is a tough task because there are countless variables going on that it would be close to impossible to troubleshoot every slight detail that is going wrong.
To make sure we have a good foundation, follow these steps to set up your router and then, we can start optimizing your router for gaming.
Each router has a different setup but most of them have the same principle. It is to secure your network, set the connection, optimize the network, and set up access where it is only you that has access to it. The steps below will be the general way on how to set up a router for gaming and can be applied to most of the routers out there.
Step 1: Location & Connections

Find a designated location for your router. It must be connected to a broadband gateway from your ISP (Internet service provider), which is usually attached to a cable near an outside wall. Find an open spot and avoid any furniture or dividers that might interfere with the signal.
Thick walls made out of concrete will surely disrupt the radio waves from going through that direction. Find a way to find the most optimal spot in your area and establish whether or not, you would need an additional mesh router.
Remember, glass, drywall, and plywood should not disrupt your Wi-Fi signal. It is all about bricks, concrete, and masonry blocks.
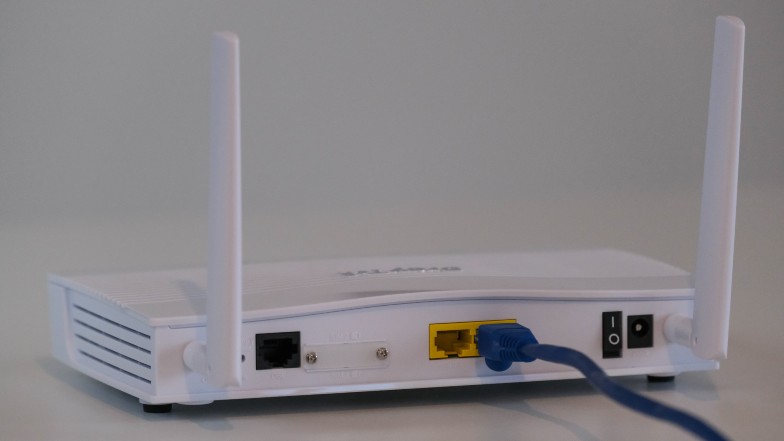
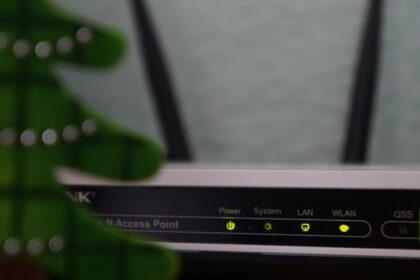
Once your router has been plugged in, you may now connect to the internet. Check the router’s LED lights if the connection is successful. If you don’t see any lights, ensure that you’ve plugged the appropriate cable into the correct port. Check the set-up instructions indicated on your router’s box or manual for further reference.
You may opt to use Wi-Fi extenders or a mesh network if you find that your device isn’t picking up the signal from where it’s placed. But if you plan on optimizing the speed, it is advisable that you simply relocate either your device or the router closer together for the best possible results.
Finally, confirm that your router has a working connection by plugging your PC or laptop into one of the device ports of the back of the router. If successful, you should be able to initiate a wired connection, just as you did when confirming an active internet connection.
Step 2: Configuration & Gateways

In some cases, internet service providers have customer gateways with built-in routers. A gateway with an integrated router requires you to re-configure in order to disable the router and pass the WAN IP address.
This is the unique internet protocol address that your provider assigns to your account and will be used through all the network traffic with your new router. If you skip this step, you may experience problems that prevent devices from connecting and working properly.
It is recommended that you turn off the gateway first, then disconnect or unplug any existing Ethernet cable plugged into the gateway’s local-area (LAN) port. Plug it into your new router’s WAN port and switch the gateway back on. Wait a moment for it to boot up, before plugging in the router’s power supply. Lastly, turn it on again and wait a few minutes.
Step 3: Setup & Login
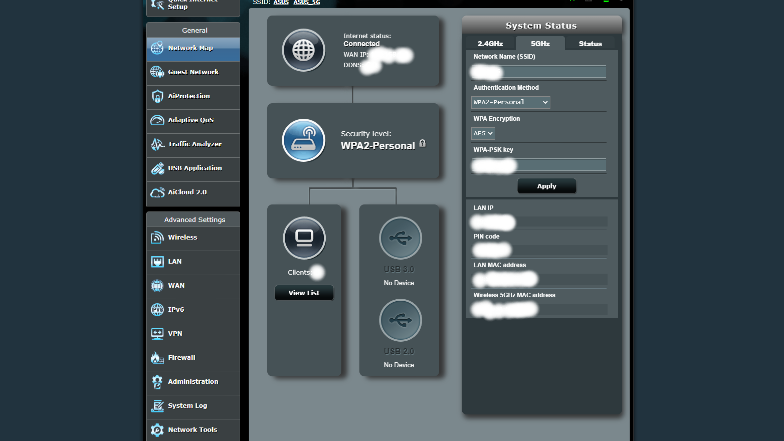
It is best to use the app your router has provided for the setup. If this is not possible, or if you prefer to use the router’s web-based interface or dashboard, you may connect the router to a computer via an Ethernet cable.
To do this, look for the router’s IP address printed on the back of the device itself or type 192.168.1.1 which is a common router address, into your preferred browser’s search bar.
Next, you will have to configure the router by logging in using a default or built-in admin name and password. This information is usually found on the router itself, or in the user manual.
Once you have entered the required credentials, you should immediately create your own username and password. As an added tip, make it memorable and recognizable yet secure enough so that the password may not be guessed too easily.
Step 4: Update Firmware
Depending on your router model and date of purchase, an update of the firmware or software may be required. It is recommended that you update as soon as you set it up since new firmware might help fix bugs or provide new security features.
It is possible for some routers to update the firmware automatically, but it is best to regularly check for updates through the app or browser.
Step 5: Configure & Secure

Your router might already come with auto-install features that you may use to facilitate and complete the setup. With the DHCP or Dynamic Host Configuration Protocol, you may automatically get assigned IP addresses to devices– Which you may always change later if you prefer.
Lastly, you’ll want to set up the security settings so that your network will be protected from hackers and malicious traffic. Router manufacturers usually come with security functionality to safeguard networks and user privacy.
To optimize the security of your internet, you may use the web dashboard to log in and enable specific security features such as a firewall, web filtering, and even access controls. You may also opt to avail of a virtual private network or VPNs for added privacy.
Once you’ve completed the setup of your new router, you may simply use your gaming devices to connect to the internet. Remember to save the network for easy access, and routinely check for firmware updates!
Tips You Should Remember

Gaming routers with more antennas are better
It sounds like a myth but in reality, it is actually true. The number of antennas gives a lot more directions for the signal to go through. It improves the directionality of the radio waves and significantly increases the radius of your network.
Antennas create more streams for sharing data which can ultimately bring more bandwidth to other devices connected to it. Obviously, if you see an unreasonable amount of antennas, it might be too much already and you might be paying more than you are getting.
You can check specific ‘gaming routers’ out there and compare all the specifications. You will notice that they get more expensive when there are more antennas included.
Do not forget to read the speed on the router packaging
This is a common mistake but it should not affect anyone buying a good router. The problem is if you are budgeting, you need to look at the speed of the router that is best suited to your data plan.
Let us take the ASUS ROG Rapture GT-AC5300 Wireless Tri-Band Gigabit Router for example. All routers have a name this long and to check the speed, it is usually the number from GT-AC5300. This means it supports up to 5,300 Mbps of Wi-Fi data throughput.
Since this is a high-end gaming router example, you would see other routers like AC1200 which just supports up to 1,200 Mbps. It will still do the job but anything lower might slow everything down especially if you have a good data plan with your ISP.
Router security features
You might have come across terms like WEP, WPA, or WPA2. These all different Wi-Fi access security protocols prevent intruders from accessing your network (basically preventing hackers or anyone trying to connect to your internet for free).
Internet service providers would recommend you to set up a WPA2 protocol and you should make sure that your router has this feature. Although all the other types of security are good, WPA2 is the most updated one. Keep that in mind when you are buying a new router or you are just about to set up your router.
Conclusion
To summarize, all routers are different but these are the key steps you need to take and the tips you need to remember when buying and setting up your router for gaming. It can be tedious when it is your first time doing it but we have all been there and it is better to learn it now than later.
It has a ton of advantages if you are able to learn all the features your gaming router can do. With that said, the next step is learning how to optimize your router for gaming. You can optimize your router to handle all the devices in your household and still keep the same level of high-speed internet connection your ISP delivers.


