Listen up! I guarantee you one thing after reading this “how to get better at Apex Legends” mega guide: You will learn something new whether you are a new player or already have hundreds of hours in the game.
This article is curated in a way that takes you from the most simple movement mechanics to the most advanced tactics that pro players use like wall bounces, crouch spams, tap strafe, and a lot of unique mechanics.
Many of our tips can be hard to do but this guide is meant to cater to everyone whether you are new or a veteran of the game.
This whole mega guide covers all the “pro” tactics that Apex Predators — the highest rank in the game — use.
Maybe you’ll be the next one getting to Apex Predator in Apex Legends.
Let’s get started, shall we?
Settings
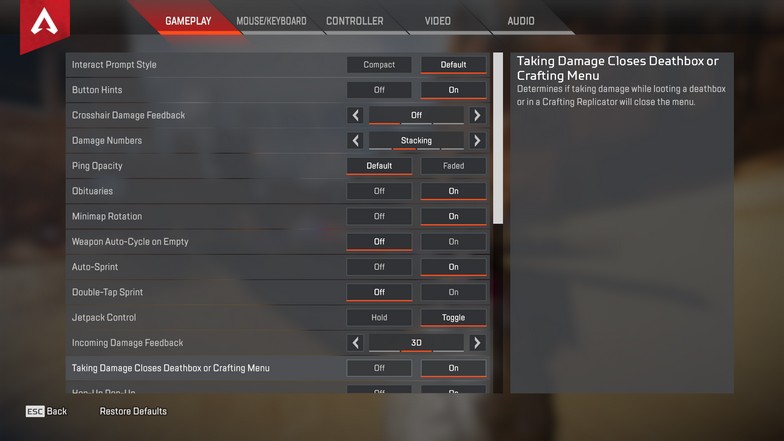
The most important thing with your Apex Legends settings is that you need to find what works for you and get used to them through practise.
You want the Crosshair Damage Feedback to be Off. The default setting is on X but you want this turned off because it will be a distraction when you want to focus on your aiming.
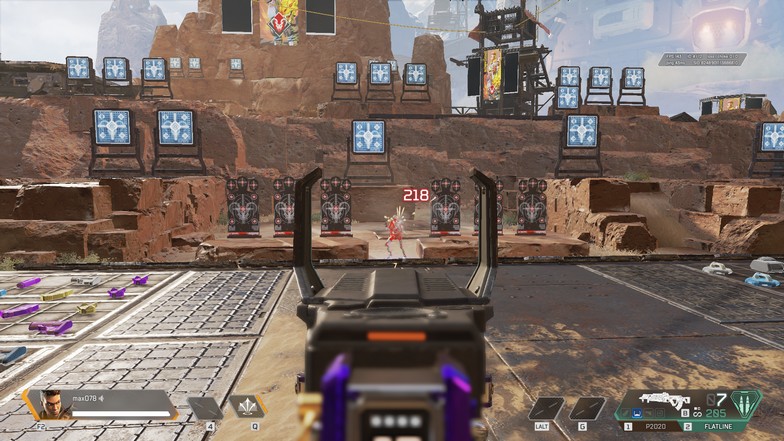
Damage numbers should be on ‘Stacking’ mode so you will just tell your teammates the last number that you see on your screen. This means that it is the total of all the damage that you have dealt with your enemy. You do not need to add everything compared to the ‘Floating’ mode.
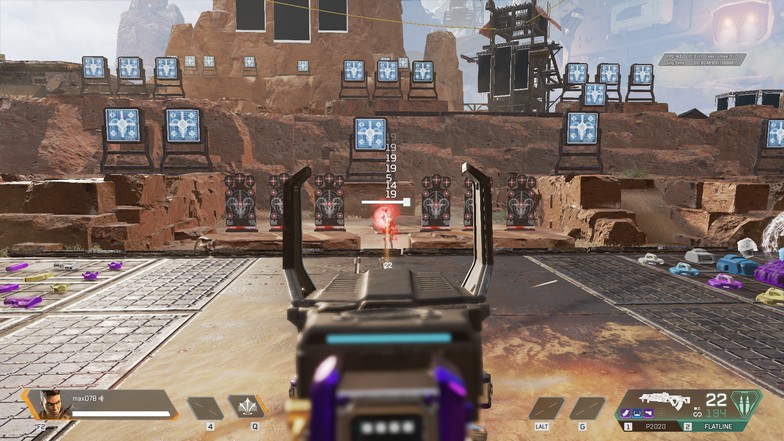
Incoming Damage Feedback should be 3D instead of 2D because 2D will just show a half-circle indicator where the damage is coming as opposed to 3D, which will show an arrow where the damage is coming from.
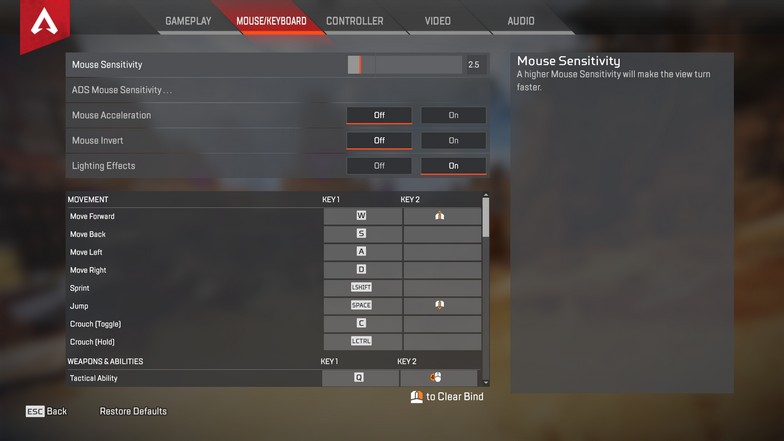
As for the sensitivity, I would suggest playing around with it. Do not copy anyone’s sensitivity and assume it will be perfect for you.
Each player has a different mouse or controller, play style and DPI settings, so copying anyone’s sensitivity is a little useless unless you get used to it immediately.
But to give you an idea of what values you could play around with, my Mouse sensitivity is 2.5 and my ADS Mouse sensitivity is 1.3. Setting the ADS Mouse Sensitivity to 1.3 will give you a 1:1 ratio for mouse sensitivity with your field of view when using ADS and hip fire as well.
If you’re using controller, you’ll have to adapt accordingly.
One of the best key binds that I use, and is widely used in the game as well, is setting the keybind 2 of ‘Move Forward’ to scroll wheel up. This will make it easier to execute some movement mechanics (to be explained later on in this guide) such as tap-strafing and redirecting.
Binding the ‘Jump’ movement to the scroll wheel down is also another great tip that I came across because this will also make it easier for you to use the movement slide + jump or launching yourself with the zipline and other movements that will also be explained later on.
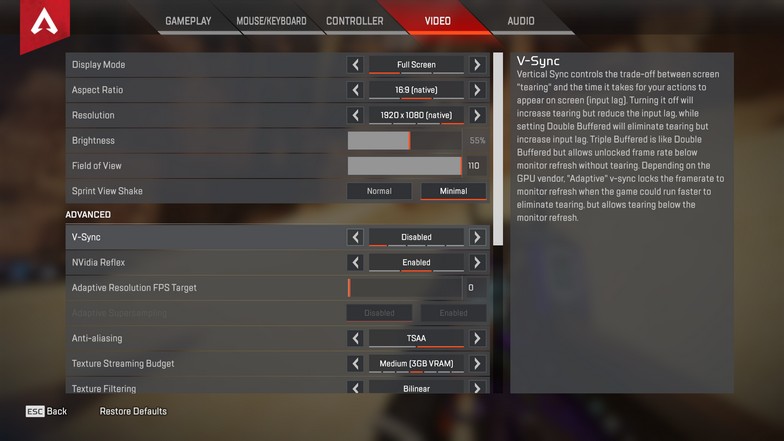
Setting Field of View maxed out so you can see a wider perspective of your POV.
As for the V-Sync, put it on disabled because you won’t need this but keep the Nvidia Reflex Enabled because this setting can give your FPS a boost.
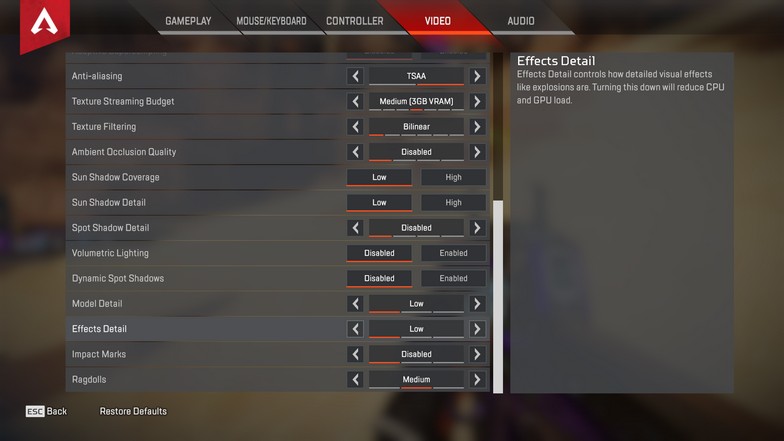
Keep TSAA for Anti-Aliasing and Texture Streaming Budget at 3GB the most because anything above that is overkill.
As for the other settings, put everything on low or disabled because you won’t need these high-quality details for gameplay and this will make it easier for you to spot the enemies. The simpler they look, the easier you can spot a moving model on your screen.
Looting
The very first thing you do in a Battle Royale is loot.
You need to learn how to loot fast, where to loot and what loot you should be looking for.
You won’t be able to do much if you don’t have any loot. You won’t be able to heal, you don’t be able to help your teammates, you won’t be able to provide distraction or cover your teammates. So, here are some tips to keep in mind when you’re looting.
Loot fast & keep in mind the items that you have looted
Spam E (default key for looting) at the very beginning of the game. You can just figure it out later once you already looted some items. Never stand still when looting. Keep on spamming your A and D buttons when trying to loot from a death box.
Stick to a certain weapon that you have chosen on your very first loot. Changing your weapons every now and then will not just waste your time, but it can affect your gameplay.
How? If you’ve chosen a weapon at the start and then you keep on changing it, you’ll first be distracted by the recoil of the gun because all guns have different recoils therefore what’s on your mind might be the gun that you previously used.
Second, you’d be losing the attachments. I’m not saying attachments will make you better, but it does help.
A faster way of double-checking what items you lack
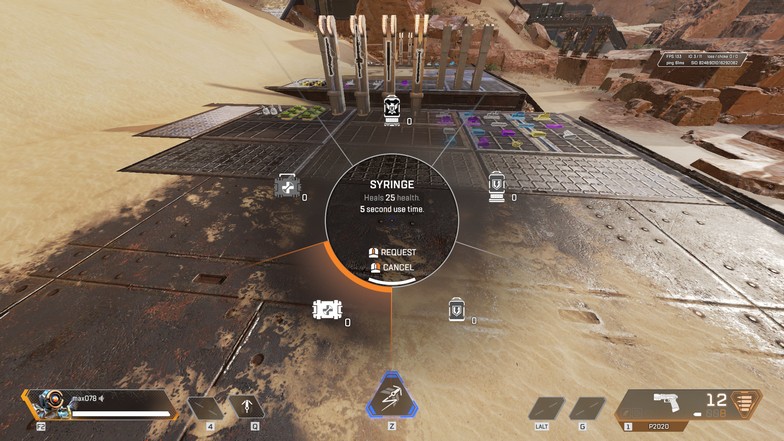
Instead of browsing your bag of the items that you lack, it is better to check the items by looking at the Meds (medicine/health) wheel or Grenade wheel.
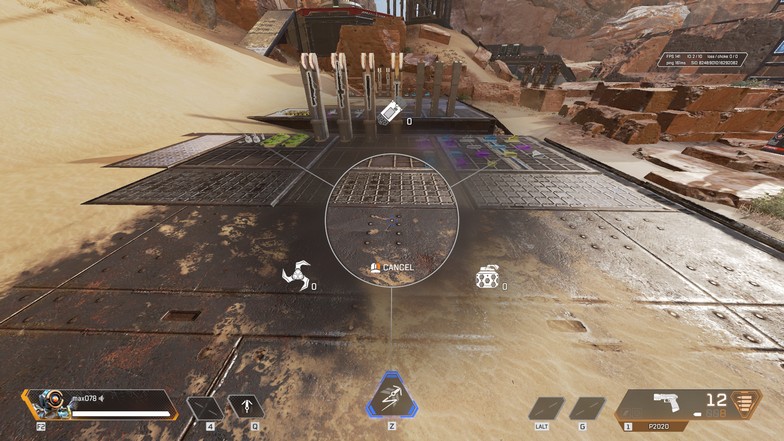
By doing this, you’ll be able to distinguish immediately which items you’re lacking or items that are already sufficient. Instead of checking your bag and browsing all of your items and determining which item is lacking, this is a more sufficient way of checking it.
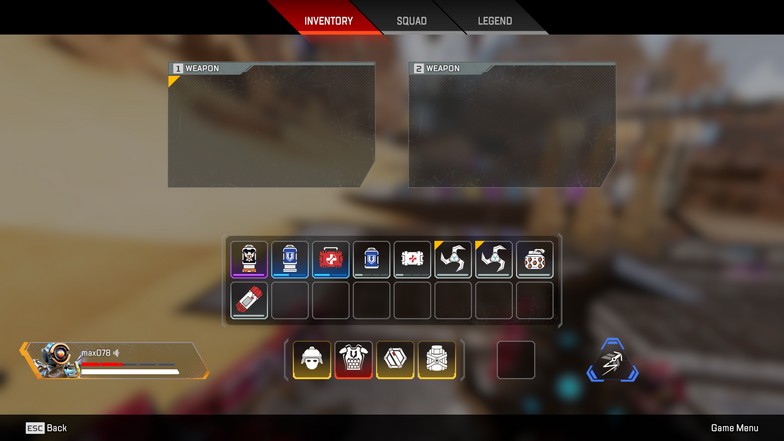
Another useful tip: While hovering over the med or grenade (nade) wheels, you can ping (default key would be the scroll wheel button on your mouse) each item that you lack instead of going over the bag and pinging the item. You can ping the item in the wheel even without those items in your bag. These will let your teammates know which items you lack.
When looting in a hot drop, loot where you can cover and shoot at the same time
A hot drop is when you drop where a lot of squads drop. It is a good practice to loot where you can have a cover and run around in case you won’t be able to get a gun. The important thing is to stay alive while looting because, well, you got nothing else to do when you’re dead, right?
Avoid looting in an open space because enemies around that area can shoot you and you’ll just be a burden to your teammates when you’re down. Have a good cover, shoot your enemies, and always keep on moving.
Do not stay on the same spot unless all areas are covered with enemies because by shooting at the same spot, your enemy could anticipate where you will peak and could give a decent amount of damage to you when this happens.
Keep on moving and let your teammates know where the enemies are so they could strategically flank the enemies when the enemies are focused on you.
What should be inside your bag?
I will mention what items you should have inside your bag, but the quantity of those items is just a suggestion.
The items are:
- 1 set of syringes
- 2 sets of shield cells
- 1-2 sets of batteries
- 1 set of medkit
- 1-2 pieces of grenades
All the slots that are left will be used for the ammo. Now the amount of ammo will depend on your guns and backpack level, but you usually give 1 slot of ammo for your secondary gun and all the remaining slots will be for the primary gun.
This could vary depending on what guns you prefer to play but just to give you an idea, this is what you should have given that you only have a normal backpack.
How to Find Enemies
Many players think that aiming is the best skill you need to have in Apex but that’s not strictly the case.
The most important thing in Apex is positioning.
Positioning is crucial in Apex Legends mainly because the idea to win is to shoot and not get shot at. If you have good positioning, whether you’re good at aiming or not, you have a higher chance of winning a gunfight as compared to when you’re in a bad spot and fighting the enemy head-on.
Don’t get me wrong, having a good aim is also important, but it’s useless if three enemies are firing at you all at the same time.
Here are some basic tips to know where the enemies are coming from and where to position yourself from the enemies.
Always Listen to Footsteps
This will be your biggest identifier in the game to know if the enemies are close or not. Once you hear footsteps (other than your teammates’, of course), you automatically assume that there are enemies nearby and you have to be cautious because a good player could down you in one clip.
Either they are above you, or below you, or coming from either side and you could make necessary actions before they even see you. Once you or your teammates hear footsteps, you need to immediately group together in order to provide support unless you’re facing an enemy yourself.
Pings
Probably one of the best things that were incorporated in the game of FPS especially for fast-paced games like Apex Legends. Using the ping option is very useful for your teammates when you’re the only one who can see where the enemies are.
Instead of using the compass that you have on your screen, you could just use your ping and let your teammates know where exactly the enemies are or where you’re going, or what you’re going to do, or what side of the map are you going to hold or defend.
Gunshots
Gunshots would also be an indicator of where the enemies are because, well, it’s safe to assume there are gunfights if there are gunshots unless a team is purposely shooting nothing to attract enemies.
You should be able to determine in your map where the enemies are based on the gunshots that you are hearing.
If you are having trouble determining where the sound is coming from, just face a certain direction and listen to the gunshots if it’s coming from the left or right of your headset. This will be a good starting point to create a strategy on placing while taking into account how the circle will end — I discuss this further later in the guide.
Dialogue of your legend
You have to have a keen ear or hearing and this is besides hearing the footsteps of your enemies. For example, when you’re in a gunfight, your character will mention that there’s another party shooting at you besides the one you are fighting with.
This is sometimes hard to hear especially when you and your teammates are too focused in the gunfight and you’re just starting to play the game. Always listen to the dialogue that your character is saying or even your teammates’ dialogue will be useful as well.
What to do in Gunfights
There are a lot of things to consider in a gunfight like your aim, position, how many enemies are in the fight, the possibility of the place to get a third party by another team, do you have enough healings, etc. Here are some tips to know what to prioritize during gunfights.
High ground
Always go for the high ground when you are able but if it’s going to risk you and your teammates by means of going there, you better weigh if it’s worth it. The benefit of having the high ground is you have a good view of where your enemies are.
You have a good spot to shoot them and it will be harder for them to shoot you because it’s a lot harder to shoot at an angle that is not within eyesight level. The enemies will also have a hard time getting to you and you have a good chance of shooting them before they even get to your ground.
Another good thing about being on the high ground is you can easily jump off the height and push someone below you to when you want to push a team that’s on high ground, you have to go all the way up to reach them and this could be a risk of getting damaged before you even get to the gunfight itself.
Always shoot with cover
This is one of the most underrated tips that I took for granted when I was just starting to play Apex. This is how players can clip their enemies without even getting damaged. The positioning also comes into play as well. Your cover must be able to cover you from the line of sight of most enemies and at the same time, you should be able to shoot at least one of them.
A good cover would be removing you from the line of sight of at least 2 enemies from a team and then shooting and knocking at least of them. This would make the gunfight a huge advantage for your team because it’s going to be 3 vs. 2 and unless they’re with a pro player who can wipe of an entire team, your team would most likely win the fight.
Make good use of the doors & zipline
A good way of using the doors is when you are in a gunfight, stand or crouch in front of it so the enemy cannot push the door and you can apply this when you’re healing or want to hold a building. The zipline is a good use to evade the enemy or push them by playing along the zipline.
A good tip during a gunfight; when you’re low in health and tried to heal behind a closed door is to spam the door open/close before your enemy destroys it so you can still have the door as your cover when healing.
It takes 2 melee attacks (whether kick or punch) to destroy the door so get the timing when they’re going to hit the 2nd attack so they won’t be able to destroy the door and you could finish your healing.
Shooting mechanics
Aim & Recoil
Each gun has a different recoil and, I will be listing the guns that are easy to control vs. the ones that are hard to control. This includes how hard it is to hit enemies as some weapons are semi-automatic.
Easy: R301 and Spitfire, Alternator, RE-45, EVA-8, Mastiff, Triple take
Moderate: Flatline (but this could be on the easy ones as well), Mozambique, Sentinel, L-star, Hemlok, G7 Scout, Prowler
Hard: R99, Wingman, Bow, 30-30 Repeater, Devotion or Havoc (without the turbocharger), Longbow, Peacekeeper, Kraber
Now, these are just my opinion on the recoil of the guns and it varies for each and every player. This is just a guide for you to have an idea of the guns’ recoils. The easiest guns that have the least recoil and easiest to use would be the R301 and Spitfire. These 2 do not have that much recoil compared to the other guns in the ‘Easy’ category.
The hardest would be the Wingman and Bow since every bullet (or arrow for the Bow) counts. Your shots should be really precise in order to hit your targets. You also have to take into account the bullet drop (for Wingman) when you’re shooting from afar.
You can try all of these guns in the Firing Range to test out their recoil and, you can determine which gun is fun for you to use or you’re comfortable with.
Though if you are a beginner, like no or little experience with Apex, I would suggest trying out the R301 or Spitfire first if you haven’t been playing long enough and then decide from there what to use if you get bored with it or have gotten the sense of aiming in Apex.
The damage of the bullets varies on what guns you use as well, but the hierarchy on having the higher damage would be the Shotgun/Sniper > Heavy > Energy > Light.
Snipers have bigger damage if you are able to hit them. The highest damage you could get of a headshot would be the Sentinel that is charged using a cell. Shotguns are on par with snipers given that you hit it with a headshot as well or you are close to the enemy.
Mozambique is the only shotgun that gives a decent amount of damage to a fairly distanced enemy (close to mid-range). All the other shotguns would be ineffective at mid-long ranges.
Kraber is the only gun that can knock you down with a single shot. You can only get this gun in care packages and, care packages are spawned randomly on the map.
ADS (Aim Down Sights) & Hip fire
There’s nothing much to say about ADS and Hip fire but the only advice I could tell you is that when the enemy is too close to you (like face-to-face combat), don’t bother using the ADS and just use hip fire. The chances of hitting using hip fire are higher rather than using ADS to an up-close enemy.
I know this is common sense to most people playing in Apex, but believe me, I tend to use ADS even when it’s up close when I was just starting to play Apex.
Peak & shoot
Always have a cover when you’re in a gunfight because you can damage your enemy while having fewer chances of breaking your armor. The benefit of utilizing your cover would always result in your advantage.
Armor
Each armor has a specific amount of damage that it can absorb before your health is on the line. Each bar on the armor has an equivalent of 25 damage.
It is safe to play with Blue armor (can absorb 75 damage) but it would be a little risky to play with white armor because it just puts you at a big disadvantage against players who already have Purple armor (absorbs 100 damage). It is easy to get a Blue armor and that’s just getting at least 150 damage on any enemies combined.
Throwing grenades
The grenades you throw out in the game will not affect your teammates. Remember this as you need to tell your teammates it is your grenade during a gunfight so your teammates won’t have to get a cover when pushing an enemy. All grenades can destroy doors.
Arc Star
Arc Star is a different kind of grenade compared to the normal ones that we usually know (HE grenade or Smoke grenade). Arc star is shaped like a Shuriken and it also throws like one. The effect of an arc star would faze the enemy and slowing down like they’re stunned because they’re too slow to move.
It can also STICK to an enemy and makes it guaranteed that they will be fazed and get the full damage. So, once you stuck an Arc Star, it is better to do some damage to that enemy so there would be a higher chance of knocking them down and putting your team at a huge advantage during a gunfight.
Tip: You can try throwing an arc star to one of your teammates who’s going to push (since I have mentioned at the beginning that your grenades will not affect your teammates) and then go near the enemies once the Arc Star is stuck and by doing this, you have a higher chance of fazing the enemy. Although, your teammate is at risk as well so be careful in executing this play.
Frag grenades
These are just like your normal grenades. But the trick in throwing this kind of grenade is through a high arc throw so your enemies won’t be able to react to it when it’s landing on them. Once the grenade lands on them, it won’t bounce or roll anymore because of the high arc that you did upon throwing it.
This is difficult to accomplish when you’re in a gunfight because your enemies are constantly moving, but this is a great opportunity when they’re healing or stuck in a certain area.
Tip – You can throw a grenade at a closed door and the grenade will land inside.
Thermites
This kind of grenade is damage over time. It will burn your enemies when they get hit by this. This is also a good grenade because the damage will keep on popping out on your screen even when your enemies are in a cover or even if it’s out of your line of sight
By seeing the damage/numbers, you can track where the enemy is moving and strategically push them and thus, winning the gunfight.
Being in the Zone
You always have to watch out for the zone especially when it’s closing and you’re in a gunfight. It is much better to gatekeep or hold a spot within the zone and wait for enemies to shoot at who’s just entering the zone.
It’ll be a lot harder to fight when a team is in the zone and your team isn’t, there’s a lot of disadvantages in those kinds of a fight and one important factor is the placing beside the fact that your health is reducing every second you’re outside the zone.
You better keep in mind the zone because if it reaches Round 3, the zone hurts a lot and you don’t want that disadvantage on your team because it’ll be a bummer if you die because of the zone.
Strategy (zones, placing, flight path, high ground)
When you’re done looting after the drop-off, always take note of the flight path as well as the zone. Taking note of the flight path could give you an idea of where the enemies have dropped and where they’re coming from.
Don’t just stare at your drop-off point, but be aware of where your enemies have dropped. This way, you could prevent from getting “third-partied” when your team is in a gunfight and know when to engage or retreat depending on the place where your team is positioned.
You could also predict where the zone is going to end. This is shown by Albralelie’s video. By knowing where it would end, you can come up with a strategy on placing especially when it comes to the last half squads.
Do not attempt to chase a squad unless you’re 100% sure that you will be able to kill them. Chasing a squad will most likely just result in getting third-partied by another squad and having less chance of winning the gunfight because you’ve already used your healing from the previous fight and then another squad would show up to wipe you.
Always be aware of your situation. The place you’re in, the healings and ammo that you have, and where you are in relation to the zone. You don’t want to get into the last 3 squads and having low on ammo or healing.
This will be frustrating and disappointing since you’ve exerted enough effort just to be in the last 3 squads and you’re just going to lose because you ran out of bullets.
Although this could happen, if you can avoid it, why not right? Always put yourself and your teammates in the best possible situation so you will have a better chance of winning the game.
When you’re down to Round 3 or 4 of the zone, always choose the high ground, as mentioned in the above section during a gunfight. Best placing would always be a better choice and, gives you a higher chance of winning.
It all comes down to your positioning and strategy on how you could hold off your position and cover most areas where the enemies can attempt to flank.
Movements (wall jump, bunny hop, zipline jump, wall climb)
There are movements that are used to cancel animation or provide more speed because it doesn’t cancel out your momentum. These are unusual or I can probably say out of the ordinary because these movements are not that easy to execute especially when you’re in a gunfight.
You can use this to juke your enemy and you will be surprised and feel like you’ve achieved something great once you’re able to pull it off in a game.
I will try to identify all the movements that I have seen on the videos of pros during their rank or pub games. They will be linked below as well.
These movements can be either beneficial or detrimental. It could be beneficial if you get used to these movements and can excellently execute them, but it could lead to your loss if you’re still trying to get used to the movements.
You can practice these movements during a pub game, but if you’re playing rank, I would suggest not to because your teammates might get pissed at you for throwing the game.
Slide jump
This is the most basic movement in Apex that can give you a little boost in speed as compared to when you are just running. Your velocity in the game will significantly increase.
You do this when you run around the map and you do not simply ‘just run’. Get used to this because you will need this in other advanced movements that I will explain later on.
Wall bounce
This movement can be used when you want to go over an obstacle or cancel the animation of climbing over a ledge or whatever you can think of that can wall bounce can be applied. You could use this when you’re pushing an enemy and you’ll catch them off guard when you execute it perfectly.
It is mainly because your enemy won’t be expecting you to come flying through the air and then your momentum is faster compared to just slide jumping into the enemy.
Ziplines
Make good use of the zipline especially when you’re in a building where each entry of a floor has a zipline. You will understand what I’m talking about once you see the video down below explaining the mechanics of the zipline.
Zipline launch
Basically, this is just launching yourself when you’re in a zipline then using the jump button while you’re at it. You will be a lot hard to target when you keep on launching yourself on every floor or you could bounce off the wall then go back to zipline before it becomes out of reach then repeat the process again so your enemies will have a hard time shooting you.
Just take note that Apex has limited the zipline reattachment up to 3 times because a lot of players have abused this technique when it was still unlimited and it is almost impossible to hit an enemy in a horizontal zipline. It will only reset once you’ve touched the ground or any surface surrounding the zipline.
Zipline jump
This is what it says it is. You use the zipline to propel you higher than your normal jump. There are variations of when to use this but this just basically gives you a higher jump than normal. People use this when they want to jump an obstacle without having to climb it or juke enemies who are chasing you.
The reason why they also do this is because it’s faster to execute, easier to do rather than the wall bounce I mentioned earlier, and enemies will not expect you to jump using the zipline because they will expect you to take the zipline and run away.
Wall climb
The way to do this is just as simple as climbing an obstacle but, in this movement, you will climb the wall to juke the enemy where you are going. Once the enemy expects you to run the usual course, they will be baffled and wonder where the hell you went and they will least expect you to be jumping in behind them and getting that kill/knockdown.
The idea of this movement is getting off your enemies’ line of sight so by just climbing a wall without even anything to hold on to and then surprising your enemy by jumping off the wall and catching them off guard since they do not know where you went.
Bunny hop
This movement was nerfed at the latest patch but you can still use it at some point in the game. Although you will slow down significantly when you continue to use this, it still gives you a little boost instead of just doing the normal movement.
It can be useful at times especially when enemies are chasing you and you do not want to slow down your speed when entering corners or when you try to heal before you close the doors.
Peak and shoot
This is best utilized when you have a cover. To effectively execute this movement is to use your cover very well. Peak with almost half of your body covered or when you can see your enemy is more than enough.
Peak and shoot with your gun and when you need to reload or if the gun has an animation of its recoil (best example would be Mastiff), go back to your cover then peak again and shoot. By doing this, you would be a harder target to shoot at and your enemies would less likely damage you.
Unless of course, your enemies are already anticipating you to peak so you also have to consider those factors.
A-D and crouch spam
This movement will only happen if you have NO OTHER covers around you. Otherwise, I would suggest going with the cover and use the “Peak and Shoot” tactic. So, if you do not have a choice and either team pushes while you don’t have any cover near, spam your A-D keys and mix some crouching on it.
This way, you’ll be a harder target for your enemies but you need to be precise with your shots because if you also miss all your shots, it will be too risky for you to win the gunfight. Practice this in the firing range and apply it to the game and you will the difference when you encounter a face-to-face gunfight.
Redirection
The purpose of this movement is to keep the momentum of your movement while turning sharp corners. This is extremely useful when you’re running from your enemies who are pushing you. They will have a hard time shooting you because all they’re going to shoot at are walls and bricks.
You have to be precise when you’re executing this. Otherwise, you’ll just slow yourself down. Sometimes, I personally keep on bumping walls when I try to do this so try and get used to it and it will give you smoother movement and not reducing the velocity of your legend.
Characters – Legends & Their Roles
Each Legend has a unique set of abilities and usefulness in the game. For me, there’s no Legend that is useless in a game. One can be useful depending on how you utilize the skills effectively. There are some people who hate particular Legends because of how their skills or build is somewhat ‘broken’.
Each update, there will be Legends that are so-called ‘meta’, meaning their skills are too imbalanced that can give you a huge advantage in the game, and usually, it’s being abused by other players.
Like for example, a combination of Gibby (Gibraltar) and Caustic would be insane (before the patch where Valkyrie came in) because once Gibraltar uses the shield and Caustic uses his ultimate, you and your teammates are basically untouchable because you’re shielded by Gibby’s skill (bubble) and no one can go inside that bubble because the damage of Caustic’s ultimate is too much to take in.
That is the reason why they nerfed the skills of Caustic (damage and the effect of the gas) in the latest patch (where Valkyrie comes in).
Having said this, you can have your own strategy with your teammates, depending on what you want to use even if that Legend is not ‘meta’. Be creative. Let your imagination run wild when using your preferred Legend and do not let the ‘meta’ wagon get to you. I will describe the skills of each Legend and how they can be useful during the game.
I will categorize the Legends as to what they’re useful at. Some Legends don’t belong to any other categories but I will mention what they’re good at doing so you will not be a burden to your teammates. These categories are not ideal. This is just to give you an idea of how the legends are usually used in the game.
Scouting
These legends have skills that can scout or know where the enemies are despite the walls, buildings, or any obstacle that blocks your line of sight.
Bloodhound
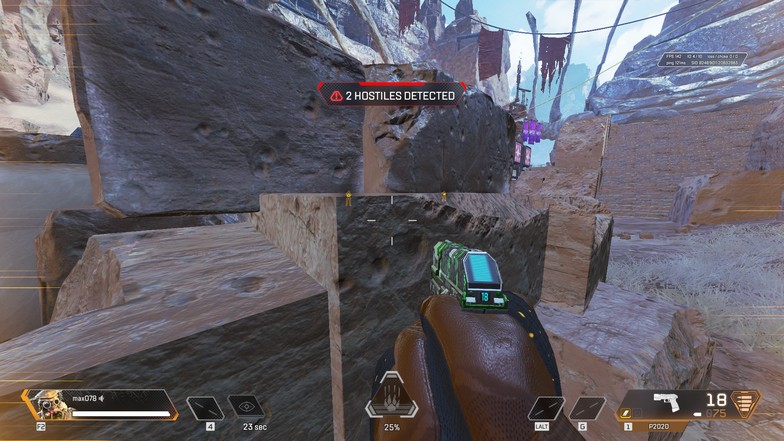
Bloodhound’s specialty is to track enemies. He’s the real scout out of all of these legends. His passive is very helpful in tracking if there are enemies nearby or who just passed by because you will see footprints on the floor as well as how many seconds have passed since they went there. You can use these tracks where they are going.
SKILL – The skill of Bloodhound is essential to the team because it can detect enemies beyond the walls. Imagine an x-ray scanning through the buildings, walls, tunnels, or whatever obstacle it may be. You and your teammates can strategize on positioning as to where to push or where to hold because you basically know where the enemies are.
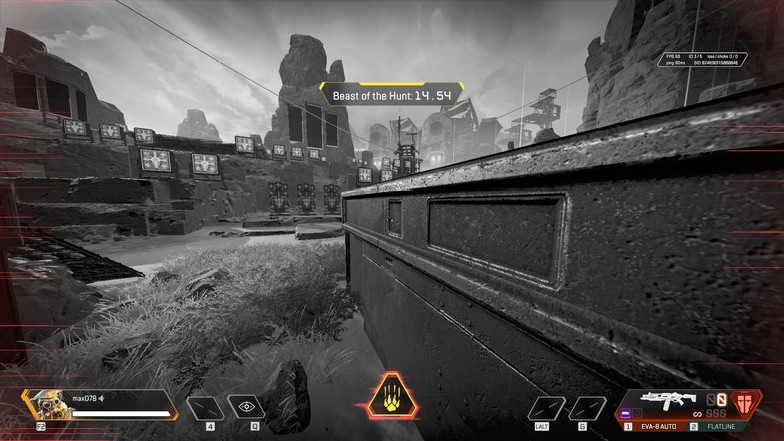
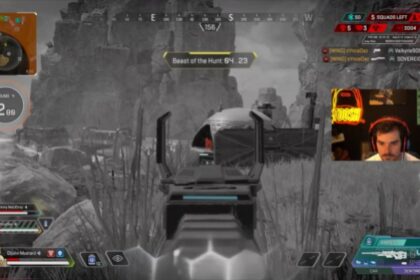
Ultimate – The ultimate of Bloodhound makes your view like this (refer to picture). It makes your screen black and white and makes the color of your enemies red so it will be easier for you to detect them.
Once you see the red enemies, it means that they are within your line of sight so it is a go signal for you to shoot. You will not see the enemies if there are obstacles blocking your line of sight. Refer to both pictures when ultimate is active.
Crypto
Crypto has almost the same skill that Bloodhound does, its purpose is to detect enemies. The only difference is that Crypto’s skill (Drone) needs to be in the line of sight of the drone before it can detect the enemies.
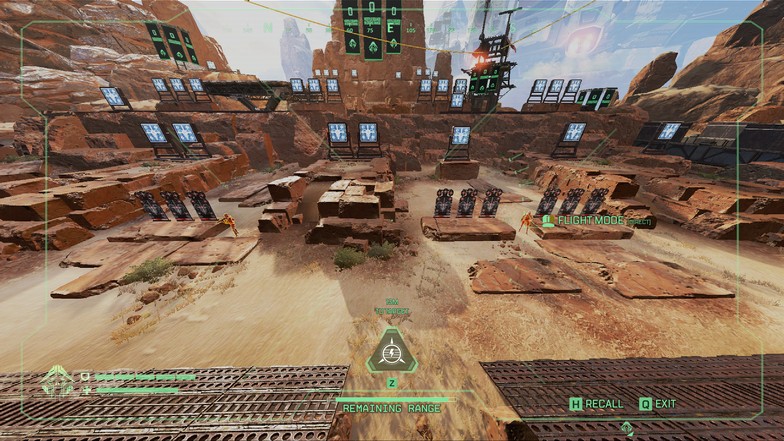
It will not be able to detect if the enemies are not within the line of sight of the drone as compared to Bloodhound that which can scan through anything even if it’s not within its line of sight. Once it detects the enemies, a triangle will appear to emphasize the enemies detected. Refer to the photos below.
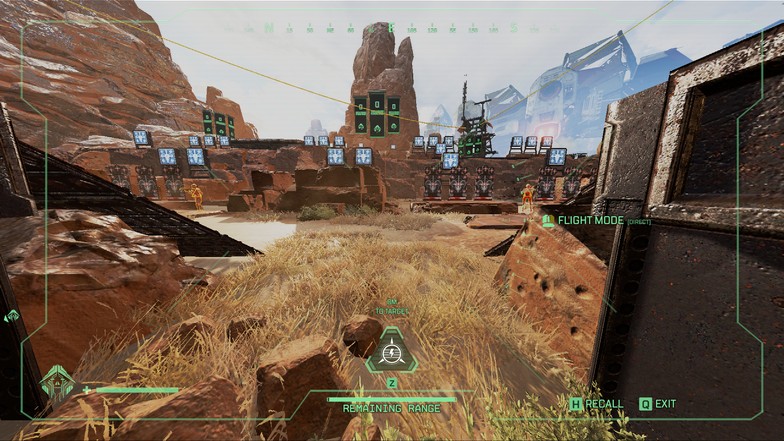
SKILL – Now, when you leave the drone view and leave your drone in the area, it will still be able to detect the enemies in that area given that it is within the line of sight of the drone.
If it’s not within its line of sight, it will not be able to detect it (figure C3) so you have left it in a good line of sight despite that they’re moving. This will enable you to know where the enemies are when you’re going to push once you have executed your ultimate.
The photo below is an example where you can still see where the enemies are as long as you have them within the line of sight of the drone. Just be sure to know where to position your drone because this can be destroyed.
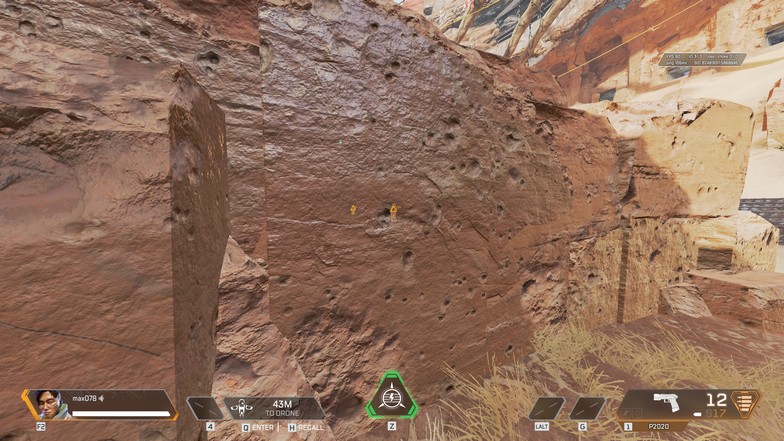
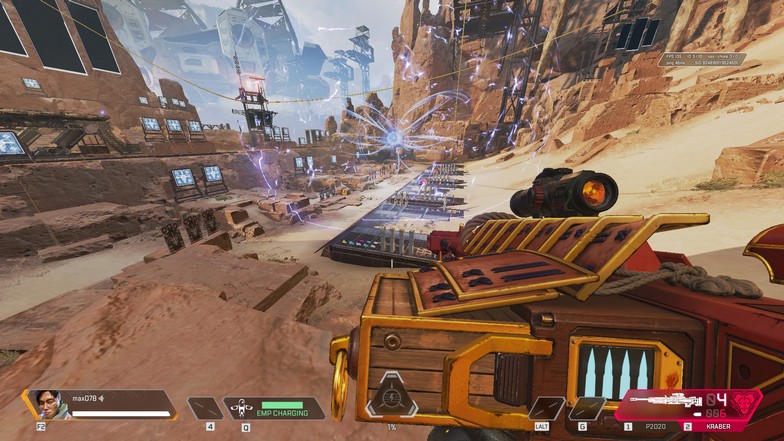
Ultimate – Crypto’s ultimate skill is that it can faze the enemies as well as reduce their shields by 50 damage (2 bars of armor) and destroy traps (Caustic, Watson). It has a huge Area of Effect (AoE) and it can be activated while using the drone or even if you are no in the drone’s view. Refer to the photo below.
Positioning
These legends have the skills to reposition or placing before, during, or even after the gunfight. It depends on which legend you are going to use and when you will use the skills of the given legend.
It is very crucial to effectively use the skills of each legend during a gunfight but for this section, I will only discuss where you can effectively apply the skills of some legends mentioned in this section.
Pathfinder
You can use the zipline (ultimate) to go to high grounds or when pushing an enemy when you have cracked them because it will surely take time for them to heal. Just be sure that when you zip, one of your teammates should cover you because most likely you will be open when you try to use the zipline.
You can also use the zipline mechanics when you want to go over an obstacle or go on top of a certain building without having the delayed animation of actually climbing the said obstacle. But the main use of the ultimate is mostly for repositioning and taking high grounds.
Octane
Octane’s jump pad (ultimate) can also be used in taking high ground as well as repositioning. It can also be used to push the enemies.
A good combination that you can use with Octane’s jump pad is using the ultimate of Revenant. Use the ultimate of Revenant and then push the enemies using the jump pad of Octane. This will enable you to put pressure on the enemies and could potentially wipe them out.
The only downside of this is when you get returned back to Revenant’s ultimate is that you reduce your life and armor by half.
There is also a movement called tap strafe using Octane’s jump pad. This is basically using redirection when launching yourself in the jump pad.
You can launch yourself 180 degrees opposite of the direction you are facing. This could be helpful especially when the jump pad is in a bad position.
A good tip as well, you can destroy the jump pads of the enemies to disrupt their strategy or they would be unable to retreat as well, depending on the situation.
Horizon
Horizon’s skill can be used to achieve high ground but it is also useful to use even in an open area so you could evade the ultimate of Gibraltar or Bangalore when you and your teammates are in the open area. As long as you’re up in the air, suspended by the skill, you will be able to evade the ultimate of other legends that is activated on the ground.
A good tip is that the skill also can be used inside an enclosed building and would disrupt the movements of the enemies. It can be used on doors so enemies would not be able to push through inside and wipe your teammates if all of you have low health.
Just be cautious when you stay in the air for too long. Good players can laser you despite you being in the air and it will be hard for you to evade the spray because you have limited movements when you are in the air.
Valkyrie
Basically, the ultimate of Valkyrie is just like using a jump tower. It can reposition you anytime you have the skill. The only downside of this skill is that you can easily be beamed by other teams and because it also draws a lot of attention when using this skill, you can be the focus of a lot of teams and could be detrimental when using it during a gun fight.
The best time to use this skill is when there are no enemies nearby or if you have Gibby’s bubble to protect you when you are still just launching.
Wraith
Wraith’s ultimate can be used in various ways. It can be used for pushing, positioning, kidnapping an enemy, or for retreat. The best way to effectively use the ultimate of Wraith depends upon the situation. Here are some suggestions on when to use the ultimate.
Pushing and retreating – You can use the ultimate when you are pushing an enemy. You can easily have your teammates beside you when you are trying to push them. You can also use this portal to retreat. The best example to retreat would be when there’s another team who’s going to push you. You can avoid third-party teams when you have this portal when pushing.
Positioning – It can be used to check the area you are planning to hold or position. It is a good idea to use the ultimate if you are unsure of the area and you are already holding a good position. You can easily retreat or go back to your old position and reduces the risk of being surprised by the enemies.
Kidnapping – Some players use this to kidnap an enemy you can easily knock down an enemy and making it an advantage to your team because it will be a 3v2. The only downside of this one is that it is very hard to execute, but once you are able to kidnap an enemy, it could be detrimental to the other teams.
A good tip as well is that some players use this skill to bait the enemies in taking the portal and then positioning the portal to an edge that could instantly kill the enemies especially when there is a team chasing you.
One of the good combinations of skills that I saw in watching competitions in Apex is that if one of their teammates have been knocked down, Gibby would immediately use his bubble, and then Wraith would create a portal from the bubble so he would not get beamed that much then just use the skill of Wraith to avoid getting shot at.
Defense or Support
These legends are on the defensive side of the group, based on their skills. It is better to hold an area, preferably an enclosed one that has doors and a roof that can protect you from getting shot from afar and wait for them to push you.
You will not be able to maximize your use of the skills to their potential if you guys were to push using these legends. Although Gibby’s bubble is also used to push at times, it is preferably used defensively unless you and your teammates are 100% sure that you will be able to wipe out the team.
Quickly do armor swaps in case there’s going to be a third-party team coming. Get used to getting the armor swaps as soon as the gunfight ends and then just get your armor (given it is better than the armor that you swapped with) after making sure there is no team coming to wipe you out.
Again, I am not declaring that you use these skills just how I explained it. This is more of just a brief explanation of how it is used in games and competitions. It really depends on the situation you’re in, the area that you’re holding, and other important factors that can come into play. Your strategy will depend upon the situation that you are in.
Watson
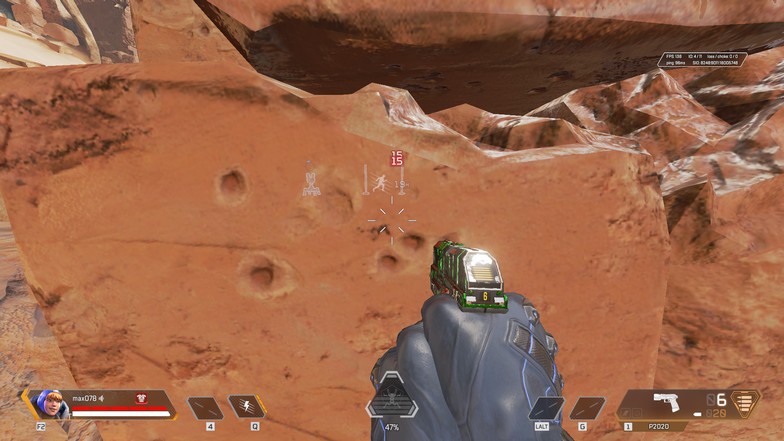
The skill of Watson is usually to camp in a certain area. Most likely the same as how you will camp using Rampart and Caustic’s skills. If the skill hits the enemy, you will be able to determine where the enemy is despite the walls/obstacles in front of you.
The ultimate skill of Watson is putting up a device that restores shield over time. Any kind of nade also gets destroyed when throwing it in the area where the device is. So, depending on your situation, you can think of any strategy how to set up the traps as well as the ultimate.
Gibraltar
Gibby is the nickname used by most of the streamers or pro. The skill of Gibby is he’s going to provide like a dome-like structure of a shield that blocks bullets, grenades, or other skills of other legends can be blocked off this shield.
But you will not be able to shoot or throw grenades from inside the shield as well. Gibby is probably the toughest legend in Apex mainly because his passive has a shield that blocks bullets when he is using ADS and the incoming damage is also reduced by 15% so you have to take into consideration when you are pushing a team who has a Gibby.
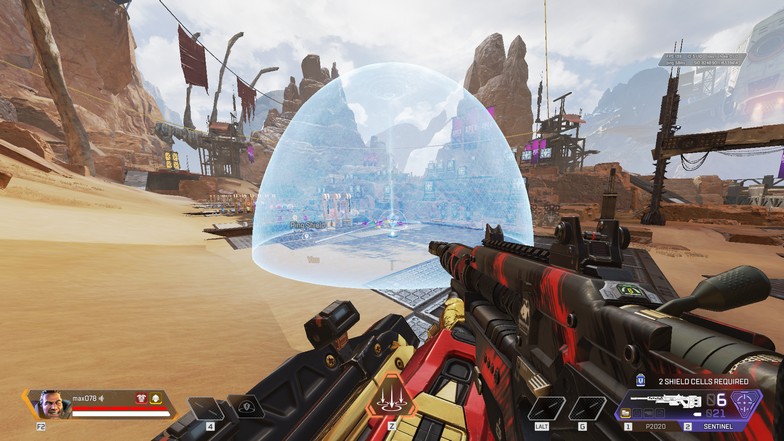
Gibby is the most used legend in tournaments mainly because of how useful his skill is. It is very crucial for a player who uses Gibby when to use the shield because the skill takes a bit of a long time to cool down especially taking into account that the shield is used in crucial moments, either be it for pushing down a squad or taking cover from multiple teams. The cooldown is 27 seconds.
The counter for the shield that I see, which is usually done by players, is that they throw grenades (Arc Stars are the most effective) outside the shield seconds after putting the shield up so the grenades will come into effect the moment the shield is gone. So the timing of throwing off the grenades is important in order for you to hit the enemies.
A tip about what’s usually done in case a team is going to push you is Gibby is going to use the shield and then executes an ultimate in that dome so no one can push around that area. You are going to have time to come up with a strategy as well as heal while the ultimate is still active.
Lifeline
Lifeline is considerably the best support that you can have in your team. Her skills are literally made to support your teammates.
One of her skills is to provide heal for your teammates but one of the most useful skills that Lifeline has is her passive. The effect is she can revive her teammates without having to do it herself so she can also defend and revive both at the same time.
Rampart
Rampart’s skill is to put up a shield that can block bullets from the other side of the shield and she can shoot through the shield from the side where she put up the shield. This is useful in an area that you want to hold, especially enclosed ones.
Rampart’s ultimate (Sheila) is creating a minigun that can be used with the shield. Yes, it is a minigun and it’s the real deal if you have a good position/placing, like covering most areas where you can get shot at.
Caustic
Caustic’s skill is such a pain when you get hit. It slows you down and it damages you over time and enemies can shoot you down when you’re slowed by this gas. The damage of this gas directly reduces the health and bypasses the armor so you really have to be cautious in passing by an area that has Caustic traps.
This is the Caustic gas that he spawns all over the place and when you pass by it, it automatically activates and the AoE of the gas is a bit big. You do not have to be too close to it before it activates. The traps can also track where the enemies are despite the obstacles. The damage will continue popping out until the effect runs out.
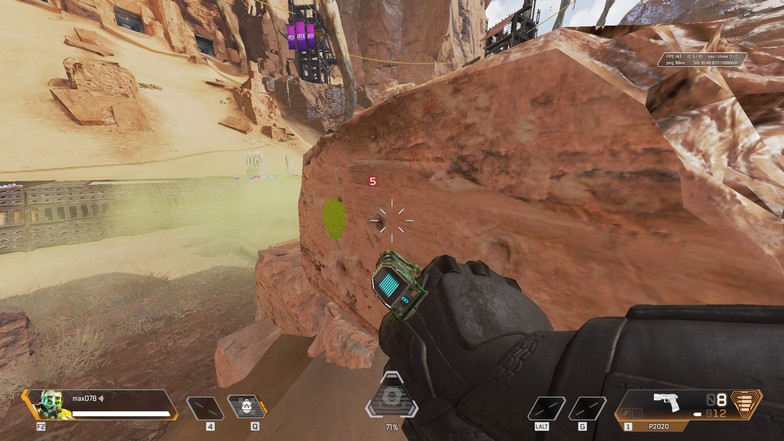
His ultimate is also too much to tank as well. It heavily reduces your health. One of the good combinations of legends that I have mentioned is Caustic and Gibby. Gibby uses the shield and Caustic uses the ultimate so by doing this, enemies will have a hard time pushing to the bubble and you and your teammates can have time to heal or prepare a strategy for what to do next.
Offensive or Pusher
Revenant
The skill of Revenants disables the skill of other legends even if it doesn’t hit the legend directly, once they pass through that skill, it will automatically take effect. They will not be able to use their abilities for 20 seconds. That’s a lot of time considering it is during a gunfight.
The ultimate skill of Revenant is spawning a totem that grants you ‘death protection’. You get a 2nd life when you take this death protection but the downside is, it reduces your life by half. But if it’s below half already, it will not reduce to half anymore, it will just retain to how much your health was when you get the death protection.
A good combination of legend with Revenant is Octane. Revenant uses the ultimate and everyone gets the death protection and then everyone uses Octane’s jump pad to run it down on the enemies and push them.
Just make sure that where you summon the ultimate of Revenant is covered or hidden and not just in plain sight where enemies can shoot at it because once it gets destroyed, the death protection comes off.
Another strategy to be cautious is that when your enemies see this, they will wait for you and your teammates to come back and then just rain down bullets on you and your teammates and you will be caught off guard.
Bangalore
Bangalore’s skill is simply just a smoke grenade. This is very useful in distracting the enemies and blinding them of their line of sight to you. You can also smoke your teammates who are being beamed by other teams since you only have 2 charges for this skill.
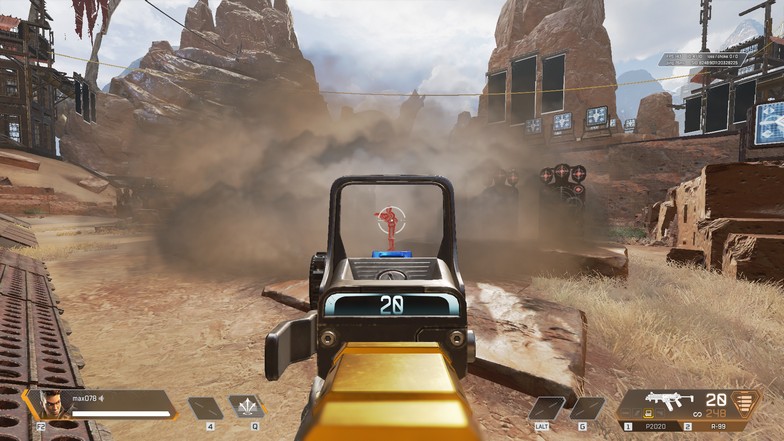
A good counter for this smoke is either high ground or Digital Threat. High ground because they will still be able to see your silhouette or in case they run, you would be able to see them easily. Or, the attachment Digital Threat because if you use the ADS with this attachment, you will be able to see the enemies through the smoke.
Another good skill of Bangalore is her passive. The passive skill activates if an enemy shoots at you. You get a little speed boost for a couple of seconds and, you can use this to have a higher chance of evading the bullets. You do not have to get hit in order for this passive to be activated, but once someone shoots near you, this will automatically be in effect.
The ultimate of Bangalore has various uses. It can be used to stop enemies from pushing you or it can also use as a push but the timing must be right when you’re going with the explosions of your ultimate. It depends on your situation when to use it these are just suggestions that I have personally experienced when playing Bangalore.
Fuse
The skill of Fuse is like a cluster of continuous mini explosives. This is useful in breaking down doors easily and can force an enemy to move and once you made that enemy move, you can easily tell where he’s going next and beam the crap out of that enemy.
He can also propel grenades farther compared to usually just throwing them. The downside of this is that you will not be able to do the arc throw in throwing the normal frag grenade but this skill is useful when using Arc Stars because it propels faster and the same goes with Thermite grenades.
The ultimate of Fuse encircle the enemy with fire. This is useful in many ways. It could separate one of the enemies from its squad. The damage of the fire is insanely high so better be careful when you’re trapped on this ultimate.
It can’t be jumped off by slide + jump. You need to be on higher ground to be able to jump it off but if it’s on flat ground, you will just burn yourself. It can do as much as 75 damage or 3 bars equivalent to your armor.
Mirage
Mirage skill summons a clone and can be controlled as well, although it is hard to control. This can be a distraction to the enemies and it could give you an idea of where the enemies are when they shoot at your clones.
The ultimate of Mirage is it’s going to deploy a certain number of clones all the same time and can be controlled as well and this is to confuse your enemies as to which is the real Mirage.
The passive of Mirage is that he can revive a teammate and both of you will be invisible at the same time. Just be cautious when and where you are going to revive because a knocked down enemy can ping you reviving a teammate or just tell them flat out and the teammate of that enemy can shoot you down.
Final Tips
After absorbing all the information in this mega guide, you might be able to come up with your own ideas in the future. Especially when a new legend is introduced or more weapons get added to the game.
Feel free to comment down below on any ideas you might have that were not mentioned here and would help other players get better at Apex Legends.

