Since his arrival at the club, Mikel Arteta has undoubtedly succeeded in rubber-stamping his football identity on the team.
The type of football that Arsenal plays certainly shows some influence from Pep Guardiola, but it is different in various ways as well. It does help that Arsenal has some of the best young players in the world to help Arteta bring his ideas to life on the pitch.
If you’re playing Kick-Off or Career Mode, it will be fun to try and replicate Arsenal’s tactics (I call it Artetactics) with Arsenal or a different team. With that in mind, I have put together this guide to Mikel Arteta’s Arsenal tactics for FC 24. Enjoy.
Squad
In relation to FC 24 as a football simulator, the most notable thing that I can point out when building/choosing the squad for this tactic is that having a handful of players with the “Press Proven” playstyle will serve you well.
This is due to the high-risk high-reward system of the attacking phase. In this phase, there is often ample space to exploit if a player loses possession in a crucial position.
Apart from this, you also want to ensure you have technical players across the board. At least three of your defenders must be physical, but you can have a smaller, more technical-than-physical fourth.
The striker should have bags of stamina. If you can get one with the Relentless playstyle or playstyle+, it’ll be perfect. Pace is not as crucial, but technical ability is. He must be secure with the ball at his feet.
Formation

The starting formation is the default 4-3-3. If you’re playing Kick Off, you can have a look at Arsenal’s formation and duplicate the edited positions of the players in this formation (especially the two central midfielders) into your own tactic.
The starting formation is really only important for the custom player instructions that we will be applying to each player because the tactic does not actually attack or defend as a 4-3-3.
Tactics
The defense and offense tactics in this section are crucial. They influence how the team behaves as a unit in the defensive and attacking phases of play.
There are certain aspects of the way that Arteta sets up his Arsenal team in real life that cannot be accurately replicated in FC 24 due to the limitations on the tactical options that we have and can change. So, I have plugged in a few ideas of my own that should give you the results closest to what we’re trying to achieve in those situations.
Defense
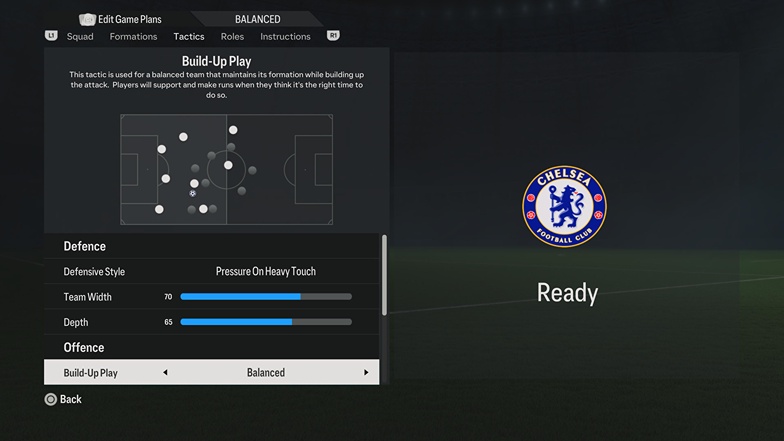
For the defensive style, I’m recommending “Pressure on Heavy Touch” because while Arsenal players do press the ball, their press is not as aggressive as the other pressing options in this section of FC 24 tactics.
Arteta relies on his players to press individually in a more tactical than aggressive approach. For instance, instead of having his attackers attempt to close down and overload the opponent’s defense when they’re in possession, the press starts with the lone striker making a bending run toward the defender/goalkeeper in possession of the ball.
For width and depth, the reason for having such high numbers (70 and 65 respectively) will become clearer later on.
The main idea is that the team will often only have three defenders in the attacking phase, so those three defenders need to spread out more to fill in the vacated space. The line itself is kept high, but the players drop back when possession is lost.
For this reason, you may choose to go with the “Drop Back” defensive style instead of “Pressure on Heavy Touch”. However, I found POHT to be more effective.
Offense
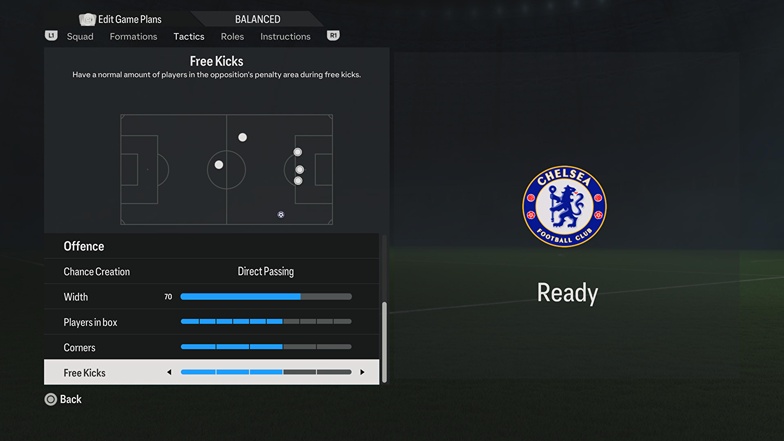
When attacking, Arsenal has multiple routes into the final third. They can go long with the keeper; they can build from the back with possession football, and they can counter-attack with efficiency.
This is why I’ve gone with the “Balanced” option for Build-Up play. The type of build-up that you use will vary according to the situation and the opponent’s defensive setup.
For chance creation, “Direct Passing” is the best option that provides the sort of attacking AI that we need for the fluid football that Arteta’s Arsenal plays.
The wingers line up on the edge of the flanks to give the team width, hence the choice for 70-width. I’ve also set “Players in Box” to six but that’s not particularly crucial to this tactic and can be adjusted to your liking. The same applies to corners and freekicks.
Player Instructions
These custom player instructions will further modify the AI behavior of the players that you’re not in control of at any given time. They have been adjusted to work well with the tactics that we’ve applied so far.
Goalkeeper
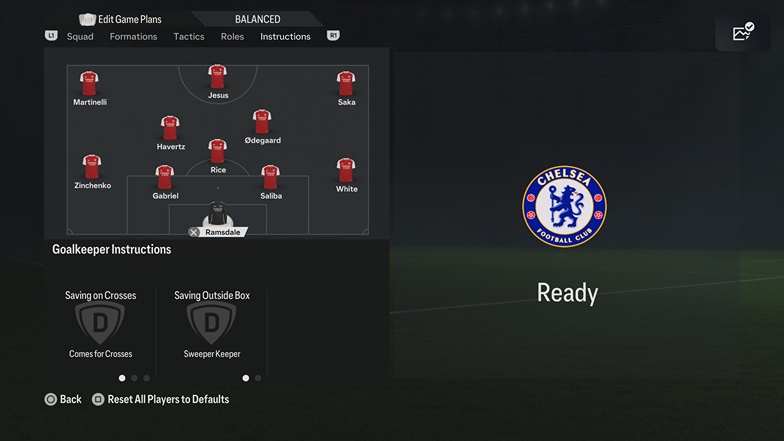
Not much going on here. Set the player to be a sweeper keeper and come for crosses. You could pay extra attention to the “Pace” attribute if you’re signing a player for this spot in Career Mode, but it’s not a dealbreaker.
Left-Back
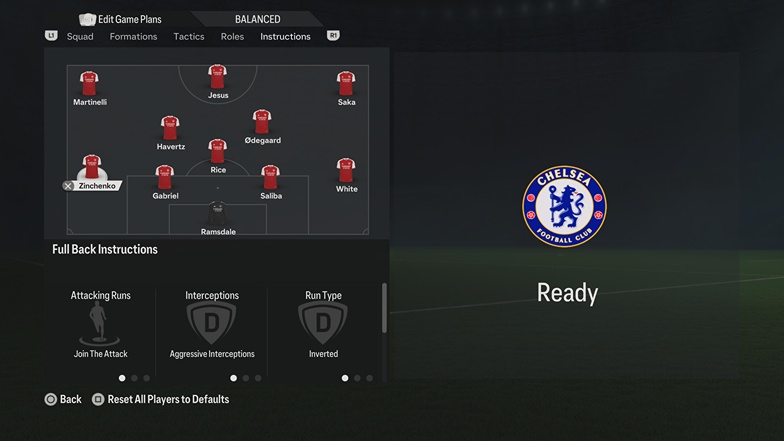
This player is going to play the “Zinchenko” role, hence the instructions to join the attack and make inverted runs. FC 24 does not quite interpret this role as it plays out in real life, but this is the closest you’ll get.
Aggressive interceptions also make this player press forward more frequently.
Centerbacks
Use default instructions. We’re still waiting for the introduction of instructions that will replicate the wider positioning of the center backs in this type of system, but there’s nothing like that in FC 24.
Right-Back

This player is often going to be the third center-back, so set the instructions to stay back while attacking and leave everything else as is.
Defensive Midfielder
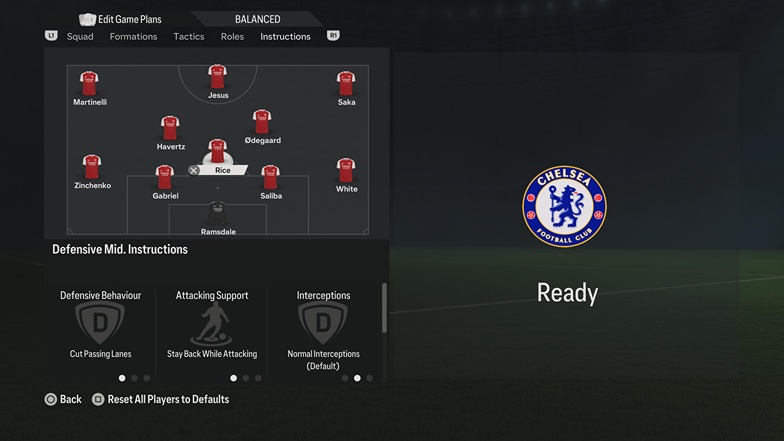
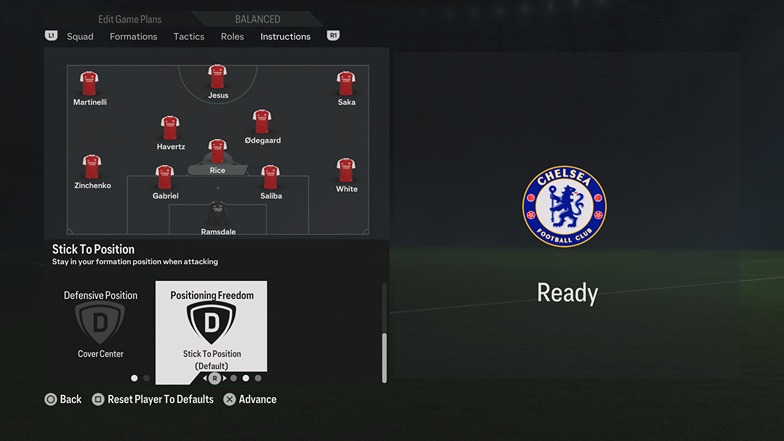
The player in this position has fairly basic defensive midfield instructions. Cover Centre, cut passing lanes, and stay back while attacking. In real life, Declan Rice is a more adventurous defensive midfielder, but we’ll keep the instructions this way for the sake of defensive solidity.
Left Central Midfielder


This role is not quite as defined in the 2023/24 season as it was in Arsenal’s 2022/23 season. Back then, Xhaka had a clear role that has been replicated with the instructions below.
In defensive phases, this player should be covering the central positions of midfield. But, in attacking phases, they need to drift wide to accommodate the inverted runs of the left-back.
The “Get into the box for cross” option also makes the player an extra body in the box which makes life more difficult for opponent defenders trying to track the runs of the other attacking players.
Right Central Midfielder

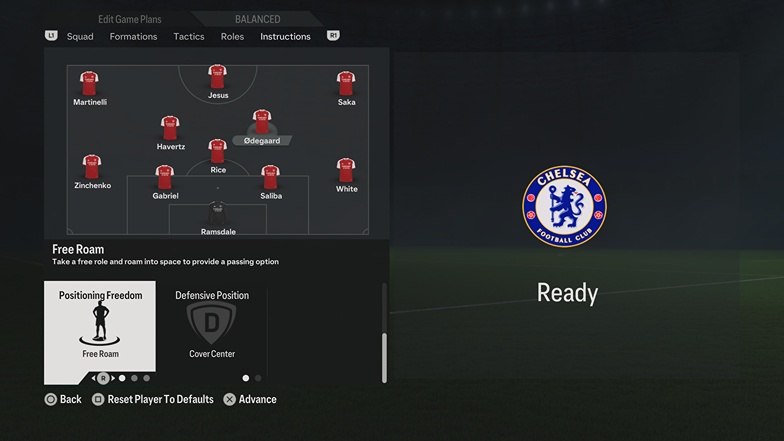
The “Odegaard” role will have a player given a lot of creative freedom, hence the “Free Roam” instruction. He also regularly makes runs into the final third, hence the “Get Forward” instruction.
“Cover Centre” helps to make sure that he doesn’t drift into wide positions too often – Odegaard operates mostly through the middle.
Left Winger
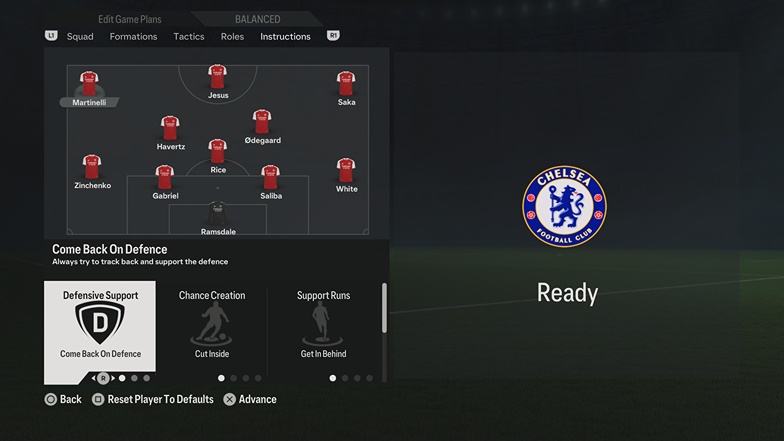
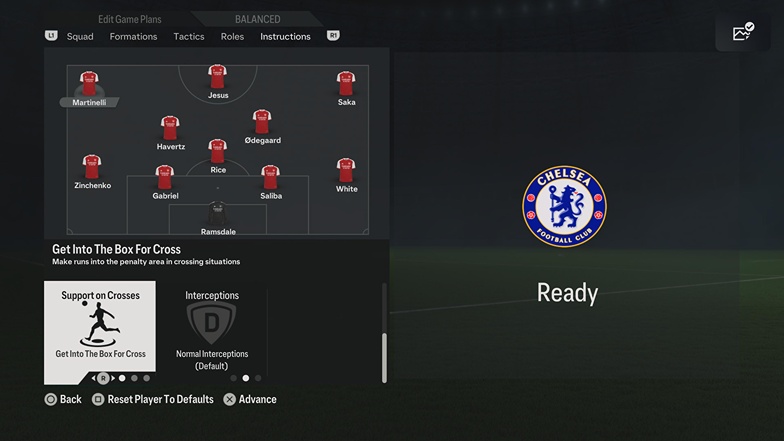
With the way this game works, you need some extra cover on the left flank due to the role of the left-back. This is why we have the “Come Back on Defence” instruction.
Martinelli often looks to cut inside when he’s on the ball in real life, so we have that instruction applied as well.
“Get in Behind” is equally important because he’s often a target of line-breaking passes or long searching balls to break the opponent’s offside trap. Constantly making those runs will contribute to stretching out and disorganizing up the opponent’s defensive line.
“Get into the box for cross” is important for goal contributions in the final phase.
Right Winger
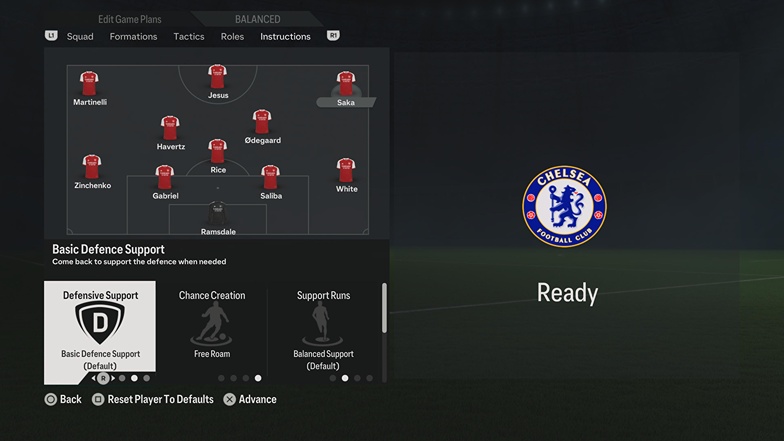

Alongside Odegaard, this Saka role has the player with the most creative freedom on the team. He is one of the best young wingers in the game, so that creative freedom is probably justified.
The player in this position on your team will line up close to the touchline to provide width, but there is the freedom to roam once the ball is transitioning from the middle third to the attacking third.
“Get into the box for cross” is important as you’ll rely on goals and assists from this side of the pitch. Leave other instructions as is.
Striker


Gabriel Jesus is Arsenal’s first-choice striker, and he’s a hardworking one. He’s far from a traditional number 9 because he likes to go looking for the ball and does a lot of defensive work. He’s also very secure technically and can create chances frequently for teammates.
The “aggressive interceptions” instruction should help with the press from the front, and “come back on defense” should make the player drop deep often. Leave other instructions as is.
If you’re undecided about which team to test this tactic on in Career Mode, check out our guide to the best teams to manage and go from there!

