Customizing your car is one way to make your car truly your own, giving it your own flair and making it unique from others. One aspect of customization that will certainly catch the eye of most people would be the car’s color.
In Gran Turismo 7, color is most certainly something that Polyphony Digital has made sure that there would be an abundance of. Getting legit paints from real-life manufacturers to custom shades of color with different kinds of finishes, there is certainly no shortage of colors that you can paint your car with.
In this guide, we will be looking at how to change the color of your car in Gran Turismo 7, checking out the various finishes each paint has, as well as how you can download liveries from other people to apply to your car.
We have a separate guide if you were looking for how to maintain your car, so be sure to bookmark that and check it out as well.
How to Change the Color of Your Car
There are a variety of ways you can change the color of your car. There are also a variety of parts you can change the color of and we will be looking at all those options in this guide.
Doing It On Your Own via GT Auto
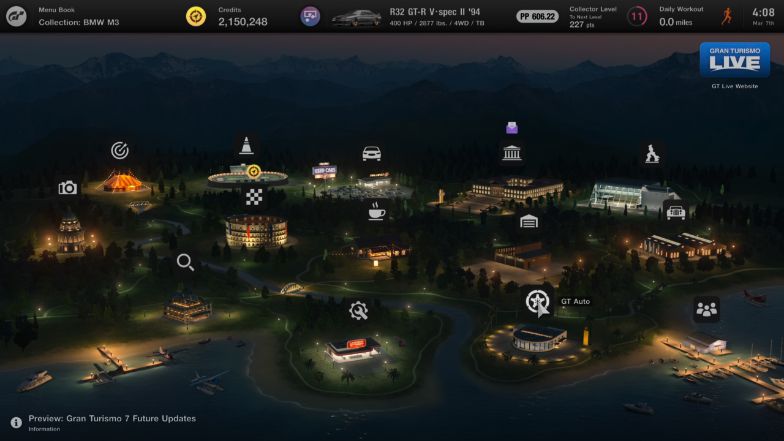
One of the ways you can change the color of your is by visiting GT Auto and going to the Customize Cars floor of the pavilion. From there you will have quite a number of options on how you can customize your car, but for this guide in general, we will be focusing on three of these options, namely the Paint Color, Other Parts, and Livery Editor tabs.
Paint Color
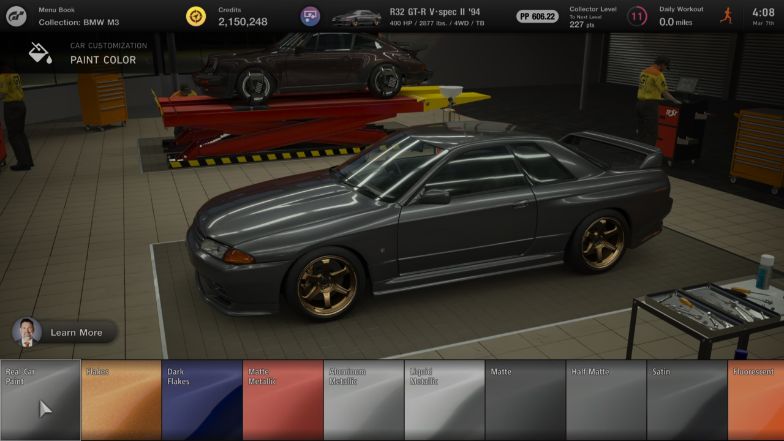
The Paint Color tab houses all the available paints that Gran Turismo 7 has to offer. These range from real car paints that come from the manufacturers featured in Gran Turismo 7 to custom colors that were put in by Polyphony Digital themselves in various different shades and finishes.
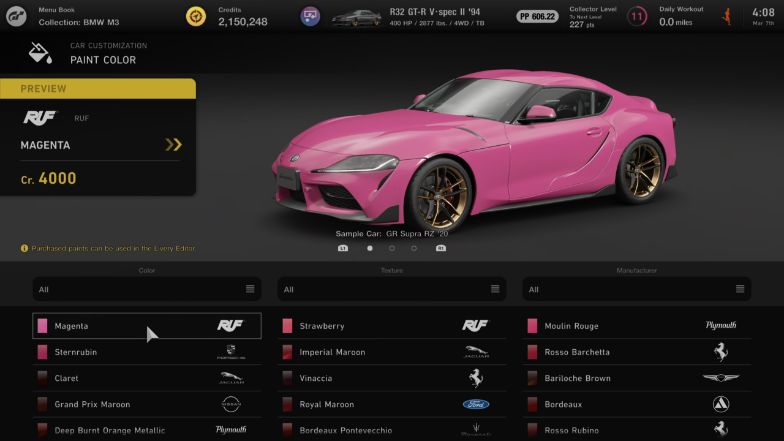
Once you enter a paint category, you are then treated to the paint picker screen where you can preview the colors on a choice of 3 cars: the ’20 Toyota GR Supra RZ for the look of more modern curves, the ’91 Lancia Delta HF Integrale Evoluzione to mimic more boxy and angular designs and the ’66 Volkswagen Beetle 1200 for the look of classic car shapes.
Oddly enough, you cannot preview your own car with the paint that you will be buying so you will only be seeing if it fits your car if you buy it already and apply it in the Livery Editor
Unique to the Real Car Paint category is the ability to arrange the paints according to their Color, Texture, and Manufacturer. The other categories will not have these filters as they are already arranged by shade, from red all the way to black or white.
In order to use the paints found here, you will need to purchase them first. Upon purchasing them, you will be able to use these paint chips in the Livery Editor where you can apply them to your car as well as your wheels.
Something to note is that you will need to purchase each individual paint chip instead of the whole category so this, in turn, might get a little bit expensive as there are over 1200 paint choices available in the game.
The prices for each paint chip are all the same based on their category and are listed below:
- Real Car Paint – 4,000 Cr. each
- Flakes – 3,000 Cr. each
- Dark Flakes – 3,000 Cr. each
- Matte Metallic – 2,000 Cr. each
- Aluminum Metallic – 2,000 Cr. each
- Liquid Metallic – 2,000 Cr. each
- Matte – 1,000 Cr. each
- Half Matte – 1,000 Cr. each
- Satin – 2,000 Cr. each
- Fluorescent – 3,000 Cr. each
- Matte Fluorescent – 1,000 Cr. each
- Candy Metallic – 3,000 Cr. each
- Dark Candy Metallic – 3,000 Cr. each
- Chrome – 5,000 Cr. each
- Colorshift – 3,000 Cr. each
- Carbon – 5,000 Cr. each
Livery Editor
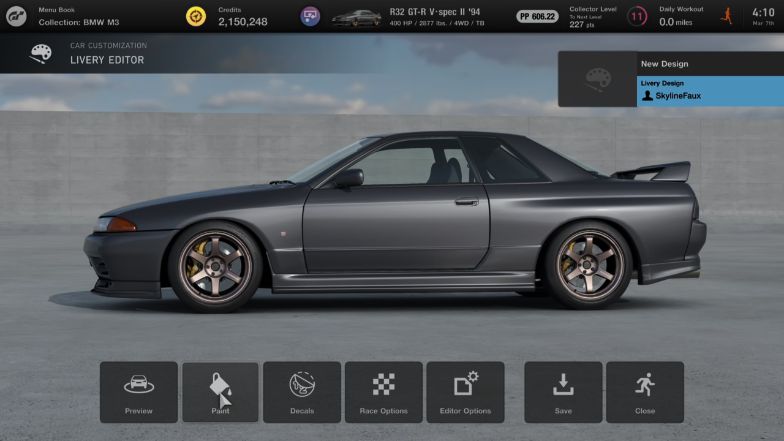
Now that you have purchased your paint from the Paint Color tab, you can now use this in the Livery Editor to change the color of your car. The Livery Editor houses quite a lot of options, so let us go through each of them in order to familiarize ourselves with the tool.
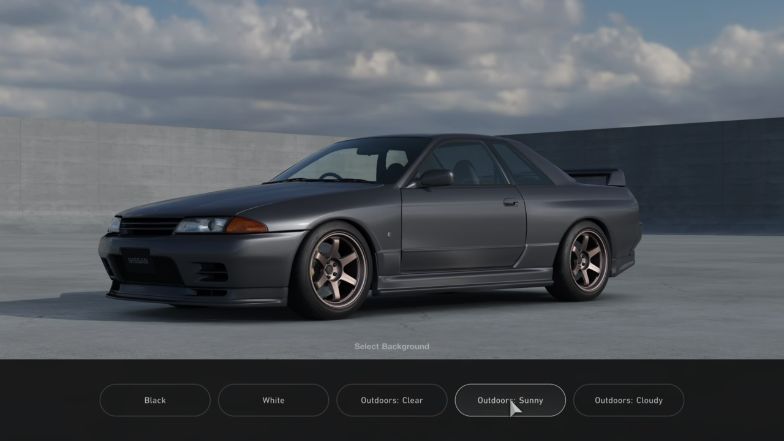
Preview basically gives your free reign of the camera in order for you to look at your car from all angles. You can also change the background in order to check your car’s color in different states of lighting.
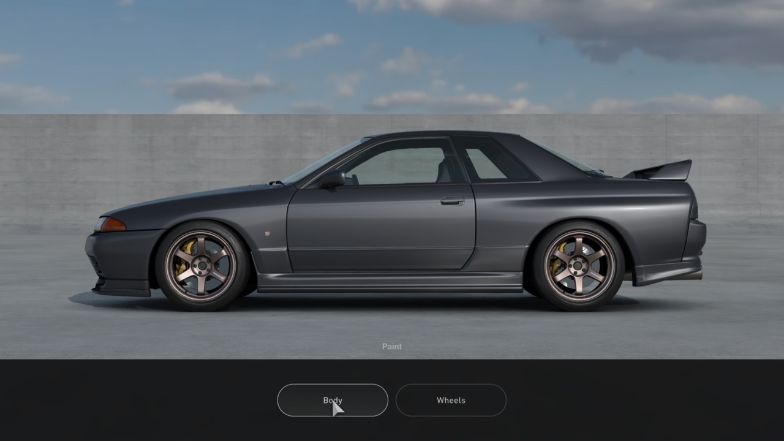
Paint is where you will be able to change the color of your car. You can choose whether you want to change the color of your body (the car itself) or the wheels. When you first choose the Body option, you will need to choose any color to paint all the components of the car.
You can do this by either selecting the paint chips that you have bought under the Special Color selection or you can create your own custom paint via the Color Palette selection.
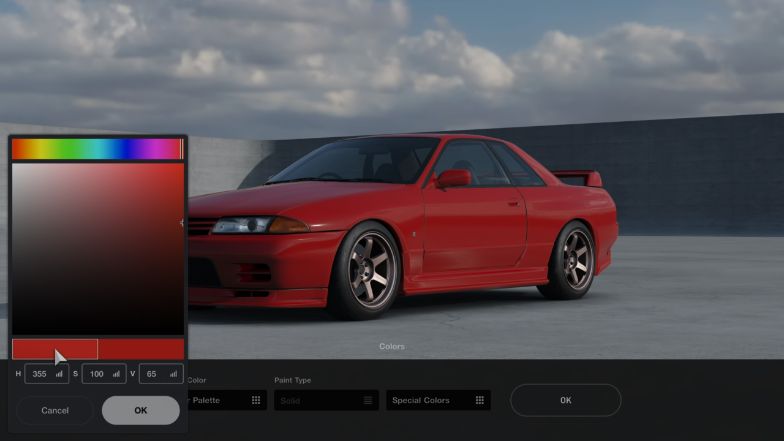
By choosing the Color Palette selection, you can then create your own color. There are some preset colors to choose from but the real beauty is the Color Picker. From here you can manually set the shade via the Gradient tool or you can enter the HSV values for the color you want in the HSV textboxes.
Once you have created your own color, you can then choose the Paint Type of it as well. The options for Paint Type are a bit limited though as you can only choose from Solid, Metallic, or a Pearl finish for your custom color.
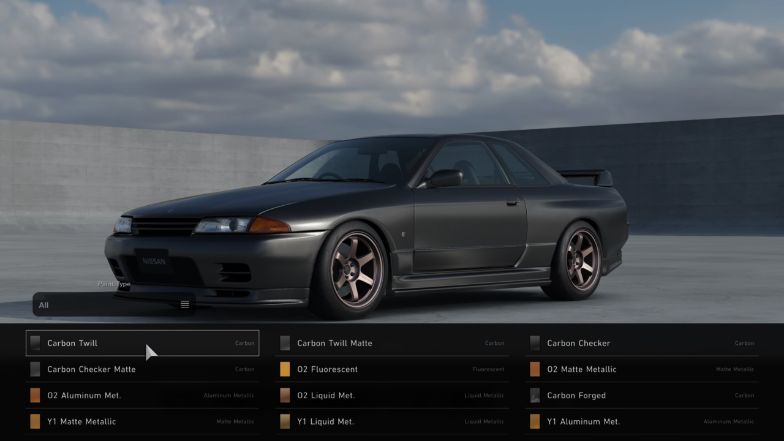
As stated above, if you just want to use the paint chips that you have purchased, you can simply choose from the Special Colors option. This will then list all your purchased paints from the Paint Color store that are free to use multiple times in all cars.
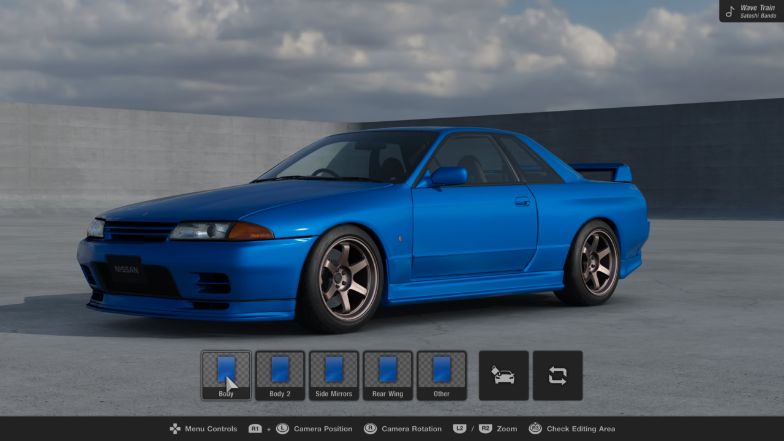
Once you have chosen your paint, you can now paint each part of your car individually as allowed by the paint system. “Body” pertains to the main body of the car including the doors and trunk.
Body 2 usually pertains to the hood of a car. “Side Mirrors” is pretty self-explanatory, and Rear Wing as well. “Others” on the other hand usually pertain to the front splitter and side skirts of a car. If you have a Roll Cage installed, you can also change the color of it here.
Unfortunately, you cannot use the Carbon paints on individual parts, making it a rather missed opportunity to have the hood, wings, and splitters have a carbon fiber accent as opposed to just painting the car fully carbon.
Painting your wheels is pretty much the same as you painting your car’s body, except that you are given only one color option and that is to color the wheel itself with the paint that you have chosen.
If a wheel design has a different-colored lip (say it has a polished chrome lip), then unfortunately you cannot change it and will have to resort to using the default lip color.
The Decals menu is where you can truly make your car unique as you can place up to 300 layers of decals onto your car, making for some wild customization options.
Race Options on the other hand are predetermined decals that you can place on your car. These include Race Numbers, Windshield Banners, and a Driver Name that includes your nickname and the country flag that you are registered in. You can also choose Light Covers for specific race cars, as well as Tire Stickers for cars that are sporting Racing tires.
Finally, we have Editor Options which acts as sort of a camera app of some sort as you can adjust the lighting of the editor location so that you can further see your car in different kinds of lighting from the preset ones.
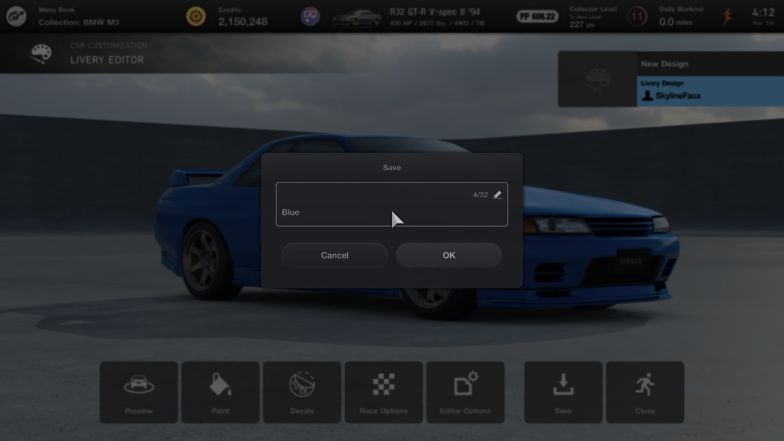
Once you have chosen your paint and decals and are happy with the results, you will need to save the changes you have made in order for you to apply them to your car. Simply choose the Save button and then name your livery. The game will then render for a little bit to save your paint job.
From there you can then exit the Livery Editor. Congratulations! You have just changed the color of your car by yourself!
Downloading Styles From the Showcase Pavilion
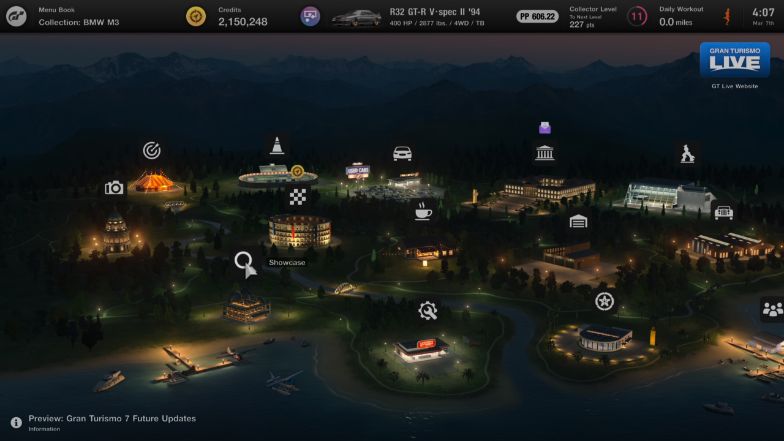
Another option you can do in order to change the color of your car is to download a paint job, or “Style” as Gran Turismo 7 calls it, in the Showcase pavilion. From here, you can search Styles created by the Gran Turismo 7 community for use on your own car.
From the Showcase screen, you can choose Styles from the Content Type selection and it will display the available liveries to download. You can also filter your search by selecting the Content Search button on the left of the screen.
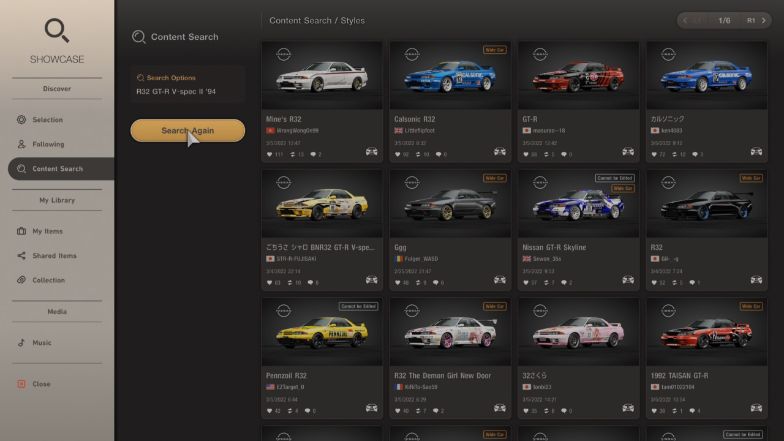
From here, you can then filter your searches by the country or region of your car, maker, as well as the specific car itself. You can also choose the car that you are currently driving to search a livery for.
Once you see a livery that you fancy from the list, you can then select that livery and save that Style to your Library. The Style that you have chosen then goes to the My Items section of your My Library.
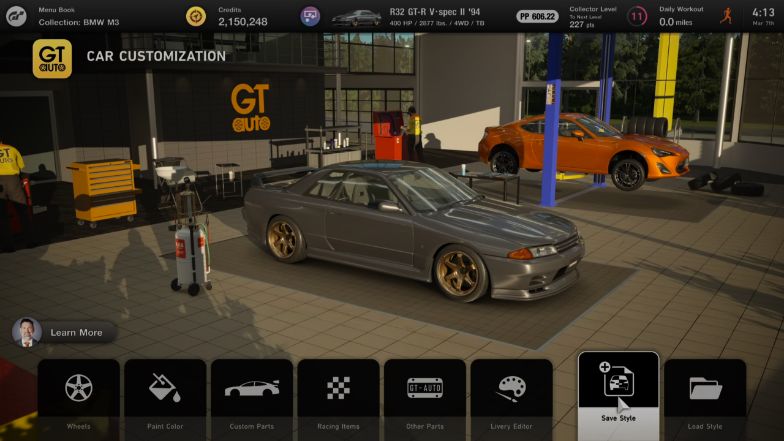
Once you have the Style, you can then go to GT Auto to apply this. Simply go to Load Style from the GT Auto menu and choose the Style from the My Items. From there you can apply the livery onto your car, and voila! You have now changed the color of your car via the Showcase feature!
Lightbulbs and Brake Calipers
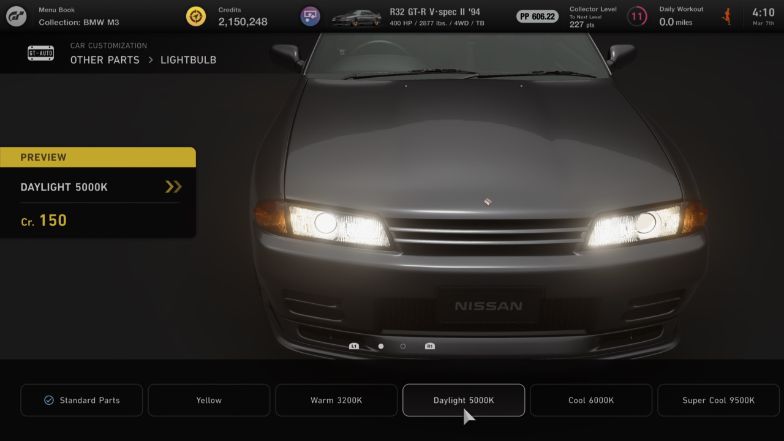
Another new addition to Gran Turismo 7 is the ability to change the color of your lightbulbs and your brake calipers. These 2 options can be found in the GT Auto as well under the Other Parts menu.
For lightbulbs, you can only change the headlights of your car and the options are fairly limited in terms of color. Each lightbulb option costs 150 Cr. which is the cheapest customization option you can buy.
There are 5 options you can change your standard lights to namely: Yellow, Warm 3200K which is a rather orangey tone of light, Daylight 5000K which is a more diffused orange, Cool 6000K which is close to white, and Super Cool 9500K which is a blue-ish white, close to xenon lighting.
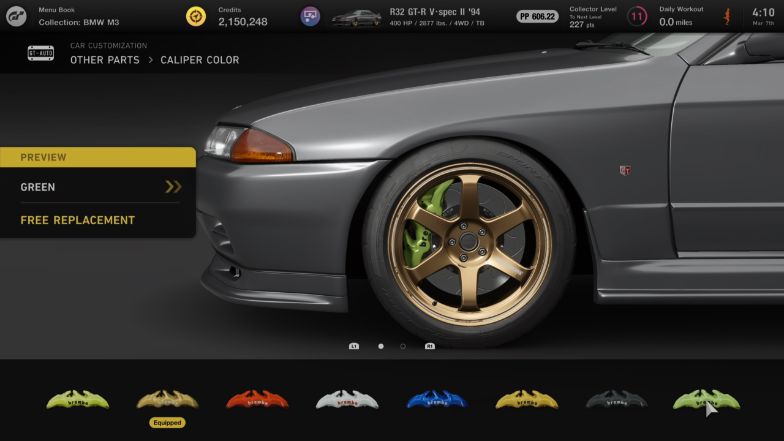
Finally, we have the brake calipers. This option can only be changed if you have a Racing Brake Kit (either Slotted or Drilled variants would be fine) or the Carbon Ceramic Brake Kit installed in your car.
There are 8 colors to choose from, namely Yellow, Gold, Red, White, Blue, Orange, Black, and Green. Changing your brake calipers’ colors is free of charge, so feel free to experiment with the colors that are offered.
Final Thoughts
The depth of customization that Gran Turismo 7 gives its players is pretty immense, with a livery editor that can change the color of individual parts of your car as well as options to change the lightbulb color of your headlights as well as your brake calipers, it gives the players a whole lot of options.
Add to the fact that there are more than 1200 colors to choose from in the Paint Color store, GT7 definitely gives players a lot of freedom when creating their dream car.
Now you’ve got your livery sorted, it’s time to get the best tuning setup in Gran Turismo 7.

