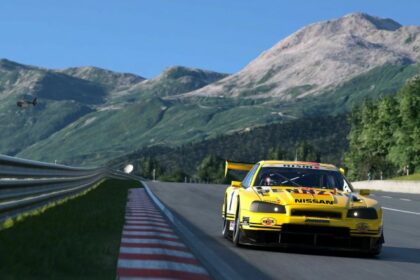
Tuning returns in Gran Turismo 7, with countless tuning options to upgrade your engine, suspension, and brakes. There are also further customization options that might seem like only cosmetic upgrades at first, but turn out to be an important part of the tuning system.
Tuning has always been an important part of the Gran Turismo series, and it becomes even more important due to the competitive online Sport Mode aspect of the game, as well as some single-player races employing certain tuning restrictions.
This means that not only will your skills be tested in GT7, but your knowledge of tuning will be as well.
But…most casual racing game fans don’t know too much about tuning.
In this Gran Turismo 7 tuning guide, I’ll show you the best ways to tune your car, from the parts to buy first to performance-restricting parts that can push your car’s potential to its very best.
I’ll also give you specific racing tunes for different disciplines like drifting, drag racing, dirt racing, and most importantly, tarmac racing.
Know the basics already? You can jump straight to how to tune your car.
How to Unlock Tuning
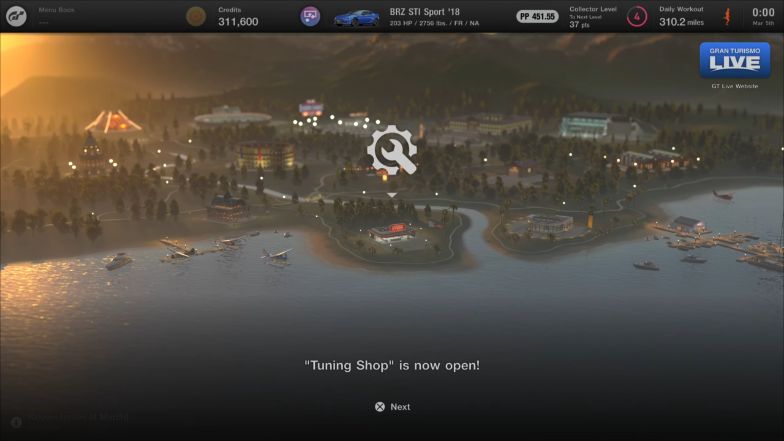
In order to start tuning cars in GT7, we will first need to unlock the Tuning Shop.
The Tuning Shop can be unlocked once you have completed the GT Cafe’s Menu Book No. 3. From there, you will be introduced to the Tuning Shop where you can buy your performance upgrades.
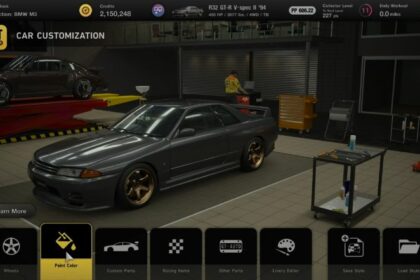
The other shop that you will need to unlock so that you can change your wheels and body panels, as well as add a wide-body kit to your car is the GT Auto.
In order to unlock GT Auto, you will have to complete Menu Book No. 7 and, from there, you will have full access to GT Auto and its array of customization options, including cosmetic changes and performance parts.
The performance parts and upgrades you need to buy in order to unlock their specific tuning settings are listed below. They are arranged in order of the shop that they are found in and how they appear in the tuning menu.
Buy These to Unlock Specific Tuning
- Height-Adjustable Sports Suspension: Unlocks Body Height Adjustment tuning
- Fully Customizable Suspension: Unlocks all Suspension
- Two-Way LSD: Unlocks Acceleration Sensitivity and Braking Sensitivity tuning
- Fully Customizable LSD: Unlocks Initial Torque, Acceleration Sensitivity, and Braking Sensitivity tuning
- Active LSD Controller: Unlocks Acceleration Sensitivity and Braking Sensitivity tuning for cars with Active LSDs
- Torque-Vectoring Center Differential: Unlocks Front / Rear Torque Distribution tuning
- Fully Customizable Computer: Unlocks all ECU tuning
- Power Restrictor: Unlocks Power Restrictor tuning
- Ballast: Unlocks Ballast and Ballas Positioning tuning
- Fully Customizable Manual Transmission: Unlocks all Transmission tuning
- Fully Customizable Racing Transmission: Unlocks all Transmission tuning
- Nitro System: Unlocks all Nitro / Overtake tuning
- Anti-Lag System: Unlocks Anti-Lag System tuning
- Hydraulic Handbrake: Unlocks Handbrake Torque tuning
- Brake Balance Controller: Unlocks Front / Rear Balance tuning
- Four-Wheel Steering Controller: Unlocks Rear Steering Angle tuning
- Front Splitter – Unlocks Front Downforce tuning
- Rear Wing – Unlocks Rear Downforce tuning (Wingless option will disable Rear Downforce tuning)
The Tuning Shop
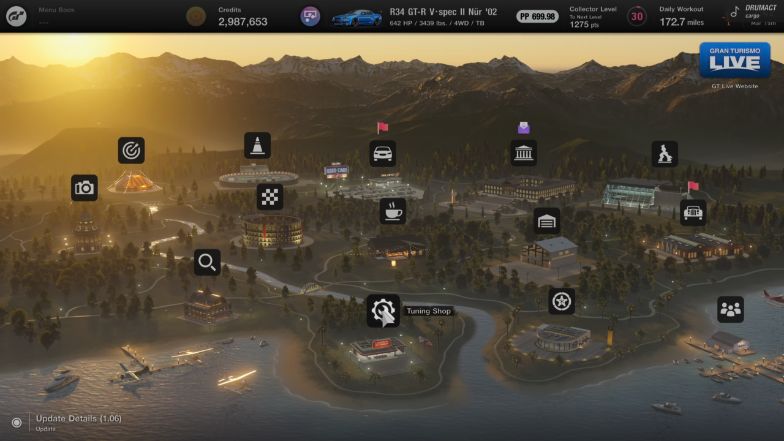
The Tuning Shop is where you will find the performance upgrades for your car. It is divided into 5 sections, each of which can be unlocked by progressing your Collector Level.
Take note that some performance upgrades will be permanent and cannot be uninstalled from your car. The only way you can uninstall them would be to either buy a new body or new engine to effectively reset your tuning done to the engine or body or by buying another car.
Also, take note that not all upgrades will be worth buying for your car. Some upgrades will actually decrease Performance Points (PP for short) when you install them signifying that they are worse than what is currently on your car. An example would be installing Street Suspension onto a car with far better suspension like a ’17 Honda NSX.
Some cars are also limited in the way you can upgrade them. Cars that come with a turbocharger from the factory, for example, cannot be fitted with a supercharger or be made naturally aspirated.
Below will be the list of the sections you can find in the Tuning Shop as well as the performance upgrades that you can get from each section.
Sports Section
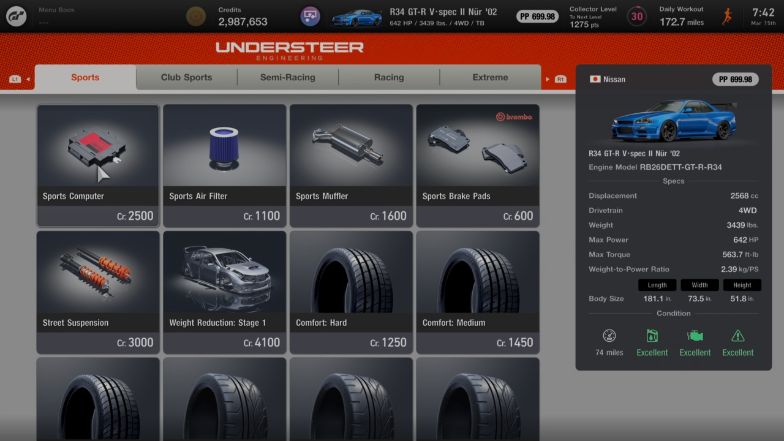
The first section that you will be unlocking, the Sports section is unlocked once you unlock the Tuning Shop and it contains all your basic upgrades that could serve as placeholder upgrades before you dive into the more serious upgrades.
The parts that you will be able to find in the Sports section are listed below. They will also be categorized if they are permanent upgrades that can only be “removed” if you buy a new engine or body or if they are bolt-on upgrades meaning they can be removed and reinstalled once they are bought for a car.
Permanent Upgrades
- Weight Reduction: Stage 1
Bolt-on Upgrades
- Sports Computer
- Sports Air Filter
- Sports Muffler
- Sports Brake Pads
- Street Suspension
- Comfort: Hard
- Comfort: Medium
- Comfort: Soft
- Sports: Hard
- Sports: Medium
- Sports: Soft
Club Sports Section
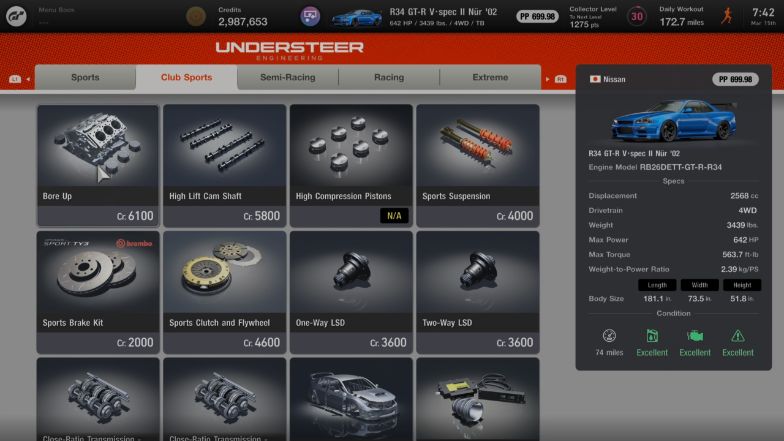
The Club Sports section brings in a lot more tuning parts for you to purchase. You unlock this section by reaching Collector Level 4.
This is the shop section that introduces permanent upgrades to your engines. You can also find both the Ballast and Power Restrictor upgrades here which are incredibly important when adjusting your performance for races with PP restrictions.
The parts you will find here are definitely not the best yet but they are good enough to be bought for 400-500 PP races. Dirt tires can also be found here which will complete any rally car you are planning to build.
The full parts list that you will be able to find in the Club Sports section is listed below.
Permanent Upgrades
- Bore Up
- High Lift Camshaft
- High Compression Pistons
- Weight Reduction: Stage 2
Bolt-on Upgrades
- Sports Suspension
- Sports Brake Kit
- Sports Clutch and Flywheel
- One-Way LSD
- Two-Way LSD
- Close-Ratio Transmission – Low
- Close-Ratio Transmission – High
- Power Restrictor
- Ballast
- Dirt Tires
Semi-Racing Section
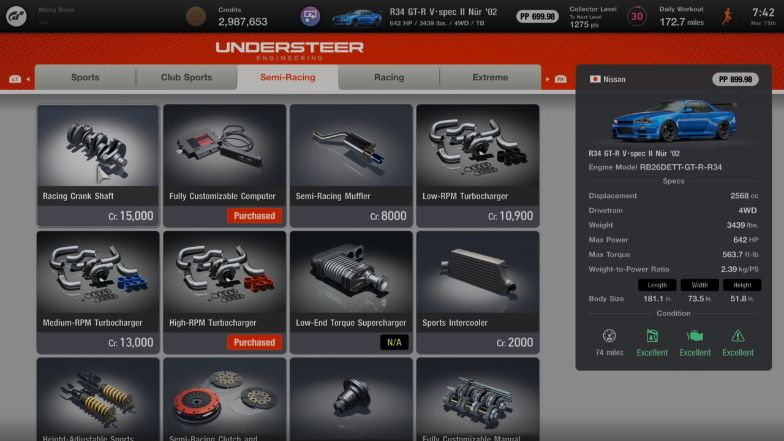
Moving on to the more serious upgrades, the Semi-Racing section introduce forced induction upgrades through supercharger and turbocharger upgrades which cranks up the power of your car significantly. You unlock this section by reaching Collector Level 5.
More customizable parts are also found here like the Fully Customizable LSD and Fully Customizable Computer and some semi-customizable parts like the Height-Adjustable Sports Suspension and Fully Customizable Manual Transmission.
The full parts list that you will be able to find in the Semi-Racing section is listed below.
Permanent Upgrades
- Racing Crank Shaft
- Weight Reduction: Stage 3
- Increase Body Rigidity
Bolt-on Upgrades
- Fully Customizable Computer
- Semi-Racing Muffler
- Low-RPM Turbocharger
- Medium-RPM Turbocharger
- High-RPM Turbocharger
- Low-End Torque Supercharger
- Sports Intercooler
- Height-Adjustable Sports Suspension
- Semi-Racing Clutch and Flywheel
- Fully Customizable LSD
- Fully Customizable Manual Transmission
Racing Section
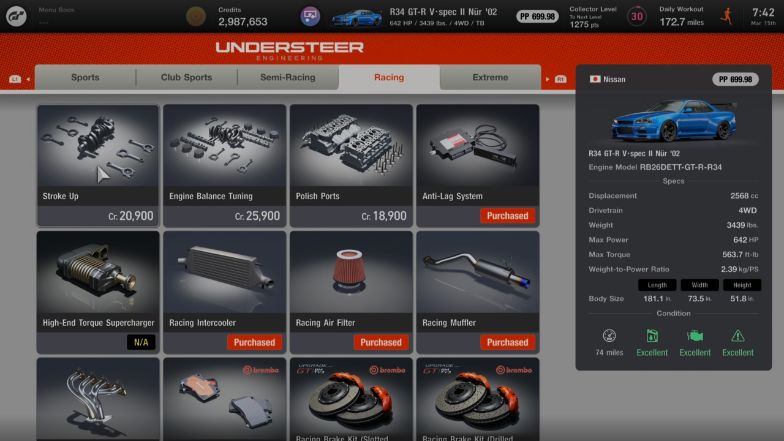
The Racing section contains most of the top-end parts that you will be needing to take your car to its fullest capabilities. It also contains the most expensive performance upgrades you can get. You unlock this section by reaching Collector Level 6.
Here you will also find the fully-customizable versions of your transmission and suspension as well as controllers like the Brake Balance Controller and Torque-Vectoring Center Differential which are upgrades that can let you adjust your settings during the race itself through the Multi-Function Display (MFD).
You will also find all variants of dry Racing tires in this section so you will probably spend most of your time in this section of the Tuning Shop.
The full parts list that you will be able to find in the Racing section is listed below.
Permanent Upgrades
- Stroke Up
- Engine Balance Tuning
- Polish Parts
- Weight Reduction: Stage 4
Bolt-on Upgrades
- Anti-Lag System
- High-End Torque Supercharger
- Racing Intercooler
- Racing Air Filter
- Racing Muffler
- Racing Exhaust Manifold
- Racing Brake Pads
- Racing Brake Kit (Slotted Discs)
- Racing Brake Kit (Drilled Discs)
- Brake Balance Controller
- Fully Customizable Suspension
- Racing Clutch and Flywheel
- Torque-Vectoring Center Differential
- Active LSD Controller
- Fully Customizable Racing Transmission
- Racing: Hard
- Racing: Medium
- Racing: Soft
Extreme Section
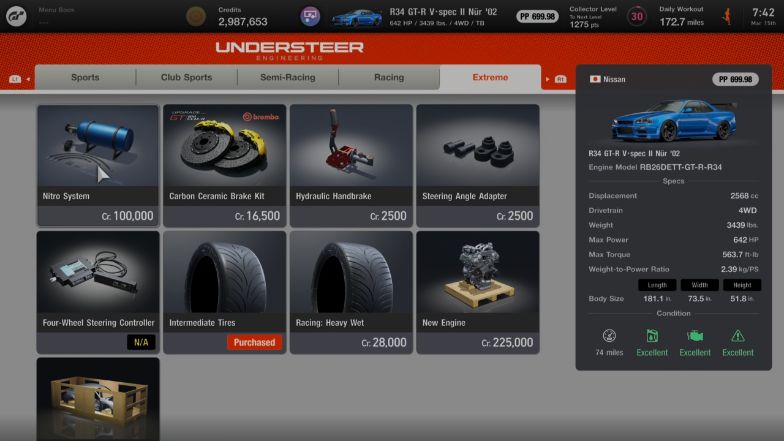
The Extreme section contains some optional upgrades, to say the least. You unlock this section by reaching Collector Level 7 which will be the last section of the shop that you can unlock.
Here you will find some drifting essentials like the Hydraulic Handbrake as well as the Steering Angle Adapter as well as the wet Racing tire variants which include the Intermediate Tires as well as Racing: Heavy Wets.
You will also find the Nitro System here which is an amazing upgrade but is definitely the most expensive upgrade you can get. It is also almost always banned in Sports mode races but if you are looking for that extra edge in drag tunes, this is the place to get it.
Finally, we have the New Engine and New Body “upgrades” which are not exactly upgrades but a reset of your engine and car body respectively. They get rid of the permanent upgrades of your car and sets them to factory stock. Do not mistake the New Engine upgrade as an engine swap as it is not.
The full parts list that you will be able to find in the Extreme section is listed below.
Permanent Upgrades
- New Engine
- New Body
Bolt-on Upgrades
- Nitro System
- Carbon Ceramic Brake Kit
- Hydraulic Handbrake
- Steering Angle Adapter
- Four-Wheel Steering Controller
- Intermediate Tires
- Racing: Heavy Wet
GT Auto Customization
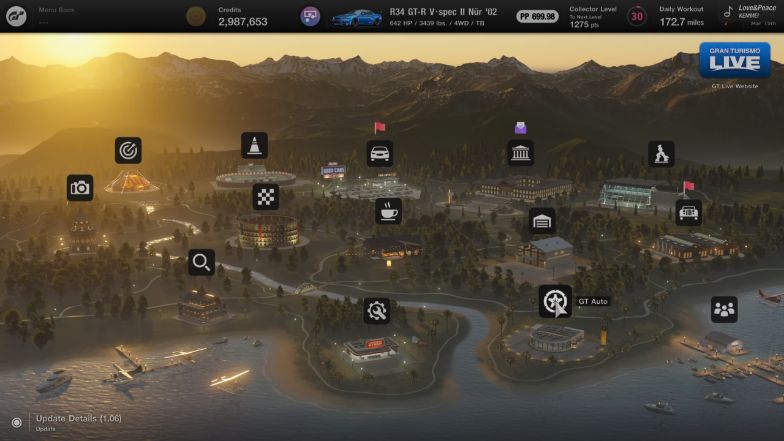
Besides maintaining your cars to keep them in tip-top shape, the GT Auto shop actually does have some upgrades that actually unlock tuning options and tuning settings.
Although the upgrades found in the GT Auto shop are touted as mostly cosmetic, there are some parts that actually affect the dynamics of your car, and in turn, affect the PP of it as well.
Below will be the parts that you will find that have an effect on your car and are parts that are definitely not entirely for aesthetics only.
Maintenance & Servicing Floor
Wide Body Kits
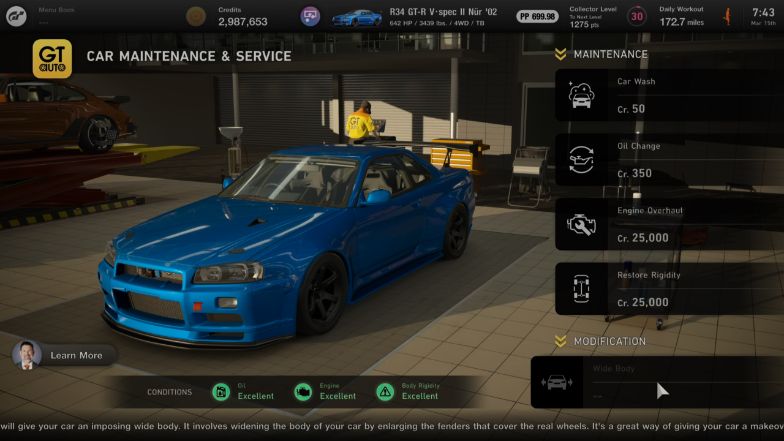
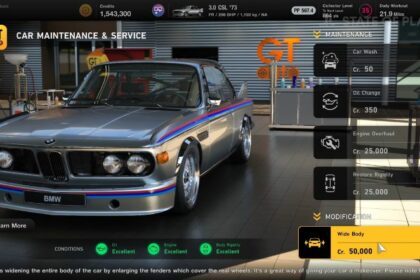
The only upgrade found in the Maintenance & Servicing floor of the GT Auto shop, Wide Body Kits are an upgrade that widens your car, giving it a whole new look and the ability to add a wider track width as well as wider tires to your car.
Take note however that this upgrade is permanent and cannot be undone. Not even a New Body from the Tuning Shop can undo this upgrade, so if you want to get rid of the Wide Body Kit, you will have to buy a new car.
Also, take note that getting a Wide Body Kit will have different Custom Parts compared to the normal body kit. So if you have bought a Front Splitter, a Side Skirt, and a Rear Diffuser for your previous body kit, you will have to buy them again when you convert it to a Wide Body Kit.
Customize Cars Floor
Wheels
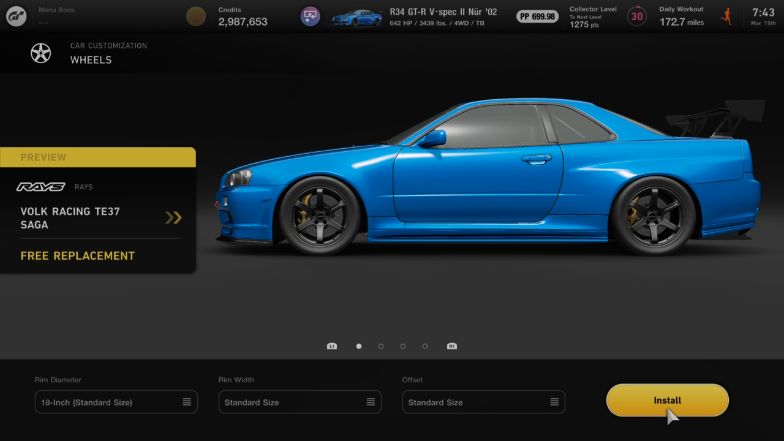
Moving to the Customize Cars floor of the GT Auto shop, your wheels can have an effect on how a car handles by how wide it is. Although the style of the wheel and the Rim Diameter does not matter and are purely cosmetic, the Rim Width and Offset sections of this upgrade bring a bit of tuning to the table.
Custom Parts
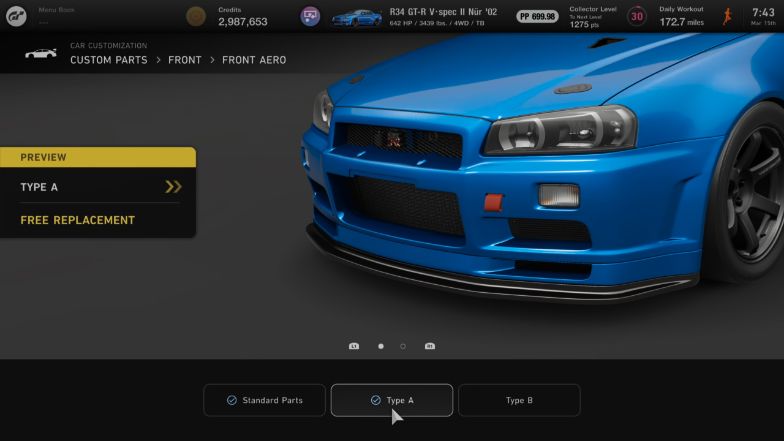
The Custom Parts section is divided into (mostly) 4 sections, namely Front, Side, Rear, and Wing. We will be mainly focused on the Front, Rear, and Wing sections.
Installing a Front Splitter in your car will unlock the Front Downforce tuning setting. Take note however that only visible splitters will unlock this tuning setting so anything that gets rid of the bumper or splitter will actually remove the option of adjusting your Front Downforce.
For the Rear section, installing a Rear Diffuser will actually have an effect on the rear grip of your car but take note again that only visible diffusers will have an effect on the PP of your car. If you install just a rear bumper with no diffuser, then this upgrade would be completely cosmetic only.
For the Wing section, any wing will unlock the Rear Downforce tuning setting so long as it is not an option that removes the wing (or Wingless).
It is important to note however that if you are building a drag car, you will want to have the least amount of downforce available to your car, so actually going for a bumper delete or a wingless setup will positively affect your drag racing capabilities.
Roll Cages
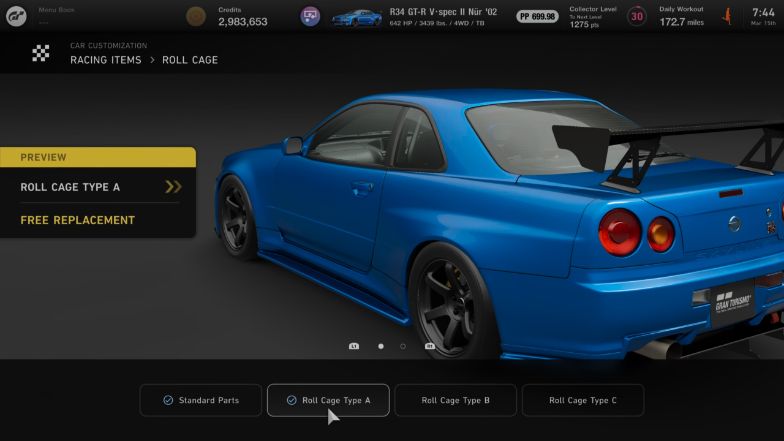
Lastly, we have roll cages. Similar to the Increase Body Rigidity upgrade found in the Tuning Shop, roll cages increase the structural rigidity of a car making it less susceptible to flexing which in turn makes it a lot more agile and stiff which is great for a race car.
The type of roll cage does not actually matter so you can install any roll cage to suit your liking, but installing a roll cage itself will have an effect on the PP of your car. Oddly enough, it does not have an effect on the weight of your car, which is usually the downside of installing a roll cage.
Roulette Ticket-Exclusive Upgrades
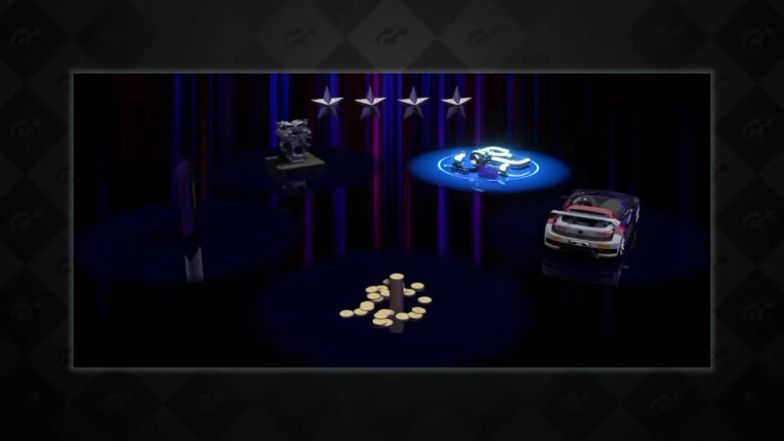
Something new introduced to the Gran Turismo series are the upgrade parts exclusive to Roulette Tickets. These parts cannot be found in the Tuning Shop nor in the GT Auto pavilion and can only be won through the Roulette Tickets.
Upon winning said parts, they will also be restricted to a specific car so you will definitely need to wish that the parts you have won are compatible with the car that you are building right now.
You also cannot sell these parts so even though some of them will show a Recommended Retail Price, they cannot be sold for additional credits. A bummer since some of these parts will definitely not be used especially if you get something for a car that you do not even use primarily.
Below will be the list of parts that you can only get from these Roulette Tickets as well as the Roulette Ticket level they will start appearing in.
Permanent Upgrades
- Engine Swaps – 4* Roulette Tickets and up
- Titanium Connecting Rods & Pistons – 3* Roulette Tickets and up
- Stroke Up S – 3* Roulette Tickets and up
- Camshaft S – 3* Roulette Tickets and up
- Weight Reduction: Stage 5 – 3* Roulette Tickets and up
- Weight Reduction: Stage 6 – 4* Roulette Tickets and up
Bolt-on Upgrades
- Ultra-High RPM Turbocharger – 4* Roulette Tickets and up
- Carbon Propeller Shaft – 2* Roulette Tickets and up
How to Tune Your Car
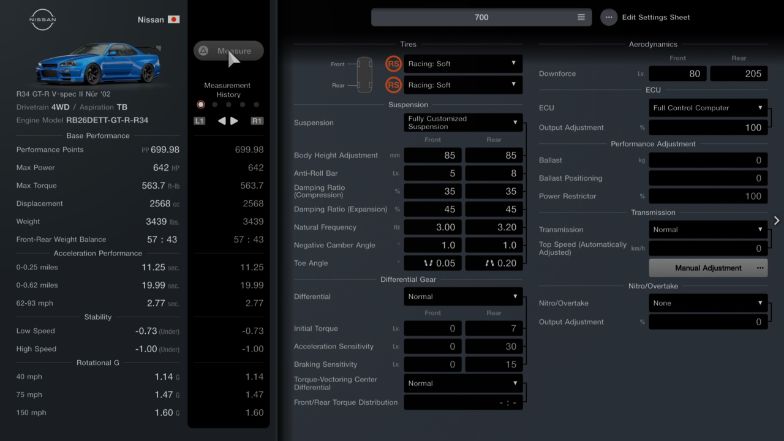
Now that we have our parts installed, we are now ready to tune our car! Although the tuning menu in Gran Turismo 7 looks a bit daunting, in reality, there are just a few things that are actually adjustable in the menu with the rest being toggles whether you would want a part installed or not.
It is also good to note that whenever you make an adjustment in the tuning menu, you can press Triangle to measure how much has changed on your car. This is a quick and easy way to see if you are actually making your car better or worse as you will immediately see if the changes you made have a positive or negative effect on your car’s overall PP rating.
Below will be the tuning categories that you will find in the tuning menu as well as the tuning options per category. We will be breaking down these options and how they affect your car. We will also be breaking down what these upgrades do to your car as a whole.
Tires
In the Tires section, you are only really able to choose which compound you would want to have at the start of a race. This can be a bit helpful since you can equip different compounds for the front and rear tires and allow for setups that could maximize your PP rating.
This can also be somewhat useful for drift tuning setups as you can have Comfort Hard tires on the rear while having a grippier tire up front.
This cannot be done in races with required pit stops though as pitting will have you taking the same compounds in both front and rear which will result in your car going over the PP limit if say you go from Hard Fronts and Soft Rears to Soft fronts and rears.
Suspension
Suspension tuning is the bulk of what you will be looking at in Gran Turismo 7’s tuning menu as it contains the most tuning options. Tuning your suspension encompasses a lot of things like body height, anti-roll bar stiffness, damping ratios for both compression and expansion, spring rate, camber angle as well as toe angle.
Suspension
This option basically lets you choose which suspension you would want to be installed in your car. Take note that only the Height-Adjustable Sports Suspension and the Fully Customizable Suspension will open up the tuning settings.
Sports Suspension and Street Suspension will have fixed values on the tuning menu and cannot be adjusted.
Body Height Adjustment
Body Height Adjustment basically pertains to the body height of the car. A general rule of thumb for making a faster and better-handling car is to have it as low to the ground as possible without the car bottoming out or the car hitting the ground due to it being too low.
When adjusting the Body Height, we also want to take into account if the car has enough height to clear its own wheel arches. If the car is too low, there is a serious risk of the tires rubbing against the car’s wheel arches which in turn makes the car understeer severely as the wheels cannot turn as far as they want to.
Anti-Roll Bar
Anti-roll bars help with keeping the car stable during corners; it reduces the car’s body roll. Too soft and the car becomes very unstable through corners leading to wayward handling, too stiff and the car does not use its suspension as effectively as it can leading to it being stubborn when trying to take a corner.
A general rule of thumb when tuning the anti-roll bars is to start on a general stiffness (meaning both settings start at the same value, usually on the stiffer side) and adjust from there.
Making the rear anti-roll bars stiffer than the fronts will result in more oversteer, while softer rear anti-roll bars will result in more understeer.
Damping Ratio (Compression)
Compression changes how your suspension compresses when on the track. The stiffer you set this, the more agile and eager a car becomes when changing directions.
However, bumpier tracks or tracks with huge elevation changes like Laguna Seca may unsettle your car a lot easier as having stiff compression lends itself to not absorbing bumps as easily as softer compression settings.
Damping Ratio (Expansion)
Tuning the car’s expansion setting alters how quickly the springs of the car expand after being compressed. It is very much like compression: the stiffer the setting, the more stable it will be on smooth surfaces.
However, if you are driving on loose gravel or bumpier tracks, it is better to soften this setting up as stiff expansion will unsettle the car very frequently.
Natural Frequency
Also known as the spring rate of your suspension, Natural Frequency behaves very similarly to your anti-roll bar settings except this is a more catch-all setting as anti-roll bars only affect lateral movement, this compensates for both lateral and front-to-back movement.
If you have low body height and Racing tires installed, you will want to have this setting to be stiff, although, like anti-roll bars, too much stiffness will result in stubborn steering.
Like anti-roll bars, it is best to start at a general stiffness for natural frequency and adjust from there.
Negative Camber Angle
When it comes to tuning camber angle, it is almost always better to go for negative camber. While this might not be optimum for going in a straight line, it is best for taking corners faster.
As you turn, your car’s weight shifts and the amount of tire in contact with the road increases as it shifts laterally. This is where negative camber comes in as the camber will then offset that shift in weight and more of the tire is in contact with the road.
Toe Angle
Toe Angle pertains to how a tire is aligned to the road horizontally. In general, we would want to angle the toe of our front wheels to be a bit outward (toe-out) or neutral while our rear wheels are inward (toe-in).
Tuning your front toe to be toe-out may help stubborn cars turn in more by having the wheels point outward, leading to a tighter turning radius at the cost of straight-line stability.
While having your rear wheels point toe-in will help with straight-line stability as well as stability when accelerating out of a corner at the cost of straight-line speed and some added tire degradation.
In general, you would want to adjust this setting only when you have already adjusted and fine-tuned the rest of your suspension setup.
Differential Gear
Differentials help with handling and power response by giving more torque to the tire with more grip. It can also let the wheels spin at independent speeds to keep stability under acceleration or deceleration at the cost of outright speed.
It is good to note that for FWD cars, you can only tune your Front Differential settings, for RWD cars, your Rear Differential settings only and for AWD cars, both front and rear differential settings plus an option to install a Torque-Vectoring Center Differential which adjusts the torque distribution of your AWD drivetrain.
Differential
This option basically lets you choose which differential you would want to be installed in your car. Take note that only the Two-Way LSD, Active LSD Controller, and Fully Customizable LSD will open up the tuning settings.
One-Way LSDs will have fixed values on the tuning menu and cannot be adjusted.
Initial Torque
Initial Torque refers to how much your differential locks the left and right wheels together during a corner. A higher value will lead to more stability during corners but will result in more understeer and decreased cornering ability, especially during hairpin corners.
A general rule for tuning this setting is to set it as low as possible and from there, tune accordingly. If you experience instability during cornering, bring the values of this setting higher.
Acceleration Sensitivity
Acceleration Sensitivity refers to how much your left and right wheels are locked during acceleration. Increasing the acceleration sensitivity will result in your wheels being locked with each other resulting in more on-power oversteer. This results in less stability in corner exits but if you can control it, it will result in faster corner exits.
Braking Sensitivity
Acceleration Sensitivity refers to how much your left and right wheels are locked during braking. In general, it is better to go all-out independent (lower setting) so that braking is much smoother with little-to-no chance of locking up.
Torque-Vectoring Center Differential
This upgrade is only available to AWD cars. This allows you to either install or uninstall the Torque-Vectoring Center Differential which allows you to adjust the torque distribution of your AWD car. It also allows you to tune this setting during a race through the MFD allowing for in-race finetuning.
Front / Rear Torque Distribution
This affects how much power is being sent to either your front wheels or your rear wheels. More power to the front will make your car understeer more while more power to the rear will make you oversteer.
You would always want to make this biased towards the rear in order to counteract the understeering nature of AWD cars but not too much that you basically end up with an RWD car.
Aerodynamics
Aerodynamics is the effect of your car’s canards, splitters, and rear wings, basically the components of your car that will help in keeping your car planted on the track.
Downforce
The Downforce tuning setting is split into 2 options, namely Front and Rear downforce. Front Downforce is responsible for keeping your front tires glued to the ground and helps with turn in while Rear Downforce is responsible for keeping your rear tires stuck to the ground and helps with cornering stability.
This setting is completely track-dependent as you will want more front and rear downforce when you are racing on a more technical track (like Suzuka) while you would want less downforce when racing on a high-speed track (like High-Speed Ring).
ECU
The ECU (or Electronic Control Unit) is basically the brain of your car. Messing with a car’s ECU can actually yield some power gains as you are essentially taking off the car’s factory restrictors. You can also program your car to produce more power through ECU tuning.
ECU
This option basically lets you choose which kind of ECU you would want to be installed in your car. Take note that only the Fully Customizable Computer will open up the tuning settings.
Sports Computers will have fixed values on the tuning menu and cannot be adjusted.
Output Adjustment
Under this setting, you can lessen your car’s power output as well as its powerband. When restricting power to fit in a horsepower-restricted race, you will want to touch this setting last as not only will you lose more power compared to a Power Restrictor, but you will lose torque as well.
Performance Adjustment
Performance Adjustment tuning is basically parts that will help you fit your car into a restricted race, whether it be PP, weight, or horsepower (HP for short), you can adjust the settings here in order to bring down your car’s power or add more weight to your car.
It is good to note that overshooting your weight reduction and power upgrades by a little bit is always recommended as you can finetune them using these performance adjustment add-ons.
Ballast
Ballast is basically additional weight added to your car. In this setting, you can add weight to your car, up to 200kg, in order for it to either reduce your PP or bring the weight of your car up in order for your car to fit a weight restriction in a race.
When tuning for PP, you will want to add to this setting first as power will always be more important than taking a hit on weight. Take note however that weight increases tire degradation and reduces a car’s acceleration and agility.
In addition, the added weight should be compensated for with stiffer springs in order for the car not to bottom out or become more of a boat.
Ballast Positioning
Ballast Positioning lets you position the Ballast that you have put on your car either towards the front or towards the rear of your car. More weight towards the front of the car will result in more understeer while more weight on the rear will result in more oversteer.
More weight over the front will also affect tire degradation towards the front and the same goes for the rear.
Power Restrictor
The Power Restrictor is very similar to the ECU Output Adjustment setting in that it lets you decrease the overall HP of a car. The difference is that when doing it with a Power Restrictor, your power band is less affected leading to more torque for your car.
Due to this, if you are tuning your car to fit an HP-restricted race, you will want to tinker with this setting first instead of the ECU so that you lose power but still retain a decent amount of torque.
Transmission
Transmission tuning helps with your car’s gearing. Tuning this will affect your acceleration and your top speed. If tuned with the gear ratios being short, you increase your acceleration at the expense of your top speed. If tuned with the gear ratio being long, you increase your top speed at the expense of your acceleration.
As with most tuning options, this is entirely track-specific as you would want closer gear ratios when racing on a technical track and longer gear ratios if on a track with more straights.
Transmission
This option basically lets you choose which transmission you would want to be installed in your car. Take note that only the Fully Customizable Manual Transmission and the Fully Customizable Racing Transmission will open up the tuning settings.
The Close-Ratio Transmissions will have fixed settings with the Low variant having shorter gear ratios suited for better acceleration while the High variant will have longer gear ratios suited for better top speed.
Top Speed (Automatically Adjusted)
If you cannot be bothered to tinker with individual gear ratios, you can always tinker with this setting. A great way to tune this setting is to take your car for a test drive (Special Stage Route X is the perfect track for this) and see what your car’s top speed is.
If your car is hitting the rev limiter on the last gear, then you can increase this setting. If it fails to even reach redline when in its last gear, then consider lowering this setting.
Manual Adjustment
This setting lets you finetune each individual gear ratio to your preference. When tuning the individual gear ratios, you can then try and do some practice runs while shifting up on the redline.
If you shift up and hit the rev limiter almost immediately or are experiencing too much wheelspin on the gear, then try to distance your gear ratios more. Vice versa if you think you are shifting into too low a rev range.
You can also tune your first gear into a longer gear if you think you are producing too much wheelspin when coming from a standstill. The opposite applies if you have an abundance of grip and not enough power to launch your car. For that, you must shorten your first gear.
Nitro / Overtake
Nitro / Overtake pertains to a system that provides a temporary speed boost through the use of a depletable resource. Some cars will come with a built-in boost system like a KERS hybrid system which uses up electric power to give the car a boost. Cars installed with a Nitro System on the other hand will deplete their Nitro reserves to give the car a boost.
This upgrade is very expensive, costing 100,000 Cr. for each car, but the upside of this is that it adds no PP to your car making it a very cost-effective way to increase performance. Just take note if races actually allow you to install Nitro Systems or not.
Nitro / Overtake
This option basically lets you choose which Nitro / Overtake system you would want to be installed in your car. Take note that Nitro Systems and cars with innate overtake/boost systems (like the Dodge Tomahawk S VGT) will open up the tuning settings.
Output Adjustment
This setting adjusts how potent your Nitro / Overtake is. Setting it to the right will increase the potency of your Nitro / Overtake but also increase the rate at which your Nitro / Overtake runs out while setting it less will make for a decreased rate of depletion while also lowering the speed you get from activating your Nitro / Overtake.
This setting is wholly dependent on how you use your Nitro / Overtake. If you are using it sparingly, then short bursts of speed would suit you better, while those that use it more often will want to strike a balance between a good speed boost and better longevity.
Supercharger
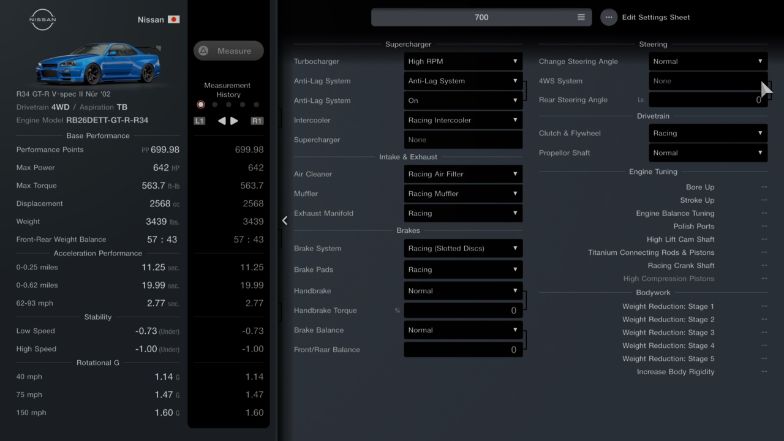
The Supercharger tab includes any type of forced induction that can be installed in your car, so both superchargers, as well as turbochargers, can be set in this section. You can also set your intercooler as well as toggle your anti-lag system on or off in this section.
These upgrades are usually the ones that bring out the most HP from a car and in turn, increase your PP by quite a lot. It also makes your car a lot harder to handle so make sure you have tuned and upgraded your suspension, brakes, and tires first as you will want to take control of the added power to your car.
Turbocharger
This option basically lets you choose which type of turbocharger you would want to be installed in your car. There are 4 types of turbochargers, namely Low-RPM, Medium-RPM, High-RPM, and the rare Ultra High-RPM turbochargers.
Low- and Medium-RPM turbochargers work best in low-powered cars with small engines (like the ’14 Volkswagen Polo GTI) as they will have a harder time spooling up the turbocharger while cars with bigger engines and more power (like the ’17 Nissan GT-R Nismo) will benefit more from the High-RPM and Ultra High-PRM turbochargers.
Anti-Lag System
This option basically lets you toggle your anti-lag system on or off. Anti-lag systems are for turbocharged cars. What it basically does is that it keeps the turbos spooled and spinning so that when you get on the accelerator, there is no turbo lag, hence the name. In essence, it makes your turbochargers more responsive with their power.
If you want to have your turbocharged car spitting flames and making those cool popping noises, this is the upgrade that you want to install. Just do not forget to turn it on as it will be turned off by default.
Supercharger
This option basically lets you choose which type of supercharger you would want to be installed in your car. There are 2 types of superchargers, namely Low-End Torque and High-End Torque superchargers.
The same philosophy for turbochargers can be applied with superchargers; low-powered cars will benefit more from the Low-End Torque Superchargers while high-powered cars will benefit more from High-End Torque Superchargers so buy your upgrades accordingly and avoid wasting money on upgrades that do not benefit your car as much.
Brakes
The Brakes tab includes all brake tuning as well as your handbrake tuning. Here you will find your brake system options, brake pads, and type of handbrake as well as tuning settings like the handbrake torque and brake bias.
Brake System
This option basically lets you choose which type of brake system you would want to be installed in your car. There are 4 types of brake systems, namely Sports, Racing (Slotted Discs), Racing (Drilled Discs), and the Carbon Ceramic brake kit.
Generally, the faster your car can go, the better your brakes should be, so if your car is only peaking at around 120 MPH, then it is best to just go for the Sports Brake Kit instead of spending more money on a higher-end brake kit.
There is also no difference between the Slotted and Drilled discs in terms of performance so feel free to install whichever brake discs you fancy from the 2 if you are installing Racing Brake Kits.
Handbrake Torque
Handbrake Torque adjusts how much bite your handbrake applies when pulling it. If set higher, it will have more effect and in turn, lock up the tires that are affected by the handbrake (usually the rear tires). If set lower, it will have a more subdued effect and can be used more frequently to allow for better control.
This upgrade is usually only used for drift builds and rally racing builds as handbrakes are not really used during circuit racing and especially not during drag racing.
Brake Balance
This allows you to either install or uninstall the Brake Balance Controller which allows you to adjust the brake bias of a car. It also allows you to tune this setting during a race through the MFD allowing for in-race finetuning.
Front / Rear Balance
Front / Rear Balance lets you adjust whether you want to have your brake bias be on the front brakes or on the rear brakes.
Having more front brake bias will have you stopping better but it will result in an increased chance of locking your brakes which will have your car going straight past a corner. It will also result in more tire degradation, especially to your front tires as more heat will be produced by your front brakes.
Having more rear brake bias will result in less tire stress and smoother braking but will result in more instability during braking and may result in oversteering.
In general, we would always want rear-biased brakes to preserve our front tires and to avoid locking up when braking. We would only go for a front-biased or neutral setup if you feel like you are lacking in braking strength.
Steering
The Steering tab is a bit of an optional tuning tab as only a few cars (like the ’20 Mercedes-AMG GT Black Series) have the ability to install a Four-Wheel Steering Controller to them. In this tab, you will be able to tune these cars’ 4WS systems.
4WS System
This allows you to either install or uninstall the Four-Wheel Steering Controller which allows you to adjust the rear steering angle of a car.
Rear Steering Angle
Rear Steering Angle lets you adjust how much steering angle you would want your rear wheels to be performing.
A lower steering angle will have your car turn in a lot less but will have better control during a complex of corners while a higher steering angle will have your car turn in better and have better cornering speeds at the expense of agility and tire degradation.
Tunes by Racing Discipline
Now that we know what each tuning category and tuning option does, we can now apply this knowledge to our cars. But of course, it does not end there as we need to decide what our car will specialize in, whether it be a drag-strip demon or a track monster.
Something good to note is that each car will be different from one another, so take this guide as something to start with rather than it being a template. The finetuning will be the one to set you apart from the rest of the tuners and in turn, make your cars faster.
Below will be a list of the different racing disciplines available in the game and how you should tune your car accordingly.
Circuit Racing Tunes
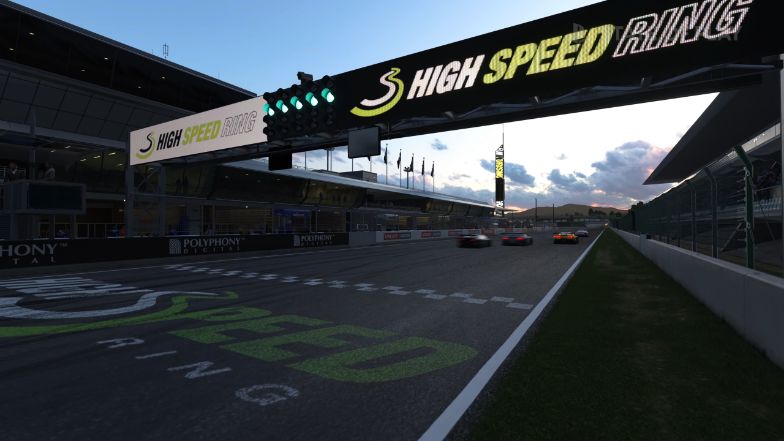
Circuit racing is pretty much the bread and butter of Gran Turismo 7 so learning how to tune here is pretty much the gateway to a lot of your tuning prowess, even for other disciplines.
What we generally want from road racing tunes is a stiff suspension setup for stability and considerable amounts of front and rear aero for faster cornering speeds. We also want to be as low as possible in terms of body height in order to make the most use of our aerodynamics.
Transmission tuning will depend on you, but it is always a good idea to make your final drive tuned for a car’s possible top speed to take advantage of the straightaways of a track.
In general, tuning will always be very track-dependent so make use of the Tuning Sheet feature and make a tune for low- and high-speed tracks instead of a catch-all tune where you will be left struggling with more specialized tunes.
All-Wheel Drive (AWD) Tune
AWD cars are usually the easiest cars to drive as power is distributed evenly throughout all the wheels. This also makes it so that AWD cars have better acceleration as all wheels will be vying for traction off the line and during corner exits.
The downside of this type of drivetrain is that it is more prone to understeering and an AWD car usually weighs a lot more than either FWD or RWD cars. To counteract this, make sure that your suspension and anti-roll bars are stiffer in the rear in order for your AWD car to slide a bit more.
For our differential, we would want our Acceleration Sensitivity to be higher at the rear than the front to promote better corner exits. This also helps in undermining the understeer caused by this drivetrain.
Center differential tuning also plays a huge part here as you can set your AWD system to be a bit more rear-biased (35:65 is a sweet spot for me) for an easier time going around a corner.
Rear-Wheel Drive (RWD) Tune
Although slow off the line due to being prone to wheelspin, RWD cars come alive after the beginning of the race where their reduced weight and nimbleness shine better than AWD cars. They also attack corners much better since they have more control of their front tires.
While AWD cars love to understeer, RWD cars on the other hand love to oversteer. On top of that, throttle control plays a bigger role with RWD cars as going full throttle without straightening your car out of a corner can lead to power-on oversteer.
To counteract this penchant for oversteering, we should make the front suspension settings and anti-roll bars of our car stiffer than the rears.
For our differential settings, you can set the Acceleration Sensitivity to be lower. This makes the rear wheels become less susceptible to power-on oversteer but will result in slower times because of a pseudo traction control setting so adjust accordingly to how comfortable and confident you are with your throttle control.
We can also counter this abundance of power to the rear wheels by tuning the transmission to have a longer gear ratio in order for power to come in at lower revs in order for the tires to catch grip first before totally letting loose.
Front-Wheel Drive (FWD) Tune
Just like AWD cars, FWD cars are more understeer-heavy, but unlike AWD cars, they are way nimbler due to their unparalleled lightweight just like RWD cars. FWD cars are also often much lighter than RWD cars due to all the drivetrains being near the engine resulting in fewer parts.
As such, tuning for FWD cars should pretty much be a combination of both AWD and RWD cars in that we tune to reduce understeer while also keeping in mind that power only goes into 2 wheels.
Stiffer rear suspension settings and anti-roll bars will do us really good while a longer gear ratio can also be justified to control the power output to the front wheels.
For our differential settings, Acceleration Sensitivity will be a lot tougher to tune here as we would want less wheelspin during corners so that we can get on the power as soon as possible while avoiding understeer. Start with a lower setting and increase the setting if you feel like you can get more corner exit speed.
Something a lot more important than the other drivetrains to consider here is the tuning of the brakes. Since the front tires will be doing most of the work, it would be a great idea to have a rear-biased braking setup to have the front tires be a little cooler to perform better.
Rally Racing Tunes
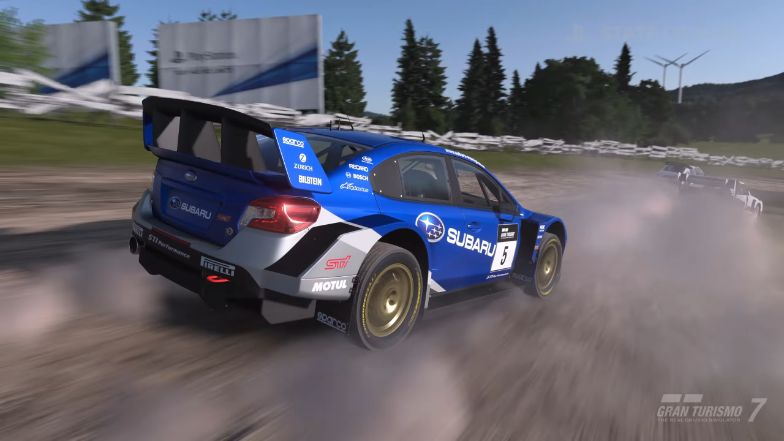
There really is just one drivetrain that dominates rally racing and that is AWD, so this section will only discuss an AWD tune.
When it comes to rally racing, we want our car to be as quick and nimble as possible but also tough enough to handle the uneven surfaces of dirt and gravel and the jumps that the tracks in Gran Turismo 7 present.
The most important setting to tune here is the suspension. When it comes to rally, we would want a much softer setting than in road racing, but also not too soft that it makes us bounce around the track, have our handling become too wayward, or bottom out from jumps.
Anti-roll bars should also be on the softer side so as to not upset the car when going through uneven terrain. Just like the AWD tune for road racing, we set our suspension and anti-roll bars to be stiffer on the rears than the fronts to help us slide through tighter sections.
Body height should also be higher just to be safe from bottoming out when going over jumps and to clear larger bumps on the track.
For our center differential tuning, it is up to you whether you want to have a truly 50:50 AWD car to account for the low-grip sections, or something like 40:60 or 35:65 biased to the rear in order to make the car livelier on the corners.
Another tuning setting to consider for rally tunes is the Handbrake Torque. Lessening the amount of torque that the handbrake emits is a great way to have a secondary, weaker brake, perfect for hairpins and getting the rear to slide out more during longer corners.
Drag Racing Tunes
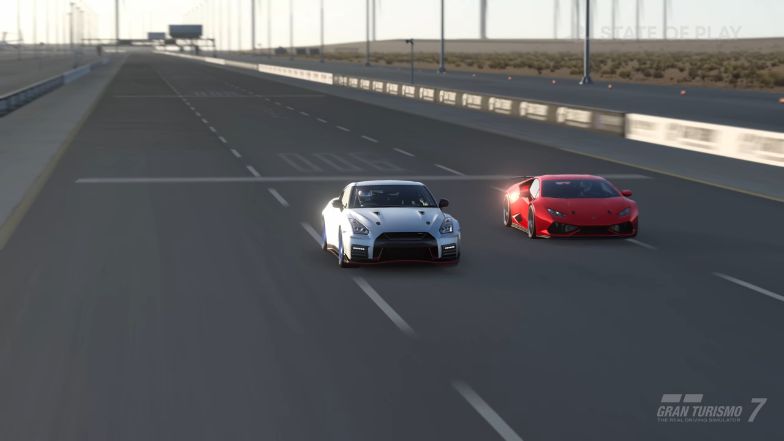
When it comes to drag racing, tuning knowledge from the other types of racing disciplines is pretty much thrown out the window as drag racing has its own priorities and deals with the extremes instead of the fine tuning required in other racing disciplines.
Tires should be the grippiest available so Racing Softs on both the front and rear tires are the go-to setup for drag racing.
Getting your transmission gear ratios right is most important when it comes to drag racing. We would want to make it so that our gear ratios always hit the peak of our powerband (this can be seen in the tuning menu) so that power is always being used to its fullest.
We would also want to make it so that our first gear reduces the amount of wheelspin we produce as wheelspins in drag races are a waste of speed. Make it so that before even reaching the rev limit of your first gear, your tires have already found grip.
Do not make the gear ratios too long though as too much grip will result in a very sluggish and anticlimactic launch with your car’s power not being enough to propel the car forward.
For our differential settings, braking sensitivity can be left alone as you will not be braking at all during a drag race. As such, brake tuning can pretty much be ignored fully.
For downforce, we should have any aero part unequipped to decrease our drag, but if a car has its downforce tuning options unlocked, just put it at the lowest setting to decrease drag and increase top speed.
If you have Nitro installed on your car, simply put it to its max setting as longevity is not a concern with drag races.
All-Wheel Drive (AWD) Tune
With superior launching capabilities compared to your two-wheel drive counterparts, you will be sure to leave RWD and FWD cars in the dust at the start of a race but your weight might just bring you down by the end.
Drag racing in an AWD car is all about balance as we would want all our tires to have the optimum grip for us to launch very quickly.
With this in mind, we tune our suspension to be incredibly stiff all around. Body height should also be set as low as possible to account for the stiff suspension.
The only setting we would want to set a bit softer than all our other suspension settings is the front natural frequency settings. We set this to be at least 2 Hz softer than the rears for the car to squat just a little bit.
For camber, we can set this neutral on both ends so your wheels are set straight to reduce drag. The toe angle should also be set to neutral for both fronts and rears for the least amount of drag possible as well.
For our differential settings, we put our initial torque and acceleration sensitivity options to the minimum to have the absolute best launch and have our tires working optimally at all times.
Rear-Wheel Drive (RWD) Tune
Although its launch will not be as good as an AWD tune, its weight might just edge out an AWD tune when it comes to top-speed runs.
When drag racing an RWD car, you want to take the weight and power of the engine and have it shift from the front to the back and then to the front again. If enough power is not pushed towards the back, this will result in wheelspin. If too much weight is forced to the back, the car will wheelie which is usually a sign that the rear has too much grip to be dissipated.
With this in mind, we can add a bit of rake to the car by having the front body height be lower than the rear body height by a little (around 5-10mm discrepancy).
Rear antiroll bars should be set to be very stiff (around Lv. 8-10) so that power and weight are kept evenly throughout the rear tires while the front antiroll bars set to be very soft (around Lv. 1-2) to allow for better grip by the front tires.
For damping, we would want our front expansion settings to be soft (around 15-20%) to lift the front tires a bit and rear expansion settings to be a bit stiffer (3-5% more than the front expansion) so that when coming from a launch, it lands smoothly.
Compression settings should be set softer than the expansion settings (around 10% less) to help put the power down onto the tires even more.
Natural frequency should be set the same as the rest of your suspension: softer on the fronts (around 2.30-2.50Hz) and stiffer at the rears (1Hz more than the fronts).
Camber should be set to neutral for maximum drag reduction while the toe angle should be set to a bit of toe-out on the front wheels (neutral to 0.05 degrees) and quite a bit of toe-in on the rear tires (0.15-0.20 degrees). This helps with straight-line stability.
For our differential settings, we put our initial torque and acceleration sensitivity options to the maximum in order for your launch to be seamless and reduce wheelspin.
Front-Wheel Drive (FWD) Tune
With the majority of the weight being on the front wheels, FWD cars actually accelerate at a surprising rate, beating out most RWD cars and some AWD cars.
Since power is being delivered to the front wheels, we will need to make sure that the weight stays in the front in order for the front tires to grip.
For our suspension setup, we can go for a stiff setup with the springs being a lot stiffer in the front than the rear (around 2.70Hz on the rear while fronts can be max or near max at 4.40Hz).
Anti-roll bars should be set to be stiff with rears being stiffer than the fronts (1 Lv. discrepancy) as this will help in redistributing the weight to the front tires quickly when launching.
For damping, compression ratios should be softer (around 10%) than the expansion ratios. These can be set equal to each other since most of the weight transfer is done by the natural frequency.
Camber and toe angle should be kept neutral in order to keep the drag as low as possible. For our differential settings, we put our initial torque and acceleration sensitivity options to the maximum in order for your launch to be seamless and reduce wheelspin.
Drift Tunes
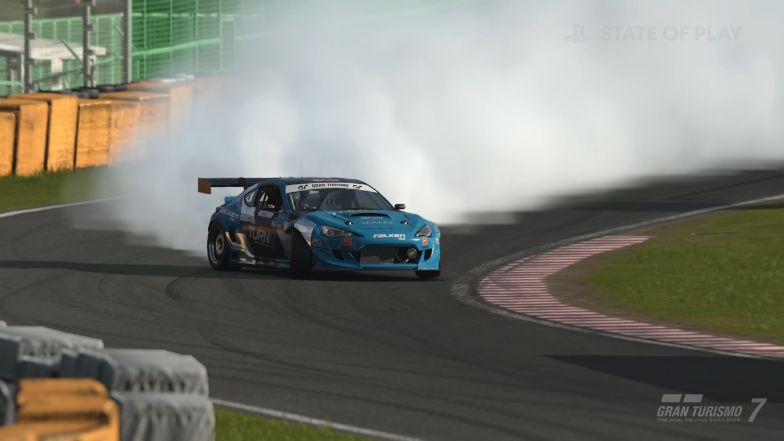
Although there are AWD cars that can drift, the most effective (and traditional) cars for drifting tunes are RWD, so we will be focusing on an RWD tune only.
Like drag racing, the rules for tuning drift cars are significantly different from tuning a normal race car because of the nature of drifting, where style goes beyond speed.
Let us start off with the tires you should be equipping. Comfort Hards are the absolute worst tires in the game and they give the least grip which makes it rather perfect for drift setups.
For gearing, shorter gear ratios are preferred to get your car close to full rev all the time (which leads to wheelspin) while allowing you to accelerate fast and keep the wheels turning during a drift.
For body height, we can go for something that is higher than your average body height (around 100mm) so that your tires do not graze your wheel arches. You would also want your front body height to be a bit higher than the rear (around 5mm higher) to allow for squat as well as even more clearance for the front wheels.
Anti-roll bars should be stiffer for both the front and rear (around Lv. 7 or 8) with the rears being stiffer than the fronts. Damping compression and expansion should be at the absolute maximum for both the fronts and rears.
For natural frequency, we go with a stiff setup at around 3.00-3.30Hz for the front wheels while the rears should be stiffer by 0.20Hz than the fronts.
Camber settings for the front wheels should be at around 1.5-2.0 degrees with the rear wheels set to 1.0 degrees less.
For toe angle, we go for a rather staggered setup with the front toe angle being at a rather extreme 0.50 degrees toe-out while the rear toe angle is at 0.50 toe-in. This is to promote more sliding.
Finally, we have the differential settings. Initial torque and acceleration sensitivity should be set to the maximum to promote as much wheelspin as possible while braking sensitivity can be set to the middle (Lv. 30) so that you still get a bit of movement from both rear wheels when transition braking.
If you have Nitro installed in your drift car, set it to the least potent setting. Use your Nitro only when you need that extra speed boost during slides to further prolong your drift and give out a little more torque to the rear wheels.
Which Upgrades Should I Prioritize?

With the incredible number of upgrades and tuning options available in Gran Turismo 7, knowing which parts to buy is very important, especially with how stingy the rewards are in Gran Turismo 7, you will need to prioritize which upgrades go on your car first to make the best of it.
We will also be looking at how effective these upgrades are to a tune. You could have Carbon Ceramic Brakes installed, but if you are only racing with a car that has less than 200 HP, then the power of those brakes is wasted. You would also be wasting money on something Sports Brakes can do completely fine.
Below will be a list of different racing disciplines and a list of which upgrades you should prioritize with 1 being the most important on that list. Any other upgrade not listed is very car-dependent and adds quite a low amount of PP so they can be installed for maxing out your car in a certain PP range.
Take note that this is a general guide so if you think your car needs Weight Reduction because it is heavier than the rest in its class (say an ’11 Ford F-150 SVT Raptor), then do so.
Must-Haves for Every Type of Racing Discipline
- Power Restrictor
- Ballast
- Fully Customizable Computer
Low-PP Circuit Racing (400PP and below)
- Comfort Soft or Sports Hard Tires
- Street or Sports Suspension
- Sports Brake Kit
- Low- or Mid-RPM Turbocharger or Low-End Torque Supercharger
- Bolt-on Racing Power Upgrades (Muffler, Air Filter, etc.)
Mid-PP Circuit Racing (450PP-550PP)
- Sports Soft Tires
- Sports Suspension
- Sports Brake Kit
- Low- or Mid-RPM Turbocharger or Low-End Torque Supercharger
- Bolt-on Racing Engine Upgrades (Muffler, Air Filter, etc.)
- Downforce Upgrades (Front Splitter, Wing, etc.)
- Permanent Engine Upgrades (Stroke Up, Racing Crankshaft, etc.)
- Weight Reduction: Stage 1 and Stage 2
- Fully Customizable LSD
High-PP Circuit Racing (600PP and above)
- Racing Tires
- Fully Customizable Suspension
- Racing Brake Kit or Carbon Ceramic Brake Kit
- Mid- or High-RPM Turbocharger or High-End Torque Supercharger
- Bolt-on Racing Engine Upgrades (Muffler, Air Filter, etc.)
- Downforce Upgrades (Front Splitter, Wing, etc.)
- Permanent Engine Upgrades (Stroke Up, Racing Crankshaft, etc.)
- All Stages of Weight Reduction
- Fully Customizable Racing Transmission
- Fully Customizable LSD
Rally Racing
- Dirt Tires
- Fully Customizable Suspension
- Racing Brake Kit
- Mid- or High-RPM Turbocharger or High-End Torque Supercharger
- Fully Customizable Racing Transmission
- Downforce Upgrades (Front Splitter, Wing, etc.)
- Weight Reduction (Preferential)
- Fully Customizable LSD
Drag Racing
- Racing Soft Tires
- Fully Customizable Racing Transmission
- All Power Upgrades Available
- Fully Customizable Suspension
- All Stages of Weight Reduction
- Fully Customizable LSD
- Nitro System
Drifting
- Comfort Hard Tires
- Steering Angle Adapter
- Fully Customizable Manual Transmission or Fully Customizable Racing Transmission
- All Power Upgrades Available
- Fully Customizable Suspension
- Hydraulic Handbrake
- Fully Customizable LSD
Final Thoughts
One thing to remember is that tuning is a process. Once you dial in your settings, you must always try and drive your car to see how much those minute settings have affected the car. And from there, you must finetune your car in order to make it the best that it can be.
With that being said, tuning also makes our cars distinctively ours as not everyone will have the same preferences when it comes to your setups. With the abundance of tuning upgrades, your car can sound and behave incredibly differently from your peers’ and rivals’ cars, so go on and tune your car, make it your own.
If you’re just starting out in GT7, I recommend checking out the best starter cars for Career Mode.


