In this guide, I’m going to share a range of Mario Strikers tips to help you win more often in multiplayer, when playing with your friends, or even against the AI.
Some of these are beginner-friendly tips, some are slightly more advanced, but all should take you to an above-average player in no time.
Please note: these tips are based on actual playthrough from a player that used to play at a high standard on the Nintendo Wii version of Mario Strikers (yes, I’m old) and from someone that completed Galactic Mode of Cup Battles on day one of release.
They’re mostly not generic tips; they’re specific, actionable tips to help you improve.
If you’re looking to get better at this unbelievably addictive game, here are my top tips for Mario Strikers: Battle League.
Hyper Strikes
I have four separate tips for Hyper Strikes, so I’ll start by breaking those down:
Best Timing
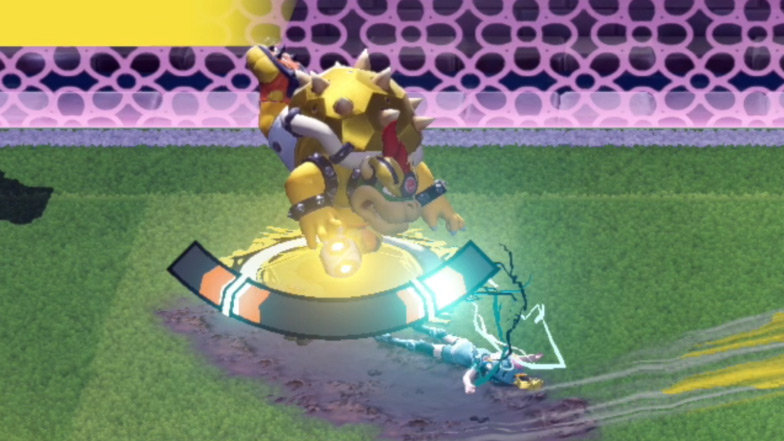
The best timing to use a Hyper Strike will always be situational, but in general you’ll want to start charging up a Hyper Strike when you have lots of time and space – I’m telling you nothing new here. However, there are ways you can give yourself additional time and space that might not be obvious.
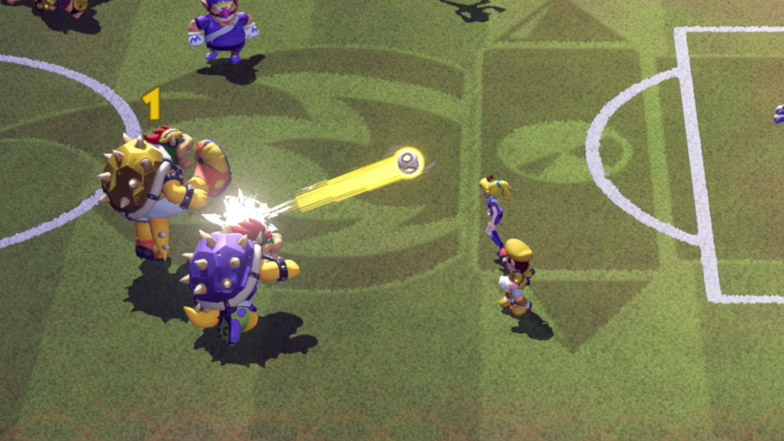
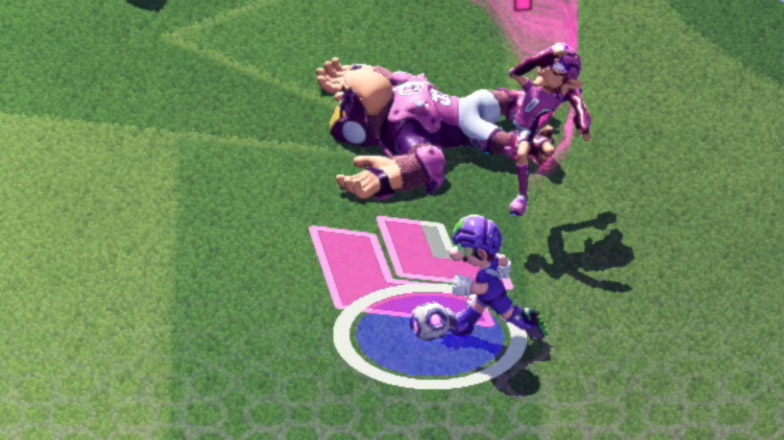
If your opponent has the ball and you have them isolated, e.g. they don’t have other teammates close by, you can do a charged tackle on them and immediately begin charging up your Hyper Strike.
Yes, even if the opponent’s player is still right next to you. This is because they’ll be stunned for a few seconds and won’t get time to recover to stop you from charging it up and timing it.
Check the image above again and you’ll see an opponent dazed underneath my Bowser.
Being aware of your opponent’s positioning is always important with Hyper Strikes, but being aware of an isolated character, or two characters in close proximity to each other, is massive. If two characters are close together and you already have the ball, you can use a shell to knock your opponents down, or a bob-omb to explode them out of the way.
Put simply, if you ever stun your opponent in any way, whether with an item or otherwise, you’ll almost certainly have enough time to fully charge up a Hyper Strike, regardless of if they’re still in a close proximity to you.
Saving
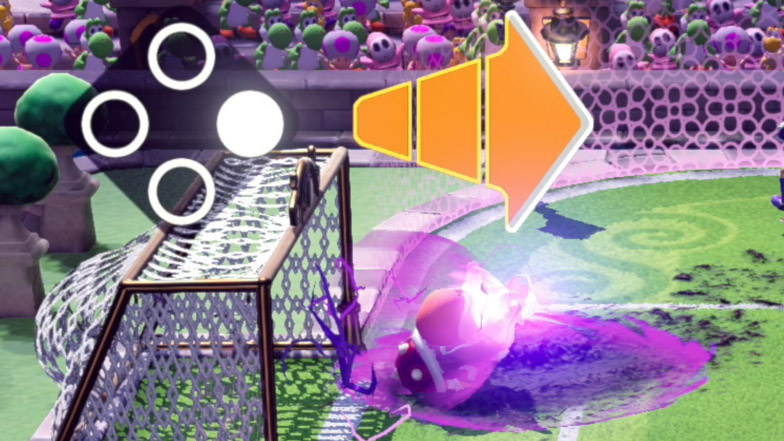
You can save Hyper Strikes if they’re not perfectly timed. If they land both lines in the green then it is unfortunately unstoppable.
If even one of the lines is orange timed (or worse), you can begin spamming the A button as fast as you can once their shot animation is complete.
Keep button-bashing on A until you fill the meter and then continue until the shot is saved. If the meter is full, you’ll make the save.
Rebounds
Even if a keeper saves your Hyper Strike, you can still score a tap in because the goalie will be stunned for a few seconds.
Always try to get other players near to the goal when your Hyper Strike animation is playing out – assuming you know it wasn’t perfectly timed – so you can cover various angles. Be ready to tap the shoot button in the hope you can get on the end of a rebound if they pull off the save, which they usually will at higher levels of play.
Time Management
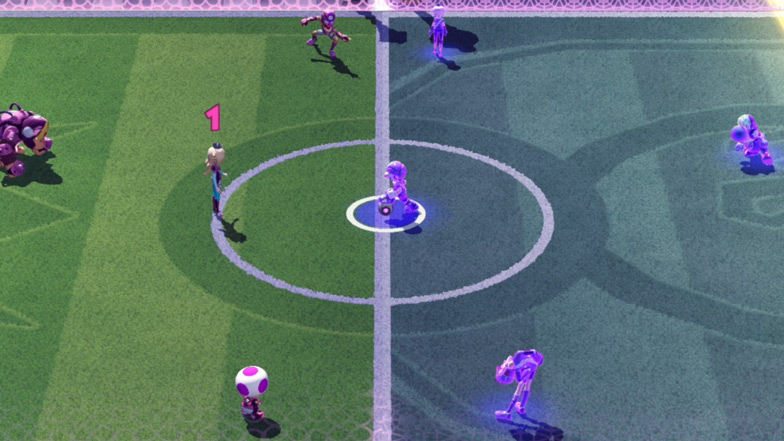
If your opponent picks up a Strike Orb – the ball of energy that allows you to do a Hyper Strike – be very aware that it will take a whole twenty seconds to time out.
This is the chance for you to rest, reset, and absolutely not rush anything. Keep the ball and don’t look to score – don’t look to do anything that risks losing possession.
Time management, better known as ‘time wasting’, is a crucial part of soccer in general. This is especially true when your opponent could score two goals for free within a very specific window of time.
You can try to score when they only have a few seconds left on the orb, but if you score a couple of seconds after they pick up a Strike Orb, they’ll have 18 seconds and possession of the ball. You might even miss your shot.
That’s a dangerous game for you. It’s probably wiser to just keep hold of the ball for longer when you get the chance to.
Team Composition
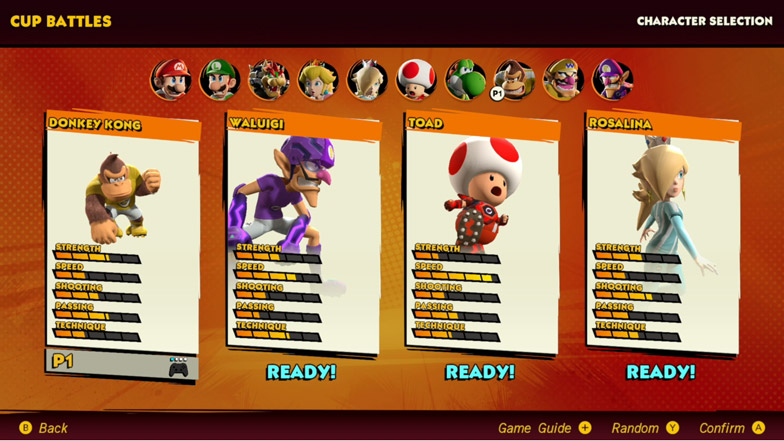
There are two really important factors when it comes to team composition. The first you will probably already know; you want variety in your squad’s attributes (and also in their gear).
You might want one character that is extremely fast, one that is very good at shot accuracy – honestly, a lot of this is personal preference and I’ll leave it to you to figure out your playstyle and ideal team, but what I will say is that variety is good.
Also, your captain should have some attacking ability and you don’t want them to be too weak. I’d say a minimum of 10 strength on your captain, to be safe.
However, the second factor is something you must take note of; you need to pick your characters in a specific order to get the best team in Mario Strikers.
Whilst rotation on the field will always happen as a game plays out, your captain will almost always be the furthest forward and most central on average. Your second and third character picks will be wider and generally not quite as advanced. Your fourth character pick will always be the furthest back, i.e. the most defensive.
Your fourth character pick should, in my opinion, always be a strong (i.e. high strength) character.
I also like my fourth pick character to be good at passing and have a small amount of speed (at least 10 in their speed stat). You can, and should, totally sacrifice shooting and technique stats with your fourth character – just remember to almost never shoot with them when you get the chance.
How to Score More Often
If you want to know how to score more goals in Mario Strikers: Battle League, I’ve got you here.
I’m not going to cover what is already in the in-game tutorial, which is just the basics of charging up shots, timing shots and first time shots. If you’re not familiar with that stuff already, I recommend doing those lessons as they’re genuinely helpful.
Here’s a range of ways I’ve found to actually score more often:
Manual Passes
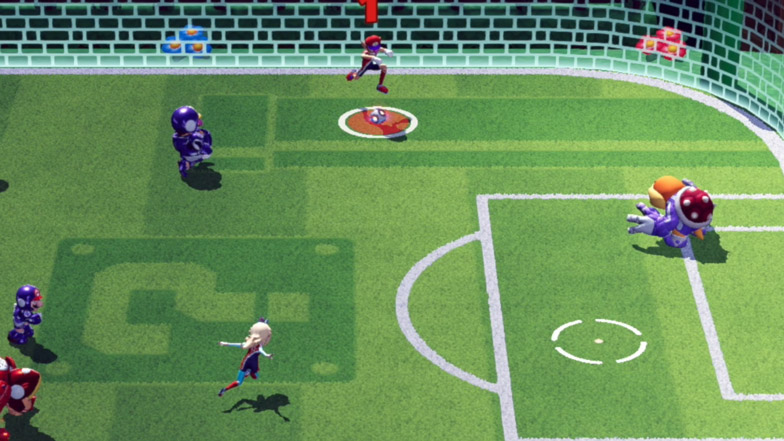
Manual passes and crosses (performed by holding L + pass or cross) are an essential way of scoring against harder opponents, either AI or human.
Regular passes go to where a player is currently standing at the time you press it. This means you can’t play the ball into space and it slows the play down every time.
To consistently score and take advantage of opportunities to get into space, you must practice using manual passes – and use them almost every time you see a space to run into.
A cross to the back post or a pass across the face of goal can be very problematic for the opposition goalkeeper.
Rebounds
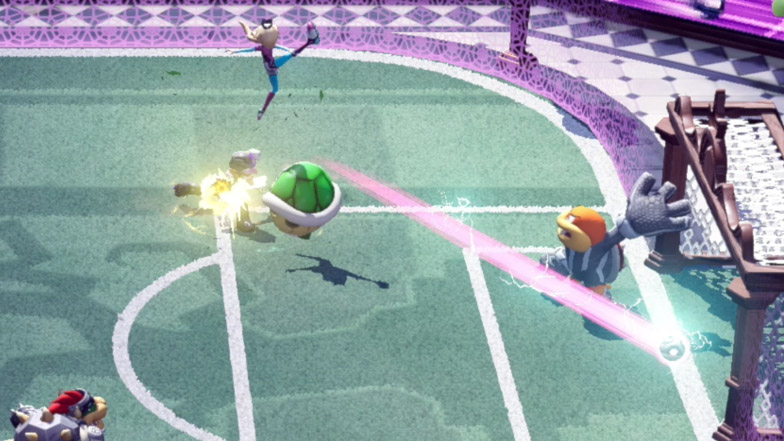
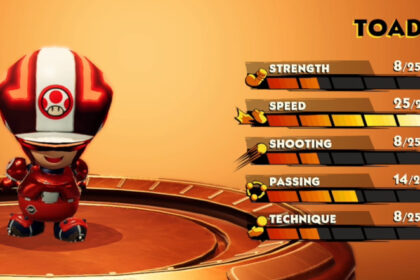
Firstly, rebounds are huge. I currently use a full-speed Toad in my squad, lacking any kind of strength and minimal shooting ability, purely so they can get on the end of rebounds for an open net tap-in.
Shoot often – purely with rebounds in mind.
Long Range
If your captain has reasonable (not necessarily high) shooting and technique, you can score from kick-off if they don’t close you down quick enough. Just run forward and charge up a shot from quite far out, it will generally go in.
This sounds too easy – probably because good opponents won’t let you do it – but against the normal AI it will work. And against humans you can throw in a dodge and pick up opportunities like this every once in a while.
Aim in the Obvious Place
Before I move onto my favorite trick to score more often, I’ll talk about something important; don’t try to be clever when attempting to score.
Always look to put the ball in the open side of the goal.
In real soccer, you often try to put the ball back in the direction the keeper is coming from (because physics). However, in Mario Strikers, keep things simple and just try to score in the side that’s already open. It’s a much more reliable source of goals.
Quick Dodge Shot
OK, my favorite trick to score more often? It requires a bit of practice, but you’ll want to be fairly close to the goal and central on the pitch for this to work…
Here’s what you’re going to do: charge up a shot, dodge to the side, then immediately tap shoot again. This works with any character with decent technique (additional shooting stats is a bonus).
The goalkeeper doesn’t react well to fast movement.
So whilst the keeper is waiting for you to charge up a powerful strike, all you’re going to do is shift position (with the dodge) and immediately slide the ball in the bottom corner.
As a side note, the quick shot is underrated in general. If you get the chance to tap shoot when you’re close to goal with a high technique character, go for it.
Fully Charged Tackles
If you’re doing a fully charged tackle, you don’t need to worry about the strength of your character. A 1-strength player can tackle a 25-strength player if it’s fully charged and accurate.
In contrast, if you have an extremely strong character against a really weak one, you don’t need to charge it at all.
However, a combination of strength and speed gives players the ability to tackle from further away, especially when they’re fully charged. Make use of this with long distance, last ditch tackles.
If your opponent is good at dodging, be patient.
You can keep your tackle fully charged for as long as you want – you don’t need to immediately let go. If they keep dodging your tackle, throw a fake, let them dodge, then tackle them straight afterwards.
Interceptions
We just spoke about charged tackles – try not to overuse them.
If you miss a charged tackle then it’s the same effect as being stunned by another method; your player will be dazed on the floor and unable to move. It’s easy to take advantage of this as the other team.
If the ball is being passed around in the air, you don’t need to do a charged tackle. You don’t need to press tackle at all. Any foul off the ball will gift item boxes to the other team.
Instead, you want to try to run to where the ball is due to ‘land’ (in the air) and press B or Y to intercept and pass the ball to your own teammate.
Opponent Awareness
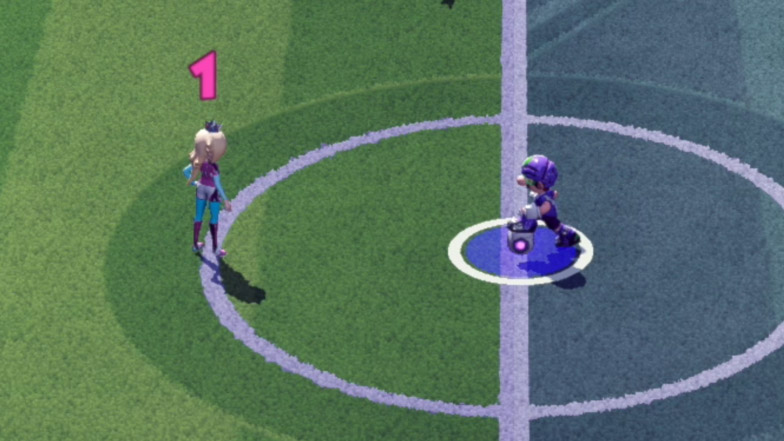
Here’s a simple tip: you need to be aware of which character you’re facing up against at all times and their strengths and weaknesses.
The most simple example of this from kick-off. If your captain is Toad (it shouldn’t be, but stick with me for this example) and your opponents captain is Bowser, you’re not going to be able to dive in with a quick tackle because you’ll bounce off them every time.
If your captain is Donkey Kong and the opponent’s is a quicker character like Peach, be aware that they might dodge if you try to dive in.
You need to be aware of these situations all over the pitch in real-time. Who is closing you down? Who are you facing up against? Could you sprint past them?
Item Timing
The timing of your item usage is really important.
We already covered using items with Hyper Strikes, but items matter always. Don’t rush them. You don’t need to always win the ball back immediately.
You should look to use your items to do two main things; prevent a goal or score a goal.
As you get better at the game things will get more complex and items will need to be used to develop favorable positions rather than clear cut chances, but keep things simple.
Use your items to prevent your opponent from getting a shot away, or clear the last defender out for an easy goal attempt.
Item Awareness
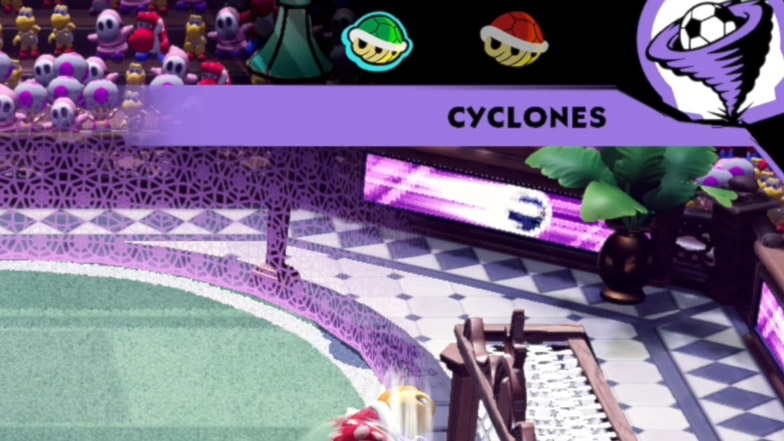
Being aware of the items your opponent has is crucial to making the right decisions in real time. You can see your opponent’s items at the top of the screen, just like you can see your own.
Why is this important?
Well, knowing your opponent has no items is huge information if you’re running through one-on-one against the goalkeeper – you know you don’t need to rush a shot at all in this situation because they can only stop you with a charged tackle that you’ll see coming for a couple of seconds.
And in contrast, if you’re one-on-one but your opponent has a red shell and a bob-omb, you know you need to rush out a much faster shot.
Analogue Dodging
Another one of my more simple Mario Strikers tips – but something that requires a lot of practice to get right – use your right analogue stick to dodge rather than the R button.
This allows you to retain full control of your intended direction of travel with the left analogue stick whilst giving you the ability to dodge in any direction you want by flicking the right stick.
If you use R, you have to control your movement and also aim your dodge all with the left stick. It’s not as efficient or effective, but is much more simple to do.
Sprint Whenever Possible
If you ever get the chance to sprint into a large amount of space with a fast player, do it.
I sometimes enjoy using a 25-speed Toad in my squad to allow me to put on the afterburners and develop a shooting opportunity. This can be great for rebounds or simple crosses.
Tactical Fouls
Whilst you can tackle players off the ball in Mario Strikers without the risk of free kicks or penalties being given, you are technically still penalized. If you foul someone off the ball, the other team gets an item.
With this in mind, you should only foul someone off the ball if you absolutely need to. There will be times when you need to.
If you can stop a certain goal or give yourself a massive scoring opportunity by fouling someone off the ball, the reward outweighs the risk.
In general, you should use items to foul off-the-ball as this won’t punish you.

