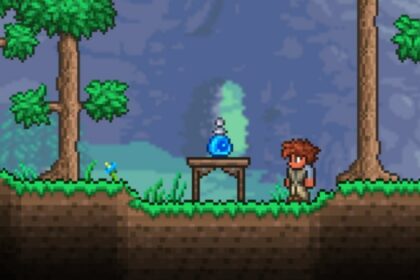
In Terraria, there are several different class setups. From melee to magic, ranged to summoning, there’s a class that suits every different playstyle. Each class setup has its own strengths and weaknesses and many different weapons, armor, and accessories to choose from.
The mage class has arguably the most variation in its setup. There are so many magic weapons available that it can be difficult to know the optimal ones to use. Not only that, but the best magic weapons to use can vary according to the stage of the game and the boss you’re fighting.
This Terraria mage guide will walk you through the best mage setups for each stage of your playthrough, as well as how to fully utilize these setups.
Pre-Bosses
Before your first boss encounter, it’s essential to have sufficiently prepared for the boss fights. This involves acquiring the best weapons and armor available to you at the time.
Weapons
Prior to fighting the first bosses in Terraria, the weapons you can get are very limited in terms of damage and special properties.
Diamond/Ruby Staff
The Diamond Staff and Ruby Staff and the first and second best gem staves, respectively, in Terraria.
All gem staves are available incredibly early into the game, and the higher tiers of gem staves are pretty powerful, so it’s best to get either the Diamond or Ruby Staff as soon as possible.
While the Diamond Staff is better than the Ruby Staff, both are viable at this point in the game, and you should use whichever is easier for you to obtain.
To craft a Diamond Staff, you’ll need 8 Diamonds and 10 Platinum Bars. Similarly, to craft a Ruby Staff, the ingredients are 8 Rubies and 10 Gold Bars.
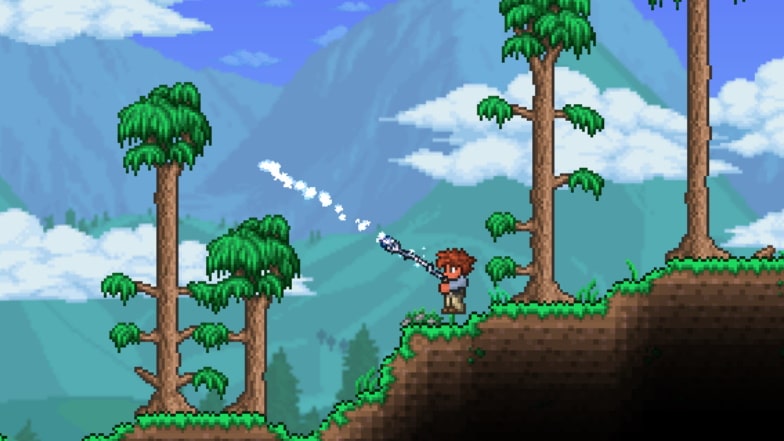
All gem staves are crafted at a Lead or Iron Anvil. These are the lowest tier of anvil in the game and are, therefore, the main crafting station for weapons until you reach Hardmode.
Thunder Zapper
The Thunder Zapper is a fast-firing, pre-Hardmode magic weapon that is available before having defeated any bosses.
It’s obtainable through opening Sandstone Chests – Sandstone Chests are found in the Underground Desert biome.
When used, it summons a fast-moving projectile unaffected by gravity. After approximately a second of fly-time, or after hitting a solid block, it will explode.
This explosion, however, does no damage and is purely visual. The weapon’s projectile is the source of damage rather than the explosion.
Vilethorn
Exclusive to the Corruption, the Vilethorn launches a projection that reaches 15 tiles. This spear-like weapon pierces several enemies and can pass through blocks. Furthermore, its projection deals a tiny amount of knockback for each hit. This can stun-lock enemies.
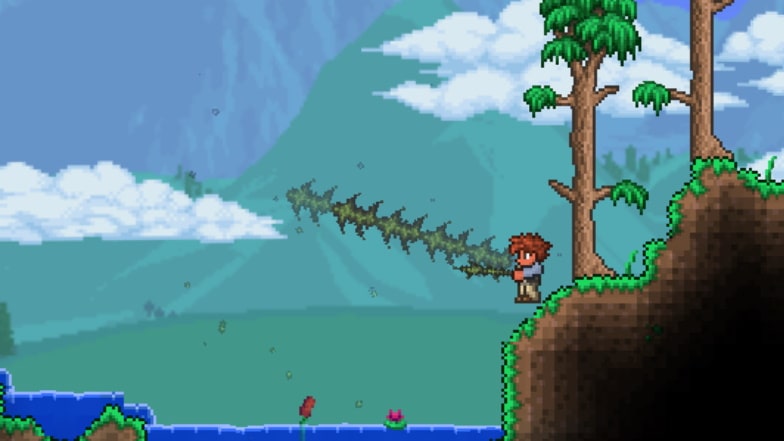
There are two ways to obtain a Vilethorn. The first and easiest way to get one is by breaking Shadow Orbs in the Corruption. The other way to acquire a Vilethorn is by opening Corrupt Crates – a type of crate caught by fishing in the Corruption.
Crimson Rod
If your world is a Crimson world rather than a Corruption world, the mentioned Vilethorn isn’t available to you. Instead, you’ll be able to get a Crimson Rod.
When used, the Crimson Rod sends a reddish cloud toward your cursor. It rains damaging ‘blood’ in the area below it. This blood rain dissipates after around 20 tiles.
It’s worth mentioning that the summoned cloud cannot travel through blocks; upon contact with a solid block, it will stop before it reaches the cursor.
Similar to getting a Vilethorn, you can get a Crimson Rod by destroying Crimson Hearts in the Crimson. Alternatively, they are found in Crimson Crates – a crate you have a chance of getting when fishing in the Crimson.
Armor
In Terraria, armor is the primary source of defense. Therefore, it’s crucial to have the best armor for your class setup at each stage of the game. Prior to defeating any bosses, there aren’t many armor options available.
Jungle Armor
Jungle Armor is the best armor available to mages, pre-bosses. It can be challenging to get, but its 17 defense points and 16% reduced mana usage make it a fundamental part of playing as a mage early-game.
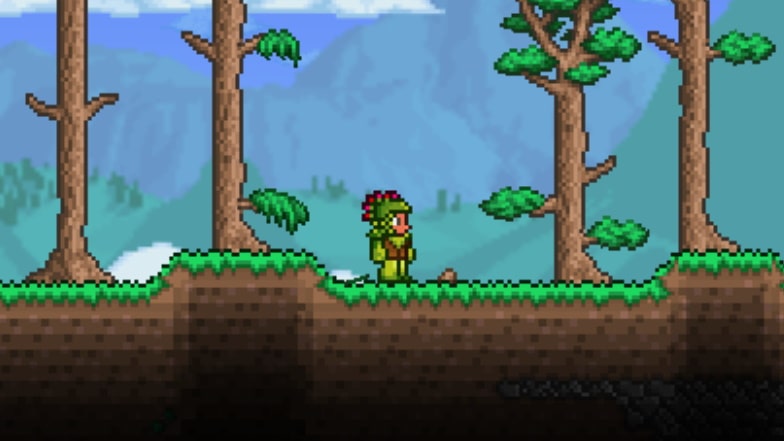
On top of these stats, each individual piece increases your maximum mana and magic critical strike chance. Both of these properties are essential for mages.
To craft a full set of Jungle Armor, you’ll need 10 Stingers (dropped by Hornets and Spiked Jungle Slimes), 2 Vines, and 32 Jungle Spores.
Wearing the full set is highly recommended due to its set bonus.
Ancient Cobalt Armor
Ancient Cobalt Armor is an incredibly rare armor set. Each piece of the set has a 1/300 (0.33%) chance of dropping from Hornets and Man Eaters – found in the Underground Jungle.
It provides pretty much the same stats as Jungle Armor, and farming the mentioned enemies to obtain this armor set isn’t particularly practical. However, it’s still worth mentioning as it does provide solid stats and bonuses for a magic user.
Accessories
Accessories typically provide special, often unique properties above anything else. Like the pre-bosses armor and weapons, there aren’t many accessories available at this stage of the game; however, there’s still enough that it’s worth getting them to benefit your first few boss battles.
Mana Flower
Despite being available so early in the game, the Mana Flower is beneficial throughout a large part of the game.
It has two special properties: 8% less mana usage and automatically using mana potions when needed.
This makes it crucial for any magic user – particularly early game – and you should focus on getting it as soon as possible.
To craft it, you need a Tinkerer’s Workshop crafting station, 1 Mana Potion, and 1 Nature’s Gift. Nature’s Gift is an accessory that’s found on Jungle grass in the Underground Jungle biome.
Its appearance is similar to that of the Jungle Rose; however, the flower harvested to get Nature’s Gift is blue rather than red.
Magic Cuffs

Magic Cuffs provide two benefits: increasing maximum mana by 20 and restoring mana when damaged. The ability to restore mana upon taking damage is incredibly useful, especially early-game when you’ll likely be taking more damage than many other points during the game.
It’s worth noting that damage from debuffs and drowning doesn’t activate this effect, whereas fall damage does. On top of this, the mana restored is equal to the damage of the attack – prior to the defense reduction; however, it’ll never be lower than 10.
Crafting Magic Cuffs is pretty straightforward. The crafting station needed is a Tinkerer’s Workshop, and the ingredients are 1 Mana Regeneration band and 1 Shackle.
Celestial Magnet
While not essential, the Celestial Magnet is a solid acquisition if you’re lucky enough to get one this early into the game. It significantly increases the range in which you can pick up stars. This significant increase is from 2.625 tiles to 21.375 tiles.
Getting one of these is pretty much solely down to luck, as it’s purchasable from the Traveling Merchant – an NPC that has a small chance of spawning each day. To make matters worse, the Celestial Magnet is one of the rarest items the Traveling Merchant can have in his shop.
If the Traveling Merchant does have the Celestial Magnet in his shop, it’ll set you back 15 gold coins.
Pre-Hardmode
The first major boss in Terraria is the Wall of Flesh. Upon defeating the Wall of Flesh, you’ll unlock Hardmode; however, this is no easy feat. Therefore, it’s important to know the equipment needed to defeat this boss.
Weapons
The weapons accessible to you pre-Hardmode are still pretty limited. However, there’s a slightly greater range of weapons to choose from. There are some pre-bosses weapons that are still viable at this point in the game. These are the Diamond and Ruby Staves, the Vilethorn, and the Crimson Rod.
Space Gun
Despite the misleading name, the Space Gun is, in fact, a magic weapon. It can autofire fast lasers, and each of these can hit a maximum of three enemies.
Due to its fast-firing and low mana cost, it’s a very powerful weapon choice pre-Hardmode. It’s worth mentioning that when a full set of meteor armor is equipped, the Space Gun has no mana cost.

To craft a Space Gun, you’ll need 20 Meteorite Bars (60 Meteorite). The required crafting station is an anvil of any type. In total, the Space Gun and a full set of Meteor Armor require 65 Meteorite Bars (195 Meteorite).
Water Bolt
The Water Bolt is a magic weapon that auto-fires a blue projectile that can ricochet, pierce enemies, and act as a light source. It lasts for a maximum of 30 seconds; however, it will disappear upon ricocheting five times or damaging ten enemies.
It can only be found in the Dungeon, which is accessible after defeating Skeletron. You must destroy the books on the bookshelves in the Dungeon in order to find the Water Bolt. This is the only way you can obtain this magic weapon.
Despite it being difficult to get, it’s definitely worth investing your time into getting one, as it’s a pretty powerful option, pre-Hardmode.
Bee Gun
Like the Water Bolt, the Bee Gun is only accessible in a specific way – it can’t be crafted, found in chests, purchased, or obtained in any other way. To get one, you must defeat Queen Bee – a boss spawnable in the Hive mini-biome in the underground Jungle. This boss has a 33% chance of dropping a Bee Gun, meaning that you may need to defeat Queen Bee several times before getting one.

The Bee Gun shoots between one and six bee projectiles that can pierce enemies and ricochet a maximum of three times. It’s worth mentioning that the Bee Gun’s projectiles don’t deal any knockback.
It fires very quickly and is a powerful choice for any pre-Hardmode mage setup.
Armor
There is a bit of an overlap between pre-Hardmode and pre-bosses regarding the best armor to pick. Jungle Armor and Ancient Cobalt Armor are both still viable options pre-Hardmode. However, there is one pre-Hardmode set that is more powerful than these – if you are able to get it.
Meteor Armor
Each piece of Meteor Armor (the Meteor Helmet, Suit, and Leggings) increases your magic damage by 9%. This means that the full set will increase your magic damage by 27% – a very significant boost, especially this early in the game.

Furthermore, when wearing a full set, the mana cost of the Space Gun becomes 0. The combination of Meteor Armor and a Space Gun is very powerful pre-Hardmode and should always be considered. The Orange and Gray Zapinators are also affected by this diminished mana cost.
To craft a full set of Meteor Armor, you’ll need 45 Meteorite Bars (135 Meteorite). Meteorite ore is found at Meteorite crash sites, where it can be mined. Instead of being generated at world creation, they generate due to certain game conditions throughout your playthrough.
Accessories
The best accessories for a pre-Hardmode mage setup are the same as pre-bosses, the most important three being Celestial Cuffs, a Mana Flower, and a Magnet Flower.
Pre-Mechanical Bosses
Upon defeating the Wall of Flesh and entering Hardmode, the game will become significantly more difficult and will require much better equipment. Luckily, when entering Hardmode, much more equipment (armor, weapons, and accessories) becomes available to you.
Weapons
It’ll take a while to get used to the increased difficulty of Hardmode – particularly with pre-Hardmode weapons. Because of this, it’s best to upgrade your weapons as soon as possible.
Crystal Serpent
There is only one way to obtain the Crystal Serpent: fishing in the Hallow. The chances of catching it are pretty low; however, it’s incredibly powerful for this stage of the game.
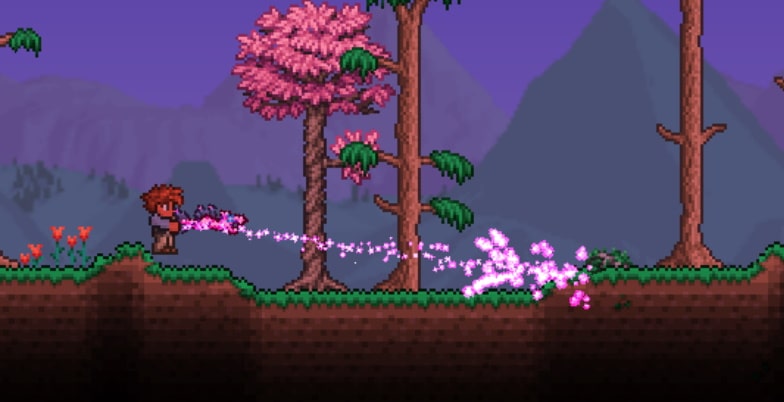
The Crystal Serpent fires a ricocheting pink projectile that splits into three to five smaller projectiles upon collision with a solid block or enemy. If you fire the Crystal Serpent at a wall that’s one block thick, there is a chance of one of the split projectiles passing through it.
Meteor Staff
On use, the Meteor Staff will spawn a Meteor projectile from the sky that falls in the direction of your cursor. While this Meteor projectile can pass through platforms, it can’t pass through solid blocks and will explode on impact with one – damaging enemies close by.
Crafting a Meteor Staff requires some hard-to-get resources for this stage in the game. The recipe is 20 Meteorite Bars, 10 Pixie Dust, and 10 Souls of Light. Similarly, the crafting station needed is a step up from that of pre-Hardmode crafting: it requires a Mythril or Orichalcum Anvil.
Shadowflame Hex Doll
The Shadowflame Hex Doll is a powerful magic weapon with high damage output and a fast use time. On top of this, using it once will fire three projectiles, so when used in quick succession, it can fire up to nine projectiles at once.
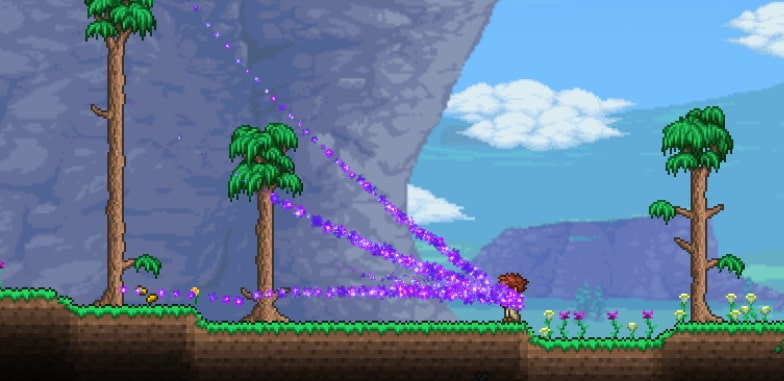
Using the Shadowflame Hex Doll will also inflict enemies with the Shadowflame debuff that prevents health regeneration and deals damage over time (also known as tick damage).
Getting a Shadowflame Hex Doll is quite difficult, however. It sometimes drops upon killing a Goblin Summoner in a Hardmode Goblin Invasion. Its chance of dropping is 1/6 (16.67%).
Sky Fracture
Despite its appearance as a sword, this weapon is actually a magic weapon. The Sky Fracture, when used, spawns three magic swords behind you that fire toward the location of the cursor. Each of the three projectiles can hit one block or enemy before dissipating.
It has relatively high damage, a very fast use time, and a base critical strike chance 20% higher than the standard 4%. This means that it has the potential for solid burst damage.
Crafted at a Mythril or Orichalcum Anvil, the Sky Fracture requires 1 Magic Missile, 2 Light Shards, and 16 Souls of Light to be made.
Armor
As mentioned, armor is your main form of defense in Terraria. And in Hardmode, its importance is significantly higher. Pre-Hardmode armor sets will no longer suffice, so getting a new set as soon as possible is essential.
Adamantite Armor
Adamantite is one of the ores unlocked upon entering Hardmode. Its armor set has three headpiece options, each of which enables you to focus on particular aspects of the game – melee, magic, or ranged.
Because this is a Terraria mage guide, the headpiece most suitable for this setup is the mage-oriented one. The breastplate and leggings have universal bonuses: 8% increased damage for the breastplate and 7% increased critical strike chance alongside 5% increased movement speed for the leggings.
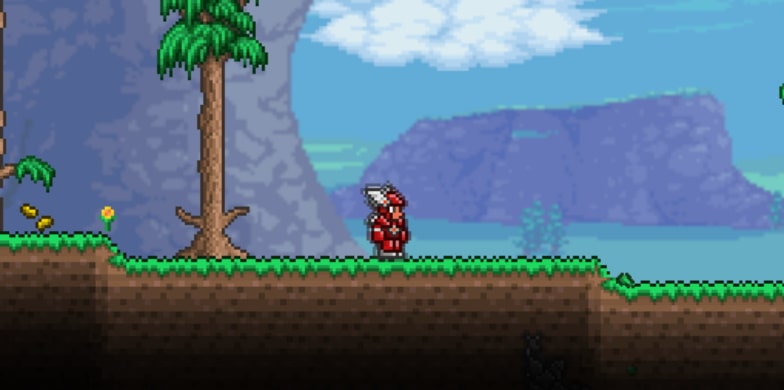
Adamantite Headgear is the magic-oriented headpiece and provides three bonuses. The first is increasing maximum mana by 80, the second is increasing magic damage by 12%, and the third, critical strike chance by 12%.
Furthermore, the set bonus depends on the headpiece you choose. For Adamantite Headgear, the set bonus is 19% reduced mana usage.
A full set of Adamantite Armor – with one headpiece – requires 54 Adamantite Bars (216 Adamantite Ore) and is craftable at a Mythril or Orichalcum Anvil.
Palladium Armor
Palladium is another one of the ores unlocked in Hardmode. Like Adamantite and many other Hardmode ore armor sets, there are three different headpiece options. The ideal one for magic users is the Palladium Headgear, as it grants 9% increased magic damage and critical strike chance, as well as increasing maximum mana by 60.
When the full set of Palladium Armor is equipped – regardless of the headpiece – successfully attacking an enemy will grant the Rapid Healing buff, which heals 2 HP (health points) per second.
The same as crafting Adamantite Armor, a full, one-headpiece set of Palladium Armor costs 54 Palladium Bars (162 Palladium ore).
Titanium Armor
Titanium Armor also has three headpieces. The best headpiece of the Titanium Armor set for mages is Titanium Headgear. Titanium Armor’s set bonus is a barrier of defensive shards spawning around you upon attacking. These shards deal damage and knockback to enemies hit.
Each piece of the Titanium Armor set provides increased damage and critical strike chance. On top of this, the leggings also give bonus movement speed, which can be incredibly useful for mobility.
Crafting a full set of Titanium Armor requires you to do a lot of mining, as the resources needed are 59 Titanium Bars (236 Titanium ore), and the crafting station required is the usual Mythril or Orichalcum Anvil.
Forbidden Armor
Forbidden Armor is hands down the most powerful pre-Mechanical bosses armor set for mages. Because of this, however, it is pretty difficult to obtain.
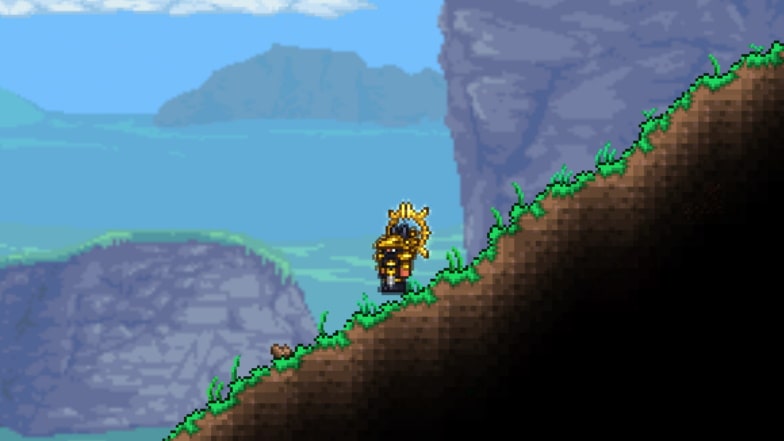
A full set of Forbidden Armor gives 26 defense, 35% magic damage, 15% summon damage, 80 maximum mana, and a bonus 2 minion capacity. This makes it incredibly strong for both magic users and summoners.
It can also spawn a small sand tornado at the nearest block below your cursor that deals 20 base damage to enemies and hits them rapidly. This can be done by double tapping your “down” or “up” keys and costs 20 mana.
A full set of Forbidden Armor costs 3 Forbidden Fragments and 46 Adamantite or Titanium Bars. Forbidden Fragments are dropped by Sand Elementals, a rare and powerful enemy that spawns in the Desert biome.
Accessories
As you progress through the game, accessories become more and more important. While some of the accessories are the same as your pre-Hardmode setup (the Celestial Cuffs and Magnet Flower), there are some new accessories worth investing in.
Sorcerer Emblem
The Sorcerer Emblem is a Hardmode mage-essential accessory. It increases all magic damage by 15%. This is a significant increase, particularly for an accessory, and should be prioritized as not only is it good at this point in the game, but it can be used to craft more powerful accessories as you progress further into Terraria.
This accessory has a 1/8 (12.5%) chance of dropping when you defeat the Wall of Flesh – the boss that, when defeated, activates Hardmode in your world.
This means that farming this boss might be required in order to get the Sorcerer Emblem; however, it’s absolutely worth getting.
Mana Cloak

A combination of the Mana Flower and Star Cloak, the Mana Cloak allows you to get the effect of two different accessories in one. As well as that, it adds a new effect to the accessories, making the Mana Cloak even more powerful.
It provides 8% reduced mana usage and automatically uses mana potions when required (so keep plenty in your inventory). Also, it spawns three damaging stars that – upon hitting an object – will transform into a special star that travels towards you, restoring mana on contact with you.
The Mana Cloak is made by combining the Mana Flower and Star Cloak at a Tinkerer’s Workshop crafting station.
Arcane Flower
Another combination of items, the Arcane Flower has both the functionality of the Mana Flower and the Putrid Scent. As mentioned, the Mana Flower provides 8% mana usage and automatically uses mana potions when required.
However, the effect of the Putrid Scent is quite unusual; it makes enemies less likely to target you. Like the Mana Cloak, crafting an Arcane Flower is straightforward. Simply combine a Mana Flower and a Putrid Scent at a Tinkerer’s Workshop.
Pre-Plantera
Once you’ve defeated the three Mechanical bosses, the next boss to defeat is Plantera. Defeating Plantera is a challenge, even for the most experienced players, due to her high mobility and damage output.
Furthermore, to find her, you need to explore the depths of the Jungle biome and set up a sufficient boss platform to help you in the fight.
Weapons
It’s important to pick the right weapons pre-Plantera because defeating Plantera can be incredibly challenging without doing so. The aforementioned Meteor Staff and Sky Fracture are both still viable at this point in the game.
Rainbow Rod
The Rainbow Rod is unusual because its projectile is completely controllable by holding your attack button and moving your cursor. You can also fling the projectile by releasing the attack button. When released, the rainbow projectile will home on enemies.
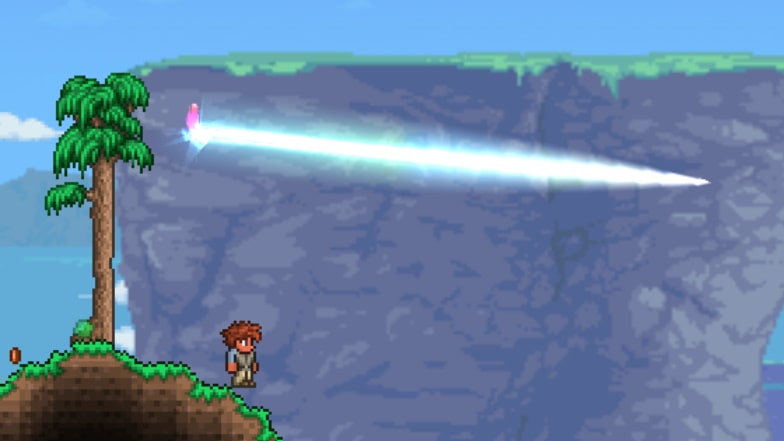
When being manually controlled, the Rainbow Rod’s projectile won’t disappear upon contact with a block. It can also move through liquids. The projectile can act as a light source, making it incredibly useful for exploration.
Getting a Rainbow Rod can be tough. The materials required are mostly obtainable from the Hallow biome and are 10 Crystal Shards, 2 Unicorn Horns, 10 Pixie Dust, 8 Souls of Light, and 15 Souls of Sight. You’ll need a Mythril or Orichalcum Anvil to craft it.
Magical Harp
While it may not seem particularly powerful, the Magical Harp is great for dealing damage – particularly in enclosed areas. This is due to its projectile’s ability to ricochet and pierce enemies infinitely until it dissipates after 4 seconds. The projectiles are not affected by gravity.
It is crafted at a Mythril or Orichalcum Anvil using 1 Harp, 20 Crystal Shards, 8 Souls of Night, and 15 Souls of Sight.
Golden Shower
The Golden Shower is a very powerful Hardmode, pre-Plantera magic weapon that fires a piercing golden “shower” that fires three times per click. It also inflicts the Ichor debuff to enemies hit – a debuff that lowers their defense.

To craft the Golden Shower, you need ingredients that can only be found in worlds with Crimson. Crimson Seeds are purchasable from the Dryad while in a Graveyard. This means that you can obtain the Golden Shower even if your world is generated with Corruption.
You’ll need 1 Spell Tome, 20 Ichor, and 15 Souls of Night to craft the Golden Shower. The crafting station needed is quite unusual: a Bookcase.
Armor
There are two armor sets that are viable at this stage of the game. Neither is particularly easy to get; however, it’s worth obtaining at least one of them to maximize your chances of success against Plantera.
Hallowed Armor
Hallowed Armor is a solid all-rounder with three different headpieces – the one you should choose depends on the class setup you’re playing. When playing as a mage, the best headpiece choice is the Hallowed Headgear, as it increases maximum mana by 100 and provides a 12% increased critical strike chance and magic damage.
Crafting a full set of Hallowed Armor (with one of the four headpieces) requires 54 Hallowed Bars. Hallowed Bars are dropped by the Mechanical bosses. When wearing the full set of Hallowed Armor, attacking an enemy will give you the Holy Protection buff – a buff that allows you to dodge an enemy’s next attack. This buff has a cooldown of 30 seconds from when it was initially applied.
Like most Hardmode armor and weapons, you’ll need a Mythril or Orichalcum Anvil to craft a Hallowed Armor set.
Chlorophyte Armor
Chlorophyte Armor is the other viable pre-Plantera armor set. It is geared more towards high magic and ranged damage than Hallowed Armor, meaning some may consider it an upgrade.
Furthermore, the full set spawns a Leaf Crystal to appear above your character’s head. This Crystal automatically attacks enemies and costs no ammo or mana.

Go for the Chlorophyte Headgear when playing as a mage, as it increases maximum mana by 80, reduces mana usage by 17%, and provides a 16% magic damage increase.
A full set requires 54 Chlorophyte Bars and a Mythril or Orichalcum Anvil as a crafting station. Chlorophyte is a rare ore found in the underground Jungle biome after all three Mechanical bosses have been defeated.
Accessories
The Celestial Cuffs, Magnet Flower, and Sorcerer Emblem are all still viable at this point in the game. However, there is one accessory that hasn’t yet been mentioned.
Celestial Emblem
With an incredibly complex crafting tree, the Celestial Emblem is a very powerful magic accessory. It boosts magic damage by 15%, as well as provides an 18.75 increased tile pickup range for stars.
It requires a Celestial Magnet and an Avenger Emblem at a Tinkerer’s Workshop. While getting this item can be tedious, the massive increase in magic damage makes it well worth the struggle.
Pre-Golem
Golem is yet another step up in difficulty. You must find the Jungle Temple – a naturally-generated structure in the underground Jungle biome. It is riddled with traps and enemies, so getting to Golem is a challenge in itself.
Weapons
Because of the enclosed nature of the Jungle Temple’s boss chamber, ricocheting projectiles are incredibly helpful. As well as this, Golem has incredibly high health and defense, so maximizing damage output is essential.
Magnet Sphere
The Magnet Sphere is a rare magic weapon with fast attack speed and high damage output. It fires an orb that travels in a straight line, zapping nearby enemies. This orb disappears after traveling 52 blocks, 7 seconds, or hitting a solid object. If you use the Magnet Sphere while there is already an orb in the air, the previous orb will disappear.

With a 1/300 chance of dropping from Blue, Rusty, and Hell Armored Bones in the post-Plantera Dungeon, the Magnet Sphere is quite a rare drop. It isn’t craftable in any way and can only be acquired from the mentioned enemies.
Spectre Staff
This is another weapon obtained from the post-Plantera Dungeon. The Spectre Staff fires a projectile that homes in on enemies. This projectile can damage enemies three times before disappearing; however, it can’t travel through solid blocks and will dissipate upon contact with one.
It drops from Ragged Casters with a 1/20 chance. Ragged Casters are enemies found in the post-Plantera Dungeon.
Bat Scepter
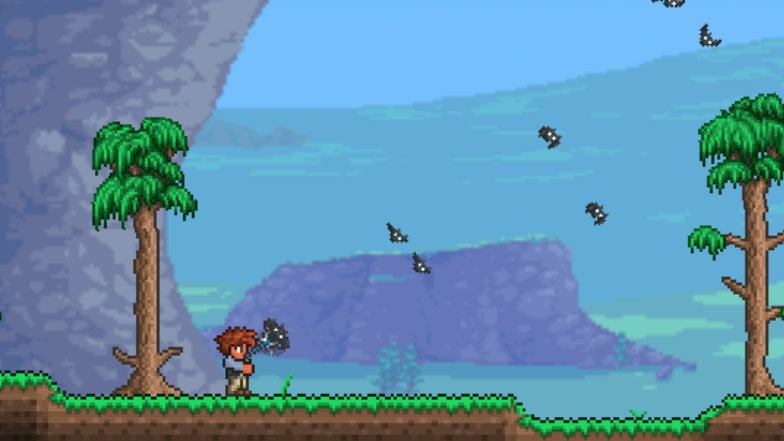
The Bat Scepter auto-fires 2-3 bat projectiles that home on enemies. These projectiles will dissipate upon contact with a solid block. It deals high damage but little knockback and has a very fast use time. During a Pumpkin Moon event, Pumpking will drop a Bat Scepter.
Armor
There is only really one armor set viable for mages at this stage in the game, and it’s incredibly powerful.
Spectre Armor
Spectre Armor provides significant magic weapon boosts. Similar to other mentioned armor sets, Spectre Armor has two possible headpieces: the Spectre Hood and the Spectre Mask. The set bonus depends on the headpiece you choose.
The Spectre Hood, as a standalone piece, increases maximum mana by 80 and decreases magic damage by 40%. However, when worn with the set, for every bit of magic damage you deal, you’ll get healed.

On the other hand, when wearing the mask, your maximum mana will be increased by 80, your mana usage reduced by 13%, and a 10% increase in magic damage and critical strike chance. With the full set, it’ll simply deal extra damage to enemies with small, homing projectiles.
This means that the Spectre Hood is best for survivability and long fights, whereas the Spectre Mask is ideal for high damage output.
In order to craft a full set of Spectre Armor (with one headpiece), you’ll need 54 Spectre Bars (270 Chlorophyte ore and 27 Ectoplasm).
Accessories
The main mage-oriented accessories have already been mentioned. These are the Celestial Emblem, Celestial Cuffs, and Sorcerer Emblem. There are a few other accessories that are essential at this point in the game, however, that aren’t mage-oriented, such as wings and the Ankh Shield.
Pre-Lunar Events
At this point in the game, most of the content in Terraria is available to you. Defeating the Moon Lord is no easy feat, so you’ll need all the best equipment to be able to do so.
Weapons
Since weapons are the primary source of damage, and the Moon Lord is incredibly tanky, it’s important to ensure you have the best weapons for the job.
Razorpine
The damage output potential of the Razorpine is better than that of pretty much every other magic weapon in the game. This makes it ideal for fighting the Moon Lord, despite it being relatively difficult to aim.
It rapidly fires 2-4 pine needle-resembling projectiles. Similar to the Magic Dagger and Throwing Knives, the Razorpine’s projectiles will drop off after some distance.
The Razorpine is a rare drop from Everscream during the Frost Moon event, with a 3.11% to 7.78% chance of dropping.
It’s worth noting that the Razorpine doesn’t do splash damage or AoE (area of effect) damage. This means that post-Moon Lord, it’ll be replaced by more viable options.
Razorblade Typhoon
The Razorblade Typhoon is an incredibly powerful magic weapon that fires fast projectiles that resemble large discs. These projectiles can ricochet and pierce an infinite number of times – but dissipate after 2 seconds. Furthermore, the projectiles have a homing ability, meaning they travel toward enemies without requiring any manual aiming.
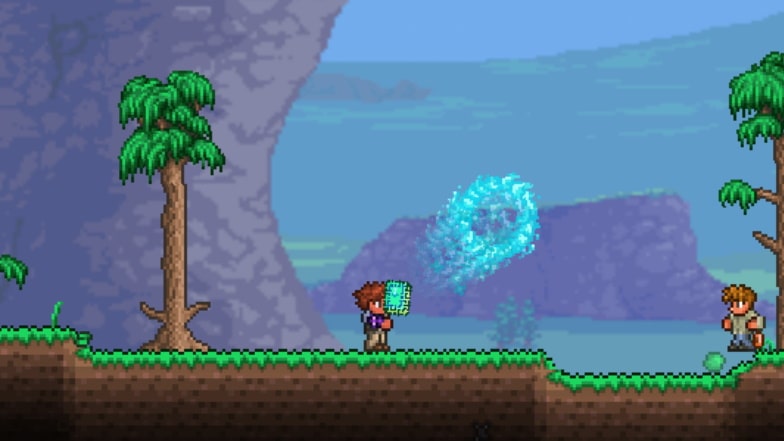
With a 1/5 (20%) chance of dropping from Duke Fishron, getting the Razorblade Typhoon can be quite a challenge.
Stellar Tune
The Stellar Tune is a strong magic weapon that fires star-shaped projectiles in pairs very quickly. These star-shaped projectiles travel in a wave pattern towards your cursor.
They also have the ability to travel through blocks, home on enemies, and create a small explosion on impact with an enemy. The Stellar Tune’s projectiles deal no knockback.
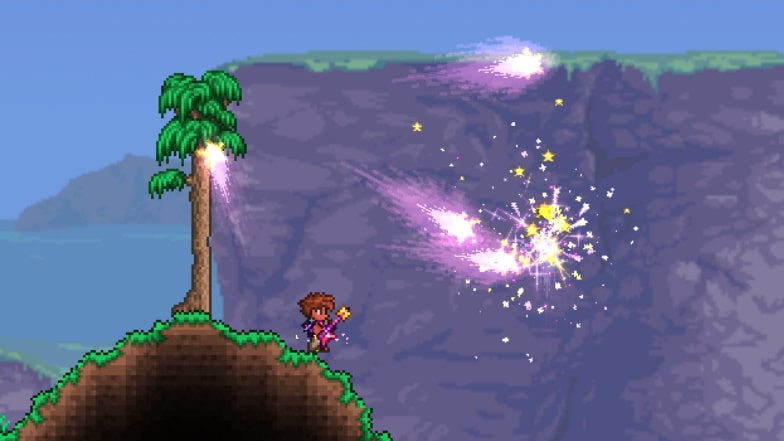
To get a Stellar Tune, you must defeat the Empress of Light. It has a 2% chance of dropping from her, so you’ll likely have to defeat her many times before getting one.
Blizzard Staff
Dropped by the Ice Queen during the Frost Moon event, the Blizzard Staff rains down a storm of icicles in the direction of the cursor. This storm of projectiles can travel through blocks to a certain extent – similar to the Starfury. It has a very fast use time and high AoE damage output.
Armor
Like pre-Golem preparation, Spectre Armor is still the best armor to use for the Lunar Events. Whether you go for the Spectre Hood or Mask is entirely down to personal preference.
Accessories
The Sorcerer Emblem, Celestial Cuffs, and Celestial Emblem remain the best mage-oriented accessories for the Lunar Events.
Conclusion
Now that you know the ins and outs of playing as a mage in Terraria, you’ll be able to dominate your playthrough every time. Remember to keep as many mana potions in your inventory as possible – of the highest tier available to you at the point of your playthrough.

