Despite being one of the earlier bosses in Terraria, Skeletron can still pose a tough challenge, even for experienced players. This is particularly true in Expert mode, where most enemies have double health and deal around double damage.
In Expert mode, enemies also take 10% less knockback.
While the difficulty of Terraria may be heightened in Expert mode, so are the rewards.
Enemies drop more items, an increased number of coins, and have a higher chance of dropping particular items. Basically, the much greater difficulty reaps much greater rewards.
Bosses are no exception to these rules, and, with Skeletron being one of the first bosses you’ll encounter, it’s essential to know how to fight Skeletron in Expert mode. This Terraria Skeletron Expert guide will explain, in detail, how to do so – mainly focusing on pre-hardmode.

Mobility
One of the key factors in fighting any boss, Skeletron included, is having sufficient mobility. Ensuring you have the right amount of mobility is essential as without it, dodging attacks and stalling for time can be a much more difficult task.
On top of this, mobility is an important part of damage dealing in Terraria. Due to the vast number of ranged weapons, moving around the map effectively is crucial to success – particularly in Expert mode.
Boss Platform
Boss platforms (otherwise known as Arenas) are an important aspect. They greatly aid mobility, as well as provide health, mana, and other buffs when set up correctly.
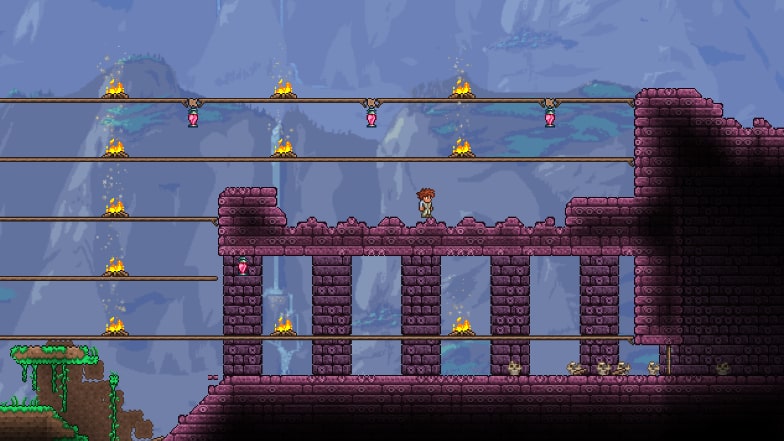
Typically, players have a main boss platform for battling the bosses spawnable anywhere on the map and extra, temporary boss platforms for bosses that can only be summoned in particular areas such as Plantera and Skeletron.
Since this boss is summoned at the Dungeon, the boss platform for battling Skeletron should always be built around it.
It’s important to remember that, when building your boss platform, you should minimize breakages to the Dungeon floor. This is because any disruption has the potential to prevent Endgame Cultists; if this happens, it could block game progression.
Therefore, it’s good practice to build the boss platform on top of the Dungeon. Not only does this avoid any possible progression issues, but it also provides more space thus meaning increased mobility.
A boss platform is made using platforms (unsurprisingly), and the height difference between each platform is generally 5 tiles. This is because the height a player can jump (without any buffs or equipment) is 6 tiles. With buffs or equipment, the height difference of your boss platform can be adjusted accordingly.
The width of your boss platform is more flexible than the height and is mainly up to personal preference. Having said this, however, a safe way to make sure it’s wide enough is to build it as wide as your screen.
The type of platform used doesn’t matter, as all platforms act the same way. However, using wood platforms is highly recommended due to the abundance of wood throughout the world, as well as the ease of access from planting trees.
Wood platforms are very easy to obtain, being craftable without any crafting station. The recipe is simply 1 wood per 2 wood platforms. This applies to any type of platform: 1 of a block will result in 2 of the corresponding platform. For example, 1 bone will result in 2 bone platforms. It’s worth noting that this crafting recipe works both ways: 2 platforms can be crafted into 1 block.
Another important factor to take into account when building a boss platform is the use of structures to increase health regeneration and mana. Campfires and heart lanterns can be placed along the platform can be placed to increase health regeneration.
Heart lanterns are crafted using 1 life crystal and 4 chain, while campfires are crafted using 10 of any type of wood and 5 torches. Both heart lanterns and campfires are crafted by hand – no crafting station is necessary.
Additionally, heart statues linked up to an activator will drop hearts that are consumed upon walking over them; these hearts will replenish 20 health each. It’s worth mentioning that there can be a maximum of 10 hearts present in a world at a time.
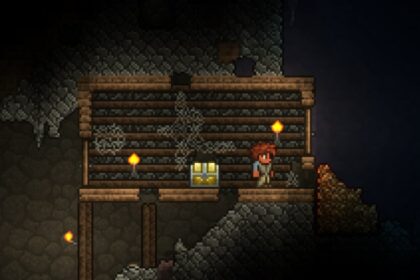
Heart statues are found randomly in the underground. They can be mined using any pickaxe. It’s recommended to look out for statues in underground cabins, as statues are more common in these areas.
Placing honey inside a bubble is another effective way of increasing health regeneration. Honey is a collectible liquid obtainable from the bottom of Bee Hives (found in the underground jungle). A bucket can be used to collect honey.

Bubbles are background blocks that have a special interaction with liquids. This interaction is that liquids treat bubbles as solid blocks when placed around them, allowing you to trap liquids.
Honey is no exception and, due to the healing properties of honey, trapping it in bubbles is an effective way to increase health regeneration at your boss platform.
The accumulation of these effects greatly increases overall health regeneration and will make your boss battling experience much easier.
Mobility Accessories
In Terraria, there are many accessories that will aid mobility. Faster movement and double jumping are just two examples of abilities provided by accessories that increase mobility around the map.
The Aglet and Hermes Boots are two items that increase horizontal mobility and aren’t particularly difficult to get.
Granting 5% increased movement speed, the Aglet can be found in Wooden Crates (obtained via fishing), Pearlwood Crates (also obtained via fishing), and surface chests.
While it is a useful accessory on its own, it’s also part of the recipe for Lightning Boots – an item that allows temporary flight, as well as 8% increased movement speed.
Unlike the Aglet, Hermes Boots can only be acquired through exploration – there is no option to fish for them. They spawn in chests in the Underground and Cavern layers of your world.
It takes a short distance to build up speed using the Hermes Boots; however, at full speed, your horizontal movement will be increased by 40%. This speed is maintained until either you stop, or there is an obstruction in your pathing, such as a block.
Due to a boss platform being entirely flat and the significant increase in movement speed on flat surfaces, Hermes Boots are a great choice as a mobility item for fighting Skeletron.
Though not quite as important as movement speed, jump boosts are still a helpful tool in fighting bosses on a boss platform.
There are 6 different types of jump boosts; however, due to Skeletron typically being an early-game boss, there are 2 types worth focusing on. These are the Cloud in a Bottle and the Tsunami in a Bottle.
The Cloud in a Bottle gives an extra jump with a 75% jump duration (as opposed to the normal jump) and increases the maximum height jump from 6 blocks to 11 blocks – assuming no other extra jump accessories are equipped.
Obtainable from gold chests in the underground and cavern layers, the Cloud in a Bottle is not a particularly difficult accessory to get, making it perfect for early-game boss fights like Skeletron.
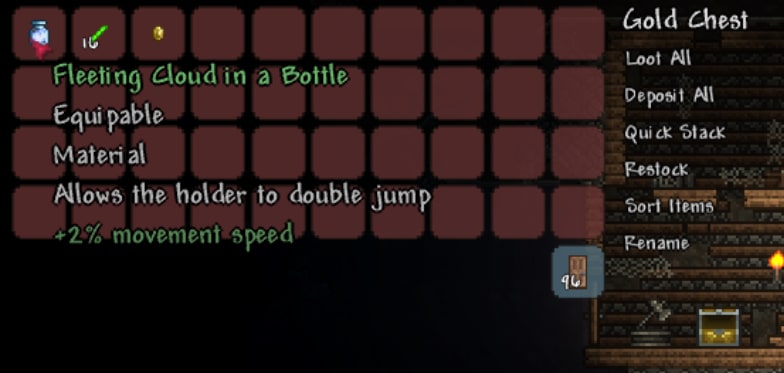
Additionally, there are two variations of the Cloud in a Bottle, these being the Blizzard in a Bottle and the Sandstorm in a Bottle. While being more difficult to find, they increase jump height more than the Cloud in a Bottle – increasing maximum jump height by 8 blocks and 15 blocks, respectively.
Both accessories are found in the biome relevant to their name: the Sandstorm in a Bottle being found in gold chests in Pyramids and the Blizzard in a Bottle being found in frozen chests in the underground ice biome.
It’s worth mentioning that the Blizzard in a Bottle is also obtainable from Frozen Crates; you can get these by fishing in an Ice Biome.
The Tsunami in a Bottle is another viable accessory for fighting Skeletron. It’s relatively easy to get, provides good vertical mobility, and can be used to craft a better accessory.
You can acquire a Tsunami in a Bottle exclusively from fishing crates. The crates that it can be found in are Iron, Wooden, Mythril, and Pearlwood crates.
Swiftness potions should also be considered, as these increase movement speed by 25%. They are brewed at a placed bottle or Alchemy Table with 1 bottled water, 1 blinkroot, and 1 cactus per swiftness potion.
Due to the fact that swiftness potions are inexpensive to brew and increase mobility to such an extent, these are a fantastic alternative to accessories when fighting Skeletron, or any boss. A swiftness potion will last you 8 minutes.
Equipment
When fighting Skeletron, especially in Expert mode, having the correct equipment is arguably the most crucial factor in succeeding. Armor, weapons, and accessories are the three types of equipment and they are all equally as important as each other.
It’s also good practice to maximize synergy as much as possible between the items. For example, if using a lot of mana when fighting (from magic items), it’s important to make sure that your equipment allows for that by giving extra mana or reducing mana usage.
Generally, the equipment you choose should follow particular class setups, however, in the early game, this is a much less prominent factor.
Armor
The best armor for fighting Skeletron in Expert mode prior to entering hardmode is shadow armor, crimson armor, or molten armor.
Shadow armor and crimson armor are exclusive to corruption worlds and crimson worlds, respectively. Altogether, the full armor sets provide 19 defense.

Having said this, however, shadow armor and crimson armor have different bonuses per individual piece of the set.
The shadow armor set is made up of the Shadow Helmet, Shadow Scalemail, and Shadow Greaves. Each piece gives a bonus of 7% attack speed (for a total of 21% with the full set equipped). Additionally, when all 3 pieces of the set are equipped together, you will gain 15% movement speed.
Similarly, a crimson armor set consists of the Crimson Helmet, Crimson Scalemail, and Crimson Greaves. These, however, provide different buffs to shadow armor. The pieces of the set each provide an extra 2% weapon damage boost (for a total of 6% with the full set equipped).
On top of this, when the entire set is equipped, you will gain substantially increased health regeneration.
To craft a full set of shadow armor, you will need 60 demonite bars (180 demonite ore) and 45 shadow scales. Defeating the Eater of Worlds boss twice can give you enough resources to craft an entire set. Demonite bars are smelted from demonite ore at any furnace.
Crafting the Crimson counterpart requires 60 crimtane bars (180 crimtane ore) and 45 tissue samples. Similar to obtaining shadow armor, defeating the Brain of Cthulhu boss twice can grant enough resources to craft an entire set. Crimtane bars are smelted from crimtane ore – also at any furnace.
Neither the shadow nor crimtane armor sets follow a specific class setup, meaning they can be used alongside a multitude of different weapons and accessories.
The other option is molten armor. While molten armor provides more defense than any of the other pre-hardmode armor sets, it can be a lot more difficult to obtain. The stats it provides are also the best of any other pre-hardmode armor set.
A full set of molten armor gives 25 defense, 17% increased melee damage, 7% melee speed, and 7% melee critical strike chance, as well as immunity to being “On Fire!”.
Due to the largely melee-oriented buffs it provides, molten armor is best when coupled with a melee class setup; melee weapons and accessories.
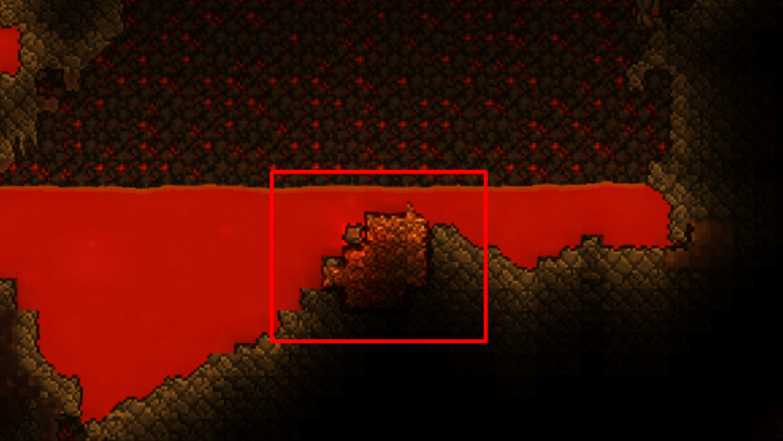
Crafting a full set of molten armor requires 45 hellstone bars (or 135 hellstone and 45 obsidian). Hellstone bars are smelted exclusively at a Hellforge. All the resources needed to create a set of molten armor are found in the Underworld (otherwise known as Hell), meaning that they can be very difficult to obtain – particularly pre-hardmode and in Expert mode.
There are some alternatives to these sets of armor, depending on your class setup. For users of magic (and therefore mana), the optimum armor set is jungle armor; crafted from resources found in the underground jungle biome.
The set consists of the jungle hat, jungle shirt, and jungle pants, with each individual piece granting 16% mana usage reduction and the full set increasing your maximum mana by 20-40 as well as damage by 6%. The total defense of the set is 17.
In order to craft the entire jungle armor set, you will need 10 stingers, 2 vines, and 32 jungle spores, alongside an iron or lead anvil.
If you are playing with the summoner class setup, bee armor is highly recommended, as it increases your maximum number of minions by 2 while, at the same time, increasing their damage by 23%.
A full set provides 13 defense, meaning that, if opting for bee armor, you ought to be more careful due to having less defense than other armor sets.
Bee armor is crafted at an iron or lead anvil using a total of 30 beeswax. Beeswax is a resource obtainable by defeating Queen Bee – a boss spawned in the underground jungle biome. Defeating it twice will provide sufficient beeswax to craft bee armor.
Weapons
Weapons are the primary source of damage in Terraria. It’s, therefore, crucial to understand which weapons are best suited to particular situations, bosses, and class setups.
Dealing damage from a distance is a majorly important factor to success in defeating Skeletron in Expert mode. This is due to Skeletron’s high damage output in melee range from both its arms and skull.
Even for melee users, ranged weapons that are affected by melee buffs (such as yoyos and boomerangs) are highly recommended for fighting Skeletron in Expert mode.
A fantastic melee weapon for fighting Skeletron in Expert mode is the Amazon, a type of yoyo crafted using resources found in the underground jungle biome. It has a maximum range of 13 tiles, alongside a spin duration of 8-9 seconds.
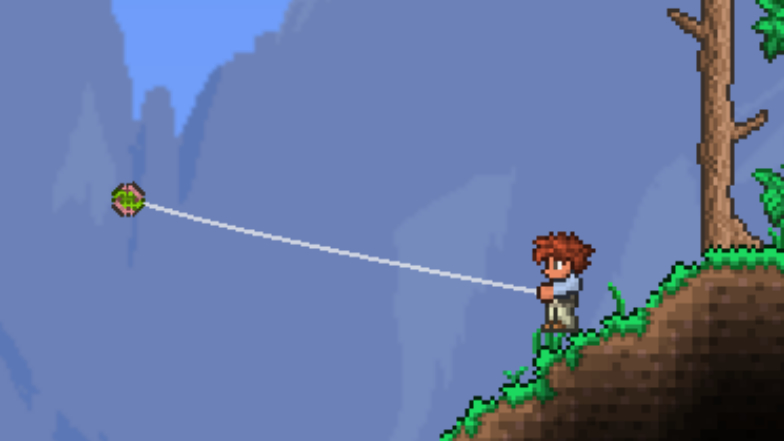
Alternatively, if you have mined to the depths and obtained hellstone, the Flamarang (a type of boomerang crafted using hellstone and an Enchanted Boomerang) is also a viable option.
The best modifier for the Amazon and the Flamarang is “Demonic” or “Godly”, both providing the same damage bonus.
For the ranged class setup, there are many options for fighting Skeletron, ranging from bows to guns. It’s important to remember that if playing Terraria as a ranged character, the type of ammo you use has a big impact on the damage output as well as the weapon itself.
The Demon and Tendon bows are good choices for fighting Skeletron and are very accessible. The Demon Bow is made using 8 demonite bars, and the tendon bow is made using 8 crimtane bars.
Using these bows with either Frostburn Arrows or Jester Arrows will maximize damage output. Frostburn Arrows are crafted with Wooden Arrows and ice torches, while Jester Arrows are crafted with Wooden Arrows and fallen stars.
On the other hand, if you decide to use guns against Skeletron, the Minishark is a fantastic option. It is, however, expensive. Costing 35 gold coins, the Minishark is purchasable from the Arms Dealer NPC.
The Minishark can use any type of ammo and has a 1/3 (33.33%) chance to not use ammo and has an incredibly high fire rate making it fantastic for fighting Skeletron in Expert mode.
For magic users, a good, pre-hardmode weapon for fighting Skeletron is the Gray Zapinator. Unfortunately, it is only purchasable from the Traveling Merchant NPC for 17 gold coins – and even then its availability isn’t guaranteed.
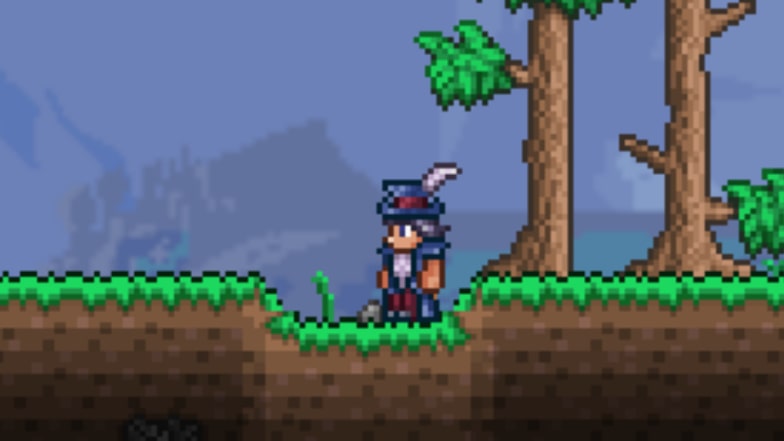
A more accessible alternative to the Gray Zapinator is the Diamond Staff. Costing 10 platinum bars (at an iron or lead anvil), it’s much easier to get than the Gray Zapinator and deals similar damage when taking into consideration the damage-to-use-time ratio.
Finally, the Imp Staff is the most viable option if playing as a summoner. While there are other staffs available, using them alone isn’t recommended as they simply don’t have the required damage output. The best modifier for the Imp Staff is Mythical.
The Imp Staff is crafted at an iron or lead anvil using 17 hellstone bars. This can make it a challenge to obtain, but – due to it being the most viable option – it’s worth acquiring.
Accessories
There are several accessories that are great additions to your equipment line-up for fighting Skeletron in Expert mode. Some of these accessories can be difficult to get, but they will be greatly beneficial in fighting Skeletron.
The Shark Tooth Necklace is an accessory that increases armor penetration by 5. Armor penetration simply means armor ignored. For example, the Shark Tooth Necklace’s armor penetration of 5 means that your attacks will ignore 5 points of the enemy’s defense.
You can obtain a Shark Tooth Necklace during a Blood Moon, by defeating Dripplers and Blood Zombies. In Expert Mode, the drop rate of this accessory is 1/75 (1.33%).
If you obtain a Shark Tooth Necklace, it can be crafted with the Honey Comb accessory (dropped by Queen Bee) at a Tinkerer’s Workshop to create a Stinger Necklace.
A Stinger Necklace provides the same armor penetration but also releases 1-3 bees (1-4 in Expert mode) upon receiving damage. On top of this, it will grant the honey buff for 5 seconds, increasing health regeneration.
The Shield of Cthulhu is another great accessory for fighting Skeletron in Expert mode, due to the ease of access and dash ability.
In Expert Mode, every boss will drop a Treasure Bag with items corresponding to the boss defeated. The Shield of Cthulhu is an item dropped from the Eye of Cthulhu Treasure Bag, meaning it is one of the first accessories you will obtain in the game.
When this accessory is equipped, it enables you to dash in the direction you wish by double-tapping the key you have bound to moving left or right. Additionally, upon contact with an enemy, the dash will deal 30 damage to it.
Other accessories worth considering are the Worm Scarf or Brain of Confusion (depending on whether you have Corruption or Crimson). Both are obtainable from Treasure Bags of the bosses of their respective biomes – the Eater of Worlds and the Brain of Cthulhu.
The Worm Scarf decreases damage received by 17%, making it a useful accessory in almost every situation.
The Brain of Confusion has a chance to apply the “Confused” debuff to nearby enemies, upon taking damage, for at least 1.5 seconds. It also gives a 1/6 (16.67%) chance of dodging an attack. If an attack is dodged, your critical strike chance will increase by 10%, for 4 seconds. During this duration, another attack cannot be dodged.
Potions
Potions are another integral part of fighting Skeletron – especially in Expert mode. The buffs they give can be the determining factor between success and failure and, luckily, most potions are relatively easy to obtain.
Ironskin potions, regeneration potions, and endurance potions are fantastic for fighting Skeletron, regardless of your class setup, and are, therefore, highly recommended.

In Expert mode, ironskin potions will reduce your damage received by 6, for 8 minutes. Similarly, endurance potions reduce damage taken by 10%, but only last 4 minutes. Finally, regeneration potions – as the name suggests – increase health regeneration substantially, with 1 potion lasting 8 minutes.
Both the ironskin and regeneration potions are simple to craft, using common resources. Ironskin potions require 1 bottled water, 1 daybloom, and 1 iron/lead ore, while regeneration potions require 1 bottled water, 1 daybloom, and 1 vile mushroom.
The endurance potion is slightly more difficult to acquire, with the resources needed being 1 bottled water, 1 armored cavefish, and 1 blinkroot.
Wrath potions give an incredible damage bonus of 10% and last for 4 minutes, so they should always be considered. 1 bottled water, 1 ebonkoi, and 1 deathweed are required to craft a wrath potion.
A potion imperative for magic users is the mana regeneration potion. Lasting 8 minutes, it increases the regeneration of mana substantially. 1 bottled water, 1 moonglow, 1 daybloom, and 1 fallen star are sufficient ingredients to craft 1 mana regeneration potion.
If you are using a bow to fight Skeletron in Expert mode, an archery potion is a very good option. It will increase the velocity and damage output of any arrow-consuming weapon by 20% and will last 8 minutes. You can craft an archery potion using 1 bottled water, 1 daybloom, and 1 lens.
Finally, if you are playing as a summoner, using a summoning potion is highly recommended. A summoning potion will increase your maximum number of minions by 1 and will last for 8 minutes. The ingredients for this potion are 1 bottled water, 1 moonglow, and 1 variegated lardfish.
All potions are crafted at a placed bottle or Alchemy Table.
Conclusion
To conclude, fighting Skeletron in Expert mode is no easy feat. However, with the correct preparation, items, and equipment, it can be done.
Always remember that mobility is key, especially when fighting Skeletron, and potions and equipment can be used to aid this mobility.
Additionally, ensure you have sufficient potions to help increase your survivability as well as your damage output.

