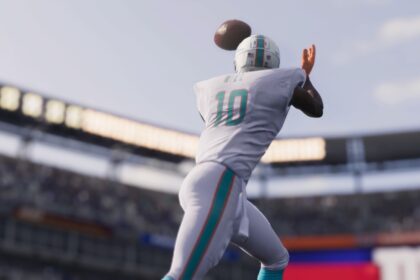
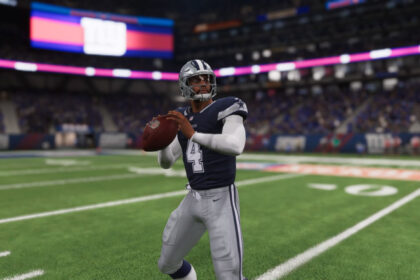
Great Madden players are like great NFL quarterbacks; they are both able to identify, diagnose, and beat opposing defensive coverages.
There are loads of different zone and man coverages in defensive playbooks nowadays, and each team could deploy dozens of unique coverages in order to confuse your offense and cover your pass game long enough to get more sacks.
In order to avoid sacks and stagnant offensive drives, you must first identify which coverage the defense is playing, know what plays work against those defenses, and finally execute.
In this article, we’ll break down how to identify, adjust, and execute against the five most popular coverages you will face in Madden: Cover 1, Cover 2, Cover 3, Quarters coverage, and Cover 6.
Cover 1

Cover 1 is an easily identifiable coverage formation, with one safety deep in the middle of the field with corners about five to eight yards off the line of scrimmage.
The cornerbacks will follow their wide receiver if you audible or flip the play. You can find out how to do this in our controller guide.
The linebackers and the shallow safety are usually either showing blitz or are set up to cover a shallow zone.
They may also be man covering your running back or tight ends; if there are more linebackers/shallow safeties than tight ends/running backs, that extra defender will almost certainly be blitzing.
Cover 1 typically uses man-to-man coverage, with corners mirroring and closely following their designated receiver. This coverage also usually comes with heavy pass blitzes as well, so be wary of the rush.
To beat cover 1, you simply need to utilize crossing routes like mesh, slants, and drive throws that take your receiver across the field.
As the receivers cross the field, the man cornerbacks will trail them, quickly losing ground as your receiver hits midfield. Make a quick scan to ensure there aren’t any lurking zone linebackers ready to pounce, and if not, throw the ball to your open receiver and let him run.
You can also try to throw deep. There is only one safety, which means that if both your outside receivers beat their corner deep, the safety will only be able to cover one of them, leaving one wide open downfield.
Cover 2

Cover is the most common defense in both the NFL and Madden. It is a fairly versatile defense that uses both man and zone coverage but is defined by the two deep safeties in the middle of the field.
Unlike cover 1, cover 2 is designed specifically to beat the deep passing game.
The two safeties play a deep zone, one on either side of the field, essentially safeguarding against any pass over 20 yards downfield.
The rest of the coverage players will either play man coverage or play shallow zones around 5 to 15 yards down the field. They are tasked with stopping plays from developing, while the deep safeties are there to prevent plays from becoming big plays.
To tell if a defense is in man or zone, look at how deep the cornerbacks are playing.
If the corners are 5 yards back off the line of scrimmage, they are in zone coverage; if they are right in the face of the receiver they will be in man.
The key to beating cover 2 man coverage is to keep your passes short with hitch routes, spacing routes, and flood routes that keep your receivers away from the deep safety zones.
When the defense is in cover 2 zone coverage, you will want to pull the two safeties to the sidelines with deep vertical routes by your outside receivers. The outside receivers should only be used as decoys.
With both safeties away from the deep middle portion of the field, this is the perfect time to hit your tight end or slot receiver in that open area. They should be wide open.
Cover 3

Cover 3 uses the same formation as cover 1 with one deep safety and two outside corners that play around five yards back from the line of scrimmage.
The difference is that in cover 3, the corners drop back into deep zones on either side of the safety, covering the deep middle.
In order to tell if you are up against cover 1 or cover 3, call an audible or flip the play so that your receivers change in formation and move.
If the corners stay put, they are in cover 3. If they follow their designated receiver, then they are in cover 1.
In cover 3, it is easier if you see the field as four distinct sections, with one covering everything within 15 yards of the line of scrimmage.
This is the low zone, typically covered by multiple zone coverages played by linebackers and safeties or nickel cornerbacks.
The other three sections are divided equally 15 yards deep or more, with the two corners covering the outside left and right and a safety covering within the hash marks deep.
The best way to attack Cover 3 defenses is to hit your receivers in the seams between the deep cover zones. Like a baseball outfield, you want to play the gaps between where the defenders line up.
Throw the ball between the safety covering the middle of the field and the corners playing the outside.
The best routes to hit the seams are literally called seam routes, but you can also use post routes and dig routes where your receivers are going from an outside zone to an inside zone.
Quarters Coverage (Cover 4)

The quarters coverage splits the deep field just like the cover 3 coverage does, but with four players rather than three.
Corners still cover the outside zones, but in quarters, the inside zone is covered by two safeties instead of just one, which means each player gets a smaller zone, and it makes it harder to hit the seams of the coverage.
Quarters coverage looks very similar to cover 2, but in quarters, the corners line up much deeper off the line of scrimmage than in cover 2, typically around eight yards or so.
A wildcard aspect of quarters coverage is the use of a nickel corner.
This corner will likely line up across from your slot receiver or tight end and play underneath zone or man-to-man. It’s always important to diagnose what type of coverage the nickelback is in by flipping or audible the play to see if the nickel follows (man) or stays put (zone).
The best way to attack quarters coverage is by taking advantage of the eight-yard gap on the outside between the corners and the line of scrimmage.
Throw quick-out routes to the sideline and utilize short hitch, stick, and curl routes to get quick and easy yards. Just make sure to keep an eye out for that pesky nickel corner.
Cover 6

Cover 6 is a hybrid defense that is difficult to identify because it uses different strategies for the left side of the field as opposed to the right side of the field.
It is a Frankenstein combination of cover 4 and cover 2.
The best way to identify the cover 6 formation is by looking for unequal depths of the cornerbacks on either side of the field.
One side of the field might have a corner 8 yards deep from the line of scrimmage, while the other side has a corner up in the face of the receiver.
The good thing about cover 6 for offenses and the reason it isn’t used very much by defenses is that its asymmetric formation creates many different gaps between defenders.
On the side of the ball playing deep, you can utilize the short passes that are effective against cover four. On the side playing close to the line of scrimmage, you can use the crossing plays and slants that work well for cover 2.
You can also exploit the gaps between the underneath coverage and the safeties with corner, smash, and flood routes.