
Rogues have one of the most powerful DPS outputs in the game while also being the most mobile classes in Diablo 4.
Rogues also have one of the most diverse builds because they can choose to either be ranged (bow or crossbow) or melee (daggers and swords). This paves the way for a lot of strong and viable builds depending on the player’s preferences.
In this guide, we’ll feature one of the best Rogue builds, Twisting Blades, which excels in both speed-farming nightmare dungeons and climbing higher tiers of nightmare dungeons.
Video Showcase
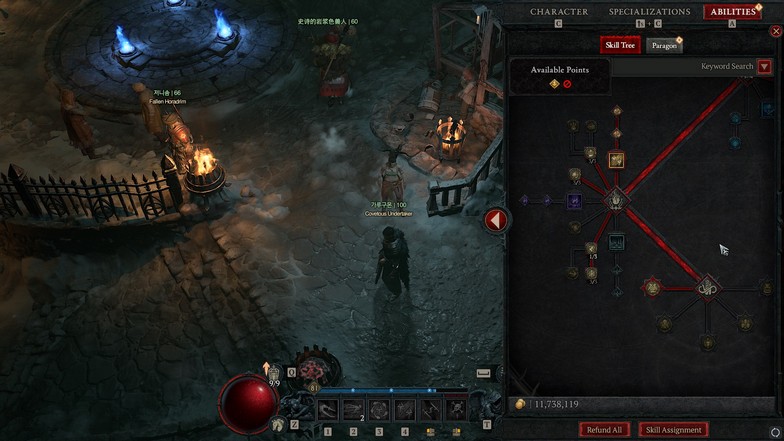
Note: At level 80, the 6th glyph isn’t inserted yet, and there are a few nodes missing for more survivability and DPS. The five glyphs equipped are not yet maxed out (some aren’t at 15 yet). Build could still use a decently-rolled CDR and DR amulet and maxed CSC with +3 Twisting Blades gloves.
Build Overview
The build revolves around the skill Twisting Blades with the Bladedancer Aspect. Every time you use Twisting Blades on an enemy, it deals a good amount of damage, and the blades return to you after a short time and spin around your character.
The direct damage from blades will crush enemies as they return to you. Once they return to you, the blades that spin around you deal a ton of damage to the enemies for a short time as well.
The damage output depends on the distance traveled by the Twisting Blades. The scaling gets pretty high when you regularly get a very high distance off on the Twisting Blades.
When the blades return to you at a short distance, they still do decent damage, as seen in the video showcase.
With skills like Shadow Step and Dash, it’ll push the damage even further while giving you mobility skills to increase the distance traveled by the blades and dodge any enemies on the way.
| Pros | Cons |
| High Damage Output | Prone to crowd-control (since you want to attack with Twisting Blades on melee range first) |
| One of the Fastest Builds | Resource management can be brutal against (3-4 targets or even boss fights) |
| Decent Survivability | |
| Easy to Find Gear/Items |
Skills
Specialization – Inner Sight
Inner Sight is the only option here, as it gives you a short window to unload as much resource as possible when you activate it. It gives you a fun little minigame when fighting against monsters by trying to target the marked enemy to activate it.
For some, it can be a bit tedious since you don’t want to think or look at which enemy is going to be marked. Don’t worry. If you want to shut off your brain while farming, it is still possible to maintain your resource generation without activating Inner Sight.
Basic
Any two points to unlock core skills.
Points here don’t matter as we aren’t using any basic skills.
Core
- Twisting Blade 5/5 – Enhanced and Advanced Twisting Blades
- Sturdy 3/3 (passives) – Siphoning Strikes 3/3
It is important to know that with Advanced Twisting Blades, you want to hit as many enemies as possible with the returning blades. It gives you more cooldown reduction on your skills.
Sturdy and Siphoning Strikes give you an insane boost in survivability. These passives are irreplaceable.
Agility

- Shadow Step 1/5 – Enhanced and Methodical Shadow Step
- Dash 1/5 – Enhanced and Disciplined Dash
- Weapon Mastery 3/3 (passive)
- Concussive 3/3 (passives) – Trick Attacks
Methodical Shadow Step gives you the ability to stun elites and do bigger damage. However, you can switch it to Disciplined Shadow Step to have more uptime on your Shadow Step.
Since you will be using Shadow Step to either hit more enemies on your Twisting Blades or dispel/break away from a stun, you want to have it up as much as possible.
Disciplined Dash and Trick Attacks work together. If you want to switch to a Methodical Dash, you can also remove Trick Attacks.
Subterfuge
- Dark Shroud 1/5 – Enhanced and Subverting Dark Shroud
- Poison Trap 1/5 – Enhanced Poison Trap
- Exploit 3/3 (passives) – Malice 3/3
Dark Shroud is used for survivability, and you want it activated (5 stack uptime) on every cooldown.
Poison Trap is there to activate Vulnerable with your aspect and to deal out more damage. Subverting Poison Trap is a must-have for single-target fights (bosses), but if you don’t have problems with bossing, you don’t have to take it.
Imbuement
- Deadly Venom 1/3 (passives) – Debilitating Toxins 3/3 and Alchemical Advantage 1/3
We are only taking passives here to buff single-target damage. All these passives rely on your Poison Trap activating, giving you a big boost against poisoned enemies.
There are some alternatives to the build where you can use Shadow Imbuement’s Blended skill path to apply Vulnerability to enemies. This opens up an aspect spot on the amulet, which is really big, but we are sacrificing another skill to add to the skill bar for it.
Some builds let go of the Shadow Clone ultimate, but it really depends on the player’s preference. The clone does a lot of damage, and you can also use the ultimate to break away from stuns if your Shadow Step is on cooldown.
Ultimate and Key Passive
- Shadow Clone 1/1 – Prime and Supreme Shadow Clone
- Innervation 3/3 (passive)
- Trap Mastery 3/3 (passive)
- Adrenaline Rush 1/3 (passives) – Haste 3/3
- Key Passive – Momentum
Shadow Clone grants unstoppable and practically doubles your damage output for a short time. This is good against bosses and big pack pulls.
Since we are taking Momentum, it is important that you know how to activate it. The buffs can be activated by hitting a stunned, dazed, or frozen target. You can also get more momentum stacks by hitting an enemy from behind.
Gearing
Aspects

- Crossbow (2H Weapon) – Bladedancer Aspect
- Swords – Accelerating and Smiting Aspects
- Helmet – Shared Misery Aspect
- Chest and Pants – Disobedience and Cheat’s Aspects
- Gloves – Mangler’s Aspect
- Boots – Penitent Greaves (unique) – Wind Striker or Ghostwalker Aspect (non-unique)
- Amulet – Blast-Trapper Aspect
- Rings – Umbral and Ravenous Aspects
Most of the aspects are fixed with a few alternatives. Edgemaster’s Aspect can replace the Ravenous Aspect for more damage but sacrifices a bit of resource generation.
The Wind Striker Aspect gives you more mobility for speedrunning but sacrifices the chill and bonus chill damage bonus from the Penitent Greaves.
However, if you do go for the aspect instead of the unique Penitent Greaves, you’ll get better stats on your boots.
Uniques

The great thing about this build is that it doesn’t require any uniques at all. You can add the Penitent Greaves for more damage, but using rare boots that increase survivability while providing more utility is also viable.
The Harlequin’s Crest gives the build a ton of power, survivability, and utility, but the item is extremely rare. Almost every build in the game would love this unique, but it is only for the ones fortunate enough to find one.
Gems
- Armor – Ruby (Max Life %)
- Jewelry – Skull (Armor)
- Weapons – Emerald (Critical Strike Damage % against Vulnerable Enemies)
Topaz is also good on the armor pieces as it gives damage reduction when crowd-controlled. Most of your deaths will be from being crowd-controlled anyway.
However, Ruby is also more reliable if you are dispelling your crowd-control effects anyway.
Armor is the king of defenses in Diablo 4. You want to stack as much of it as possible and even buff your Disobedience aspect even more.
Stats

For offensive stats, we are looking for the following:
- Critical Strike Chance
- Critical Strike Damage
- Vulnerable Damage
- Dexterity
- Core Skill Damage
For defensive stats, we are looking for the following:
- Damage Reduction
- Damage Reduction from Close Enemies
- Damage Reduction from Poisoned
- Maximum Life
- Total Armor
These stats are in order of priority, but there are a few exceptions. Some gear pieces can roll other stats that are extremely useful. These are the stats that you should look for, and they should overlap the priorities above.
Cooldown reduction on the amulet and helmet is mandatory and holds #1 in priority. Resource generation can also roll on both pieces, so it could be useful as well.
Movement speed on boots is also mandatory. You can also add energy cost reduction on boots if you aren’t using Penitent Greaves. Amulets should also prioritize movement speed rolls.
Gloves should have additional ranks to Twisting Blades while having Critical Strike Chance and Attack Speed. The gloves and amulet would probably use up a ton of Forgotten Souls. You should be a bit thrifty when rolling stats on these items.
Your melee weapons should hold the initial DPS stat on the item as the #1 priority. For example, an item level 810 sword with one good stat should be better than an item level 770 sword with four good stats.
However, your crossbow doesn’t follow the rule. Since you are using melee skills, your crossbow’s DPS doesn’t matter. Just look for the best stats you can get. Don’t forget to upgrade your crossbow, even if the DPS doesn’t matter. The extra stats on the crossbow still matters, especially since it has high rolls because it is a 2H weapon, after all.
It is also worth noting that we are exclusively using the crossbow and swords for our weapons. Bows and Daggers don’t give the implicit stats that we want. Crossbow gives Vulnerable damage, while swords give critical strike damage.
Gameplay
The play style for Twisting Blades forces you to think a bit. Since dungeon layouts are different each time, increasing the return distance for your Twisting Blades will also be different each time.
When you encounter enemies, you want to attack the first target with Twisting Blades 2-3 times. After attacking, run immediately to the other enemies or dash towards them.
If you overshoot the dash, wait for the blades to return and return to the enemies once the blades circle you. If you overshoot by a lot, you can dash back or use Shadow Step to be in the middle of the enemies when the blades return.
You want to hit enemies with your dash to get more energy and increase your critical strike damage at the same time.
If you increase the distance of your Twisting Blades on each encounter, you’ll perform much better than what you can handle.
This is one of the reasons why my character could finish tier 50 dungeons at level 80 with suboptimal gear. With a lot of missing paragon points, glyphs, and gear upgrades, you can already see the damage potential.
For the Inner Sight activation, you want to keep your eye on which enemy is marked. You don’t have to focus on using Twisting Blades on marked enemies, but you could throw your dashes and Shadow Steps toward them and let the rotating Twisting Blades activate Inner Sight for you.
You’ll notice quite a difference in your gameplay if you change your aspects from Ravenous to Edgemasters because of resource management. If you cannot get your gauge up, you’ll be out of energy quite a few times.
For boss fights, you want to time your Inner Sight gauge when you can freely hit the boss. You don’t want to activate it when the boss can randomly disappear.
For some final tips, save your Shadow Step as much as possible. You can break away from stuns with the Shadow Step.
Use your Poison Traps as much as possible, but mainly on elites.
Shadow Clone can also be used to break away from stuns. If you are using it for more damage output, make sure to use it first before your other skills
Others
Elixirs for resource generation, crit strike chance, crit strike damage, and maximum energy are all good. Maximum life and armor elixirs are best for increasing survivability on higher-tier nightmare dungeons.
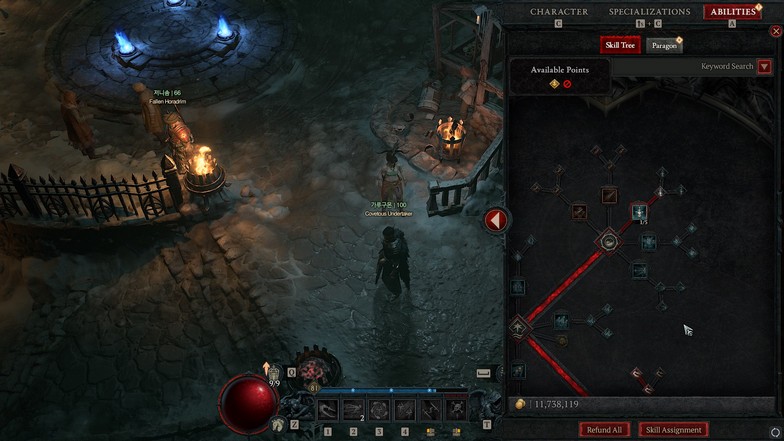
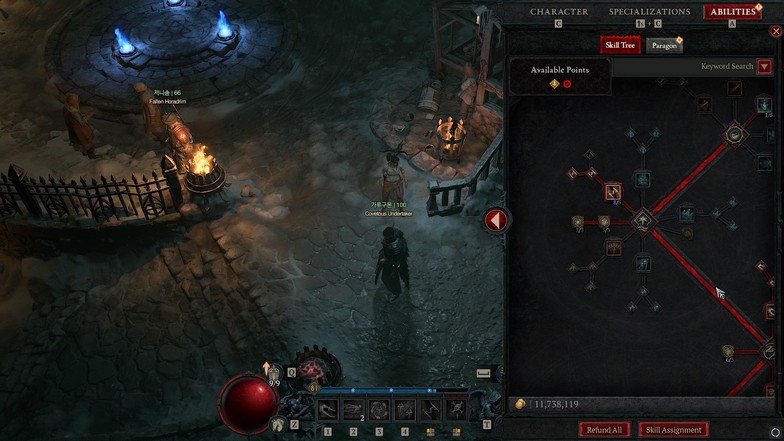
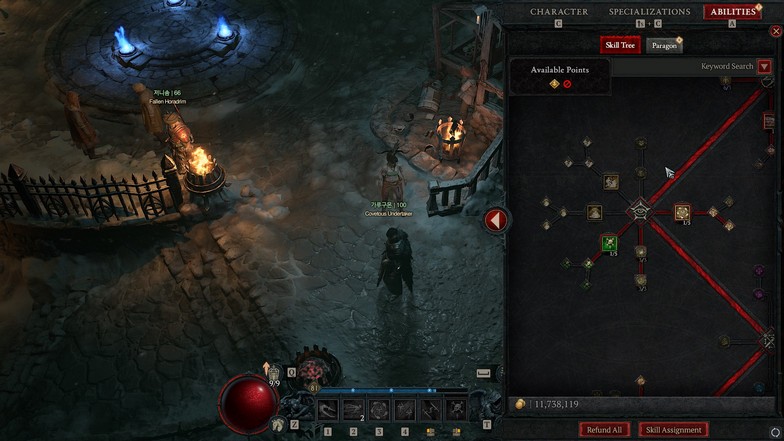
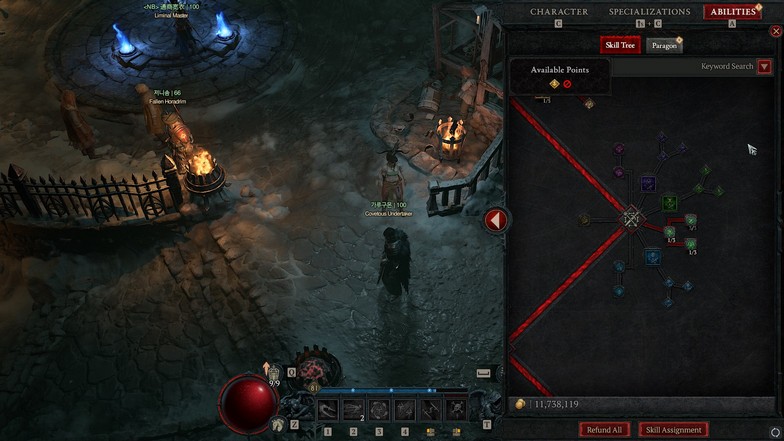
Paragon
For the build, Wudijo’s paragon is one of the best boards to follow for the Twisting Blades Rogue build.
Glyphs
- Closer
- Diminish
- Control
- Exploit
- Turf
- Combat
These are acquired in order, but I would highly suggest focusing on getting Exploit to 15 and using it first. This activates your build by applying Vulnerable to all enemies when damaged.
If you followed our previous Sorcerer Arc Lash build, the Exploit glyph works differently for the Sorc class. They still use Frost Nova to apply Vulnerable to the enemies.
Boards
- Deadly Ambush
- Cheap Shot
- No Witnesses
- Cunning Stratagem
- Exploit Weakness


