Hunts are exciting challenges in FF16 that provide players with thrilling battles and valuable rewards.
Basically, they work as side quests which demand you to do nothing but defeat an optional boss. Some might be pretty simple or just a different version of a previous enemy.
However, most are fun battles that present a new take on a creature you’ve fought. That said, these optional bosses must be found first. Luckily, we know the location of each and every one of them.
Not only you will find all Notorious Mark locations below, but also all you get for defeating them.
Ahriman
- Level: 25
- Reward: 200 XP, 35 AP, 5000 Gil, 10 Renown, 10 Magic Ash, and a Meteorite.
- Location: Southwest of Martha’s Rest, Rosaria Province Recommended

Ahriman possesses a shield bar, but fear not, for it is not an overly challenging fight. Beware of its laser beam attack and the chasing balls it throws.
Additionally, watch out for teleportation and the casting of Doom. Once the shield is down, unleash your fury for a well-deserved victory.
Aruna, The Angel of Death

- Level: 27
- Location: Clairview, The Holy Empire of Sanbreque
- Reward: 350 XP, 40 AP, 6200 Gil, 10 Renown, and a Clouded Eye.
To unlock this hunt, complete a main quest called “Release.”
Aruna will attack with dive and wind attacks, but they are easily avoidable. Seize the moments when it’s vulnerable and unleash your onslaught. Watch out for area-of-effect wind explosions.
This battle won’t be that hard since you’ve fought similar creatures, including Benedikta’s Wind Elementals.
Belphegor

- Level: 30
- Location: Behind The Broken Hills, The Imperial Province of Rosaria
- Reward: 700 XP, 60 AP, 8000 Gil, 20 Renown, and 2 Dragon Talon.
Belphegor’s swipe and charge attacks are its signature moves. Dodge its wide flamethrower and use your defensive skills to your advantage.
This battle isn’t that special. The fight will feel pretty much like any other fight against Wyverns in FF16.
The main difference here is that Belphegor is more aggressive and has a very impressive firebreath attack.
Strike when the opportunity arises and repeat the tactics until victory is yours.
Dozmare – Griffin

- Level: 28
- Location: South of Caer Norvent River Gate, Holy Empire of Sanbreque
- Reward: 650 XP, 55 AP, 8500 Gil, 20 Renown, 1 Scarletite, and 1 Meteorite.
To unlock this hunt, progress through the “Here Be Monsters” main quest and complete the “Blacksmith Blues” side quest.
Navigate through Lost Wing and Cutter’s Gate to reach the Griffin. Stay alert for its wind attacks and dive assaults.
Sekhret

- Level: 31
- Location: Northwest of Greensheaves, Martha’s Rest, Rosaria Province
- Reward: 800 EXP, 60 AP, 8200 Gil, 20 Renown, and 1 Minotaur Mane.
Sekhret’s charging attacks will give you ample time to dodge, but the timing might be a bit hard to get the first time.
Although this creature is somewhat aggressive, you don’t have to do much besides dodging its swings and attacking right after.
In fact, if you are good at dodging, you can stagger this creature rather quickly by perfect dodging each of its attacks and attacking right after.
With proper positioning and precise dodging, victory will not be hard to achieve here.
Severian

- Level: 31
- Location: Martha’s Rest, Rosaria Province, to the North of Sorrowise, Rosaria Province
- Reward: 800 XP, 70 AP, 8500 Gil, 20 Renown, and 1 Electrum.
Strategy: Severian unleashes an AOE attack, throws balls, and lunges at you. Evade these assaults and strike when it is vulnerable.
Be cautious of its Eradicate attack, and continue the battle with patience and precision.
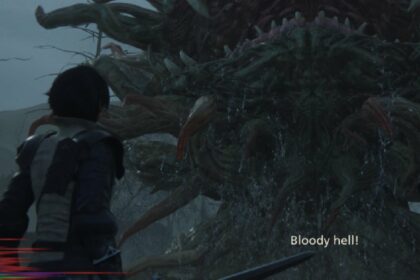
Muddy Murder – Flan Prince

- Level: 38
- Location: North of Hawk’s Cry Cliff, Rosaria Province
- Reward: 5200 XP, 95 AP, 12000 Gil, 30 Renown, and 1 Gelatinous Mass.
Unlock this hunt after completing the “Bolts from the Blue” main quest. Prepare to face the Flan Prince, a formidable opponent.
Stay vigilant for its various attacks and unleash your skills wisely.
The Flan has many weird and different attacks, but they usually have long windup animations. Generally speaking, you want to be careful and play safe.
Flan Prince’s damage is high, so getting out of the way and slowly damaging this creature is the best approach if you are having a hard time dodging its attacks.
A Hill to Die On – Fastitocalon

- Level: 34
- Location: Northeast of the Velkroy Desert, Dhalmalkian Republic
- Rewards: 1100 XP, 65 AP, 10000 gil, 20 Renown and 2 Scarletite
To unlock this hunt, you must complete the main quest called “Riddle of the Sands.”
Once you have access to it, head over to the Dollar Mill in Obelisk and make your way into the desert.
Proceed straight through the main Velcroy Desert until you reach the top right corner of the map. In this corner, you will encounter the Fastitocalon.
The Fastitocalon is a level 34 hunt and primarily vulnerable on its head. Its attacks include a water cannon that can be easily avoided by moving.
It also performs spinning attacks when it gains distance. Keep your distance and utilize ranged attacks to deal damage effectively.
Watch out for its special move called “Testudo Trump,” which involves water explosions and spins.
Soul Stingers

- Level: 32
- Location: West of The Fields of Corava, near Empity Hovel, Dhalmalkian Republic
- Rewards: 400 XP, 40 AP, 5500 Gil, 10 Renown, 50 Sharp Fangs, 20 Bloody Hide, and 10 Magicked Ash
This hunt involves multiple enemies known as Soul Stingers. To reach their location, travel to the Dravzod Obelisk in the Dhalmalkian Republic and head southeast.
Eventually, you will reach a corner where the hunt takes place.
The Soul Stingers fight as a group and one of their attacks, Acupuncture, will be coordinated and can deal massive damage if you don’t get out of their way.
The best strategy is to use area-of-effect (AOE) moves to handle multiple enemies simultaneously. It’s characterized by their tails lighting up and them moving together to deal damage.
Grimalkin

- Level: 32
- Location: The Cattery, South of The Sickle, Dhalmalkian Republic
- Rewards: 500 XP, 45 AP, 6100 Gil, 10 Renown, and 1 Grimalkin Hide
The Grimalkin hunt is situated in the Sickle area of the Dhalmalkian Republic. To find it, follow the road leading to the ruins in The Sickle.
As you approach, you will trigger a cutscene where the Grimalkin screams from above. However, the hunt won’t immediately engage you. You will need to defeat a few waves of smaller cats before the Grimalkin joins the fight.
The Grimalkin is a level 32 hunt and primarily uses close-range physical attacks. It performs swiping attacks, runs towards you, and occasionally executes a special move called “Savage.”
Dodge its attacks, counter when possible, and perform precision dodges. After defeating the Grimalkin, you will receive the Grimalkin Hide, which is essential for crafting the Excalibur sword.
The Nine of Knives

- Level: 38
- Location: The Jaw, Dal Malki Republic
- Rewards: 5000 XP, 90 AP, 10500 Gil, 30 Renown, 25 Wyrite, and 2 Meteorite
To encounter the Nine of Knives, head to the Jaw in the Dal Malki Republic. If you’ve already reached this location, simply follow the road straight ahead.
The Nine of Knives is a formidable opponent, using spinning attacks, rushes, and jumps. Watch out for its Poison Mist, which inflicts massive damage, and its Smoke Screen, followed by a lunging attack.
By dodging its attacks and capitalizing on vulnerable moments, you can gradually whittle down its health.
Break of Worlds – Atlas

- Level: 45
- Location: East of Cressida, Province of Rosaria
- Rewards: 15000 XP, 120 AP, 20000 Gil, 50 Renown, 1 Fallen Iron, and 1 Orichalcum
The Break of Worlds hunt features Atlas, one of the first S-Rank hunts in the game. To initiate this encounter, make your way to the East Pool Obelisk in the Province of Rosaria.
From there, cross a bridge, traverse the Broken Hill area, and continue through Ria Non’s Ride. Eventually, you’ll reach a dead end where Atlas awaits.
During the battle, Atlas will use a combination of long-range and close-range attacks, including dropping objects from the air. Stay vigilant, avoid its attacks, and seize opportunities to deal damage.
Bomb King

- Level: 33
- Location: The Crock in The Holy Empire of Sanbreque
- Rewards: 1000 Gil, 65 AP, 9000 Gil, 20 Renown, and 1 Bomb Ember
To unlock the Bomb King hunt, complete the main quest “Letting off Steam 3” (quest number 47). The hunt begins with a side quest called “Weird Science,” given by Owen in The Hideaway.
Once you’ve obtained the quest, travel to the Holy Empire of Sandberg and head to the Dragon’s area Obelisk.
From there, navigate through the foresty region until you encounter the Bomb King. Be cautious of its explosive attacks and prioritize taking out any summoned bombs it may call for assistance.
The Ten of Clubs

- Level: 35
- Location: Vamare, in The Fields of Corava, Dhamakian Republic
- Rewards: 2200 XP, 70 AP, 9200 Gil, 20 Renown, 1 Scarletite, and 1 Meteorite
In the hunt known as The Ten of Clubs, you’ll need to reach the Damakian Republic. Begin from the Dravozd Obelisk, move south, and pass through the Empty Hovel and Fields of Corava.
Proceed until you reach Vamar, or if you have unlocked the Creator of Obelisk, make your way from there.
The Ten of Clubs fight is relatively straightforward, with the creature using a move called Pine Force to throw heated rocks in a straight line. Avoid its swings and exploit its vulnerabilities to emerge victorious.
The Mageth Brothers

- Level: 38
- Location: Quietsands, Province of Rosaria
- Rewards: 5100 XP, 90 AP, 13000 Gil, 30 Renown, and 2 Meteorite
The Mageth Brothers will be located near the beach to the north of Port Isolde’s Obelisk. There’s no missing them once you get to Quietsands.
Since you will be facing three enemies, it’s important to be cautious and avoid getting overwhelmed. It’s recommended to group them together and use area-of-effect attacks to damage them all at the same time.
Watch out for their special moves, such as “The Last Crusade” where they team up to rush you and “Kriya Equim” which is a powerful swing.
Ruin Reawakened – Svarog

- Level: 50
- Location: Mornebrume, Holy Empire of Sanbreque
- Rewards: 25000 XP, 300 AP, 30000 Gil, 60 Renown, 1 Orichalcum, 1 Fallen Enigma, 1 Amber, and 1 Empty Shard
To unlock this hunt, you need to reach the Holy Empire of Sanbreque and proceed to the Carenorvit Glory. From there, head east and then south until you reach Mourn Broom.
Continue south until you arrive at an open area where a cutscene will trigger, introducing the giant dragon, Svarog. Svarog is a formidable rank S hunt with level 50 difficulty.
Be prepared for its attacks, including “Blazing Legion,” which involves a barrage of fireballs, and its line attacks that explode upon impact.
Dodge its spinning attacks and area-of-effect explosions. Maintaining range attacks with Bahamut’s Impulse and Satellite moves can be beneficial.
Watch out for its devastating moves like “The Last Dance” and “Embroil” as its health decreases.
The Pack

- Level: 33
- Location: South of Tabor in the GIlded Path, Damalkian Republic
- Rewards: 700 XP, 50 AP, 5800 Gil, 10 Renown, 20 Sharp Fang, 50 Bloody Hide, and 10 Magicked Ash
To access this hunt, you must complete the main quest “Cloak and Dagger” (Quest 56). Head to the Damalkian Republic and reach the Tabor Obelisk.
From there, exit the pathway and proceed to the open area where you will encounter The Pack. The Pack consists of a group of wolves roaming around.
Since you will be fighting many wolves at once, make sure to use area-of-effect attacks to defeat them efficiently. Beware of their “Throw the Hunt” move, which becomes more powerful if more wolves are present.
The Man in Black – Holy Trumpitour

- Level: 36
- Location: At the end of the Cellar Passage, Holy Empire of Sanbreque
- Rewards: 2200 XP, 75 AP, 9800 Gil, 20 Renown, 1 Scarletite, and 1 Meteorite
This rank B hunt requires completion of main quest 56, “Cloak and Dagger,” and side quest “For Great Justice Too.”
To reach the hunt location, go to the Holy Empire of Sanbreque and head to Lost Wing. Find the Lost Wing Obelisk and proceed to the indicated location.
Holy Trumpitour hits hard, using multiple combo swings and attacks like a flamethrower, jumps, and ranged shots.
Beware of its wide flame thrower attack and stay behind it to avoid damage. Utilize range attacks and timing to defeat Holy Trumpitour.
Dread Comet

- Level: 38
- Location: The Sickle, Dhalmekia
- Rewards: 5300 XP, 90 AP, 13000 Gil, 30 Renown, and 1 Comet Feather
To find the Dread Comet, head to the Dhalmakian Republic area on your map. They will be between The Sickle and The Fields of Corava.
This hunt is relatively simple, as the Dread Comet doesn’t even have a yellow bar to be staggered like stronger enemies usually do.
Upon completion, you’ll receive 1 Comet Feather, which you can later use to craft the Oroboros Belt.
Carrot

- Level: 31
- Location: Whispering Waters, Province of Rosario
- Rewards: 2000 XP, 70 AP, 10000 Gil, 10,000 gil, 20 renown points, 1 Morbol Tendril, and 1 Morbol Flower
To unlock the Carrot hunt, you need to have the main quest “Like Father, Like Daughter” active, as well as the subquest “A Song of Hope” and the side quest “Please Sir, Can I Have Some Morbol.”
Visit The Hideaway and talk to the botanist to activate the quest. Once available, it will appear on the hunt board.
Head to the Three Reeds Obelisk in the Province of Rosario and follow the path to Whispering Waters. The hunt will trigger when you reach the middle of the area, and Carrot will emerge from the water.
Be cautious of its attacks, such as bad breath and tentacle strikes. Dodge its charges and stay mobile throughout the battle. Defeating Carrot rewards you with, among other things, the Morbol Flower, a key item for completing the quest.
The Tricephalic Terror – Gorgimera

- Level: 45
- Location: Velkroy Desert, Northwest of The Dalimil Inn, Dhalmekian Republic
- Rewards: 15000 XP, 120 AP, 20000 Gil, 50 Renown, and 1 Orichalcum
To undertake The Tricephalic Terror hunt, you must progress to the main quest “Across the Narrow” and visit the infirmary.
Afterward, head to the Dhalmekian Republic and reach the Dollar Mill area. From there, continue north until you spot Gorgimera in the distance. Gorgimera may seem intimidating but is actually straightforward to defeat.
It primarily uses elemental attacks, so staying out of harm’s way is crucial. Watch out for ice attacks, flamethrowers, and the Delta attack with three elemental circles.
Pandemonium

- Level: 50
- Location: Between Skaithfarr and Wolfdarr, The Kingdom of Waloed
- Rewards: 15000 XP, 120 AP, 20000 Gil, 50 Renown, and 1 Stained Loincloth
To fight Pandemonium, you must first complete Main Quest 63, “Foot Falls,” to unlock the hunt. Follow the Shadow Coast to the Kingdom of Waloed. Once you reach a dead end, prepare for the battle.
Pandemonium’s attacks include a damaging orb from the sky, three imploding orbs, teleportation strikes, and explosions on the floor.
This fight is not necessarily super hard, but it the Orc’s attacks can be quite vicious, so pay attention to his windup animations so you can avoid them properly.
Gobermouch

- Level: 38
- Location: Eistla, The Kingdom of Waloed
- Rewards: 4800 XP, 90 AP, 15000 Gil, 30 Renown, and 1 Primitive Battlehorn
To unlock this hunt, you need to complete the main quest “Brotherhood.” Once unlocked, head to the Eistla Obelisk in the Kingdom of Waloed.
From there, go straight in the opposite direction of the stairs and climb a ladder. You’ll find Gobermouch in front of you. This hunt is relatively easy. Just make sure to beware of its Goblin Punch, which can knock you back, and its Little Swing, which deals significant damage.
Once you defeat Gobermouch, you will receive the Primitive Battlehorn. This item can be used to craft powerful weapons.
Agni

- Level: 15,500
- Location: To the North of The Edge of Infinity, The Kingdom of Waloed
- Rewards: 8000 XP, 100 AP, 15500 Gil, 35 Renown, and 1 Stone Tongue
To undertake the Agni hunt, you must progress through the main quest “Edge of Infinity” and reach the Edge of Infinity Obelisk.
Follow the pathway until you reach an open area, where a cutscene will trigger the hunt. Agni’s main move is Collider, where it rolls up and zips past you.
Time your dodges to avoid getting hit. Agni also uses a flamethrower and tail attacks. Take advantage of its vulnerable moments and deal damage.
Defeating Agni rewards you with the Stone Tongue, a key item for crafting the Oroboros Belt.
Bygul

- Level: 40
- Location: Kritten Hollow, The Kingdom of Waloed
- Rewards: 8000 XP, 100 AP, 16000 Gil, 35 Renown, 1 Meteorite, and 1 Coeurl Whisker
The Bygul is a level 40 Coeurl. In order to to find this creature, head to the Ravenwit Walls Obelisk in the Kingdom of Waloed. From there, proceed straight until you reach Criton Hollow.
Bygul will be roaming in this area. Bygul’s moves are predictable, but be cautious of its Static Torrent, Whip Crack, and straight lunge attacks.
Keep moving and dodge effectively. Bygul also has ranged attacks. Defeating Bygul grants you a Coeurl Whisker, which can be used for crafting purposes.
Usher to the Underworld – Thanatos

- Level: 42
- Location: Main passage of Titan’s Wake, Dhalmekian Republic
- Rewards: 9000 XP, 110 AP, 17000, 45 Renown, and 1 Darksteel
To begin the Usher to the Underworld hunt, travel to the Kritov Obelisk in the Dhalmekian Republic. Follow the eastern pathway until you reach the Titan Wakes area.
A cutscene will trigger, and Thanatos will appear. Watch out for Thanatos’ Spirits move, which shoots a continuous beam. Get behind Thanatos during this move and deal damage.
Another move to be aware of is Destroodo, which causes explosions around the map. Stay close to Thanatos and avoid its charge beam attacks.
Defeating Thanatos rewards you with Darksteel, a valuable material for crafting.
The Blood Moon – Terminus
- Level: 40
- Location: The Crock, The Holy Empire of Sanbreque
- Rewards: 3200 XP, 85 AP, 9800, 35 Renown, and 2 Meteorite
The Blood Moon is a unique hunt in FF16 that puts you against a huge technological sphere from the time of the Fallen.
To start it, you must go to the same area where you fought The Bomb King, which is called The Crock. Once there, activate the hunt by interacting with the giant ball on the floor.
Terminus possesses several moves, including shooting balls, a charging beam, attempts to slam you, an electric AOE, and a move called “Short Circuit.”
Pay attention to the floor markings during the Short Circuit attack to identify the safe direction.
The Wailing Banshee – Gizamaluk

- Level: 41
- Location: Garnick, West of Vidargraes, The Kingdom of Waloed
- Rewards: 3000 XP, 80 AP, 9700 Gil, 45 Renown, 1 Clouded Eye, 20 Sharp Fang, 10 Magicked Ash
To unlock this hunt, you must first complete the main quest “Back to Their Origin.” Once unlocked, head to the Vidar Gray’s Obelisk in the Kingdom of Elude.
From there, proceed to the Garnik Cacophony area. Gizamaluk has various moves, including summoning exploding wind damages and shooting wind balls.
Kuza Beast

- Level: 40
- Location: Balmung Dark, The Kingdom of Waloed
- Rewards: 5500 XP, 90 AP, 15000 Gil, 35 Renown, 1 Behemoth Shackle, and 2 Meteorite
The Kuza Beast is a unique hunt that can only spawn during the side quest “Nobody’s Tools.”
In order to get this side quest started, you will have talk to Doris at the Hideaway once she has a green icon on her head.
Proceed to the Ravenwit Obelisk and follow the green quest marker. Without spoiling the details of the quest, complete the objectives and reach the center of the Coliseum to initiate the hunt.
Its moves include spinning attacks and comet attacks. Be cautious of its charge attack. All that said, the Kuza Beast is not among the hardest Behemoths in the game.
The Masterless Marauder – The Behemoth King

- Level: 47
- Location: Vidargraes, The Kingdom of Walude
- Rewards: 20000 XP, 200 AP, 20000 Gil, 55 Reonown, 1 Behemoth Shackle, 1 Orichalcum
To encounter the Behemoth King, complete the side quest “Nobody’s Tools” mentioned earlier. This hunt is a rank S and one of the toughest Behemoth fights.
In order to fight it, simply fast travel to the Vidargraes Obelisk in Waloed. It should be pretty easy to spot this massive beast in the open fields of this area.
Be prepared for its powerful attacks, including lightning strikes and comets falling from the sky. Avoid its Male Storm ability and take advantage of its moments of vulnerability to deal damage.
At some point, the Behemoth King will start casting many different spells at once, and it might be really hard to understand what is going on.
That’s his most dangerous phase and you should focus on staying alive until you have a window to attack a bit more safely.
Knight of the Splendent Heart

- Level: 42
- Location: Royal Meadows, Holy Empire of Sanbreque
- Rewards: 9000 XP, 105 AP, 17000 Gil, 35 Renown, and 2 Meteorite
To unlock this hunt, you need to complete the side quest “Under New Management 2.”
Head to the obelisk in Northridge, or if you haven’t unlocked it, make your way through the Royal Meadows and reach the Royal Meadows Obelisk.
The mechanics of this hunt won’t be too challenging since you’ve battled numerous dragoons in the game.
The Knight will perform an advanced dive called Mirage Dive, marking multiple spots on the ground and diving down on them. It will also do one to three swings and jump in the air to throw its lance down.
Watch out for Mirage High Dive, which hits harder than the previous move, and Phantom March, where the Knight falls on all the marked spots, dealing continuous AOE damage.
Grim Reaper – The Prince of Death

- Level: 40
- Location: Westwatch, near Cape Orsierre, The Holy Empire of Sanbreque
- Rewards: 8000 XP, 105 AP, 17000 Gil, 35 Renown, and 2 Meteorite
To access this hunt, you must complete the side quest “Under New Management 2.” Head north from the Northreach Obelisk and then turn west once you exit the area.
Continue along the path until you reach Westwatch, where you’ll find the Grim Reaper, also known as the Prince of Death.
Despite its ominous name, this hunt is not among the hardest hunts of the game.
The Grim Reaper has the ability to teleport, so stay aware since it can suddenly show up at your face and swing that large weapon for a ton of damage.
It will perform slash attacks that are not too hard to dodge and make him very vulnerable if you can parry them.
Additionally, it can throw long-range scythe attacks and create explosive damage on the ground. Take advantage of the moments after it performs these attacks to deal damage.
Watch out for the Soul Harvest attack, where the Grim Reaper lunges at you multiple times, performing rapid and spinning attacks.
Precision dodging and moving out of the way will help you avoid this devastating move. As you gradually chip away at its health, you’ll be able to defeat the Grim Reaper.
As a reward, you will receive the Darksteel, which is needed to craft the best sword in FF16, the Gotterdammerung.