The Destroyer is one of the three mechanical bosses and is a step up from any previous bosses in Terraria. Like the other mechanical bosses, defeating the Destroyer is quite an accomplishment.
Defeating the Destroyer can be difficult; however, you can make it much easier with the correct setup and preparation. Such preparation includes a boss arena, the most suitable equipment, and weapons, and understanding the attack patterns of the Destroyer.
This Terraria Destroyer guide will teach you all you need to know about defeating the Destroyer, including the mentioned factors and more. It’s important to remember that the Destroyer is a challenging boss, and it may take you multiple attempts before you succeed.
Having said that, by following this guide, you’ll be able to defeat the Destroyer much more quickly.
What is the Destroyer?
Before knowing how to defeat the Destroyer, you should first understand what the Destroyer actually is. The Destroyer is a hardmode boss that is one of the three mechanical bosses. The other mechanical bosses are Skeletron Prime and The Twins.
If your world’s evil is Corruption rather than Crimson, and you haven’t cleared the evil in your world, you’ll be more familiar with the Destroyer. This is because it resembles the Eater of Worlds – a pre-hardmode corruption-exclusive boss.
Not only does the Destroyer resemble the Eater of Worlds, but it has the same movement and abilities as it. However, although they are very similar in terms of appearance and movement, the Destroyer is considerably more difficult to fight.
The Destroyer is spawnable in two ways. The first is using a Mechanical Worm during the game’s nighttime (between 7:30 pm and 4:30 am). If the Destroyer has not yet been defeated in your world, every enemy has a 1/2500 (0.04%) of dropping a Mechanical Worm. Note that this is only applicable once you’ve entered hardmode.
You can also obtain a Mechanical Worm via crafting at a Mythril or Orichalcum anvil. The ingredients required are 6 Rotten Chunks/Vertebrae, 5 Iron/Lead Bars, and 6 Souls of Night.
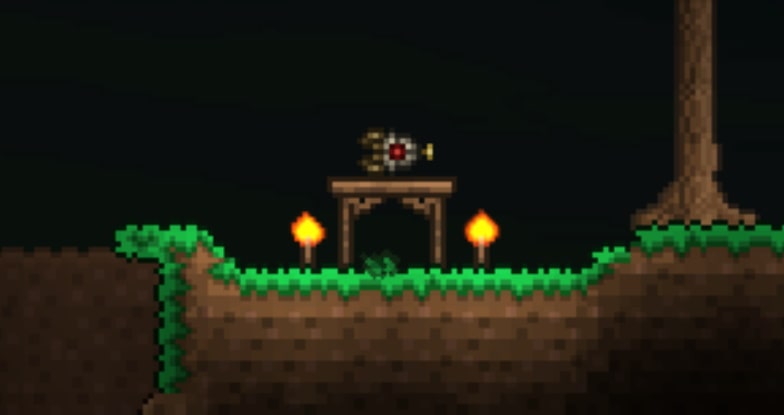
Alternatively, you can destroy a Demon or Crimson Altar. After doing so, the Destroyer has a 1/30 (3.33%) chance of spawning at dusk if no other mechanical bosses have been defeated.
If this occurs, it warns you slightly in advance with the status message “You feel vibrations from deep below…”. This will only work if the Destroyer has not yet been defeated in your world.
It’s worth mentioning that you must kill the Destroyer before dawn; if you don’t, it will flee, then despawn.
Defeating the Destroyer is a great way to get Souls of Might and Hallowed Bars, as it’s guaranteed to drop 25-40 and 15-30 of each, respectively. These are important for crafting weapons, armor, and other equipment that are essential late-game.
The Fight
Compared to other fights, such as the Plantera fight, the Destroyer’s fighting mechanics are pretty straightforward. However, it deals a lot of damage and moves pretty quickly. Therefore, you should still be very careful when fighting it.
Similar to the Eater of Worlds, the Destroyer will dig underground to attack you from below. You should always try and dodge these attacks because the head of the Destroyer deals the most damage.
The Destroyer is made up of segments: the head is unique, but the rest of the body segments have the same function. You must kill all segments of the Destroyer to defeat the boss.
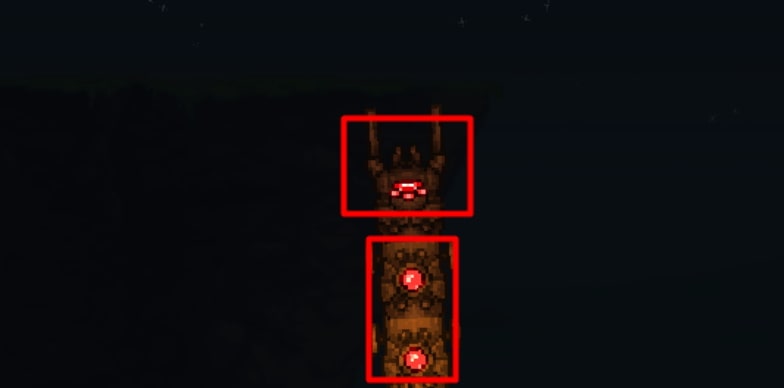
Each segment of the Destroyer will fire lasers at you. While they don’t deal a huge amount of damage, there are so many of them that it’s difficult to dodge them all; however, you should do your best to dodge as many of them as possible.
Probes will sometimes spawn when the Destroyer takes damage. Despite dealing a lot of damage, they can be pretty useful. This is because they drop hearts when killed (1/3 chance); these will heal you for 20 health when you pick them up.
When dealing with the Probes, it’s best to use weapons with a large hitbox spread, such as flails, broadswords, or ranged weapons with similar effects like the Shotgun. Doing so will ensure you are able to handle the number of Probes with ease.
Because of the Destroyer’s massive health pool, using a piercing or AoE (area of effect) weapon is pretty much a necessity. It may seem tempting to use a high damage-over-time weapon, such as the Nimbus Cloud, where the Destroyer spawns; however, this should be avoided.
The Probes spawn at the same rate the Destroyer takes damage meaning that using a damage-over-time weapon will likely result in you being overwhelmed by the vast number of Probes that are spawning.
When you’re avoiding the Destroyer, it’s crucial to remember to always travel up – never down. This is because, by traveling downward, the Destroyer can practically trap you with its body, which is very dangerous.
Boss Arena
Like any boss fight, from defeating Skeletron to defeating the Moon Lord, having a good boss arena is vital. The Destroyer is an unusual boss regarding movement and mechanics, so it’s even more important to have a sufficient boss arena.
You should build several layers of platforms in the sky; many types of wings are available at this point in the game, so getting there won’t be a problem. There should be at least 4 layers of platforms, and each of them should be 5-7 tiles vertically apart.
Scattering Campfires and Heart Lanterns around your boss arena is an absolute necessity. These will increase health regeneration. Furthermore, the Campfire will provide additional light.
Crafting a Campfire is simple – all you need is 10 wood (of any type) and 5 torches. This means that you can craft many of them without any problem. On the other hand, crafting a Heart Lantern is more difficult but still pretty straightforward – especially at this point in the game. You’ll need a Life Crystal and 4 Chains. Making Chains is also easy.
Campfires and Heart Lanterns both act as background blocks. This means that you can pass through them at no detriment to your mobility.
Another common strategy to improve your health regeneration is using pools of honey. When you’re in a pool of honey, you’ll be granted the “Honey” buff, which gives extra health regeneration.
Honey is a liquid; however, it can be trapped using bubble blocks. Not only do bubble blocks trap the honey, but they also act as walls, meaning that you can pass through them. This will stop them from interfering with mobility.
The combination of Campfires, Heart Lanterns, and the “Honey” buff will provide sufficient health regeneration for your boss fight.
To further boost the rate at which you regenerate health, you can also use Heart Statues linked up to timers with wire. When linked up correctly, Heart Statues will drop hearts that regenerate small amounts of health. Note that only 3 hearts can be in a small area at any one time; however, a solution to this is spreading out the Heart Statues.
You can find Heart Statues at random locations in any underground biome. But, they are more likely to be found in Underground Cabins than in any other place.
Building a suitable NPC house near your boss arena is recommended. This is for the Nurse. The Nurse is very useful because, at a small cost, she can instantly restore all of your health as well as remove any debuffs you are afflicted with. The ability to do this is invaluable and should absolutely be utilized during your boss fights.
The Dryad is recommended for some bosses; however, this isn’t the case for the Destroyer. While she provides a boost in health regeneration and a thorns effect, the thorns effect can act as a handicap. This is because the thorns can trigger the Destroyer’s Probes to spawn.
A crucial placeable for magic users is the Star in a Bottle. The Star in a Bottle is very simple to craft and increases mana regeneration considerably. It’s craftable by hand (it doesn’t need a crafting station) and requires 1 Bottle and 1 Fallen Star per Star in a Bottle.
Armor
There are several armor options for fighting the Destroyer, and of these sets, the one you choose is entirely up to personal preference. At this point in the game, there are armor sets suitable for you – regardless of class setup.
Adamantite Armor
The first set is the Adamantite armor set. Of all armor types available at this progression point, Adamantite armor provides the best overall increase in stats. Having said that, however, it doesn’t have a unique set bonus. Still, Adamantite armor is arguably the best choice.
Additionally, there are Adamantite headpieces suitable for different class setups: the Adamantite Headgear, Helmet, and Mask. These are best suited to magic, melee, and ranged users, respectively. All headpieces require the same amount of resources.
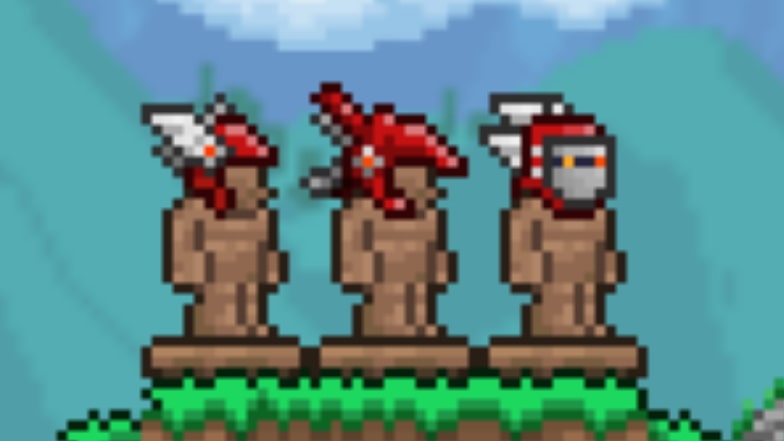
Crafting a full set of Adamantite armor with one headpiece requires 54 Adamantite Bars. The crafting station required is a Mythril or Orichalcum anvil.
Titanium Armor
Another viable armor set is Titanium armor. It provides high stats and the Titanium Barrier buff. After attacking, this buff grants a defensive barrier of shards that will deal damage to incoming enemies.
You can have up to 7 shards around you, and each deals 50 damage with high knockback. These shards last 10 seconds but refresh when you attack.
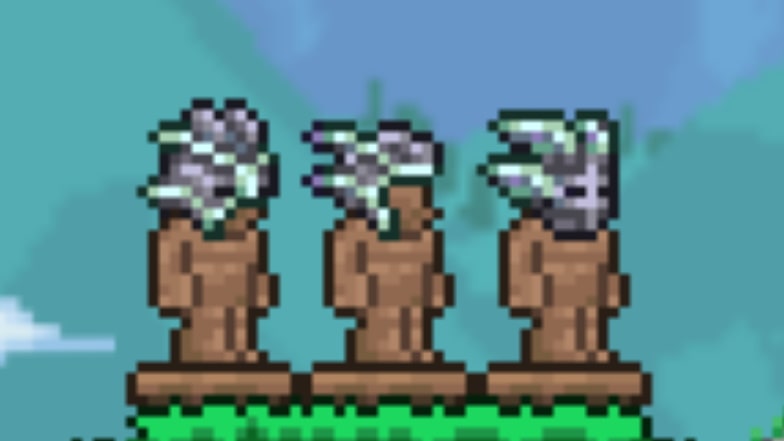
Like Adamantite armor, Titanium armor has 3 headpiece options: the Titanium Headgear, Mask, or Helmet. These are best suited to the same class setups as the Adamantite headpieces.
Crystal Assassin Armor
The Crystal Assassin armor set is also a solid option due to its high defense and dash ability. Additionally, it’s suitable for any class setup because each piece gives an extra buff to different aspects of gameplay.
Furthermore, a full set of Crystal Assassin armor allows you to dash. This dash is infinitely useful and frees up an accessory slot because the Shield of Cthulhu (Expert mode-exclusive) will no longer be a necessity.
To get Crystal Assassin armor, you must defeat Queen Slime. She will always drop one piece of Crystal Assassin armor upon death; however, the piece she drops is random.
Spider Armor
While class setup-specific armor isn’t generally necessary for fighting the Destroyer, if you’re playing as a summoner, there’s only one viable armor option.
This is Spider armor. A full set of Spider armor is crafted from 36 Spider Fangs and provides 20 defense, 3 extra minion slots, and 28% minion damage. On top of this, the set bonus is a further 12% minion damage bonus.
Accessories
Having good accessories is just as important as having the best armor and weapons. The best accessory options for fighting the Destroyer are as follows.
Wings
In Terraria, wings are absolutely crucial. There are lots of different types of wings to choose from; however, there are only 2 viable options. Wings allow you to move freely through the air. This is an invaluable ability for most boss fights.
Frozen Wings are the best wings available at this point in the game. They give flight for the longest amount of time, at the fastest speed.
To craft Frozen Wings, you’ll need 20 Souls of Flight and 1 Ice Feather. Unfortunately, Ice Feathers are quite rare; however, spending the time required to get one is entirely worth it.
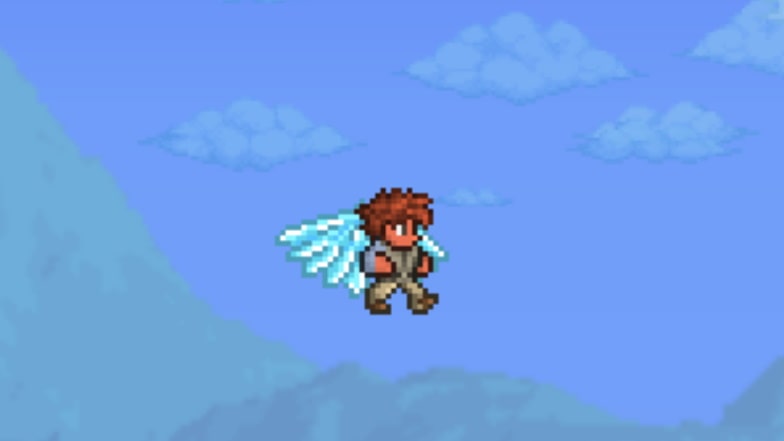
Ice Feathers have a 1/3 (33.33%) chance of dropping from an Ice Golem. Ice Golems will spawn during a Blizzard in any Snow biome. This includes artificially-made snow biomes.
The other wings option is Leaf Wings. Leaf Wings are much easier to obtain than Frozen Wings and give similar bonuses.
To get Leaf Wings, you simply need to ensure your Witch Doctor NPC is in a house in a Jungle biome (whether it is natural or artificial doesn’t matter). He will then sell Leaf Wings at nighttime for 75 gold coins.
Emblem
There are emblems for every class setup. At this stage in your adventure, you can choose from the Ranger, Sorcerer, Summoner, and Warrior Emblems. These increase ranged, magic, summoning, and melee damage, respectively.
All of these Emblems have a 1/8 (12.5%) chance of dropping after defeating the Wall of Flesh. Therefore, farming the Wall of Flesh until you have the Emblem best suited to your character and playstyle is recommended.
Cross Necklace
The Cross Necklace is an accessory that provides a unique ability. When equipped, it doubles the duration of your invincibility after taking damage. In Terraria, there is a mechanic that prevents you from taking damage constantly – the typical cooldown period is around 0.66 seconds.
However, by equipping the Cross Necklace, this time is doubled to approximately 1.33 seconds. This unique property can be incredibly useful against bosses, particularly those that rely on consistent damage rather than bursts of high damage, such as the Destroyer.
The Cross Necklace is a pretty rare item, with a 1/6 (16.67%) chance of dropping from Mimics. Mimics are rare hardmode enemies that disguise themselves at chests corresponding to their environment. For example, a Mimic in a Jungle biome would appear as a Jungle chest.
Cobalt Shield
The Cobalt Shield is an accessory that makes you immune to knockback when equipped. This ability is pretty much a necessity for melee users; however, it can be useful for any class setup. Additionally, it provides 1 defense point.
You can find a Cobalt Shield in the Dungeon in Gold Chests. Alternatively, you can also find them by opening Golden Lock Boxes – a grab-bag-type item found in Dungeon Crates.
Frozen Turtle Shell
While obtaining it may be time-consuming, the Frozen Turtle Shell is a very useful accessory for boss fights – particularly if you don’t have many healing methods.
The Frozen Turtle Shell puts a shell around you that reduces all incoming damage by 25% when you’re at or below 50% health. It will appear underneath your hotbar as a buff called the “Ice Barrier” buff.
To get a Frozen Turtle Shell, you must kill Ice Tortoises – an uncommon enemy found in the Ice biome. This accessory has a 1/100 (1%) chance of dropping from an Ice Tortoise, meaning that getting one can be time-consuming.
Having said this, it can be incredibly helpful for fighting the Destroyer and is worth the time required to get it.
Charm of Myths
The Charm of Myths is another form of health regeneration. While it’s equipped, you will regenerate 1 health per second. On top of this, it decreases the duration of the Potion Sickness debuff by 25%, meaning that you can use potions more frequently.
When used alongside a sufficient boss arena and with the appropriate potions, the Charm of Myths is fantastic for sustainability.
You can craft a Charm of Myths using a Band of Regeneration and a Philosopher’s Stone at a Tinkerer’s Workshop crafting station.
Weapons
Weapons are another integral part of fighting the Destroyer or any boss. After all, they are the main source of damage source. There are several weapon options for each class setup.
Melee
Due to the segmented nature of the Destroyer, using weapons that can deal damage to multiple targets at once is highly recommended.
Weapons such as the Drippler Crippler and the Dao of Pow are the best flail options because they can deal a lot of damage to several segments in one swing.
With the correct accessories and armor, the Fetid Baghnakhs can defeat the Destroyer pretty quickly. However, knockback immunity (granted by the Cobalt Shield) is a necessity.

Fetid Baghnakhs are a melee weapon with short range but incredibly high attack speed. This means that with no knockback, you can maximize the damage output of Fetid Baghnakhs.
They are another item dropped by Mimics, with a 1/5 (20%) chance of being dropped by Crimson Mimics.
Yoyos can be great for fighting the Destroyer. They have good range and accuracy while maintaining melee damage allowing for easy damage to multiple parts of the Destroyer at a time.
The Chik yoyo is a solid option and is pretty easy to make. All you need is 1 Wooden Yoyo, 15 Crystal Shards, and 10 Souls of Light. The crafting station required is a Mythril or Orichalcum anvil.
Finally, the Shadowflame Knife can be powerful against the Destroyer. This is because it has the ability to bounce off the Destroyer, allowing you to hit it and its Probes several times.
During a hardmode Goblin Army, the Shadowflame Knife has a 1/6 (16.67%) chance of dropping from Goblin Summoners, meaning that it’s one of the easier weapons to get.
Ranged
The Daedalus Stormbow is arguably the best ranged option to use against the Destroyer. Unlike most bows, it has the ability to rain arrows from the sky rather than shoot them from the bow.
Every single shot fires 3 arrows with a 1/3 (33.33%) chance to spawn an extra arrow while consuming just 1 arrow from your inventory. The arrows will fall toward the area that your cursor was, at the time of firing. It has a 1/4 (25%) chance of dropping from Hallowed Mimics.
If possible, you should use the Daedalus Stormbow with Jester’s Arrows. Holy or Unholy Arrows are also suitable but less powerful alternatives.
The Phantom Phoenix bow is also a viable option against the Destroyer. When lined up correctly, it can deal massive damage. It fires 2 arrows at a time that spread randomly; however, it also fires a large phoenix every third shot. This phoenix deals double damage and explodes upon collision.
At this point in the game, the Onyx Blaster is the best gun available. You should use it with Meteor Shot ammunition. It is especially good against the Destroyer because it fires a spread of 4 bullets while only consuming 1.
It also shoots an explosive projectile resembling dark energy that explodes on collision with a block or enemy.
Magic
Against the Destroyer, the Crystal Vile Shard is one of the most powerful magic weapons available. This is because of its piercing effect and armor penetration.
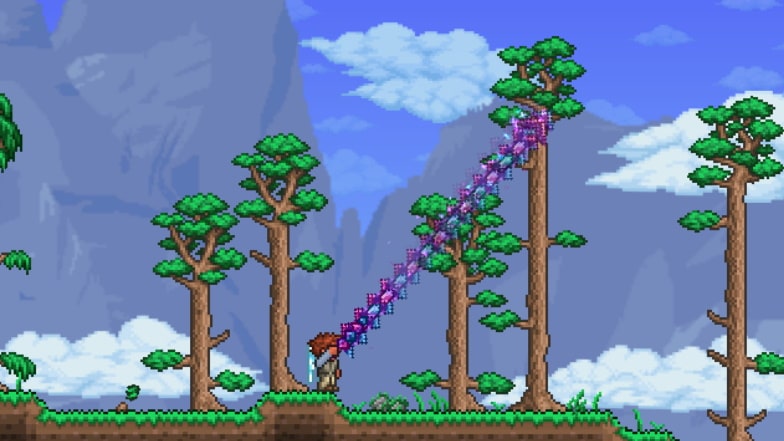
It is an upgraded version of the Vilethorn and fires a large, colorful, spear-like projectile. This projectile pierces through both blocks and enemies, meaning that it’s very effective against the Destroyer.
The Crystal Vile Shard is another weapon dropped by Mimics, with a 1/4 (25%) chance of being dropped by Hallowed Mimics.
Another very powerful option is the Tome of Infinite Wisdom. The tornadoes it spawns deal high damage and have infinite piercing.
However, you must have previously defeated at least one mechanical boss, as well as gotten past the second tier of the Old One’s Army, to be able to access the Tome of Infinite Wisdom.
Summoning
There are typically 3 types of weapons that summoners use: whips, sentries, and minions. Whips are similar to flails but have a special effect in that your minions will attack the last enemy attacked with your whip.
The best whip to use against the Destroyer is the Durendal; however, you must have already defeated at least 1 mechanical boss to be able to get it.
So, a less powerful but still viable alternative is the Firecracker. Enemies attacked by the Firecracker will be targeted by your minions and take 2.75x minion damage. On top of this, when a minion attacks a targeted enemy, a small explosion will occur. Unfortunately, the explosion doesn’t damage multiple targets.
While this isn’t relevant to the Destroyer fight due to its immunity to debuffs, it’s worth noting that the Firecracker also inflicts the “On Fire!” debuff to enemies. This debuff makes them take damage over time.
The Sanguine Staff and Optic Staff are the best minion weapons for fighting the Destroyer at this point in the game – both deal high damage. The Sanguine Staff is slightly easier to get than the Optic Staff; however, neither are particularly difficult.
Additionally, a Lightning Aura Rod is a sentry summon that can provide a little extra damage at no cost.
Potions
Finally, there are some potions that are practically mandatory for fighting the Destroyer. You should always carry a stack of the highest tier potion available to you at the time.
Endurance and Ironskin Potions will significantly increase defence. Similarly, Lifeforce and Regeneration Potions improve health regeneration substantially.
When used together, these potions all provide enhanced survivability which is essential when fighting the Destroyer.
Mana Regeneration Potions will, as the name suggests, improve your mana regeneration. This is crucial for magic users as you’ll be able to use your weapon without having to worry too much about your mana running out.
A way to increase your mobility is by using a Swiftness Potion. This will increase your maximum movement speed by 25% for 8 minutes.
As for damage, Rage and Wrath Potions will increase your critical strike chance and damage output respectively.
Conclusion
Now that you know how to fight the Destroyer, you can start farming Hallowed Bars and Souls of Might. Remember that it may take a few tries to defeat it; however, following this guide will significantly improve your chances of success.

