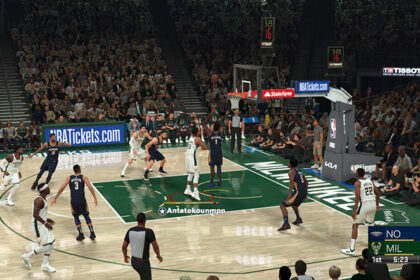
Hot zones can have a huge effect on your success when taking shots in NBA 2K23, both positively and negatively.
A cold zone can cause a shot that you swore was going to fall in the basket to instead bounce out into the hands of the defense, while a hot zone can help ensure that the last small bounce off the rim falls your way.
While NBA 2K23’s hot and cold zones aren’t the most important factor in determining the success of a shot, as the actual quality of said shot attempt itself does still matter, they do have a big impact on whether your shot ultimately falls in or not.
Due to this, it’s very important that you understand both how hot zones work as well as how to use them to your advantage.
The last thing you want is to miss a game-winning shot due to taking an unfortunate shot from a cold zone when you could’ve called for a screen to place yourself in a hot zone to attempt the shot instead.
Today, we’ll explain what hot zones are and we’ll show you how to get hot zones in NBA 2K23.
What Are Hot Zones?
In the simplest terms, hot and cold zones in NBA 2K23 are a system to let you know where on the court your player is having success at shooting and where they’ve been struggling with their shots.
The hot zones also act as a sort of momentum for your player, as you’ll find that shots taken from hot zones are more likely to go in, while you’ll see that shots taken from cold zones are more likely to rebound back into play.
Due to this combination of qualities possessed by hot zones, they can often act as a sort of feedback loop.
As a player finds more success from a specific area of the court, that area will eventually become a hot zone. Due to this, they’ll now have a greater likelihood of sinking shots from that area, which will keep the zone hot.
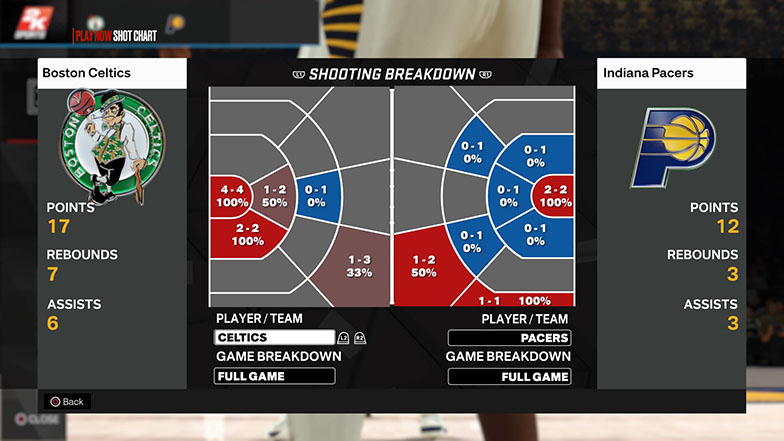
This feedback loop is also in play for cold zones: as a player begins to miss multiple shots from a particular area on the court, that area will become a cold zone. This means that now when a player takes more shots from that area on the court, they’ll have a harder time getting them to fall in, which will in turn keep that zone cold.
In NBA 2K23, there are fourteen total zones on the court; five zones make up the areas outside of the three-point line, while the remaining nine zones fill out the area inside it.
As you were most likely able to guess, hot zones are represented by the zone being colored red, and cold zones are signified by the zone being colored blue.
A gray zone shows that the zone is currently neither hot nor cold, meaning your player will see no boosts or penalties in shooting from that zone.
So, if you’re looking for how to get hot zones in NBA 2K23, the answer is actually pretty simple. To get hot zones, all you need to do is make shots consistently within a specific area.
Now that you know what hot zones are, how they work, how to use them, and how to read which zones are hot and/or cold for your player, the question is: where do you find this information?
How to Find Hot Zones
Knowing how hot zones work and what their advantages are isn’t of much use to you if you aren’t able to find where to access the information! Luckily for you all of the data on hot zones is very easily accessible.
In a Normal/Exhibition Game
In an exhibition game, all you have to do is go to the pause menu and scroll over to “Game Stats”. From there, you’ll want to scroll down to the bottom option of “shot chart”.
After choosing the shot chart, press either L1 and R1 (or LB and RB) to toggle from the shot chart to instead show “Shooting Breakdown”.
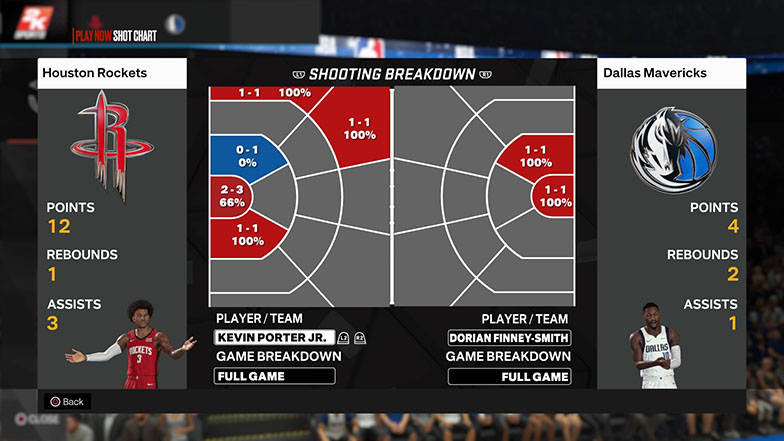
From this screen, you’ll first see a zone map of all shots taken during the game for both teams.
You can hover over either team name and use L2 and R2 (or LT and RT) to toggle between seeing the zone maps for individual players.
You can also move one option below the teams, where you can now use L2 and R2 (or LT and RT) to toggle between the view of zone maps for individual quarters.
In MyCareer
You can also quickly and easily access the stats for the hot and cold zones for your MyCareer player from the MyCareer menu or during a game.
To access the stats during a game in progress, you can use the same method of doing so in a normal game. Simply pause the game and scroll to “Game Stats”, before scrolling down to “Shot Chart”. From there, use L1 and R1 (or LB and RB) to toggle to “Shooting Breakdown” and use L2 and R2 (or LT and RT) to toggle to view of only your player.
You can also view a breakdown of the hot and cold zones for your entire career or on a year-by-year basis. To do this, you’ll want to begin at the MyCareer menu. Once there, simply use L1 and R1 (or LB and RB) to navigate to the “Play Next Game” tab. From there, scroll down to “Player Stats” and select it using X (or A).
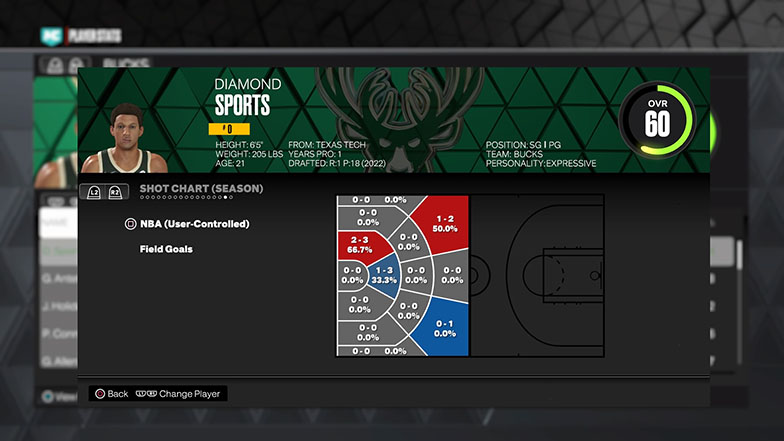
When your player’s name is highlighted, press R3 (pressing down on the right stick) To bring up the advanced stats. The first thing you’ll see is “career stats”. You’ll then want to use L2 and R2 (or LT and RT) to toggle between the different categories of advanced stats. Your hot zones (once established) will be the very last tab to the far right.
Final Word
In NBA 2K23, hot zones can and often do play a big role in a player’s rate of success when shooting, even if they don’t realize that it’s doing so.
Due to that, understanding how these hot zones work and how you can best take advantage of them can help give you a leg up in 2K23 whether you want to dominate against other players online or perform well enough against the CPU to earn yourself some sweet endorsements in MyCareer.
However, if you want to play the game, you can use NBA 2K23’s hot zones to your advantage. Is there anything you think we missed?

