Domination is one of the most popular game modes in Call of Duty Black: Ops Cold War. It also one of the best ways to level up because you will not be limited to your team’s score.
This involves teams capturing flags and holding them as long as they can until they get enough points to win. This article will help you strategize better in winning and earning more points to level up faster.
What is Domination?
Domination is a 6v6 game mode where the objective of the game is to control flags to score points for your own team. There are 3 flags to capture in any map and each team will spawn near one of the flag’s locations which are flag A and flag C. It is best to focus on 2 flags involving flag B.
The best setups are controlling A/B or B/C depending on which side your team spawns on. Always grab the nearest flag to your spawn and try to capture flag B and hold both until you win. This will be explained more in the main objectives for winning.
There are multiple maps available for Domination and the strategies depend on each map whether they are large open space areas or smaller maps where players can flank flags and cut off reinforcements easily.
How the Point System Works in Domination
The point system in Black Ops: Cold War is the same as all the other Call of Duty titles. It is still scored as 1 point for each flag captured every 5 seconds in the match. The first team to reach 200 points will win the match and there will be no time limit in this game mode as well.
Main Objectives for Winning in Domination
The main objective of domination is holding as many flags as you can, for as long as you can, rather than capturing flags multiple times.
Playing for kills is not the best way in winning but it can definitely help your team if you are able to secure a killstreak. This is not ideal because if you fail to get killstreaks up when you are not playing the flags, you will be a liability to the team.
Flags to focus on
Teams spawn near one of the flags at either A or C. The best strategy is to always capture 2 out of the 3 flags right at the start; a home flag, and fight for B.
Capturing B will always be chaotic as this is where the two teams usually find each other fighting. This is where you would want almost your whole team to pincer from two angles while covering stragglers from the side who are looking to capture your team’s current flag near your team’s spawn point.
On every map it will always be slightly advantageous to hold A over C, or C over A, along with B. It’s crucial to your team’s overall chances of winning that you determine whether A or C is better to hold for defending B, and then you focus your attention on winning that home flag.
On some maps, you’ll see a team immediately charge from the C spawn to the A flag because holding A and B is such an advantage in terms of where you spawn in proximity to capturing and defending the B flag.
Holding your 2-Flag setup
After capturing flag B, your team should ensure they have a solid setup to defend it. Once your team has set up a position that would make it hard for the enemy team to flank, they will lose a lot of time dealing with these players before even capturing flag B.
The ideal strategy is to hold onto either A or C, whilst winning and holding onto B.
Keep winning the battles to defend B while also ensuring you protect your own team’s flag near a starting spawn location. You want to make sure you keep spawning in the ideal place to retain your 2-flag setup so you will rarely need to go for the opposing team’s flag location and just focus on flag B.
When to try and capture the opposing flag
This is ideally not recommended because you would not want your team to be scattered too much on the map.
The reason you should try capturing the opposing flag is when they are trying to capture yours and your whole team does not have enough time to respond since you are all out of position. The best strategy is to just capture their flag but this will flip the spawn locations for both teams.
Another scenario would be if they are heavily invested in defending flag B and they are all in a good position to defend it.
Attempting to capture their flag even for a short time will alert them and will force them to scatter their team’s great position on flag B. If you’re in good communication with your teammates, you can simply run over their home flag to alert the enemy that you’re there, and then your teammates can launch a charge at B whilst your opponents are distracted.
Fighting for spawns
Normally, the spawns you want for your A/B or B/C setup is near A or C, depending on which side you spawn on at the start of the match. If you spawn C side but you want to capture A, sometimes it’s best to just ignore C and push as a team to immediately try to flip the spawns so that the opposition spawns at C.
Trip cap
Trip cap basically means that you are capturing all the flags in the map. This is only worth doing if you have a significant advantage in terms of active killstreaks and skill level against the other team. When you see that the enemy team has no idea what they are doing or are just playing for kills, all flags will be easy to control once you have an active air support like the Chopper Gunner and Attack Helicopter for your team.
Capturing and holding all 3 flags for even a minute will almost make it virtually impossible for the enemy team to come back. Sometimes this is also the only option to come back after being down at least 50-60 points while the enemy team is close to 200 already. This is Call of Duty’s version of a “Hail Mary” play.
For example, the enemy team has 190 points and your team is just hovering around 140 points. Holding 3 flags for one whole minute will get you 36 points for your team. Assuming you can hold it a bit longer than that and give up a 1 flag after, it is still possible to come back from a 50 point deficit.
Best Loadout to Use for Domination
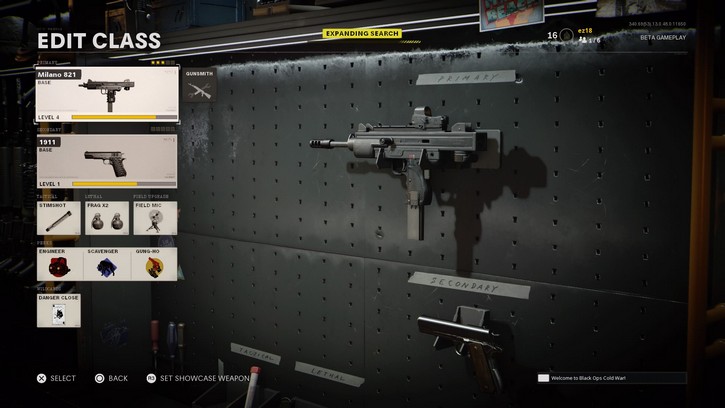
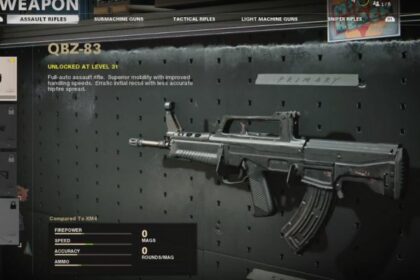
Going for a submachine gun or assault rifle for short to mid-range combat is ideal for small maps. If you try holding clumped up objectives with multiple covers all the time with the Milano 821, you will have the advantage against any gun. The space is so tight that submachine guns shine so well and shotguns will still have a disadvantage from peeking windows and enemies who are just about to enter the objective from mid-range.
Maps with open areas will favor assault rifles and tactical rifles more. Large maps with open space areas will render close-range weapons useless unless you camp certain areas that are not recommended because you might rarely see enemies go to it just based on how big the map is. Sniper rifles are also great but you will be hard-pressed into going for objectives that are not ideal unless you can quickscope extremely well.
You can still support your team with a sniper rifle but it is hard to tell if how many players on your team have a sniper rifle as their current loadout. If there are too many snipers on your team especially on Domination, you will most likely lose.
Tips and Tricks for Domination
- Killing on objectives will give more score than just killing players normally
- It is better to go on killing sprees than just trading 1 for 1 because it gives more points. This is easier said than done but securing high killstreaks like the Attack Helicopter will not only get you more points but also, help you secure the win
- Wait before calling out any killstreak and use them when you are safe. Also, keep in mind that if you use multiple Spy Planes on your team, it will be inefficient so you might as well hold on to it until the active one expires
- Have multiple loadouts for each map or playstyle you want
- Focus on a 2-flag setup as much as possible because it will be tricky to go for a trip cap and you might end up losing your 2-flag setup by doing so
- Pay attention to the score and check whether it is a good time to secure a trip cap when you are down big before it is too late. If the score is 141 to 170, you can still win with a 2-flag setup as long as you hold it until the match is finished
Combined Arms: Domination
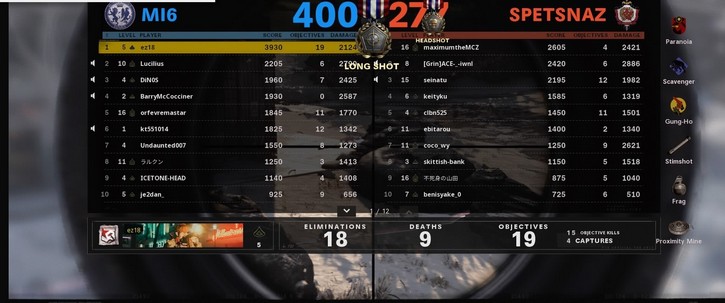
Combined Arms: Domination is a 12v12 multiplayer game mode and also requires the capturing of flags. The difference lies in the number of objectives to be captured. In Combined Arms: Domination, there will be 5 active objectives to captured at the same time.
You can strategize which flags to capture and hold. Holding a hot objective point can get you the killstreaks you need to hold off the enemies. This is why I recommend this game mode for leveling up fast because these objective points get you more score at the end of the game. Sneaking past a capture point all by yourself and securing it will get you +200 points and anyone you kill while doing that will get you +75 points with objective kills.
How to Use Vehicles Efficiently
Most vehicles in the game are mostly used for fast transportation than combat. In Combined Arms: Domination, players are most likely to have loadout changes that add weapons to destroy vehicles and killstreaks. Even if there is not much activity with vehicles, these weapons can still be effective to deal with killstreaks.
The only time you would use vehicles for combat is to try and pick off campers on an objective. They will be more focused on finding players that attack the objective on foot than to deal with vehicles while on an objective. It is not ideal to stay on vehicles for a long time because players will change loadouts once they know someone is using a vehicle like a tank
Preferred Flag Setup
Just like normal Domination, you would still want to ‘one-up’ your opponents ideally by holding 3 of the 5 flags available and hold it for as long as you can instead of trying to go for 4 flags at a time. You can use the strategies mentioned in regular Domination as it is still applicable here.
Try to hold a 3-flag setup as much as possible. If you see players blindly going to one objective, you can try to sneak past flags near their location and make them scatter.
Conclusion
If you want to bump up that W/L ratio instead of your K/D ratio, you should always be thinking about what is best for the team in all situations. While it is fun to just keep respawning and play what you want to play, losing hard can be frustrating especially if you experience enemies with multiple killstreaks active all the time. Remember to always play smart if you want to win and not just going to points blindly looking for kills.

