If you purchased the PlayStation version of Hogwarts Legacy, then you’re one of the lucky ones to have access to the Haunted Hogsmeade Shop quest.
In the game, the quest is actually called “Mind Your Own Business” but you cannot access it until the winter season in the game. For me, this was a little while after I completed the second trial, so it was my 29th main quest.
I’ll start off by saying that playing this quest was an incredibly fun and fairly challenging experience, and it is definitely a worthwhile addition to the game. Sorry, Xbox and PC gamers!
Anyway, the Haunted Hogsmeade Shop’s challenge can get a bit too daunting, and that’s why I’ve put together this guide to completing it. Let’s get right into the details!
Breakdown

To make this guide easy to follow, here’s a breakdown of the room-by-room process of completing the quest. This breakdown should make it easier for you to know how close you are to the end of the quest, just look at the text on top of the mini-map in the bottom-left corner of your screen.
- Step 1: Speak to Penny the house-elf
- Step 2: Speak with Cassandra Mason
- Step 3: Collect 1,500 Galleons to purchase the shop from Cassandra Mason
- Step 4: Speak to Penny the house-elf
- Step 5: Clean up and make repairs
- Step 6: Open the mysterious chest
- Step 7: Explore what lies below
- Step 8: Explore the library
- Step 9: Entertain Fastidio
- Step 10: Return to the foyer
- Step 11: Explore the atrium
- Step 12: Play with the poltergeist
- Step 13: Return to the foyer
- Step 14: Venture beyond the foyer doors
- Step 15: Challenge Fastidio
- Step 16: Return to the shop
- Step 17: Speak to Penny
- Step 18: Seek out Officer Singer
- Step 19: Confront Cassandra Mason
- Step 20: Return to the shop
Steps 1-6

The first six steps are pretty straightforward. Find Penny the elf at the far eastern end of Hogsmeade and follow the instructions that come up.
Be sure to have at least 1,500 Galleons as you cannot purchase the shop from the owner, Cassandra Mason otherwise.

It’s a fair trade as there are many ways to make Galleons easily, including looting eye-chests. There is a handful of these chests in Hogsmeade that yield 500 Galleons each, including one right behind Cassandra’s house.
Once you’ve paid for the shop and fixed it up with a simple spell (Reparo), you can go in the back and climb down the chest to begin the quest proper.
Steps 7-20

Before I go into the step-by-step walkthrough, I think it’s important to plan ahead.
The shop is haunted by a poltergeist named Fastidio, and you will hear his voice and see him a bunch of times during the quest. You cannot touch this character, which means you also cannot directly harm him.
Be prepared to dodge whenever he appears, and make sure to fill your easily accessible spell slots with damage spells, Lumos, and Wingardium Leviosa.
If you have Crucio, it will be useless here as the enemies you’ll encounter are not actually alive, they’re re-animated so they cannot feel pain. In the best-case scenario, using it will buy you a few seconds during damage spell cooldown periods.
Finally, a lot of brainwork is required here. It’s like working through a puzzle that’s intended to look more complicated than it actually is. You’re moving forward, but it will often seem like you’re going in circles as the poltergeist messes around with you.
Explore what lies below

In the first room, there’s a bunch of old stuff, mannequins that move every time you look away, and a chest containing a single hat.
At some point, the scene goes completely dark, so you need to use Lumos to find your way forward. There will also be a lot of shifting of your surroundings taking place to confuse you, but you just need to keep going forward until you arrive at a door flanked by two lantern holders.

One of the lantern holders has a lantern hanging from it, so you have to look for the second lantern and use Wingardium Leviosa to place it on the second one. This will activate and open the door.
You’ll find the second lantern floating somewhere on the right side of the room. Head into the now-unlocked room and you’ll meet the poltergeist waiting.

Prepare to dodge as he’ll chuck a few things at you for fun before allowing you to move forward. You can also try to break the items before they get to you but I find that dodging is easier.
When Fastidio leaves, you should notice a large locked door in the foyer and two smaller doors flanking either side of you. You need to explore each one of the rooms on both sides to find a way to unlock the door.
If you go left first, you’ll come to the library section.
Explore the library
In the library section, you’ll find another door flanked by two empty lantern holders. Use Lumos to find your way down the right-hand side until you come to a room with three doors.
This library area can be confusing and feel like you’re going around in circles, but listening to Fastidio will help as he’ll occasionally drop clues. I would also suggest retracing your steps when you begin to go in circles.
One after the other, go through the mazes behind each one of the three doors. Each time, it’ll lead you back to the room you started in and the door you’ve explored will disappear.
In my playthrough, I found a lantern in the room behind the third door but I had to fight off a bunch of animated mannequins to get to it. Lumos and your attacking spells are crucial.

It can be hard to see ahead of you even with Lumos, but you can place where the mannequins are by looking for the red arrowheads on your mini-map.
Once you have the lantern, take the exit back to the part of the library that has a locked double door. Place the lantern in a holder and head left until you come to an upside-down room.

You’ll notice an empty lantern holder on the other side of the room – you need to get to it.
Turn around, head down, and climb up the flight of stairs to get to the other side of the room. Look to your right and you’ll see the missing lantern in an alcove along the top right corner of the room.
Again, use Wingardium Leviosa to place it on the holder and the room should spin to offer you an exit.
You’ll have to repeat this theme of levitating a lantern onto the appropriate holder one more time in this area, but once you’ve attached it, you can get back to the library double door.
Entertain Fastidio
Fastidio makes another cheeky little appearance. Dodge and roll and he’ll be gone.
Return to the foyer
Go back to the foyer. You’ll see that one of the bars blocking the main door has been removed. Now we need to get rid of the other bar.
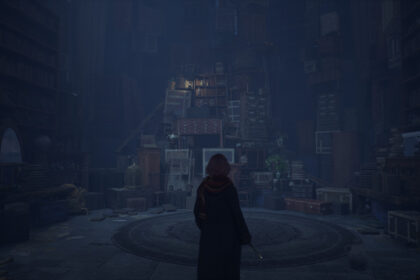
Explore the atrium

Now, you need to head down the door on the right-hand side which leads to the atrium. The puzzles here are pretty similar to that of the library section with rotating rooms, levitating lanterns, and mannequins.
If, at any point, you don’t know where you are, retrace your steps and the room will most certainly have changed behind you.
In the atrium section, you get to a dark void with what looks like shattered floating pieces of wooden floor and multiple doorways. Only a couple of these doorways are open.

If you go down the doorway on the left, you’ll come to a door boarded up. Use Depulso to blast it open and access another lamp. Move that over to the lantern holder close to it and walk in the door.
On your left, the first door you come to is also boarded up. Use Depulso again and grab another lamp from it to place on the stand close to it.
Then, grab the first lantern you used on your left and use it to open the last door.
Another round of combat with mannequins follows, but you should be able to make light work of them.

Find an open door, pick up the lantern you come across, and go through the door to get back to the one with two lantern holders. Place the lantern and head down to the right.
You should find yourself in a large chess room. Use Revelio and avoid any spot on the chess floor that glows red.

Jump and move forward until you get past all the chess pieces to the other side. You’ll find the next lantern that you need for the atrium door.
Play with the poltergeist
You should know what to expect from Fastidio by now, but he mixes it up this time by summoning mannequins to fight alongside the items he’s repeatedly chucking at you.
Dodge his throws, Confringo your way through the mannequins and he’ll move on once again.
Return to the foyer
Go back to the foyer. The second bar should be gone and the main door should be open.
Venture beyond the foyer doors
The door should lead you to a cemetery where a cutscene with Fastidio should begin.
Challenge Fastidio

Accept Fastidio’s challenge and fight against the monster that he creates from items lying around the cemetery.
Damage spells are all you need here, so you might want to adjust your spell slots accordingly before beginning the fight.
After a couple of minutes, I noticed that there was a pattern to Fastidio’s monster’s attacks. Identifying this pattern can be very useful for you too.
For instance, he regularly threw three heavy attacks in a row – the first two were unblockable so I had to dodge roll, but I could use Protego to block the third one and reverse the attack on the monster in the process. However, timing Protego appropriately is key.

When you’ve taken a good chunk of the monster’s health, Fasitidio will turn the screen upside down, so be ready for that because your controls will be inverted.
Defeat the monster and accept Fastidio’s contract to get back to Hogsmeade.
Return to the shop
Get back to the shop.
Speak to Penny
Penny is waiting, and you can decide to lay into her for not telling the truth or choose to be more understanding.
Seek out Officer Singer

Report Cassandra Mason’s business to Officer Singer. She’s close to the shop and should be easy to find if you follow the marker.
Confront Cassandra Mason
In the resulting boss fight with Cassandra Mason, pay attention again to repeated attack patterns. You should also be prepared to swivel quickly as she tends to teleport often.
Dodge and roll when she hurls stuff at you, and be ready to use Crucio when she puts up her shield. Follow-up attacks very quickly with quick damage spell bursts before she gets a chance to teleport again.

When Cassandra is defeated, Officer Singer arrests her.
Return to the shop
Get back to the shop and talk to Penny. If you grabbed the hat from the haunt earlier on, you can present it to her and make her a free elf. I needed her to be there to run things, so I did not. It’s your choice.
Choose a name to appear on your shop sign from a list of three options, and that should complete the Haunted Hogsmead Shop quest.
I strongly recommend checking out more tips to help you complete other quests in Hogwarts Legacy quickly.