One of the most exciting things to do in Minecraft is going on long journeys and exploring new territories. Even though you may already have a base, the thrill of expanding your knowledge of the surrounding biomes, temples, and villages drives us to savor distant trips.
It’s common to take some good supplies whenever we’re packing up to explore Minecraft’s map a bit further.
For instance, you never know how much trouble you can run into, and taking some food and an enchanted bow with the infinity enchantment and a bunch of arrows can be pretty necessary.
Still, although you’re going up in arms, ready for combat, there is the risk of meeting a bunch of mobs and risking your player’s life. Besides, maybe you found treasures and ran into a bad situation while returning home with the goodies you found from the trip.
Nevertheless, dying in the middle of a long journey, in which you relied on a compass, can be pretty troubling.
In addition, the loss of a bunch of valuable items in the middle of nowhere is discouraging.
So, to avoid losing yourself again while trying to find where you died, let us show you how to find where you died in Minecraft.
Mark the Way
After prepping up everything for a long journey, make sure you take only necessities so that you can avoid filling your inventory too much. Now, reserve some space for items you can use to mark the way while traveling.
This way, choose something you can place regularly on the ground or a platform when you distance yourself further from the base. Like John and Mary dropping breadcrumbs along the way.
Use the Light
My personal suggestion to mark the path you’re traveling and avoid losing yourself is to use something glowy. So, take up torches, glow stones, lanterns, beacons, Jack o’ Lanterns, Redstone lamps, Sea lanterns, froglights, and more.
The reason to choose something that glows is to provide you with a better sense of direction during the night.
It is best to pick glowing items with a high light level, as they will emit a bigger glow that can be seen from further away. That way you do not need to squint at your screen to spot your light.

In addition, one of the most valuable items you can have to coordinate you better while long-distance traveling is enormous campfires.
The reason is that campfires in Minecraft build massive towers of smoke, which you can see from a far distance.
Another approach you can take even more advantage of is to build a tall post and attach your light to it. For instance, instead of just placing a torch on the ground or a bare wall, build a block tower and attach the torch on top of it.
This way, you’ll be enhancing the torch’s exposure, making it easier to see from greater distances.
Distinct Blocks
A different approach you can take to mark your path is to place distinctive blocks along the way. For example, by placing purple-dyed wool blocks on a forest trail, you’ll be making it easier to spot the way you‘ve come through.
Notice how the red wool block drags attention in the snowy biome below.

However, doing so works better during the day as, during the night, you might struggle with seeing the unique blocks from a distance since they don’t emit any light.
Clear a Path
Another method of marking the way, which I used before, is clearing a path through a forest. For example, if you’re exploring and cutting through a dense forest, try chopping down a few trees along the way.
In this sense, you’ll end up creating an organic design in the forest, making a more accessible pathway, where there will be fewer trees on the way.
Naturally, you’ll follow that path since it will be a literal trail.
A tremendous facilitator to find a path if you lose track is to climb to a considerably high point and set your FOV to the max. You can see how to adjust FOV in Minecraft in one of our previous articles.
Craft Various Maps
Since the beginning of time, humans have been using maps to locate themselves and mark the surrounding territories; Minecraft is no different.
If you have enough resources, make sure to gather a good amount of compasses and paper to craft a bunch of maps. Also, you’ll benefit hugely from looting a cartography table if you find a village that has it.
You can also craft the cartography table by combining four planks with two paper pages.
One of the most beneficial ways of using the cartography table is to build a map wall with the alignment of various maps marking the areas you will explore.

For more information on doing an ideal map alignment, check Minecraft’s wiki about it.
If you play Minecraft with friends and are scared of dying somewhere where you’ll lose items and won’t find them again, craft locator maps.
In Minecraft, locator maps allow other players to see your location, so if you feel at risk of dying and can’t quite take the time to look where you’re at, ask one of your buddies to check your location on their map.
Minecraft Map Recipe
- 8 Paper
- 1 Compass
In order to begin working with Maps you have to craft one. The main component of a Map is the Compass, which goes in the center of the crafting table with the Paper surrounding it.
This will create an Empty Map which you may then use to map out your world.
Enable the Coordinates
This method works specifically for the Minecraft Java Edition.
In Minecraft Java Edition, if you press the F3 button, you’ll enable the coordinates (X, Y, and Z) on the screen. The coordinates will specify your location on the map. They generally pop up on the screen’s left side.

So, if you happen to die while having the coordination debug on, you can read and write down the F, X, and Y information. This way, you’ll be able to reach the location you died with precision.
Use Mods
Although many players would rather approach this problem vanilla, some can still benefit from using mods to gather their lost items after death.
Among many mods, you’ll find that “Death Finder” works exceptionally well at pointing out the location where your player died. Moreover, the mod provides the place of every death that occurred to your character.
The mod informs the player of the dimension, coordinates, and current distance from the death point.
Other mods with similar features are:
- Death Beacon
- Corpse Mod
Follow a Strategic Path
If you’re planning to venture far away, try following natural assets on the map that will serve as a reference for you. For instance, look for villages and buildings and mark them mentally.
For instance, I took note of a massive lava volcano in the image below. It helped me get back on my track.

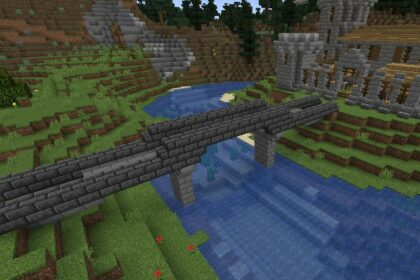
In addition, you can also follow a path alongside a river or a biome border.
Always look for something unique on the map and use that as a point of direction. This way, you’ll be able to remember where you went whenever you spot that reference entity again and navigate your way back.

