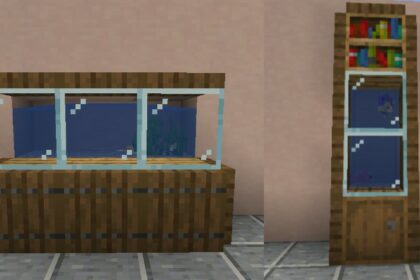
Minecraft let’s players build anything. The game allows various methods of creating different models of Redstone-powered mechanisms.
Elevators in Minecraft can appear in multiple settings, with distinct effectiveness and roles.
As you evolve in Minecraft, you’ll feel the importance of automating everything; elevators can speed up your gameplay if you craft them as part of a more complex mechanism. These builds can carry players, mobs, dropped items, etc.
In addition, elevators are highly valuable to servers that rely on roleplay experience. In this case, player cities with this type of mechanism can feel highly immersive, providing an experience we’re familiar with in real life.
Moreover, elevators can feel highly decorative in single-player campaigns, especially if you’re into Redstone-powered builds. Still, there are numerous ways to craft elevators, resulting in distinct-looking ones.
Let’s see how to make elevators in Minecraft and discuss the best models of this mechanism and how useful they are.
Elevators
In Minecraft, you can craft Redstone-powered elevators or water elevators. The first is the most realistic alternative and often appears in multiplayer servers.
Alternatively, there are simpler elevator mechanisms that only require the player to walk or swim.
In Minecraft, you’ll notice that the “X” and “Z” values shift on the coordinates screen when your character moves horizontally. Likewise, you’ll see the “Y” value change when moving upwards or downwards on a surface.
Hence, elevators operate towards the “Y” coordinate in the game.

Redstone elevators can be a vast range of builds and we’ll explore the most useful. However, water elevators only have a particular setting concerning how they operate, using water blocks. We will look at a few models.
Foremost, let’s discuss water elevators.
Water Elevators
This type of transportation moves the player vertically through water blocks. In some cases, the player might need to control the character to swim while inside the mechanism.
Bubble Elevator
The bubble elevator is a type of water elevator that uses water blocks with either magma or soul sand blocks. The primary mechanism works by pushing the player up if you use soul sand or down if you use magma blocks.
In this sense, you’ll need two separate bubble elevators to take you up or down. The mechanism can also move mobs and dropped items.
To build a bubble elevator, you’ll need:
- 4 Glass blocks per “Y” distance.
- Bucket of water.
- 1 Kelp per “Y” value.
- 1 Soul Sand block (Elevator going up)
- 1 Magma block (Elevator going down)
- 2 Signs
Begin the structure by placing the glass blocks in a pillar-like setting, with four glass blocks adjacent to an empty space in the middle. Look at how I did:

Now, expand the pillar as much as needed; this will depend solely on the elevator size you need—every extra block of height adds to the “Y” value.
When you reach the structure’s top, fill the empty space between the glass panels with water. You must place the water while staring at the inner side of the last glass block. This way, the water will flow down and fill the entire pillar.
Once the water reaches the pillar’s bottom, you must jump inside the structure and dive down until you get to the ground.
Then, begin placing kelp; the kelp must fill the entire inner frame of the pillar.

After the kelp reaches the final water block in the structure, you’ll need to dive down once again and break the kelp vine from its base. Then, dig the ground block and replace it with soul sand to create an elevator that goes up.
It should look like this:

If you want to create an elevator that goes down, repeat the same structure and swap the soul sand block on the pillar’s bottom with a magma block.
An exciting way of setting this helpful transportation is to create an upwards elevator adjacent to a downwards elevator.
For now, the only way of accessing the elevator is by jumping on its ceiling opening. Therefore, you’ll need to create a ground entrance by using two signs and a few extra glass blocks.
Go to the structure’s outer base and place two glass panels between its exterior walls. Follow this setting:

Now, you’ll need to break two glass blocks supporting the pillar. However, you’ll need to quickly break them and put a sign on the adjacent glass block that you just placed. There’s a risk of the water escaping if you’re not fast enough.
Both signs will hold back the water from escaping the pillar. Look at the result:

Now, you can quickly enter the elevator’s ground level and exit at its top floor. To add extra exits to the elevator, you can follow the same structure you’ve used to make the entrance.
However, be aware that the soul sand block only pushes the player upwards if the character touches the block. Therefore, the elevator’s middle section entrance won’t effectively work since you would still need to swim to either the soul sand block or the next exit.
Fortunately, the magma block doesn’t have this boundary and will pull the player down through any of the elevator’s entrances.
You can decorate the structure as you want. Still, do not alter the glass blocks, or the mechanism won’t work.
Waterfall Elevator
This type of water elevator is elementary and straightforward, and you can build it anywhere in your gameplay.
Consequently, this method is suitable for the early game since it doesn’t require rare or tough-to-get blocks and items.
The main principle of a waterfall elevator is to get down from high-altitude drops safely; it works by using the water flow and doesn’t require any particular structure to operate.
You’ll only need a bucket of water and maybe some terraforming to create this elevator.

Hence, this type of elevator is an ideal alternative if you’re exploring and need temporary transportation.
To create one, fill a bucket with water and get to the entrance point you want to place the elevator. It’s vital to understand that the elevator’s main direction is downwards, so its entrance should be on its higher point.

Once the waterfall forms, you can hop on it to slowly and safely descend to the elevator’s bottom level. Since the character will be gradually moving inside water blocks, they might drown depending on how long the transport takes.
Therefore, when using waterfall elevators, ensure that you can move from the water blocks’ center enough that the character stays partially in it. The breathing meter on the screen should disappear, and there won’t be a drowning risk.
Although rudimentary, this elevator is safe since its bottom floor becomes a water puddle, pushing enemies away from the player when they reach the ground.
You can also use the waterfall elevator to throw down items. But, attempting to push mobs into it can be risky.

A unique feature of this type of elevator is its usefulness in descending into lava since it turns the material into obsidian upon contact, creating a safe ground.
You can also go upwards in a waterfall elevator. However, it’ll take extra time since you’ll be swimming against the current. Also, mobs can descend on the stream but cannot go upwards since they require active motion.
To remove this elevator, simply use the bucket on the water’s source block. You can also dry this type of elevator using sponges.
Redstone Elevators
These types of elevators dive into complexity compared to water ones. All the models in this category use Redstone principles to transport players upwards and downwards. Let’s explore the most popular one.
They’re typically appropriate for complex buildings, like hotels, resorts, castles, modern facilities, etc.
Slime Elevator
A slime elevator is an excellent option for players far into the late game with plenty of materials and resources. You’ll need assets and minerals such as Redstone, which requires iron-level tools.
These are the materials you’ll need:
- Redstone Dust
First, you’ll need to prepare the elevator area you want to build. Terraforming is a must; make sure that you have enough space. The elevator should be in a site about 8×8 blocks in size.
Start by digging a hole in the central area of the site. The hole’s figure should resemble a cross, with its head portion meeting the site’s wall that will support the elevator. The middle of the cross should be three blocks deep, and its “legs” must be two blocks deep.
The hole should look like this:

Now, place a note block on the cross’ middle and two specks of Redstone dust on its “legs”. Next, cover the bottom square of the cross’ legs with any block and put a stone button on top of it. Then, place an observer staring downwards on top of the note block in the cross’ center.
You should get something like this:

On top of the observer, place a slime block.
Then, position two sticky pistons on the cross’ arms, adjacent to the slime block. Next, stack two slime blocks on top of the pistons; these other slime blocks mustn’t contact any other asset apart from the block below.
The structure must look like this for now:

Now, place a sticky piston on the cross’ center, above the slime block and facing downwards. Then, put an observer above it. The observer should be facing upwards.
See how I’ve done it:

Finally, close the structure; you build the elevator entrance.
Next, you’ll need to build the top part, which is where the elevator will take you. You can either create a platform or terraform the floor around the exit. Still, the elevator must take you somewhere flat.

Repeat the 8×8 room you’ve used on the elevator’s entrance on the top floor.
See below what I mean:

Now, on the exit floor, you must position an obsidian block precisely above the observer you’ve put on the bottom entrance.
Then, put a note block under the obsidian. Next, you’ll need to place a block (any kind) adjacent to the note block, facing the elevator’s exit.
Finally, place a stone button on the last block. See below:

After doing so, close the upper entrance’s structure.
You can follow any block pattern you like, but it’s essential to stack a two-block pillar on each side of the elevator’s upper shuttle. Look how I did:

Close the structure and connect the bottom entrance of the elevator with the top exit through pillars.
You can decorate the elevator as you want. Additionally, this structure can stretch as high as you’d like.

However, this type of elevator only goes from point A to point B and cannot stop on different floors. Therefore, it might be beneficial to have at least two or more of this type of elevator in large buildings to transport yourself on multiple floors.

