If you want to get better at Valorant, you need to commit to learning and improving.
From improving your aim to playing defense like a pro, we’ve broken down everything you need to get to Diamond (and higher) in the quickest possible time.
We hired Itachi, a Radiant-level, top 500 EU ranked, competitive Valorant player to fact check and provide additional insight into this guide.
Please follow this simple piece of advice when implementing the things learned hereafter: practice with purpose. To improve quickly, you must be intentional with your time and avoid slipping into bad habits for any reason.
Improving Your Aim
Aim and game sense go hand-in-hand in Valorant. You can’t reach the higher ranks without improving both.
If you are new, or ranked Gold or lower, focus on improving your aim first.
There are many steps you can take to improve your aim in Valorant:
Aiming Tips
- Lower your sensitivity. Calculate your eDPI and get used to playing with an eDPI of 250-350.
- Keep your crosshair at head height: many low-level players peak, walk and run with their aim too low.
- Avoid ‘spraying’, or firing more than a few bullets at a time.
- Try to avoid crouching as this is a bad habit that will often get you caught out.
- Don’t move whilst firing. Only move between mouse clicks.
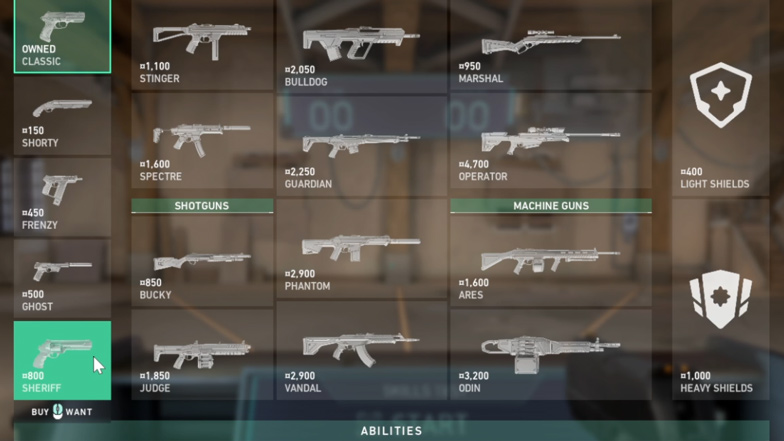
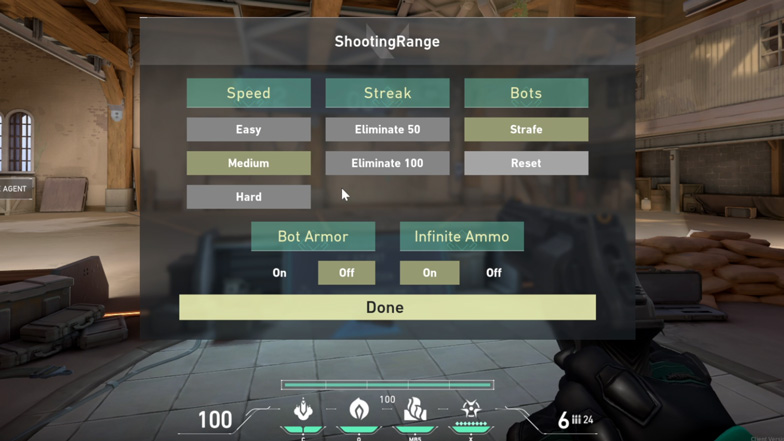
- Practice in the Firing Range using only a Phantom or a Vandal and up to 5 bullets per shot: aim to headshot 30/30 on Medium bots. Once you’ve reached that goal, play Hard bots and aim for new records.
- Play the ‘Eliminate 100’ bots option and try to beat your time consistently. Bots must be standing still (‘Strafe’ setting disabled).
- Add movement to your practice: move left and right (ensure you stop before shooting).
- Make it a daily routine to practice your aim for at least 30-45 minutes.
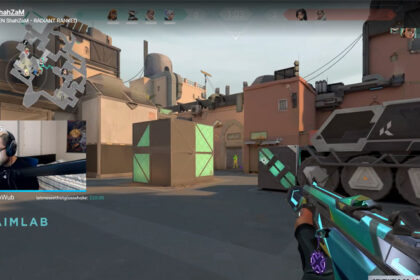
We also recommend trying external aim trainers like AimLabs or KovaaK’s to train aspects of your play like flicking and tracking.
Recoil Control
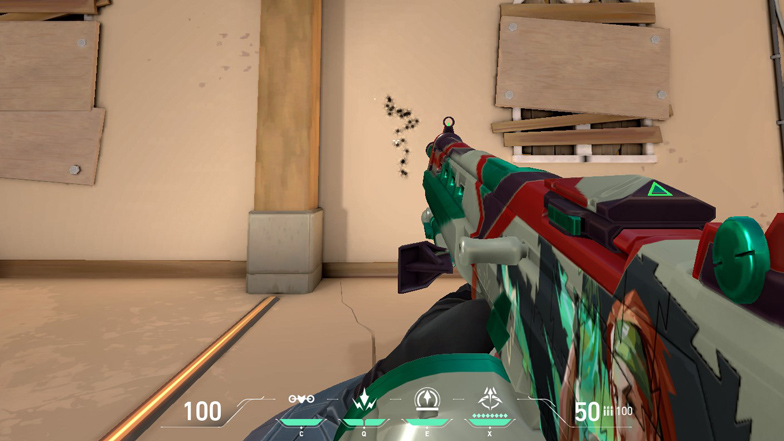
Every weapon in Valorant has a different recoil pattern. You can manage recoil by moving the mouse in the opposite direction to its pattern.
Head to the Firing Range, fire at the wall without trying to control recoil, and look at the pattern it leaves after around 10 shots.
To control the recoil, you know you need to move in the opposite direction to the pattern on the wall.
For example, the recoil on the Bulldog can be nasty. It’s controlled by moving the mouse upwards and then right (a mirrored 7-like movement).
You’ll find the recoil pattern on the Phantom to be like an upward T-shape. You can control it by moving the mouse down, right, and then left.
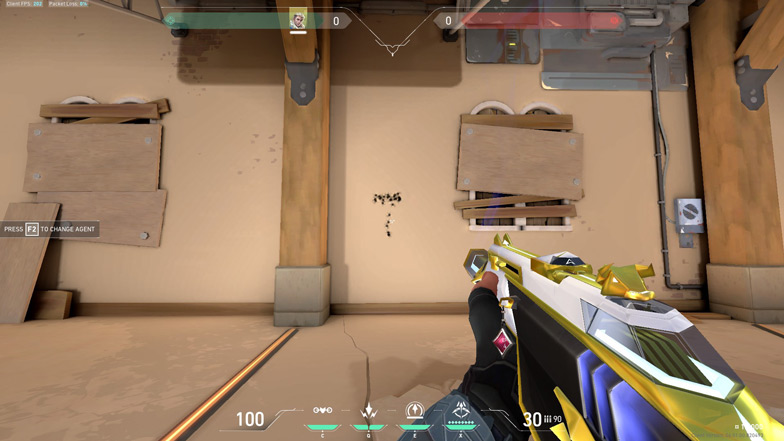
Valorant uses a hybrid of repeatable patterns and RNG. This means that whilst patterns are the same every time, there is randomness to every bullet. The longer you’re firing, the more randomness there is. The further away from your target, the more deviation you’ll notice in your accuracy.
Crouching lowers the spread of fire and gives you much more accuracy. Unfortunately, it will also make you an easy target.
Recoil control will be different if you’re doing multiple single taps instead of a spray.
The key is to understand the recoil pattern of every weapon under different scenarios. Keep practicing to control them using the Firing Range and Deathmatch.
However, the most important thing is that you should almost never be spraying. Don’t practice this way and don’t play this way either. Just ensure you know the recoil pattern of the first few bullets and more in case a spray is essential.
Most Radiant-level players don’t spray so try to play the same way. Focus on firing in bursts and spray only if an opponent is 0-10m away.
Training to spray is going to put you in the habit of spraying in game, so only practice burst firing and controlling those initial five shots.
Warming Up
You can warm up on the Firing Range (using the Eliminate 100 or Medium/Hard settings recommended above) or in Deathmatch.
In Deathmatch, practice with the Vandal or Phantom only and aim for headshot bursts of up to 5 shots.
Aim for the highest amount of frags in the lowest number of shots. Focus on your crosshair placement — it needs to be at head height.
On the Firing range, start warming up with Easy settings first, then switch to Medium and Hard.
Here’s a good Valorant warm-up routine:
- Complete the Eliminate 100 bots option one time.
- Complete Medium bots one time.
- Complete Hard bots one time.
- Play one game of Deathmatch.
Training more than this is fine but we recommend ending your day with aim training and only warming up for 15-20 minutes immediately before you play. You don’t want your arm or eyes to become tired during competitive play.
Crosshair Recommendation
The ideal crosshair comes down to personal preference.
As a rule of thumb, you’ll be better off with a small crosshair if you’re looking to increase accuracy.
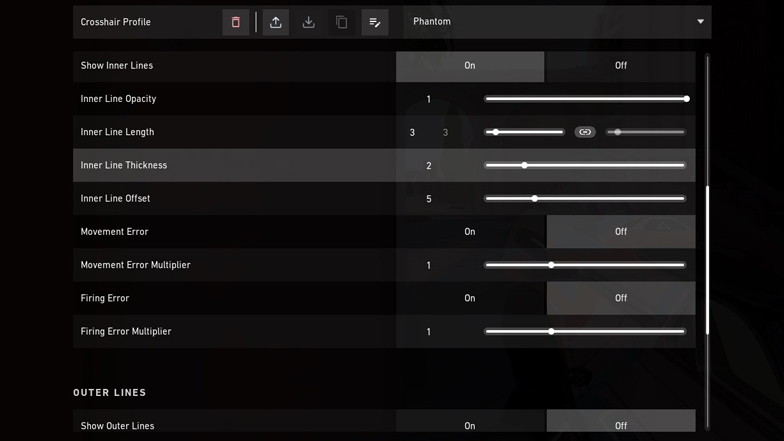
Go to Settings > Crosshair, and set everything as follows:
- Outer Lines: Off
- Outlines: Off
- Inner Lines: On
- Inner Lines Opacity: 1
- Inner Lines Length: 4
- Inner Lines Thickness: 2
- Inner Lines Offset: 2
- Movement Error: Off
- Firing Error: Off
- Center Dot: Off
If you don’t already have a custom crosshair set up, this will be good enough to get you started.
Aiming Down Sight (ADS)
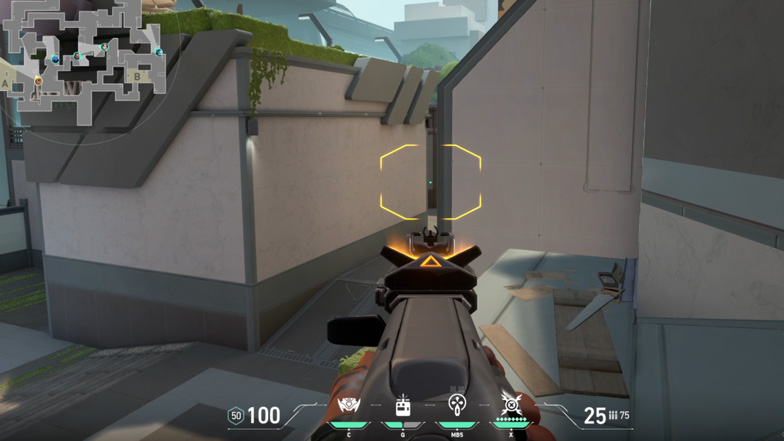
ADS reduces your rate of fire but it’s also helpful when you’re trying to take one-taps from over 40m.
Don’t rely on ADS and don’t ADS in close range fights because the slower rate of fire will significantly hinder you. Use ADS for holding angles and acing long-range one taps.
High rated players will avoid using ADS, especially on the Phantom and Vandal, but it’s fine to use it with the Stinger, Spectre, Bulldog, Guardian, Ares and Odin, especially over longer ranges and when burst firing.
Line-ups
Agent abilities in Valorant have the potential to make or break a round for your team. Line-ups are an essential part of maximizing your success with certain agents.
A line-up is when you aim an agent’s ability at a specific point to ensure it hits the same part of the map every time. You line up your aim with something on screen and stand in a specific place for 100% consistent results.
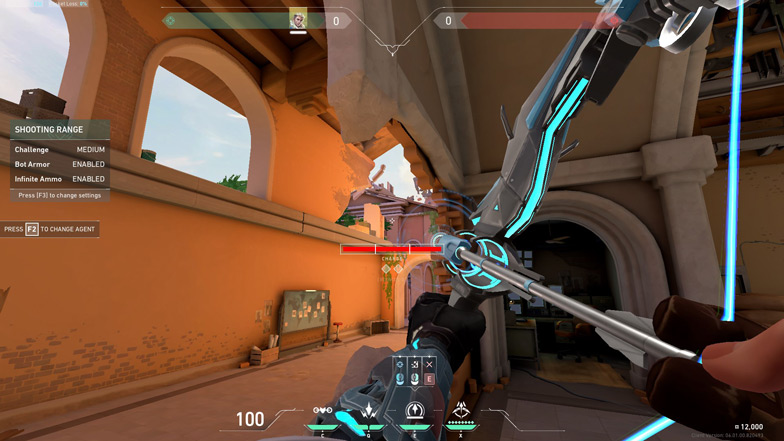
The most common line-ups that teams use include:
- Sova’s Dart lineups for early-round information and post-plant shocks
- Viper’s wall and Snake-Bite line-ups
- Fade’s Haunt line-ups for better info
- Raze’s Paint Shell line-ups
- Killjoy, Brimstone, Phoenix, Sage, and Cypher are other agents with potentially round-winning line-ups
It’s essential you know some of the most useful line-ups if you want to use an agent in competitive play.
Each map has unique line-ups spots and every agent’s line-ups are different.
You can use line-ups while rushing, defending, preventing diffuses, and more. You don’t have to know a large number, but knowing a few is helpful.
Having line-up knowledge can even help when on the opposing team.
If you know there’s a large chance that an enemy Sova dart will scan where you’re pushing from, you can pre-aim the spot where the dart will likely land so you can destroy it upon impact.
Eco Management
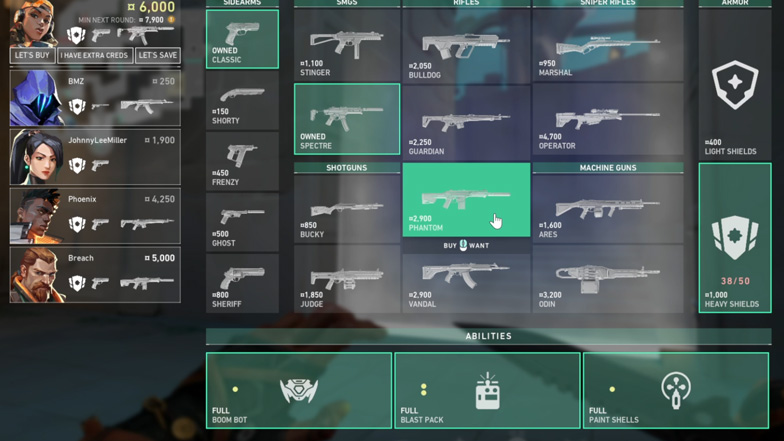
If you’re serious about improving, you need to understand how little aspects of the game affect its outcome.
Smart economy management, for instance, is a crucial aspect that puts you ahead of an average player.
Your team cannot drain its economy every round because it will set you up for failure.
Before we dig deep into when to buy and when to save, let’s understand the following terms:
- Full buy is when you buy as much as you need and you’re fully equipped.
- Half buy is when you buy abilities and a budget weapon.
- Eco or ‘Eco Round’ is when you aren’t buying much — abilities only for most agents.
- Force buy is when you buy as much as you can in a round, regardless of poor economy.
Understanding Valorant Credits
Every player in Valorant starts with 800 credits, or ‘creds’. From there onwards, each action within a round will contribute to how many credits you earn.
You must understand the allocation of creds for wins and losses to be able to make effective buy/save decisions:
- You earn 200 creds for each kill
- A round win bags you and your teammates 3000 creds each
- The whole Attacker team gets 300 creds each for planting the spike
The losing side gets less creds, with some rubberbanding to keep the game balanced:
- If you lose one round, each team member earns 1900 creds
- If you lose two rounds in a row, each team member earns 2400 creds
- If you lose three rounds or more in a row, each team member earns 2900 creds
- If you survive a round but your team loses, you will only get 1000 creds
When to Buy
A buying decision is always situational. Try not to have pre-determined rules for what you do and at what point, but think of the following figures as a good starting point for the whole team:
- < 2000 creds: Go for an Eco round.
- 2000 – 2500 creds: Abilities, pistol, and light shield.
- 2500 – 3500 creds: Abilities, budget weapons, and full shield.
- 3500 – 4000 creds: Abilities, Phantom/Vandal, and full shield.
- > 4000 creds: The team should do a full buy (ideally including one Operator).
If your teammates aren’t communicating and force buy in a round that should be a save, you should probably buy too. Team synergy is essential when managing the economy.
If your team loses a force buy where you decide to save, they will probably have no choice but to save in the next round and you’ll have a complete buy that won’t help the team too much. It’s a team game — strive to be the bigger player to benefit the team wherever you can.
You also need to factor in Ultimate abilities, both your own and across your team.
If you are an agent like Raze, it might be worth saving because you could take out an opponent with your Ult and pick up an enemy’s weapon.
If your team’s economy is poor but you have at least 3 or 4 Ults to work with, it could be worth force buying. You have a realistic chance to win the round in this scenario and you can pick up your opponents better items.
If the opposing team is on 12 points, needing just 1 more to win, you probably can’t risk saving.
If you win the pistol round, you can buy in the second round and then save in round three if you win the second round. You won’t have Phantoms or Vandals, but this is called a bonus round as it can give you a huge long-term advantage if you win it.
When to Save
- When you don’t have enough credits to realistically win a round, go eco or half buy.
- You could buy up light in round two or three after a pistol round win for a longer economic advantage.
- Go for a save or two after losing the pistol round.
- If you aren’t confident about taking on a 1v3 or 1v2 fight in the remaining time in a round, hide and save an expensive weapon (unless it’s the final round of a half).
- If you can afford to buy and your team can’t, go for a save or half-buy (unless it’s potentially the final round).
If you lost two or more consecutive rounds, you never need to save a Spectre or another cheap weapon at the end of a round you’re likely to lose, assuming you have no shields. You will gain more creds overall by dying than you will by saving at this point. It is mathematically correct to try to take down 1-2 enemies from the other team to damage their economy, and to help build your Ult point balance, before you lose the round.
Peeking
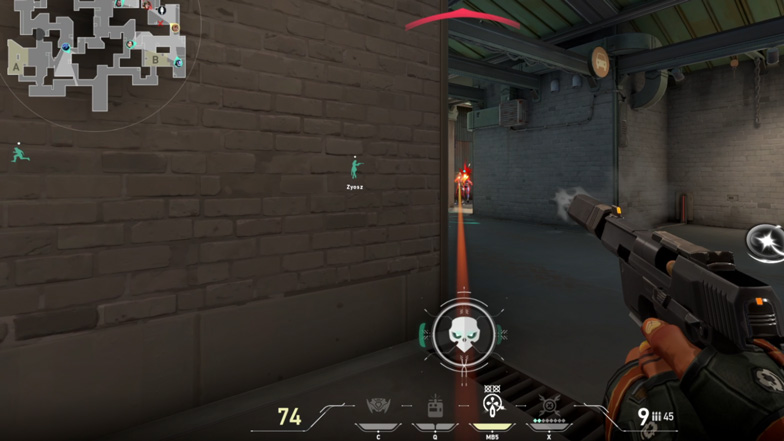
A ‘peek’ is when you look into an area to get information or to try to take down an enemy.
There are multiple types of peeks in Valorant.
Getting info first and acting second is a good rule of success in the game.
If you’ve played more than a few rounds of Valorant, you will know the angles that enemies commonly hold early in the round.
You should never run in blind.
It’s always a good idea to check angles before rushing right into the site.
An example of this would be at C Long on Haven. This is a common lane for an enemy Operator. If you want to push down this lane, you have to peek for information to confirm if an Operator is there, or another enemy weapon, or if the coast is clear.
If an Operator is there, you cannot realistically challenge this lane because the opponent has an advantage. Your options are to smoke or wall off the Operator so you can push the site, or you could rotate to push a different site instead.
The important thing is to get the information you need by peeking.
You must always peek in a structured way. If you aren’t putting a lot of thought into your current peeking, or if you aren’t peeking at all, you’re making mistakes.
Let’s discuss the different types of peeks and I’ll share tips for each.
Keep in mind, peeking is highly situational. Use the following information to educate yourself and improve your game sense.
The Different Types of Peeking
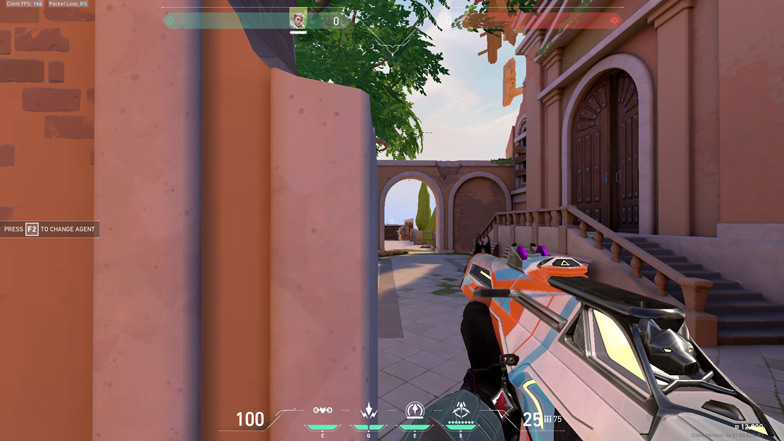
To help you understand better, we’ll be explaining each peek at C Long on Haven, the same example as above, on the Attackers’ side.
Let’s start with an important rule:
When peeking for info, make sure you only move sideways (by pressing A and D).
Pressing W, or moving forward, will lower your left-to-right speed, making you an easier target for enemies.
The most common types of peeks are as follows:
Wide Swing
A wide swing is when you pop up into a scene looking for a fight and scan your complete screen for enemies.
To wide swing at C Long, press and hold left, stop and scan every spot that you can see on the C site, and prepare to take a fight.
Wide swinging is usually discouraged because you’ll often be completely exposing yourself to an enemy that is waiting for you.
Pair wide swinging with utility use and only do it if you have some information about what could be lurking on the enemy side. This could include a teammate communicating that the enemy Operator is at the A site, so you know they can’t be at C.
Jiggle Peek
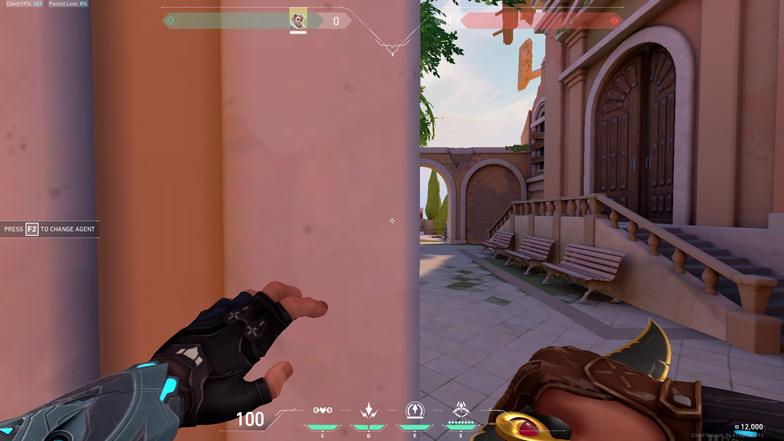
Jiggle peek by holding a knife (so you’re fast) while standing up against the wall. It’s usually done to bait out an Operator shot from your enemies or simply to gain info.
Without holding shift, press A (to move left) but quickly move right (by pressing and holding D) as soon as you expose the left side of your body.
Repeat this 2-3 times to bait out an opponent.
You don’t actually take a fight while jiggle peeking — you use it to get the enemy’s attention.
Jump Peek
There are multiple types of jump peeks — one is to get info and the other is when you pop up to take a shot.
The first is similar to jiggle peeking but with a jump. The mechanics are a little trickier. You need to run, jump, hold left, counter strafe, and spin your mouse 180 degrees.
The second kind of jump peek is when you want to take a kill instead of just peeking. You jump on the scene when your enemy least expects it, or expects a standard peak. I suggest jiggle peeking before it.
For the 2nd peek, press and hold left, press jump simultaneously, stop, and take a shot. But always remember to return to cover as fast as possible if you miss.
The third type of jump peek is usually mid-battle when you take cover behind a crate. You can jump to see where your enemies are over the top of the crate.
Crouch Peek
Crouch peeking is when you do a jump peek (the second one) or a standard peek and sit down after landing. Why? To throw off the enemy’s crosshair placement.
This can go both ways — crouching after the jump gives you better accuracy and makes it easy for you to take a shot. However, you can also miss your chance. Sitting down will make it easier for the enemy to take you down if you do.
Double Peek
Double peek is when you first do a standard peek or a jiggle peek, followed by another quick peek right after.
The first peek is for information, the second peek is to take a shot. Peek a second time after baiting out a shot from the enemy so you can catch them unaware.
Ferrari Peek
Ferrari peeking is when you wide swing and shoot immediately.
This is best done at short ranges and best executed with SMGs.
Ferrari peeking is most useful thanks to peeker’s advantage, a common issue in all FPS games.
If you peek fast, you will literally see your opponent before they see you due to the way the internet works.
Ferrari peeking also makes it hard for enemies to land their shot.
Overusing this aggressive peek can be a recipe for disaster, so use it wisely. If your enemies are getting the better of you, switch up your style.
Peeking Tips
- Think about what the enemy might be thinking in the current situation.
- Use reverse psychology to catch your opponents off-guard.
- Isolate fights — avoid peeking two enemies, or two angles, at once.
- Avoid peeking with your back against the wall.
- Get as close to the corner as you can before peeking so your movement is quick.
- Never rush into a site without peeking for information or to take down enemies first.
- Avoid playing in corners: you have no cover if an enemy peeks.
- If peeking a common angle, mix up the timing and change the types of peeks you’re going for.
Strafing
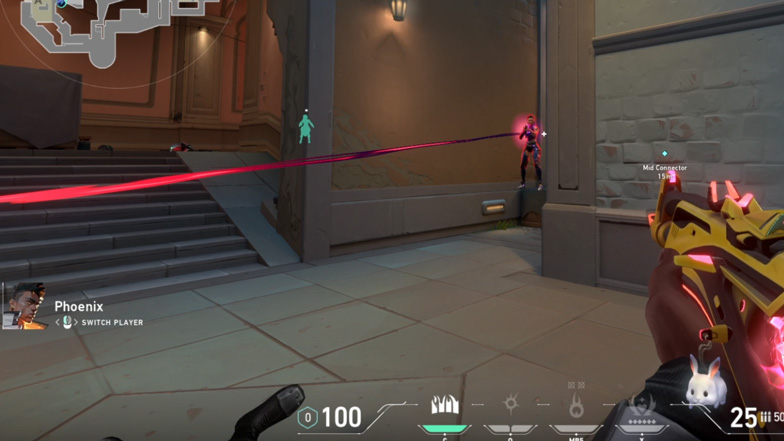
Strafing in Valorant is not the same as in many other FPS games. This is because you must stop to shoot otherwise your accuracy will be dependent on RNG.
There are two types of strafing — strafe shooting and counter-strafing.
You can strafe shoot whether you’re holding a position or rushing.
To do this, imagine you are jiggle peaking. Instead of showing yourself and hiding in one movement, stop and shoot temporarily before taking cover.
The benefit? It makes it hard for the enemy because you’re moving, but you’re also stopping for brief moments to be more accurate.
Suppose you’re attacking and rushing through C long in Haven. Once your team uses its utilities, instead of running into the site blindly, here’s what you do:
- Press and hold A (to move left).
- Release A, stop, and shoot 1-3 bullets while aiming at the enemy in front of you.
- Quickly move right, back behind cover, by pressing and holding D.
- Repeat the steps above until you’ve won your duel or made an opponent retreat. If you sense a threat, you should be the one backing down.
Counter strafing is not relevant in Valorant because movement has almost no momentum. You stop almost immediately after letting go of A or D so regular strafing is all you need to worry about.
Crouching
Crouching has three benefits:
- You can hide behind an object.
- You can control recoil and spray: crouching reduces bullet deviation and RNG.
- It lets you throw off your enemy’s aim.
Despite the above, we already said earlier in this guide that you should not crouch. Or, at least, not often.
The real question is, when should you crouch?
In low-rank lobbies, most players usually aren’t aiming at the head. If you crouch in a fight, you’re actually making it easier for them to headshot you.
In high-rank lobbies, other players will be able to headshot you when you’re crouching in a fight. If you’re crouching it means you’re not moving, and moving is far greater for avoiding enemy fire.
Crouching should only be used to throw off your enemy’s aim. For instance, you sit down for a split second, get back up, and start counter-strafing.
Another situation when crouching might be a good idea is when you’re holding a long distance angle whilst ADS. This will help increasing your accuracy, but you need to be aware of opponents’ wide swinging you.
We recommend that you keep crouching to a minimum and only use it to reset your aim in a fight.
Bunny Hopping
Bunny hopping is another Valorant game mechanic that lets you jump your way through the map.
The benefit? It makes it hard for your opponents to land their shots.
If you bunny hop uphill (up a ramp, for example) with perfect timing, you move quickly and silently. The distance you travel between jumps increases after multiple jumps, and there’s no footstep audio.
You can use bunny hopping to your benefit during fights. In clutch situations, if you’re good, you can dodge enemy bullets and take appropriate cover for a potential round win.
Neon is an excellent agent for bunny hopping. She rotates quickly between sites and benefits the team greatly.
Before learning how to bunny hop, you need a suitable jump button.
While many players are comfortable jumping with their space bar, others prefer using mouse scroll up or down.
To practice bunny hopping:
- Go to the firing range. Stand straight, press and hold W (to move forward), and press jump.
- As soon as you land, press jump again whilst holding the W key to continue your momentum.
- Keep repeating this until you’ve mastered the jump timing.
- Once you’ve mastered this, add strafing to your hop. Move forwards and side to side between jumps.
- Once you’re comfortable with bunny hopping with sidewards movement included, add 180 degree mouse spins. This will help with your jump peaks.
- Use bunny hopping in Deathmatch and actual game scenarios to master it. Find uphill ramps to practice fast movement with silent footsteps.
Shift Walking
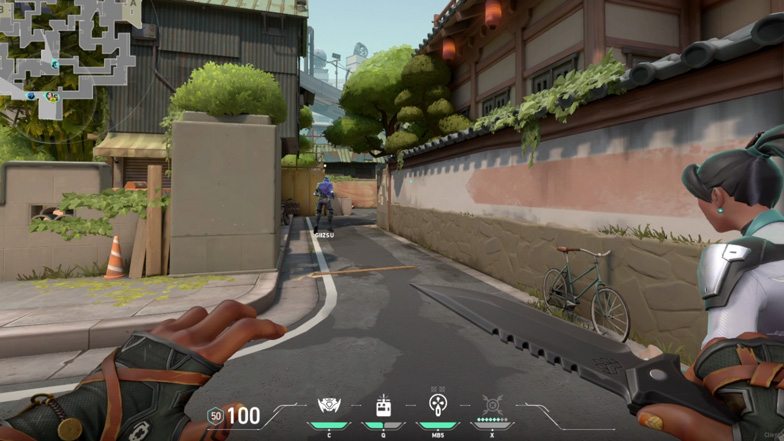
Your enemies can hear you moving from quite far away in Valorant. The minimap shows exactly how far away people can hear you from at all times.
When you press and hold shift whilst walking, your agent moves with silent footsteps. Your enemies will not hear you coming or moving away.
Shift walking can be super helpful in clutch situations when you’re up against multiple enemies. It lets you catch them off-guard.
But like all things in Valorant, shift-walking can be tricky and is always situational.
Shift-walking might be enough to trick opponents at the lowest levels, but you need to know when to shift walk and when to run — even though your opponents will hear you.
So, when should you shift walk?
- When you’re trying to sneak into a location to lurk, or take opponents by surprise.
- When you’re trying to rotate from one site to another without alerting the other team.
- When you want to fake a rotation to another site: slowly walk away, but walk back to the same site 10-20 seconds later.
- When you’re trying to hide or save a weapon for the next round.
There are always other situations to consider, but these are the most obvious.
When shouldn’t you shift walk?
- When there is 30 seconds left in a must-win round and you’re nowhere near the site for a defusal.
- When you need to quickly rotate away for any reason.
- When you know there is zero chance an opponent can be near to you.
Agent and Player Knowledge
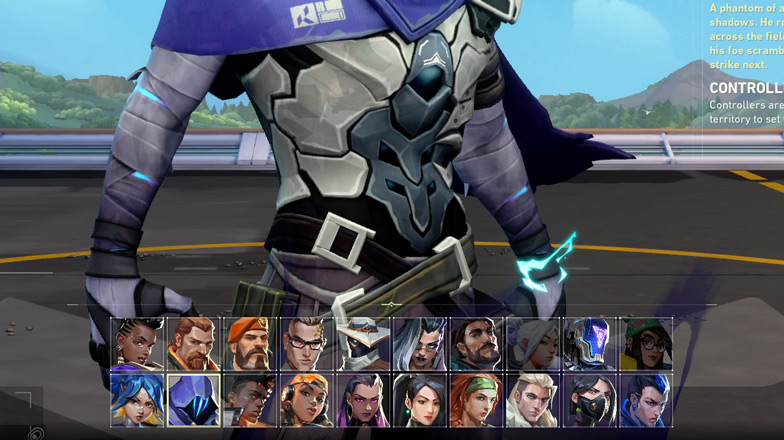
If you want to rank up quickly, you must fully understand all agents in the game and not just the one you play.
This gives you much greater situational awareness. Knowing what enemies can do and where they can be at any given moment is essential to reaching Diamond.
Mastering Your Agent
Your first priority is to understand your agent’s role in a game. We’ll be covering that in a further section shortly.
You need to know if your agent has line-ups. If it does, you need to learn them.
You also need to understand how your abilities can benefit your team.
For example, saving your smokes and flashes to win 1v1 situations might seem like a good idea. However, using your utility to blind enemies during a team push might provide a greater chance of winning a round.
Remember: it’s more important for your team to win than for you to have a high K/D ratio. If your team are winning and you’re having an impact with distracting and providing key information, you’re doing a good job.
To master an agent, play with it repeatedly and remember to practice with purpose.
You will need to have a shortlist of 3-4 agents that you can play to a good level because of the times when a teammate will select the agent you want to play.
Enemy Agents
You need to know what each enemy agent brings to the table, as well as the pros and cons of using each one.
Be aware of map specifics — an agent like Raze is great in close quarters maps but isn’t great on large, open maps.
Her toolkit isn’t that well suited to open maps like Breeze. There are certain parts of the Breeze map where Raze is effective, so you know where she’ll likely be if she’s picked. If she’s not in those places, your team likely has the upper hand regardless.
Having knowledge of what opponents can do is key to your situational awareness.
Know which agents can teleport across the map (Omen, for example). Knowing which can trick you (such as Yoru with his Fake Out ability). Knowing more subtle things like how an enemy is likely to play a situation are all crucial bits of information.
If Sage is alive and has her Ult, you know she’s probably going to be looking to revive a fallen teammate.
Play every situation accordingly.
Player Knowledge
You should also strive to understand how a certain players are playing in a given game.
If an enemy is constantly lurking or rushing, you need to counter it rather than letting them win with their strategy repeatedly.
If an enemy is playing the same spot and the same angles in every round, again you can counter it by using utilities effectively.
Study enemy patterns, understand where they usually like to hide, where they push from, what line-ups they use, and so on.
If a team is constantly rushing and you’re unable to tackle them, try asking your teammates to help you out.
If you’re constantly losing rounds in the same way, try something different.
Knowing Your Role
There are four primary roles in Valorant: Initiator, Sentinel, Duelist, and Controller.
These roles give a rough guideline of what your primary contribution to a team should be.
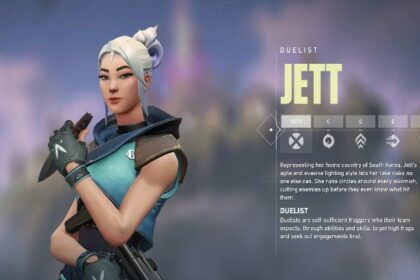
If you’re playing a duelist like Reyna or Jett, you’ll usually be the first one to enter a site and try to take down the enemy. Duelist abilities are good for clearing angles due to their flashes, smokes, and quick movement.
As a duelist, you’ll often be top fragger on the team, but you’ll also get taken down in many rounds as the first point of contact.
As an initiator like Skye or KAY/O, use abilities to initiate the attack on a site and bring out enemies from their hiding spots. Flashes and suppression are great ways to open up space.
Initiators are usually recon players whose job is to provide information for their team. You need to be near the front lines and should rarely (if ever) be lurking.
Sentinels like Cypher and Killjoy lock down sites while defending and keep an eye on possible flanks. Spycams and turrets can be especially useful for the latter.
Your job as a sentinel is to stay alive and play defensively, even whilst attacking. Never be the first player to push a site.
Controllers such as Astra and Omen assist teammates by blocking vision or helping take control of an area with smoke.
Importantly, the in-game role you’re assigned is only a guide. Many agents can be used in a variety of ways.
Sage is a sentinel but can be one of the most aggressive Operator agents in the game thanks to her walls.
Chamber is another sentinel and, until Riot nerfed him into oblivion, he was used as a duelist. This was because of his ability to aggressively peak and get out of trouble as quick as a flash.
You need to understand what each role does in theory but also what your agent can offer in reality.
In other words, it’s all about knowing how your agent actually plays.
You can use agents differently within certain teams and on certain maps, rather than what the game defines as their role.
This is commonly seen in games where players select four or five duelists because of reasons unknown. You can’t all be the entry player, so who is going to be best at gathering information, or holding down defense?
Team Composition
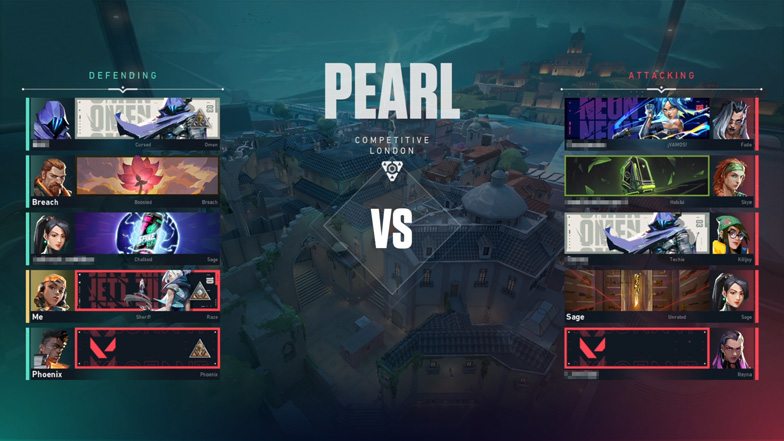
There isn’t a single approach you can go with when it comes to team composition, or the breakdown of the agents you select in your squad.
Some people would argue that team composition comes down to the choice of the map. Others might opt for a trending meta based on the four primary roles.
In professional play, maps don’t see the same five agents selected for every match-up.
Certain agents get picked every time on specific maps, but team composition can be fluid depending on how you want to approach things.
There are some general rules every team should follow:
- Each team needs three things: smokes to cover crossings, utility that can locate enemies, and utility that can disrupt enemies (flashes, mollys, etc.).
- Open maps should use initiators like Sova, who is strongest when his recon darts have lots of space to scan
- Closed maps should use initiators like Breach. He can disorient opponents through walls. Agents like Raze that can also clear angles with her Boom Bot, so she possesses Initiator qualities.
Here are some team composition recommendations for each map:
- Fracture: Jett, Brimstone, Breach, Killjoy, Sage.
- Pearl: Jett, Killjoy, KAY/O, Fade and Astra.
- Ascent: Jett, Omen, KAY/O, Sova and Killjoy.
- Split: Raze, Astra, Sage, Fade and Killjoy.
- Haven: Breach, Jett, Killjoy, Sova and Omen.
- Icebox: Sova, Viper, Killjoy, Sage and Jett.
- Lotus: Raze, Fade, Breach, Astra and Killjoy.
The meta keeps changing in the pro scene in big tournaments because of regular nerfs and buffs.
Two duelists, one sentinel, one controller and one initiator was the basic meta for a long time.
More recently, teams have selected two sentinels, two initiators and a controller.
Professionals from region to region even vary with their preferred compositions.
Playing two duelists usually brings a fast-paced game.
In a game without duelists, the whole team depends on info and their individual abilities. Communication and synergy is vital.
Map Knowledge
Knowing each map inside out is essential to progressing as a player.
Study the callouts for each map. Find line-ups. Find possible spots where enemy players can easily teleport to.
Watching streamers play or consuming YouTube videos are two of the fastest ways to learn maps. Watching pro-level tournaments is also an exceptional way to improve your game knowledge.
The most important thing you need to learn when it comes to maps is the different ways you can play offense. Which site should you be attacking more often? How should you be attacking it?
You should also know the most common places that opponents might have planted the spike, and the angles you need to approach from to retake on defense.
Team Comms
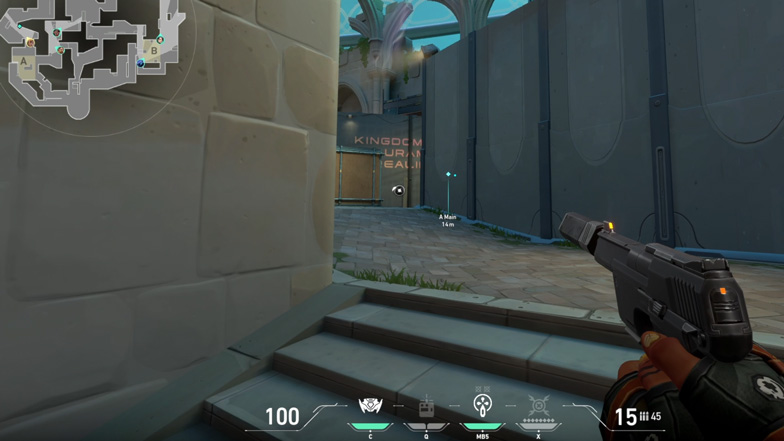
Low-rank lobbies often have a lack of team communication and that leads to poor plays.
Nobody knows what they’re doing. There are lots of new players and other players that lack both the mechanical skill and situational awareness to level up.
Here’s what you can do to help:
- Try joining communities on social media, Discord, and TeamSpeak. Party up if you can.
- If you’re still unable to find anyone (which is unlikely), try and make friends in the game. See if you can find players ranked higher than you so they can help you improve and rank up.
Even when there is communication and teamwork, information can often be wrong.
Finding yourself in a match with good communication and good vibes is a dream scenario. More likely than not, you’re going to find yourself in a game with no comms, or negative comms.
Here are some rules for good comms in Valorant:
- Communicate: even if nobody is talking, there’s a large chance they’re listening. Your information can help even if they’re too shy to help you in return.
- Be polite, be nice, bring good vibes: if other people are negative, it doesn’t mean you have to be.
- Be efficient with your words: instead of wasting time, let your teammates know how and where you got killed. Say “two in garage, Sage and Reyna”, not “argghh I’m dead I didn’t think they’d do that, why did they do that? So weird.”
- Give useful information: “Jett 100, flanking” is much more helpful than “Jett 100”.
- Coordinate with your team: every round should have a plan. Don’t give up angles without informing your teammates, be clear when it comes to mid-round adjustments.
Position & Overextending
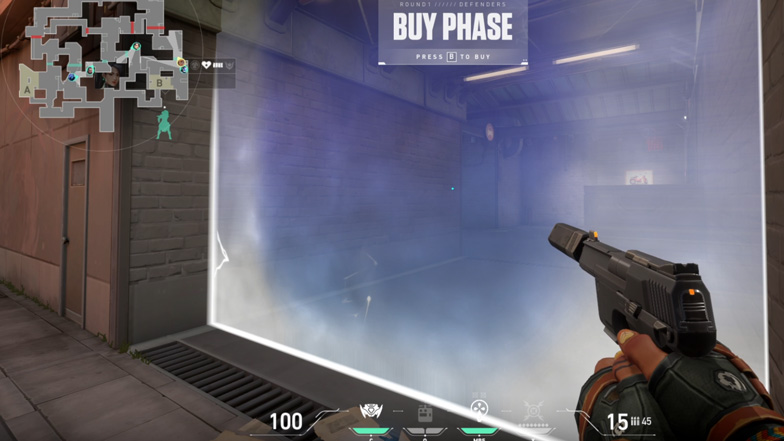
Positioning is just as important as having great aim.
There is always optimal positioning for where you will be set up in any scenario.
You want to cut off angles, along with your teammates, to prevent access to certain areas of the map.
You need to be aware of which areas of the map are currently “open” — angles your team are unable to watch — so you have knowledge of where opponents could look to exploit.
If teammates fall, you need to be aware of how this undoes your team’s setup and how you need to react.
If you get pushed and utility starts to rain down on you, you should back up and reposition for a retake.
You also need to have a fundamental understanding of ‘overextending’.
Overextending is when you push up the map too far — so far that you can’t return safely.
Firstly, you want to avoid overextending. It can stretch your team too thin. Pushes should always be coordinated and strategic, rather than hoping for the best.
However, if you find that you’ve overextended, you need to commit to it.
By the very definition of the word, you cannot try to come back. You’ve gone too far. Try to do whatever damage you can, however you can.
Flanking
Flanking is a very useful play that can help take map space away from an enemy team. Importantly, it is not the same as overextending.
Overextending means you have pushed too far into enemy lines and it’s landed you in trouble. Flanking means you are attacking your opponents from behind.
The obvious example of flanking is when a team continues to send all five attackers to the B site. This means you can push from A or through mid and shoot them in the backs.
However, you need to flank in the same way that push any other way — strategically.
If you flank every round, or too often, the other team is just going to wait to pick you off.
Flanking is most effective when timed to perfection. If an enemy falls in a key position, opponents will being scrambling. If your team is aggressive in taking map space, your flank can be the decisive blow.
Minimap Awareness
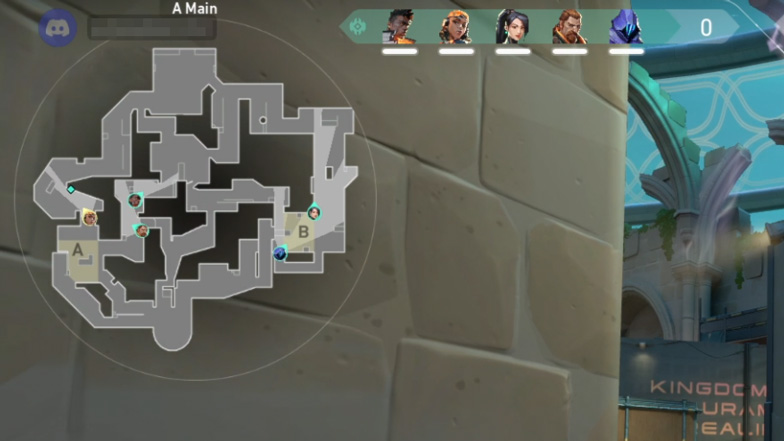
A lot of people don’t pay attention to their minimap enough, so let’s talk about how it can give you an advantage.
Firstly, you want to start with ideal settings. Here are the minimap settings I recommend:
- Rotate: Rotate
- Minimap Size: 1.2
- Keep Player Centered: Off
- Minimap Zoom: 1
- Minimap Vision Cones: On
- Show Map Region Names: Always
The “Keep Player Centered” option keeps the minimap centered around a player. This prevents the player from seeing everything on the minimap. It limits your potential for info.
The “Minimap Vision Cones” option lets people view teammates’ range of vision and helps strategize.
The “Rotate” option keeps your map rotating with respect to your movement.
As a low level player, you’re probably not looking at your minimap enough. You’re even more likely to be using it incorrectly when you do.
You need to continually check the minimap for fractions of information and, importantly, act upon the intel.
Here are some of the things you should do with your minimap:
- Look at teammate positioning to work out which areas of the map are covered and which are open for enemies.
- Look at the circle around your player so you know how far away enemies can hear you from, giving you a good indication of when you should shift walk.
- Look at your teammates’ line of vision: if they see multiple enemies, you might need to help them get out of trouble.
Enemy Awareness
Awareness is everything when it comes to improving at Valorant.
Being aware of everything the enemy is doing doesn’t just come down to how individual players are playing.
It also includes:
- Where a specific enemy can be on the map at any given time
- Which enemy agents have their Ultimate ability
- Which enemy agent is likely to have an Operator
- How healthy the enemy’s economy is and how likely they are to be saving or buying in a round
If an enemy agent used their Ult in the previous round, you know they can’t be using it again next round. This means you can adjust your round strategy accordingly.
Imagine you’re in a 2v1 vs Omen, they were last spotted at B but you know they have their Ultimate. You already know that there’s a large chance they’ll teleport if they have the spike. Your team could set up with one at each site based on this. Or, you could choose to stick together to play retake with a majority — everything is situational.
You also need to keep a watch out for which enemies are dead, which are alive, and keep track of their last known locations.
When you’re observing their patterns, you can also predict their likely plays.
Predictions are perfected with experience, and it’s only with experience that you master your game sense. However, this guide’s advice will put you ahead of lower level opponents if you put it into practice.
Here are some things to consider with regards to your enemy:
- When you’re about to buy, press tab and look at the enemy team’s stats. It shows you how many credits they have to spend and even whether their Ult is ready.
- Make a mental note of an enemy player’s positioning and tendencies.
- Keep track of enemy utility usage. If Raze already used her Boom Bot, you know she’ll struggle to push you out of close angles on the site. If Sage used her wall aggressively, you know they can’t defend a site as effectively later in a round.
- If anyone in the enemy team has 4700 credits, prepare to be playing against an Operator.
- If you hear Skye or Pheonix audio cues nearby, you can expect a flash to come your way. Be ready to turn your head away.
Audio Cues
You have to be mindful of audio cues. Footsteps, sprays, spike plant and defuse sounds, reloads, and ability sounds are all things to be mindful of.
Not only should you have an ear out for this at all times, but you can also fool an enemy team by faking a rush on either site.
As soon as they hear your footsteps at A, the enemies on other sites will rotate for A. And that’s when you silently rotate to B, plant, and defend.
Keep a track of your footstep circle around your agent in the minimap.
Train your ears to determine exactly where enemy sound is coming from.
Use the following two rules in mind to get better at reading audio cues:
- Footstep sound is actually slightly different for every agent. Brimstone’s footsteps have a lot of bass, which can give them the negative effect of sounding louder. Jett’s footsteps are lighter — even though they’re the same volume in theory.
- The louder the sound, the closer the source.
Attacking Strategies
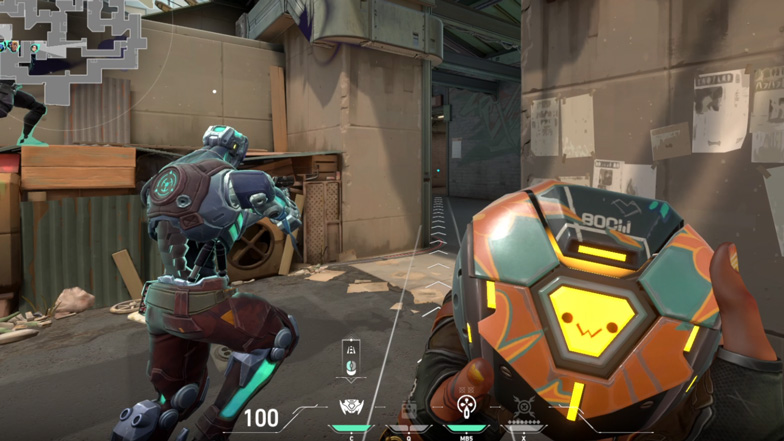
You have 1 minute 40 seconds to plant the spike on offense, with an additional 40-second spike timer once you plant the spike.
Low level players struggle with knowing different ways to take control of a site, get the spike planted, and defend the site after a plant.
At the lowest levels of Valorant, there is one strategy more prevalent than all others, and it makes up 90% of all attacking rounds.
Can you guess what it is? It’s the ‘all 5 players push the same site at the same time’ strat.
There’s a large chance that you try to do it almost every round.
We’re not saying this is a bad strategy.
In fact, there’s only one bad strategy in Valorant: being predictable.
Doing the same thing every round is a bad idea.
If the opponent knows what you’re going to do a large percentage of the time, they’re going to counter your play.
Here are a few different attacking strategies you can try:
- Rush towards a site, initiate the attack, take kills, plant spike, lock down the site, and wait for the spike to blow up.
- Hold around the attackers’ spawn area for about a minute, only to rush and plant in the next 40 seconds.
- Fake an attack at the A site with footsteps and small utility use. Send a couple of allies near to the B site to pick off any flankers and to take control of B for your team to rotate to.
- Four teammates can attack a site whilst one lurks behind to pick off opponents, or to look out for a potential rotation to the other site.
- 3-4 players can push through mid whilst 1-2 watches the flanks. From mid, you can decide whether to push to A or B (or C).
Your attacking strategy can also differ depending on whether you’re buying or saving.
If you’re saving, your minimum goal should not be to win the round. Instead, you should aim to pick off multiple enemies to damage their economy as much as you can. From there, you might also get a bonus chance at winning the round. How does your strategy change based on this?
Playing Retake on Defense
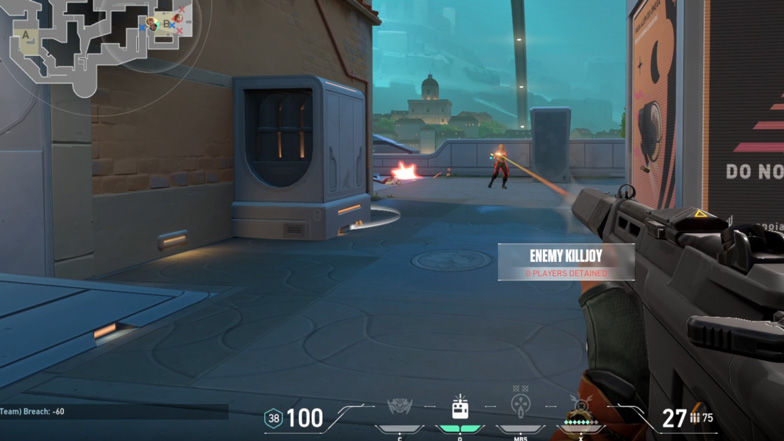
The most common defensive play at low levels is to send 2 players to a site and 3 to another. Maybe one player watches the middle of the map.
In almost every game, there is no deviation from this strategy.
On top of this, there is no understanding of the concept of playing retake.
What do we mean by ‘retake’?
To retake a site means to give up a site to your opponent and then try to take it back.
If all 5 enemies rush a site and you’re the lone defender, or there is only one team mate with you, don’t just sit there and get punished.
Instead, back off, give up control of the site, then work with your team to retake it in unison.
This works because your team can attack from multiple angles and, with good utility usage, you can trap the enemy team in a small location.
The ability to retake a site also means you can totally mix up your defensive play calls.
You will never see a team in Gold or below send all 5 defenders to one site with the intention of defending it, with the back-up plan to play retake if the enemy goes to the other site.
However, this is a perfectly viable strategy when timed correctly.
When would you do this? If one site is heavily favored by attackers and multiple enemies have their Ult, you might want to give up a site because it’s likely you’ll be overrun.
Like with attacking strategies, the only bad defensive strategy is to be too predictable. You can’t set up to play retake every round.
Just remember:
It’s perfectly fine to leave a site if you’re unable to maintain control.
Leave the site and take it back as soon as your teammates rotate from the other site. Ask your teammates to back up if they sound like they’re going to be in trouble.
Other times, you might be confident in your ability to take down 2-3 enemies and decide to play aggressively on defense.
The other thing you need to be aware of when defending: don’t immediately rotate to the other site just because a teammate says the enemy is there.
Yes, your team should often send 1-2 additional agents to support if necessary. But, in case the enemy is faking or plans to rotate, you shouldn’t give them a free ticket to the other site every time they try to trick you.
As well as trying to rotate to defend, you should also look to take map space away from your opponents when possible. Also throw in the occasional flank to keep them on their toes.
Composure
Even good players can lose their cool in certain situations. To efficiently rank up, you must get a grip on gamer rage and nerves.
Here are some tips on how you can control your emotions during the game:
- Remember that anger is likely to make you play worse. Channel your emotions into playing well, even if your team aren’t.
- Do physical exercise daily and train your mind to become more resilient. Think about past scenarios where you lost your composure and work on not doing it again.
- Be kind to yourself and to others in the game.
- Try to ignore those that are swearing at you, but consider whether they’re making a good point at the root of it. Was the last round your fault, and can you improve how you’ve been playing? Was your play fine? Can you explain how teammates could help you more effectively?
- Mentally visualize yourself in tough scenarios on different maps over and over again, Think about how you will win difficult 1v2 and 1v3 scenarios. Think about angles you can approach from. Think about the cover you can take. How will you utilize your remaining abilities? Will you switch to your pistol when you need to reload or will you quickly bunny-hop and take cover? Visualizing will make it feel like you’ve been in lots of clutch situations before, and it will feel more natural as a result.

