If you’re playing The Legend of Zelda: Tears of the Kingdom, it’s important to work your way through the Shrines while you explore. They’re crucial for unlocking different abilities and getting the hang of combat mechanics.
The In-isa Shrine is the Shrine you need to beat in order to get the Fuse ability. It’s a little more complex than the Ukouh Shrine, but still quite quick to solve once you know where to go.
Here’s a quick guide on how to beat the In-isa Shrine in Tears of the Kingdom.
How to Beat the In-isa Shrine
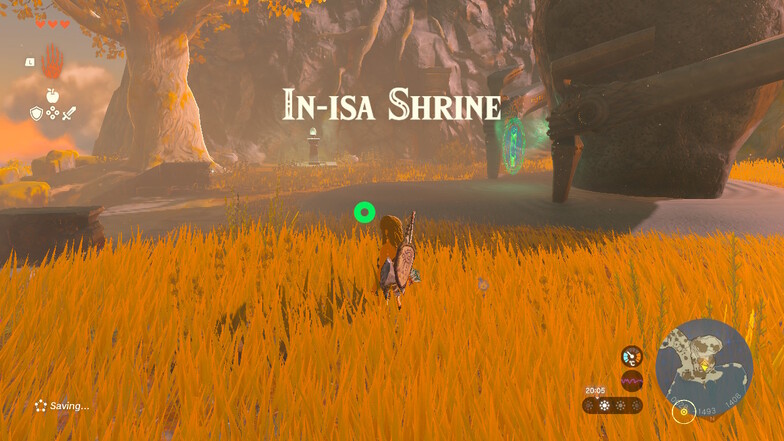
The In-isa Shrine can be found in the location shown below.

To start the encounter, interact with the Shrine entrance.
You’ll get a small cinematic explaining what the Fuse ability is and how to use it.
The Shrines in Tears of the Kingdom almost all revolve around using a specific ability, and the In-isa Shrine focuses on this particular ability.

As a reminder, hold down L1 and select your chosen ability with R.
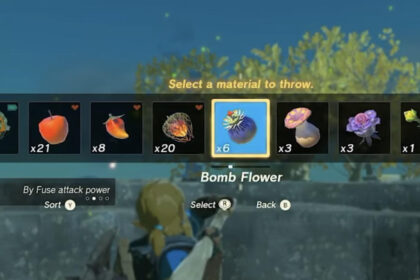
From there, you’ll be able to select eligible objects from your environment to fuse with your equipped weapon or shield. The weapon or shield will take on qualities of the item that you have fused with it.
Once you’re inside the Shrine, pick up a nearby boulder with Fuse and fuse it with your weapon.

Then, knock down the gray wall blocking the next section of the Shrine with your new weapon.

Don’t worry, you won’t take any damage from the wall falling on you.
Enter the next room and turn right, then pick the Fire Fruit from the nearby trees.

Take all of them if you have the inventory space, as they can be incredibly useful when cooking. In particular, you can use them to create meals that boost your attack in high temperatures.
There’s also a spare bow and set of arrows nearby if you don’t have one already.
Once you’ve picked the Fire Fruit, you’ll get a prompt explaining how to combine different materials with your arrows.

All you need to do is to use ZR to draw your bow, hit the up button on your D-Pad and hold it, then use R to select which item you want to attach.
This can be a bit finicky, so I’d recommend practicing a little before proceeding. You can turn motion controls off to make aiming a little easier if need be.
Once you’ve got the hang of this, attach a Fire Fruit to your arrow and look up. There is a chest being held up by a bundle of ivy, which you’ll need to fire at.

Hitting it successfully will drop down the chest. Inside, you’ll find a Small Key which is essential for your progress in the game.
There’s another chest nearby, but you can skip this if you’re on a time crunch as it’s not required for beating the In-isa Shrine.
If you want to get the extra chest, head back out of the Fire Fruit room and keep running straight forward until you reach two stone pillars.
Hit the pillar on the right with your Fused stone weapon, and an extra chest containing a few spare arrows will drop down.

Then, head up the stairs to the side of the pillar and open the green door.

Follow the path along, and head up the ladder.

You’re almost done with the Shrine, as this section is essentially the final boss battle.
Here, you’ll need to face off against a Captain Construct, which is a type of Zonai enemy.

As with most Zelda games, there are a few different ways that you can deal with this enemy. You can charge straight in and defeat it with a melee weapon, although this may take a few attempts as it hits hard.
My personal recommendation would be to head to the platform on the left and to start attacking it with your bow and arrow. Despite the covers on the platforms having holes in them, you can use them to shield from attacks.
Use a Fire Fruit arrow to ignite the leaves below the Captain Construct. This will take out a significant chunk of its health and make the fight a lot easier.

Once you’ve done this, make sure to loot the Captain Construct.
It drops a few handy items, including a Construct Bow which is a type of fireproof bow that will come in handy later on in the game.

After you’ve picked up your loot, smash the final gray wall ahead of you and interact with the Shrine to start the final cinematic.
You’ll leave the Shrine automatically, so you’ll be able to heal up and replace your equipment soon after if needed.
What to Do Next
After you’ve beat the In-isa Shrine, you’ll receive an Energy Cell. The Steward Construct will tell you about a cave system to explore in order to learn more about Zonai machines, which is worth doing as soon as possible.
Make sure to continue exploring and looking for new gear and weapons, though.
The ability to Fuse things to your weapons and shields will be super helpful when going through the cave, but there are some tricky fights ahead. Keep looking for other Shrines and unlocking more abilities where possible.