Equipment load is one of the most important stats in Elden Ring. It is directly affected by your character’s weight which is a result of your equipped armor, talismans, and weapons.
Compared to your maximum weight capacity, your current equipment load will affect your mobility, especially how you dodge. Learning how to manage equipment load is just as important as understanding how scaling works.
This guide will explain the basics of how weight and equipment load affects gameplay. Most importantly, it will also explain how to increase equipment load in Elden Ring so that you can wear heavier armor without affecting your movement.
How Equipment Load Works in Elden Ring
First and foremost, your character’s maximum equipment load is based on your current Endurance attribute.
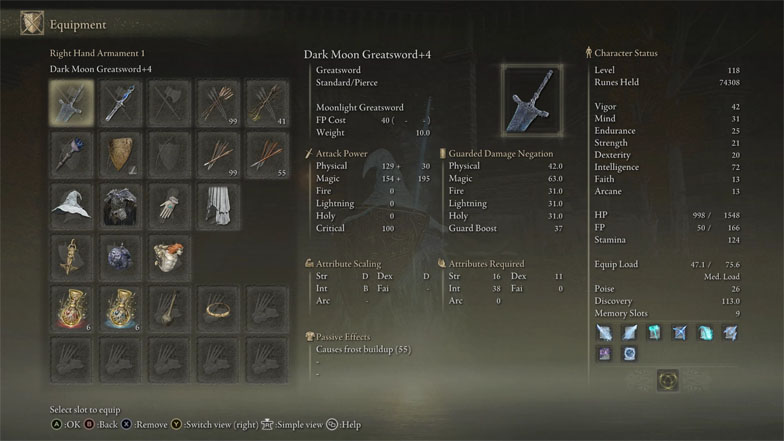
Raising Endurance to increase equipment load was originally a feature in Demon Souls and Dark Souls. But it was changed in Dark Souls 2 and Dark Souls 3, where they added the Vitality stat to govern equipment load.
Fortunately, the feature was reverted to its initial state in Elden Ring. As a result, for every point added to Endurance, your character’s stamina and maximum equipment load will also increase.
Regarding increasing equipment load, you’ll see the most returns until Endurance reaches its soft cap at 60 points. Though it is still possible to raise the maximum equipment load past that, it will be diminishing returns as you’ll receive fewer stat gains per level.
Now the number to the left of your maximum equipment load is your current equipment load. It is based on everything you have currently equipped on your character.
Every armament, armor, and talisman has a designated weight that adds to your burden when equipped. However, consumables are weightless, so you can carry as much as you want.
Finally, dividing your current equipment load by your maximum equipment load gives you your character’s weight ratio in decimals. Then, you can multiply it by 100 to convert it to a percentage.
For example, on my current build, my current equipment load is 47.1 and my maximum equipment load is 75.6. That puts my weight ratio at 62.3%, which means that my character is carrying a medium load.
There are four weight ratio thresholds that affect your character’s mobility in Elden Ring:
A 29.9% weight ratio is a character’s lightest state. As a result, you’ll have the longest possible roll distance, backstep distance, recovery speed, and additional invincibility frames.
However, unlike in previous Dark Souls installments, the positive bonuses of light rolling are barely felt. On the plus side, the Blue Dancer Charm talisman raises attack power with a lower equipment load, letting you trade away defensive comfort for more offensive power
A 30% to 69.9% weight ratio is the average for any character. Staying within this weight threshold provides a decent amount of defense and poise while also giving you the standard evasion without any stamina penalties.
A 70% to 99.9% weight ratio puts you in a burdened state. When you dodge, your character will perform a clumsy, fat roll that covers almost no distance while negatively affecting your invincibility time. Additionally, your stamina regeneration will negatively take a hit.
Lastly, a weight ratio at or over 100% puts you in an over-encumbered state. Movement is severely limited, and you can’t even dodge.
On a parting note, while it’s nice that FromSoftware has once again tied increasing equipment load to Endurance in Elden Ring, it is baffling that they removed the weight ratio stat present in previous titles. While you can compute the weight ratio yourself, it feels unintuitive and unnecessary for players to calculate the value manually.
Increasing Equipment Load
As explained in the previous heading, you’ll want to raise endurance to increase equipment load in Elden Ring. Therefore, any armor and talismans that buff endurance also temporarily raises maximum equipment load while it’s equipped.
For example, the Hierodas Glintstone Crown and Imp Head (Wolf) headpieces both increase endurance. While talismans like Radagon’s Soreseal also add temporary points to endurance while equipped.
Activating Godrick’s Great Rune also provides a sizeable buff to endurance. Committing a Rune Arc to increase equipment load through this method is a great way to overcome a difficult roadblock.
Regarding talismans, there are three items that directly increase equipment load in Elden Ring. Two out of three of them have upgraded variants that further raise your maximum equipment load.
Arsenal Charm
The Arsenal boosts maximum equipment load by 15% when equipped. You can find it near the end of Stormveil Castle, Limgrave, just before fighting Godrick, the Grafted.
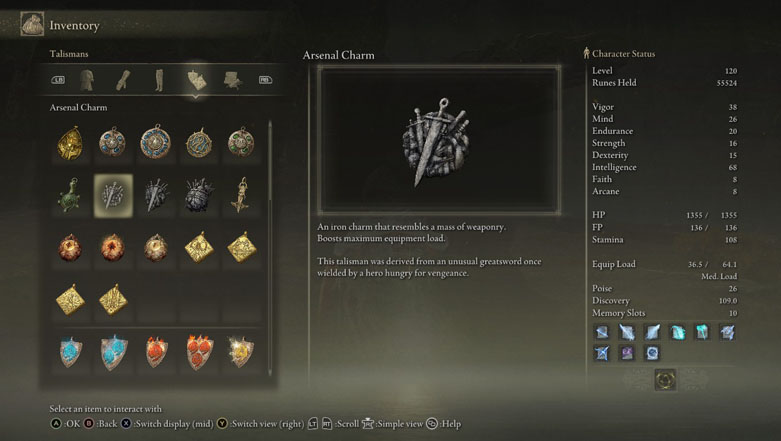
Players need to search for Nepheli Loux, she’s the friendly tarnished NPC who is wearing the Hero’s starting armor set. Start from the Secluded Cell Site of Grace, then move away from Godrick’s golden boss fog.
Deal with the troll waiting there and the soldiers accompanying it. Keep heading south and go into the room. If you went past the wooden barricades, you’ve gone too far.
Speak to Nepheli Loux and exhaust her dialogue, as usual with FromSoftware NPCs. She’ll offer you her assistance to take down Godrick, the Grafted.
Whether or not you summon Nepheli Loux to fight Godrick, the Grafted, she’ll return to the Roundtable Hold as soon as he’s defeated. Don’t forget to rest at the Site of Grace unlocked after killing Godrick to trigger her to move away from the area.
Then, you can find Nepheli Loux in front of the library, where Gideon Ofnir stays. Talk to her and she’ll give you the Arnesal Charm.
If she doesn’t appear in the area after defeating Godrick, the Grafted, try exhausting Gideon Ofnir’s dialogue first. Afterward, reset the area by fast traveling to the Roundtable Hold’s Site of Grace and she should be there.
Arsenal Charm +1 is the upgraded variant of the talisman. It increases maximum equipment load more than its base variant at 17% instead of 15%.
You’ll have to take a trip to Altus Plateau to find Arsenal Charm +1 in Elden Ring. Starting from the Grand Lift of Dectus, keep following the main road north.
Eventually, the road breaks into an off-beaten path and will curve along the face of the cliff. Follow that until you reach a broken bridge with a wandering merchant and a finger reader.
Don’t use the waygate as you’ll teleport to the other end of the bridge. Instead, jump down the broken segments and into the remote forest.
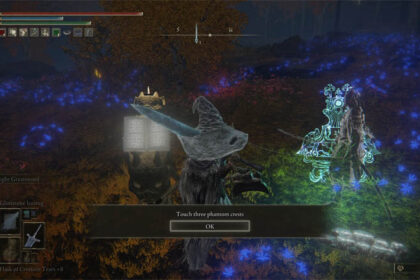
While you’re here, there’s a puzzle to the west that requires you to touch three phantom crests. Successfully accomplishing the task will reveal the Mirage Rise tower, along with its rewards.
There’s a Minor Erdtree in the center of the remote forest. Head south and look for the entrance to the Altus Tunnel. Once inside, take the lift down and rest at the Site of Grace.
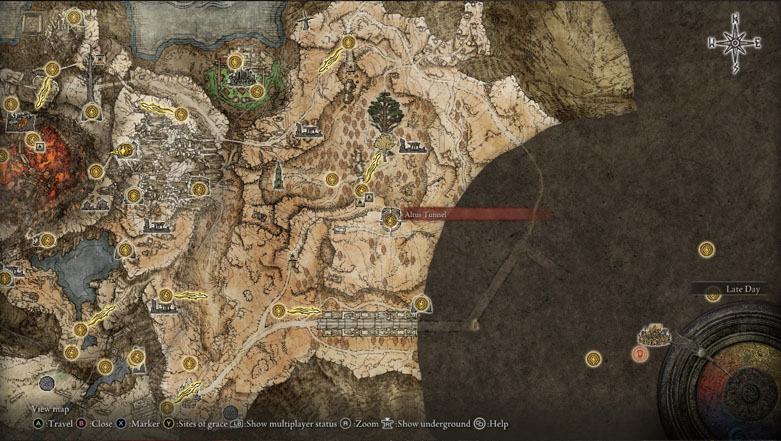
Venture inside to find a cavern filled with Stonediggers mining away and branching paths. One of the paths leads to a very large cavern with a giant insectoid creature hanging upside down.
You might have seen one previously in Ainsel River while exploring underneath Ainsel River Well in Liurnia of the Lakes. While these monstrosities are immobile, they have a lengthy aggro range and will attack with powerful spells.
The best way to deal with it is by using long-ranged attacks. For example, the Loretta’s Greatbow sorcery can reach enemies far away. Faith-based casters can opt for the Frenzied Burst incantation as it also hit targets at a long distance. If you’re not using any kind of magic, you could always use a regular bow to snipe the creature.
Following the creature’s death, jump down the large branch and go to the very top. Grab the shiny purple item on the hanging corpse to get the Arsenal Charm +1.
Erdtree’s Favor
The Erdtree’s Favor talisman is an all-around great talisman to have as it increases important stats, namely maximum health, stamina, and equipment load. There are two upgraded tiers of the talisman that you can collect later in the game.
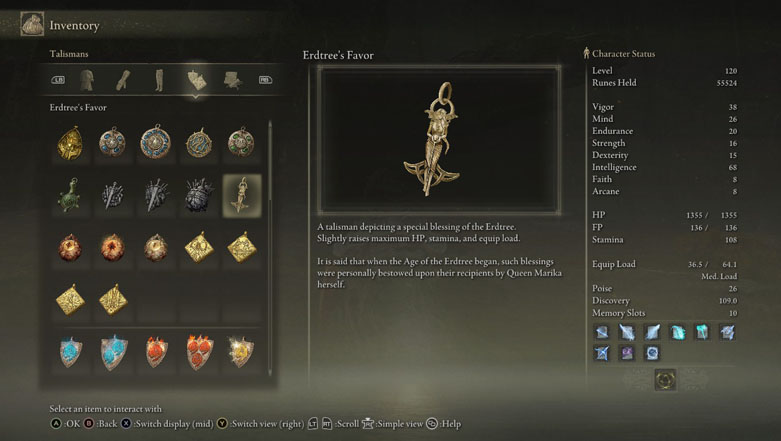
For now, the regular Erdtree’s Favor can be found right in Limgrave. In fact, it’s right inside the tutorial area.
You may remember the imp statue seal in front of the lift that leads to Limgrave. It takes two Stonesword Keys to break the seal and access Fringefolk Hero’s Grave.
Fringefolk Hero’s Grave is a cruel and unwelcoming dungeon. You’ll start by crossing a poisonous bog and then end up dodging against a quick and lethal spiked chariot.
As notorious as these chariots may be, there is actually a way to completely avoid them. The Ash of War: Raptor of the Mists lets you dodge through the chariot with the right timing. It’s great to see that the underutilized prosthetic in Sekiro: Shadows Die Twice found renewed vigor in Elden Ring.
Use the spaces on either side of the wall to evade the chariot. These nooks are a temporary respite against the onslaught of the chariot, and allow you to observe its pattern to better move away from it
Be wary that a few of them have spectral soldiers to ambush you. The most important note to remember is to fight with your back against the wall, not the chariot, so you won’t get knocked down on its path.
On the lower level of the ramp, make a break towards the bridge and jump to the platform below. Be wary of the imp enemies waiting to ambush you. It’s a good habit to spam the target lock function in darker areas as it will automatically target an enemy if they’re within range.
Further forward, there’s a trap that spews fire at you down the stairs. You can shoot it with a bow or any ranged spells to deactivate it.
There’s a large open chamber in the room after the fire trap. At the end of the bridge, the Erdtree’s Favor talisman can be looted from the corpse. Get ready to run and roll through because two Grafted Scions will drop down when you’re in the middle of the bridge.
Once you’re done, explore the rest of Fringefolk Hero’s Grave for more great rewards.
Erdtree’s Favor +1 further increases equipment load, maximum HP, and stamina. You’ll find the upgraded talisman at Subterranean Shunning-Grounds, which is under Leyndell, Royal Capital.
At the end of Subterranean Shunning-Grounds you’ll face Mohg, the Omen. You’ll receive Bloodflame Talons incantation as a reward for defeating him.
Additionally, open the treasure chest at the altar to get the Erdtree’s Favor +1 talisman to further boost its helpful effects.
The best variant is the Erdtree’s Favor +2, aside from raising maximum HP and stamina, it also increases equipment load by 8%. However, you can only get Erdtree’s Favor very late in the game.
First, you have to transform Royal Capital Leyndell into Leyndell, Ashen Capital. To do that, you have to burn the Erdtree after defeating Maliketh in Farum Azula.
Once that’s done, fast travel to the Forbidden Lands Site of Grace. Then, ride the lift to go back into the city.
From here, head west into Capital Outskirts. Continue down the long bridge with dangerous enemies until you reach a wooden lift that takes you down to Leyndell, Ashen Capital.
Peek over the railing and you’ll see a desecrated ashen field with a roaming Ulcerated Tree Spirit. Don’t become overconfident because more will emerge when you step foot on the field.
The Erdtree’s Favor +2 is located at one of the protruding roots near the south of the area. You can either run and avoid the Ulcerated Tree Spirits entirely or defeat them before grabbing the legendary talisman.
Great-Jar’s Arsenal
Last but certainly not least, the Great-Jar’s Arsenal vastly raises maximum equipment load. At 19%, the Great-Jar’s Arsenal talisman is the best talisman to increase equipment load in Elden Ring.
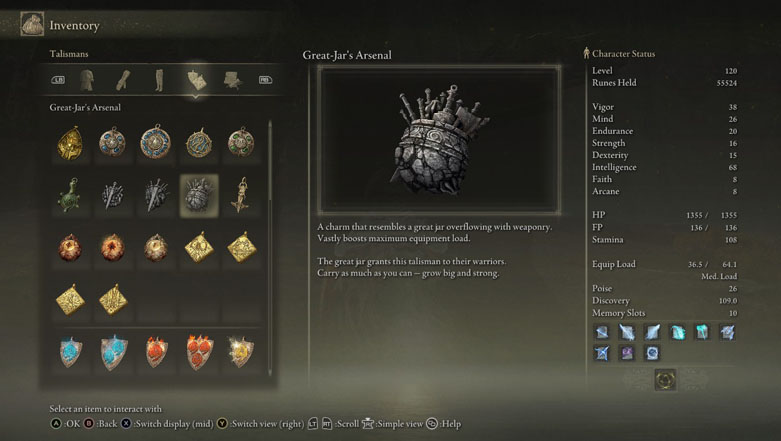
The Great-Jar’s Arsenal talisman is located at the northwestern tip of Dragonbarrow. You’ll receive it as a reward for finishing the Great Jar’s challenge. And you better believe that it is one of the hardest encounters in the game.
But first, you have to make your way to Mistwood in Limgrave. From the Third Church of Marika, go down the path and enter the circular structure named Siofra River Well near the Minor Erdtree.
You’ll take a really long elevator leading all the way down to the Siofra River. Ride your horse and take another lift at the end of the place to get to the main Siofra River area.
Then, ride all the way to the north of the Siofra River. Avoid the water as there are dangerous balls of lightning that can catch you off-guard.
Be on high alert as the Ancestor Spirit enemies are hidden and will appear when you’re near them. Get ready to dash and jump at a moment’s notice.
However, there isn’t much you can do about the Ancestor Spirit’s using a bow. They’re notorious for their aimbot-like precision and will constantly wear you down with their arrows. Make sure to heal up frequently and use the terrain for some breathing room.
Take the stairs at the northern tip of the area. Then, use a Stonesword Key on the imp statue to activate the elevator. It will take you all the way up to Deep Siofra Well in Dragonbarrow.
Alternatively, you can go to the area before where you got the Gold Scarab in the Abandoned Cave. It is possible to carefully jump down the branches but it is a riskier option.
After resting at the Site of Grace in front of the well, keep moving west past all the Abnormal Stone Clusters. There will be two giant golems who will try to hit you with great arrows.
You don’t need to kill the first one but it is highly recommended to take care of the second. If you don’t, the golem will disrupt your duels as you’re within the range of its arrows.
Talk to the Great Jar even though it will say nothing in return. Instead, three red summon signs will appear right in front of it.
You can touch the summon sign to view the loadout of your adversary. You have to defeat all three duelists without resting or dying to complete the Great Jar’s challenge.
The most important tip here is that these duelists seem to use the equipment of real players. Hence, you’ll fight a lot of meta and strong builds, like players who use the Rivers of Blood katana or the Sword of Night and Flame. So, the best option is to disconnect from the online servers and play offline.
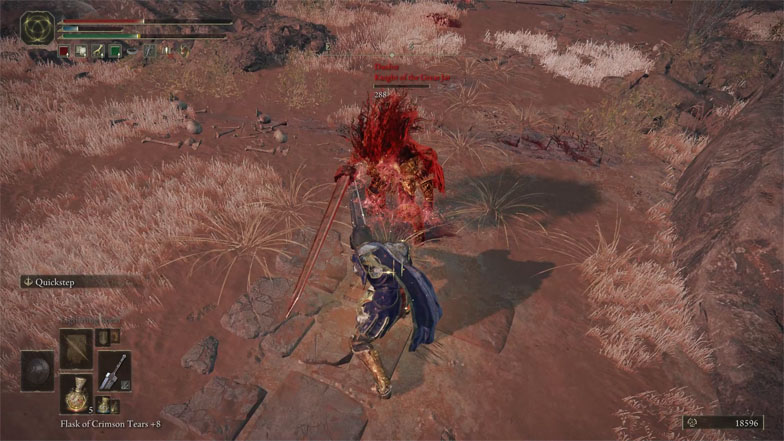
There is a consistency to playing offline as there will only be the same three duelists. Therefore, you won’t have trouble trying to adapt to random factors each try.
These fights are extremely difficult if you’re playing honorably. They’re overtuned and you can easily die from one combo. Additionally, they also scale with your level so no matter what you’re level is it will still be a hard time.
The saving grace of this fight is that their AI is a little wonky and prone to cheese. How I personally took on the challenge was by equipping two spears imbued with cold and bleed, and only attacked during a big opening.
Unfortunately, it was almost impossible to use my colossal weapons as one mistake could lead to my death. It was definitely a rage-inducing moment when the duelists would endure through my hit and kill me with one weapon art.
For casters, Elden Ring’s enemies have a nasty tendency to read your inputs and dodge immediately. I’d recommend using delayed spells like the Rock Sling sorcery or the weapon art of the Halo Scythe to trick them into dodging the cast but not the projectile.
There are certainly ways to cheese the fight even further like baiting them to fall on the edge of the cliff near the rocks. You can also give them the gentle push they need by using incantations like Rejection or Wrath of Gold.
Weapons and incantations that proc madness is also a good choice for this challenge. After successfully stacking madness, you’ll have enough time to deal the killing blow on them.
Try to save your flasks between duels by using items like the Warming Stone to restore HP or the Starlight Shard to recover FP. Don’t forget to refresh any buffs between battles too.
After defeating the three duelists, you’ll receive the Great-Jar’s Arsenal as a reward. As mentioned earlier, it’s the most cost-efficient way to increase equipment load in Elden Ring.
How to Optmize Equipment Load
Now that you know how to increase equipment load, there’s a good chance you have a clearer vision of how you want to build your character.
That said, you might need to learn how to respec in Elden Ring. That way, you can better distribute your attribute points to increase or decrease your maximum weight capacity.
However, in order to do that, you must first learn how to enter the Raya Lucaria Academy and defeat Rennala.


