Thunderjaws are enormous creatures that used to bring fear to players of Horizon Zero Dawn. Since they are pretty much the franchise’s mascots, they returned in Horizon Forbidden West.
Menacing as ever, these machines will destroy anything in their path once provoked. It doesn’t take more than showing up to make them aggressive, and they might be nearly as hard to defeat as it is to beat a Slaughterspine.
Although Thunderjaws are tough, scary, and challenging machines, they are not impossible to defeat. It can certainly be done with the proper preparations.
In this guide, we are going to teach you everything you need to know about how to defeat a Thunderjaw in Horizon Forbidden West using Aloy’s weapons and skills.
Where to Find Thunderjaws

There are a few different spots where you will find a Thunderjaw in Horizon Forbidden West. Some of them might be alone, while others might be accompanied by lesser machines.
Marked sites are pretty easy to find since you can use the map to locate the areas where the Thunderjaws are. On the other hand, unmarked sites can either surprise players or cause them not ever find the machines they are looking for.
The Thunderjaws that are not alone will be extremely more complicated to deal with. These major machines are already powerful enough to cause trouble on their own, so make sure to carefully choose where you intend to engage with them.
Marked Sites
South to Stone’s Echo settlement is where you will probably find the first Thunderjaw machine. It is not accompanied by lesser machines besides a survey drone.
There is a Thunderjaw on the hills in the Scalding Spear area, which is located in a Tenakth settlement at the southern edge of the tribe’s territory. There are quite a few machines in this area. There is a Tallneck nearby and a few Grazing Fanghorns.
Between Salt Bite and The Memorial Grove, you will find another marked site with a Thunderjaw that wanders nearby wind turbines.
To the North of Scalding Spear, there is another marked site with a Thunderjaw. This is also an area with a lone Thunderjaw, but sometimes you might find it being looted by a group of rebels.
Finally, there is another Thunderjaw to the south of Cliffwatch. It will be roaming alone between the snow-covered mountains.
Unmarked Sites
Near the Zenith base, below the downed Horus, you will find a Thunderjaw that is part of the quest called The Valley of the Fallen. Please, keep in mind that the machines encountered due to this quest will not respawn.
When traveling by foot or grounded mount near the campfire to the north of Mono Lake, you will be ambushed by a Thunderjaw.
Strengths, Weaknesses, and Loot

Thunderjaws are hulking, heavily armed, and armored combat machines. They move and strike with speed and ferocity while relentlessly deploying their array of powerful weapons.
These heavy machines have a hard outer casing to protect synthetic muscle and operational systems. They are strong versus frost and shock damage, but they are weak to purgewater and acid damage.
Here are all the Thunderjaw’s parts and why they matter:
- Ammo Drum: this detachable part contains valuable resources. It is destroyed when the Thunderjaw is defeated, so you must detach it to collect its content.
- Antenna: This detachable part is used to call reinforcements. Attack it to make sure you won’t have to deal with other machines while fighting a Thunderjaw.
- Chillwater Canister: This is a detachable part that contains valuable resources. It is destroyed when the Thunderjaw is defeated, but it can also cause a chain reaction if hit with frost damage.
- Data Nexus: This is an indestructible weak spot, but you deal massive damage when you hit it.
- Disc Launcher: This piece allows the Thunderjaw to launch several explosive discs. It is also a detachable part that contains valuable resources. However, it is not destroyed when the Thunderjaw is defeated. Once detached, the Disc Launchers can be used as a weapon.
- Glowblast Canister: This is a detachable part that contains valuable resources. It is destroyed when the Thunderjaw is defeated. However, it can also be detonated with plasma damage to cause massive damage to the machine.
- Heart: This is an indestructible weak spot, but you deal massive damage when you hit it.
- Radar: This piece allows the Thunderjaw to detect enemies, even stealthy ones. It is also a detachable part that contains valuable resources. It is destroyed when the Thunderjaw is defeated.
- Rapidfire Cannon: These pieces on the Thunderjaw’s head fire energy projectiles. Rapidfirecannons are detachable parts that contain valuable resources. They are destroyed when the Thunderjaw is defeated, so you must detach them to collect their content and prevent the Thunderjaw from using energy blasts.
- Sparker: This is also a detachable part that carries valuable resources. It is destroyed when the Thunderjaw is defeated, but it can also cause a chain reaction if hit with shock damage.
- Tail: This Key Upgrade Resource is destroyed when the creature is defeated. Detaching it prevents the Thunderjaw from using its tail attacks.
With all that in mind, you will be able to come up with a good plan to fight Thunderjaws in Horizon Zero Dawn. Honestly, it’s not that complicated once you get the hang of it.
I generally start detaching the Antenna, so I won’t worry about any backup. After that, I go for the parts that have the attacks that I dislike dealing with.
These are the items that Thunderjaws drop:
- Glowblast: This is an uncommon resource that is used for crafting ammunition that deals plasma damage to prime enemies for a plasma blast.
- Metal Shards: Used for crafting ammunition and purchasing items from merchants.
- Crystal Braiding: This ammunition resource is usually obtained from machines with Stealth Generators, Force Leaders, Gravity Generators, laser weapons, or shields. It is used for crafting Berserk Hunter Arrows, Targeting Hunter Arrows, Staggerbeams, and Shieldwires.
- Braided Wire: Used for upgrading weapons at the Workbench.
- Large Machine Core: This rare resource is used for upgrading the most powerful weapons and outfits at the Workbench. It is one of the main reasons players want to hunt Thunderjaws.
- Sturdy Hardplate: Used for upgrading outfits at the Workbench.
- Thunderjaw Circulator: This item, which is unique to Thunderjaws, is used for purchasing and upgrading weapons and outfits, or selling for Metal Shards.
- Thunderjaw Primary Nerve: This rare resource, which is also unique to Thunderjaws, is used for upgrading weapons and outfits, or selling for Metal Shards.
- Volatile Sludge: This rare ammunition resource is obtained from the most powerful and dangerous machines, such as the Thunderjaw. It can also occasionally be obtained from any Apex variant machine. It is used for crafting advanced and elite ammunition and traps.
- Machine Muscle: Used for crafting ammunition for Sharpshot Bows, Blastslings, Ropecasters, and Shredder Gauntlets.
- Luminous Brainstem: This is a very rare gear upgrade resource. It is rarely obtained from the most powerful and advanced machines. This item can be used for upgrading the most powerful weapons and outfits at the Workbench.
- Metal Bone: This is a rare Ammunition Resource that is used for crafting ammunition for Tripcasters, Spike Throwers, and Boltblasters.
Detachable Weapons

The only weapon you can use once detached from a Thunderjaw is the Disc Launcher.
This is a heavy weapon that works pretty much like a rocket launcher. It shoots an explosive disc in a straight line and has only four charges.
It is a great way to deal massive damage to the Thunderjaw, especially if you have exposed its Heart or Data Nexus. It’s also an easy way to inflict a lot of damage.
It is also very useful to damage armor since it has the potential to expose vulnerable parts of any machine with a well-placed shot. Sometimes, a not well-placed shot might do the job just fine due to the big explosion that each disc causes.
I personally like using this weapon every time I have the chance. It’s effective, it’s there, and it doesn’t deplete my own resources.
Thunderjaw’s Attacks

- Bite: It opens its jaws and launches its head towards you. You can simply dodge to the side to avoid this attack. You can tell that this attack is coming because the Thunderjaw will look down before doing it. Sometimes it will bend its neck to the side and step forward before performing this attack. Make sure you can recognize this variation as well.
- Charge Attack: The Thunderjaw will run towards you in a straight line. This attack can be devastating if you get hit. Fortunately, if you are not too close to it, this will be pretty easy to avoid by dodging to the side.
- Disc Launchers: The Thunderjaw will shoot discs in the air that will use a laser-based guiding system before exploding. Just pay attention to the lasers, and you will know when it is the right time to dodge and where not to go.
- Energy Shots: This is an attack that the Thunderjaw uses after you have removed some of its weapons. It will fire laser-like beams that will travel in a straight line most of the time.
- Rapid Fire Cannons: It looks a lot like medium-range machine guns on the side of the machine’s head. This is another attack that you can just dodge out of the way.
- Stomp: When you are too close to the Thunderjaw, it will heavily stomp the ground. This attack causes damage in an area of effect, so keep that in mind when Aloy is close to the machine.
- Tail Attack: The Thunderjaw will slam its tail against the ground if you are close to it but attacking from behind. It can also use its tail to sweep you away when you’re near its head. Don’t push your luck when you are close to this machine.
The Apex Thunderjaw

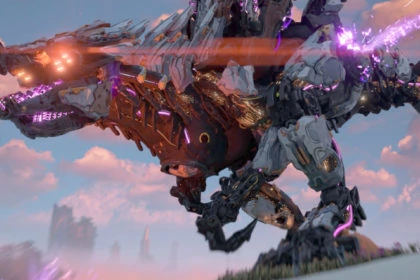
The Apex Thunderjaw is a hunter-killer variant, recognizable by black and gold armor plates and purple muscles. It has been modified to be significantly more resilient and deadly.
This machine cannot be overridden and provides significantly better chances of dropping good loot once defeated. For that reason, it is the recommended go-to variant when your objective is to farm items.
This Apex variant machine has 100% drop rates for Crystal Braidings, Metal Shards, Glowblasts, Luminous Brainstems, and Apex Thunderjaw Heart.
The latter is a Gear Upgrade Resource that is exclusively obtained from Apex Thunderjaws. It is used for upgrading weapons and outfits, or selling for Metal Shards.
Unlike the standard version, the Apex Thunderjaw is weak versus acid damage. Still, it is strong versus all other types of damage in the game.
Also, there isn’t a Thunderjaw Heart drop from the normal variant of this machine, so defeating the Apex version is the only way you will come across this item.
There are other differences too that are important to be aware of. For instance, the Apex version has Blaze Canisters instead of Chillwater Canisters. Also, it has Purgewater Canisters instead of Shock Canisters.