Sometimes just good old Vanilla Minecraft doesn’t really do it for us anymore. There are things we wish to do or see that aren’t part of the game, but we badly want to experience them.
Maybe we want to see a functioning spinning windmill or to add more biomes and variety to already existing ones. That is why Minecraft mods are so nifty.
It is really easy to install Minecraft mods and make the game feel brand new and exciting all over again. There are countless mods to choose from too, so let’s see what are some favorable picks and how we can install them.
How to Install Mods on Java Edition
To install mods for Java Edition Minecraft is pretty easy. Before you go looking at what mods you want to add to your Minecraft, you will first have to look for Forge. This is a simple program that will help you run any Mods that you want for Java Edition.
Installing Forge
Forge is a program that acts like a Minecraft Launcher of its own that is able to install and apply mods to Vanilla Minecraft. There is a version of Forge for each version of Minecraft that is out there.
You will have to make sure that your Forge and mods have compatible versions when you go downloading.
If you, for example, have a mod for 1.15. Minecraft, your Forge also has to be the 1.15. update. This will apply for any version of Minecraft and every mod.
When you open the website for Forge, you will be met with a list of all the existing versions of Minecraft and Forge. Each of these has a “Latest” and “Recommended” version.
The “Latest” refers to the most recently updated and debugged version of Forge for that particular update, and not for the Minecraft version itself. Usually however, it is best to simply go with the “Recommended” option.
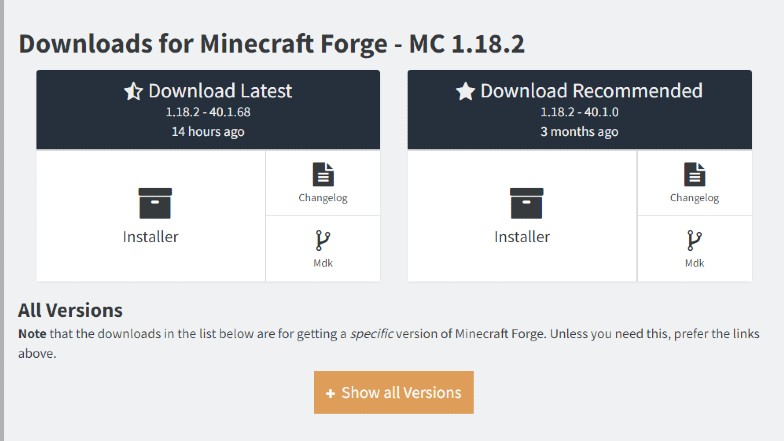
Click on the “Installer” button. It will redirect you to a partially blank website where you have to wait 5-10 seconds. A “Skip” button will appear in the upper right corner. Click on it and the download will begin.
Once the download finishes, simply click on the .jar file that has downloaded. This will launch the Forge installer.
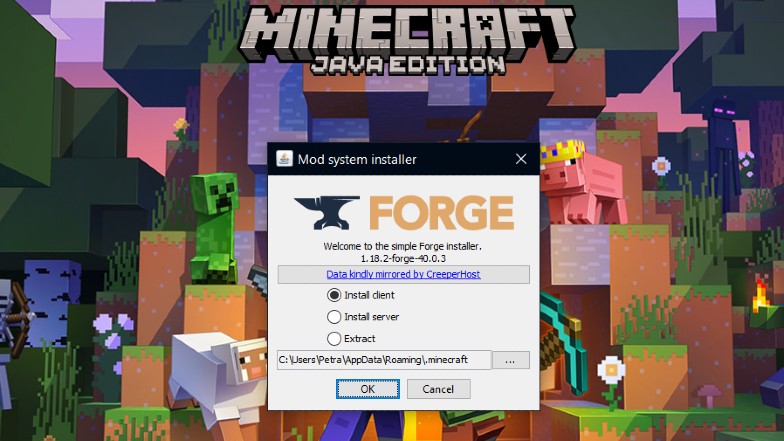
The Installer will choose the appropriate file folder where it should be installed in the .minecraft folder. If you are just installing mods for yourself select the option “Install Client” and then “OK”.
Once the client has been installed you will get a popup that notifies you. Then simply open up the Minecraft Launcher and under profiles select the “Forge” profile.
Before you install and run any mods you will need to launch Minecraft’s Forge profile at least once so that it can work properly.
Installing Mods
It is important that you get your Minecraft mods from a reliable Website, like Curse Forge. Curse Forge has thousands of different mods which you can all safely download. Take your time while browsing.
Once you have found a mod you like, make sure you read exactly what versions it is compatible with and if it has any other requirements.
Certain mods need other mods to work. When you are sure click on the small “Download” button in the corner.
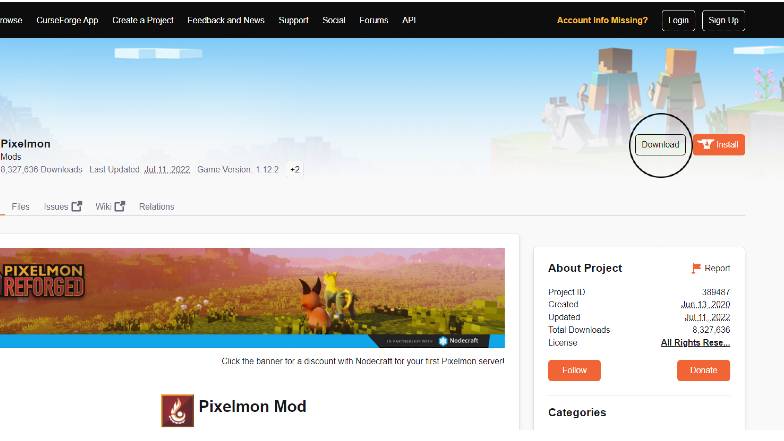
Just like with Forge, you will have to wait a couple of seconds and then the mod’s .jar file will be downloaded automatically.
Next you will have to find your .minecraft folder and the mods folder inside it.
To find .minecraft on Windows press the Windows key and R and type in %appdata%.
On OS X you will have to input ~/Library/Application Support/minecraft in your search bar.
For Linux you can find the folder in: /home/user/.minecraft
If the mods folder isn’t there you can simply make a new file and name it appropriately. Make sure that you write it in all lower case.
In there simply copy and paste the downloaded .jar file for your mod or mods. Then open the Launcher and launch the Forge installation. All the Mods you have put in should be under “Options” and “Mods” where you can activate them.
How to Install Mods on Bedrock Edition
With Bedrock Edition it is a little different to install mods. They cannot be installed like they can be in Java through Forge. This means that your options for mods are far more limited than on the other version.
Minecraft Bedrock mods can be installed either through the Marketplace which you can access from your Main Menu, but not all of these are free, or as Addons from websites like mcpedl.
Many mods here don’t just alter the game, but they can give you skins and even alter the way your game looks. On Java Edition doing this is a whole different process.
You mainly have to go into the Marketplace and select the ones you want. If you are installing Addons from other sites it will be much simpler than on Java Edition.
Once you have found the Addon you prefer, you can simply extract the file by double clicking. The next time you launch the game it will be immediately imported and running if the version is correct.
Best Minecraft Mods
With thousands of Mods at our disposal it becomes quite hard picking out just one or few for us to try. There are mods for utility that make the game much easier to play, changing up the UI and HUD.
Other Mods add more to the gameplay and crafting, expanding it and giving you loads more to work with.
Utility Mods
- Just Enough Items – A Minecraft Mod aimed at improving Inventory sorting and Item searching. It gives you the entire new HUD that allows you to search for all the Items you may need and their related recipes.
This is one of the Mods that works great with other Mods and it can often be found in Modpacks to help with Item searching. - Journeymap – Rather than constantly making new Maps as you explore areas, Journey Map is a mod that gives you a permanent map that does not need to be crafted. At the push of a button you can access the enormous map that actively maps every place you explore.
- Optifine – Optifine is a Mod that assists all those players that may not have the beefiest of computers or laptops. Not only does it help the game run smoother, but Optifine is also used to install Shader Packs, which enhance the way the game looks.
- Here’s What You’re Looking At – A perfect Mod if you struggle remembering the names of Items and what mod they are from. It displays all the needed information simply by pointing your cursor at whatever you need some info on.
This mod can also be made compatible with other mods and it greatly helps with identifying all the new things you may have added to your game.
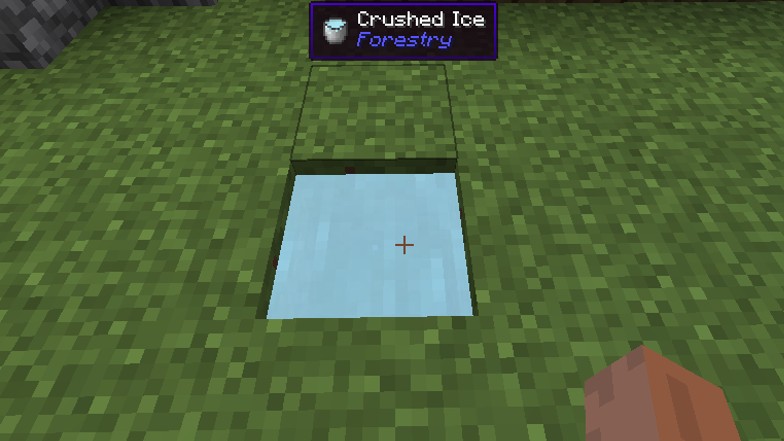
- Inventory Sorter – If you are tired of sorting out all your different items, then this is definitely a Mod you just have to have. This mod allows you to automatically sort all the items in your Chest and Inventory by simply clicking your middle mouse button.
Fun Activity Mods
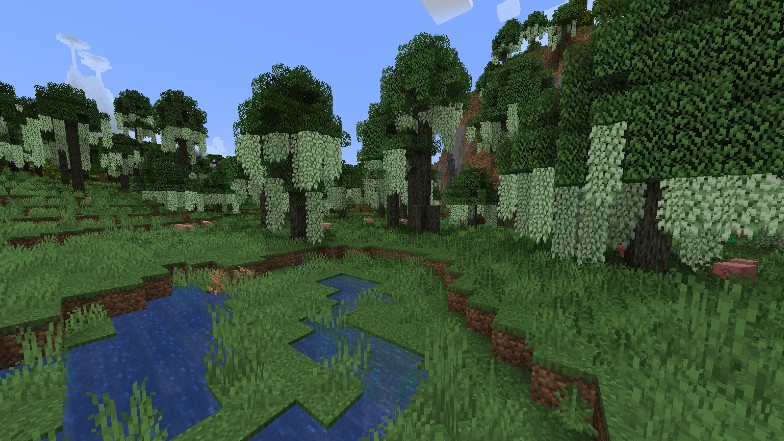
- Biomes O’ Plenty – If you feel like the current Biomes in Minecraft are lacking, then Biomes O’ Plenty will help brighten up the scenery. This Mod brings in many new biomes, along with new blocks, plants, trees, and much more for you to explore, build and craft with.
- Pixelmon – Pokemon is an age old classic we all keep coming back to. So why not bring it into Minecraft?
Pixelmon adds many aspects from the Pokemon games to Minecraft, including catching, battling with, and breeding 8 generations of Pokemon. - Chisel – Chisel is the perfect Mod if you want to add some much finer details to your builds and furniture. Chisel allows you to add a whole variety of decorative blocks as well as shift textures around.
- Ice and Fire: Dragons – For fans of fantasy creatures and monsters, Ice and Fire: Dragons is a Mod that adds a large variety of mythical beasts for you to fight or train, with a big emphasis on multiple types of dragons.
- Pam’s Harvest Craft 2 – A mod made specifically for those who are bored of farming and cooking the same exact few kinds of foods. Pam’s Harvest Craft will add over a 1000 new food items to your world that you can grow, gather, and prepare.
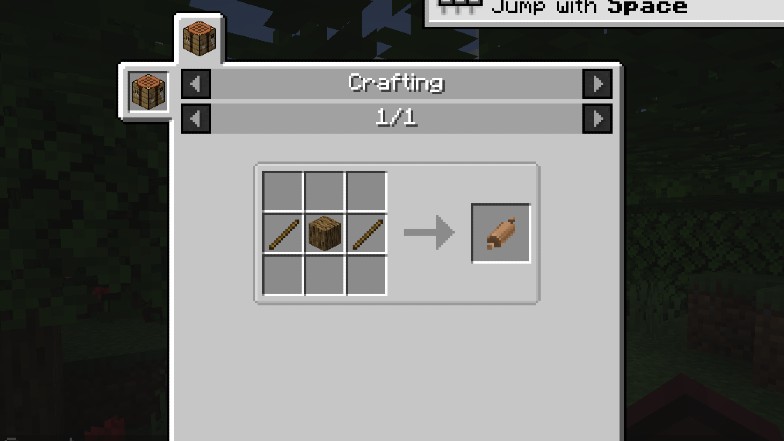
- Carpenter’s Blocks – Expanding even more on decoration and furniture, Carpenter’s Blocks is a mod that adds an extensive amount of decorative items. From realistic chairs and chandeliers, to many other things that allow for the creation of much more complex designs.

