Taking your favorite NHL team to glory in Franchise Mode is a special feeling, but creating a brand new team and writing NHL history – that’s the real challenge.
The Expansion Draft has long been one of the most popular NHL features, and this year is no different. You can create a team in NHL 22 from scratch, design their jersey, create a mascot, construct their arena, and build a brand new roster to compete with the league’s best.
Here is how to start Franchise Mode with one of the NHL 22 custom teams.
Start an Expansion Draft
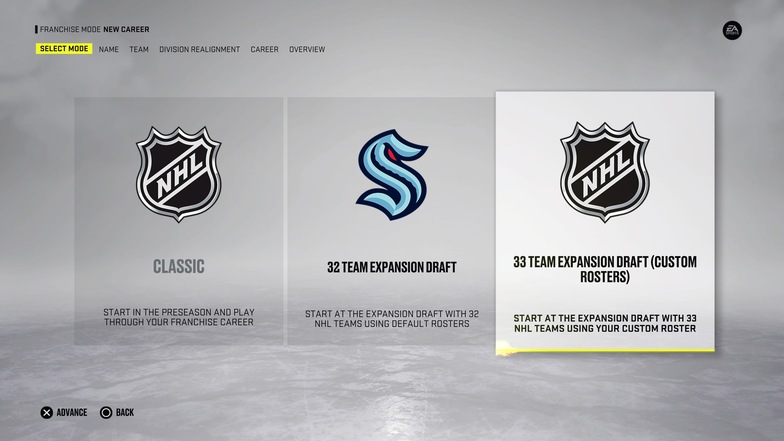
In NHL 22, you can play two types of expansion drafts. You can start with the Seattle Kraken and play the 32-team draft, or opt to create a 33-team expansion draft, with your created team being the 33rd. In this case, the Seattle Kraken will already be in the league.
To start with a custom team, select the 33-team expansion draft. On the next screen, select Create Team. The other option, Select Team won’t be available if you haven’t already created a custom team.
Customize Your NHL 22 Team
Now is the time to create a team from scratch in NHL 22.
You have five things to create here:
- Details (name, nickname, arena name, etc.)
- Logos and branding
- Team uniform
- Arena
- Mascot
Changing Your Team Details
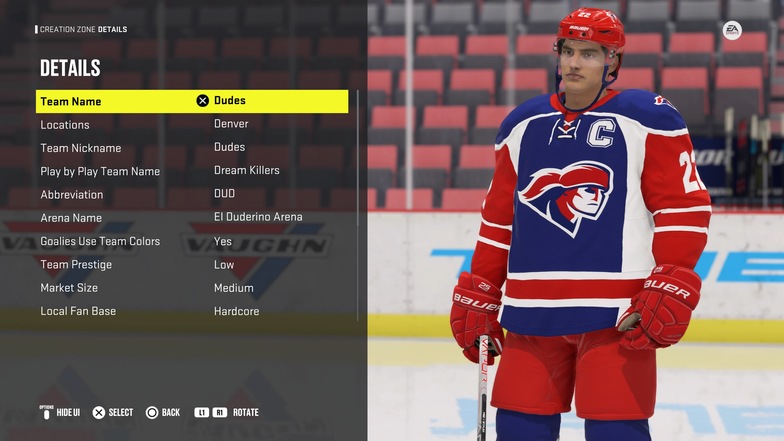
This is pretty standard – come up with a name and give your team an identity. Just be aware that your Location + Team Name will be your team’s entire name. So, the Buffalo Sabres would have “Sabres” as their team name, and Buffalo as their location. Putting “Buffalo Sabres” as the team name would result in your team being called Buffalo Buffalo Sabres.
Here, you can also set your Team Prestige, Market Size, and Local Fan Base. I like to go with Low team prestige and work my way up (choosing “Bottom” for team prestige I feel is really low). You might want to go with a Large market size to attract high-profile free agents, I go with Medium.
Finally, I like to set my local fan base as Hardcore because I like the idea of a small-town team having 100% passionate fans. You can go with Devoted if you don’t like the pressure.
Creating Your Logo, Branding, and Team Uniform
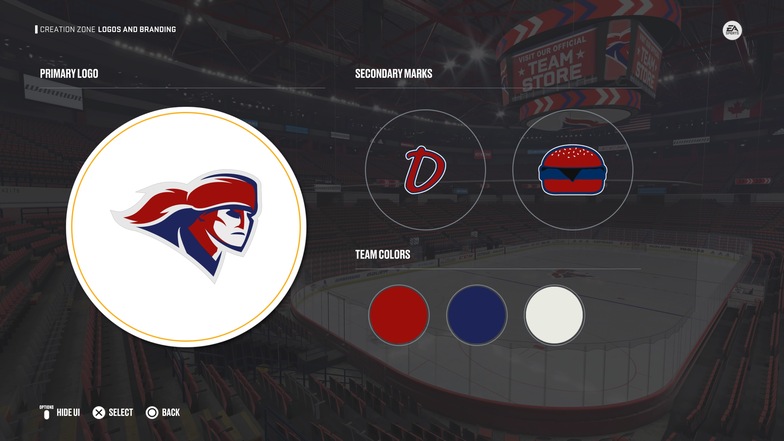
To design your logo, you can go to Primary Logo Style and find several options. You have current and vintage NHL logos, as well as simple font options. If you want to create a team from scratch, you will find the best logos in the Custom Logos category. Find something that works for your team name and have fun with it. You can set your team colors right in the Logos and Branding menu.
To create a team uniform, I suggest going to your home/away/alternate jersey menus and tapping Square (PlayStation) or X (Xbox) to apply team colors. The game will automatically create a uniform that uses your team colors on all items. You can then tweak things you want to tweak, this is just much easier than changing each part of the uniform manually.
Team Mascot and Arena
I won’t get into too much detail here since these two things are pretty straightforward and don’t have too much bearing on the experience.
Although I will admit that creating a mascot is fun, I just wish there were more options. On the other hand, there are way too many options when it comes to arena design – you can change your light effects and pretty much every color in the entire building.
Save these things and advance.
Edit Your Franchise Mode Settings
Create your GM name and proceed to team selection. Make sure you select the team you’ve just created and proceed to Division Realignment. You will be asked if you want to customize the AHL teams for the Seattle Kraken and your brand new team – this is entirely up to you.
In Division Realignment, you can choose where you want each team to play. I like to mix things around and create the most equal experience. Since one division will have an extra team, I like to make sure that the teams in that division aren’t too overpowering.
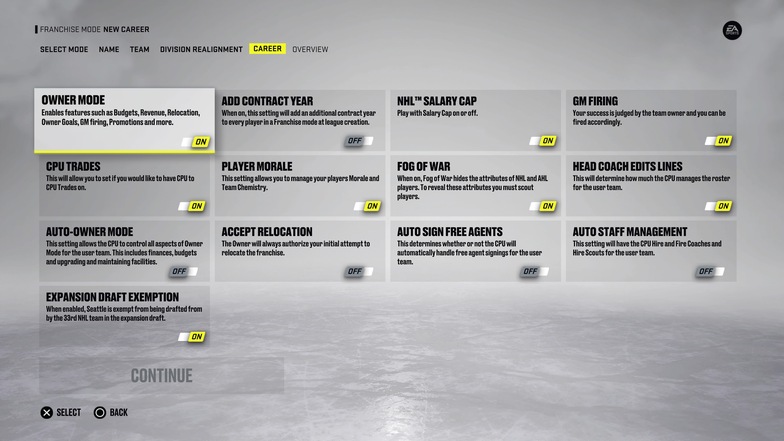
The next screen is very important: you can edit your career settings to create an experience you want to have.
The most important settings are:
- NHL Salary Cap: I always recommend keeping the salary cap on for a more realistic experience
- GM Firing: Turn it on if you want to be judged (and potentially fired) by the owner
- Fog of War: Keep it on for realism – you won’t be able to see player attributes until you scout them
- Owner Mode: If left on, you’ll be able to handle the budget, revenue, relocation, etc.
How to Do the Expansion Draft in NHL 22
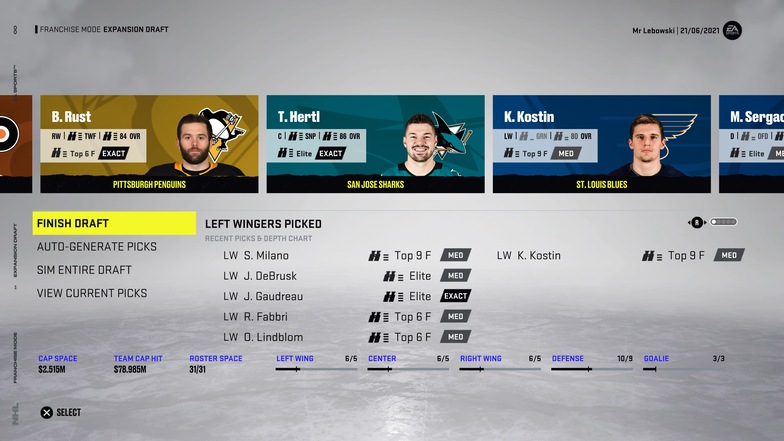
Finally, the last step is arguably the most important one: you need to draft one player from each NHL team (except for Seattle). You can opt to auto-generate picks but where’s the fun in that?
Instead, go through the teams patiently and choose the players you like.
It’s important not to fall into the trap of going for the best-rated player available from each team. What you need to do is plan out your lines and draft with them in mind. Make sure you have a few top players as starters and team leaders – go through each team once and identify these players.
After that, pick the players with good contract situations (avoid the ones that are grossly overpaid) and watch your salary cap. Ideally, you also want to go for some of the best young players in NHL 22 and start your franchise around them. Of course, you won’t have access to players like Auston Matthews and Connor McDavid but someone like Mikhail Sergachev (22 yrs, 87 OVR, Elite potential) will be available.
Make sure to watch your roster spots a the bottom and draft at least 15 forwards, 9 defenders, and 3 goalies.
Also, don’t worry, you can always remove a pick if you don’t like it, nothing is set in stone until you select “Finish Draft”.
Final Word
Starting Franchise Mode with a custom team in NHL 22 can be a rewarding and exciting journey. You can create a unique team and write history for your hometown, a vintage team, or go in any possible direction you can think of.
The key thing is to set up your team, choose the right settings, and draft intelligently. Once that is done, you can start making GM moves and creating a dynasty that will dominate the league for years to come.

