PlayerUnknown’s Battle Grounds, popularly known as PUBG, is arguably one of the most progressive games of our time because it was the first one to fully incorporate the “battle royale” element in its gameplay.
Yes, technically speaking, PUBG is the first online multiplayer battle royale game. Since then, PUBG has taken a foothold in the industry; breaking Steam records here and there and maintaining its standing as a top game all-around.
Just like any battle royale game though, PUBG is also eternally hounded by the constant need to have stable latency and framerates. In fact, I’d wager that any modern shooting game requires these two things and more.
It’s virtually impossible to play competitively when you have bad latency/extreme lagging and, of course, low ping. These things enable players to quickly assess plays, make moves, identify enemies, and just overall, play the game comfortably.
Don’t worry! There are actually a lot of reliable and free ways how to increase fps in PUBG. We’ve compiled the simplest but tried and tested ones in this article.
Turn Off Your Lighting Software

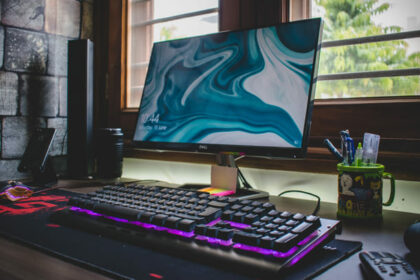
If you have a software to synchronize RGB lights for your PC, or even if you have a keyboard or mouse that lights up, turning that off may solve your fps drop problems.
There have been a lot of discussions about RGBs. Most have been sarcastic, some are just dismissive. Nevertheless, RGBs, or colorful hardware in general, are undeniably pretty to look at and it’s here to stay. There are even a lot of RGB software out there that enables users to create a beautiful harmony of lights.
Ideally, RGBs shouldn’t affect any computer performance. However, there are some software that are particularly dodgy. There are also official software that can have a wonky interaction with the game.
For example, Corsair’s iCUE was found to have been affecting PUBG’s framerates negatively.
Run PUBG on DirectX 11 or DirectX 11 Enhanced

DirectX is a series of Microsoft applications that are responsible for multimedia outputs like games. What DirectX does is basically link the game to your graphic and multimedia hardware. By doing so, users will have an overall better visual experience.
Right now, the latest version of DirectX is DirectX 12. You can check which version of DirectX is on your PC by going to the Run command, typing “dxdiag”, and in the window that pops up, you will find the version of DirectX at the very last of the System Information list.
Some players found that DirectX 12 is sort of broken in PUBG; even bordering on unplayable.
There is actually no way of changing or downgrading the entire DirectX orientation of your PC. However, you can “force” PUBG to run on a different DirectX through Steam.
First, go to your Steam game library and search for PUBG. Right-click on the game and click on “Properties”. Under the General tab, there is a “Launch Option” with a text box. Afterward, type “-dx11”.
For those with a mid to high-end build, DirectX 11 enhanced is the better option. There should be a double-digit percentage improvement under this setting.
Set Your Settings on Ultra Low Latency

Latency is the more technical term for “lag”. What players would want is consistently low latency. This can be affected by a number of things, ranging from network speed, monitor framerate, and even the type of mouse because latency refers to the time it takes for data to reach one point to the other. In a game like PUBG’s case, it could be the time it takes for server data to reach your monitor.
Nvidia has banked on this common issue of gamers by creating the “Ultra Low Latency” mode. According to Nvidia, this mode should improve latency by around 33% by using the maximum pre-rendered frames option. In easier terms, it’s like having a scheduled set of frames to process.
To turn this setting on, go to the NVIDIA Control Panel and look for “Manage 3D Settings” on the left menu. Under the Global Settings tab, scroll down until you see “Low Latency Mode”. Once you click on it, a drop-down menu should appear. Opt for “Ultra”.
Disable HPET

HPET stands for High Precision Event Timer. It is a hardware timer developed by Intel and Microsoft to synchronize multimedia. Hardware timers use a clock signal to add a certain value. Think of an electric circuit, but in this case, it’s value and data that is traveling in the circuit at certain time intervals.
HPET was created to provide smooth playbacks but in some cases, it has negatively affected games like PUBG. The problem arises when there is a different HPET interpretation vis-a-vis your PC.
This tip is especially applicable for high-end gaming PCs.
To disable HPET, go to the command prompt by pressing Windows + R. Type “bcdedit /deletevalue useplatformclock” and then press enter. Next, go to the device manager by searching for it on the Windows search bar or typing “devmgmt.msc”. Under System Devices, search for high precision event timer, right-click on it, and opt for “disable device”. Before playing, you have to restart your computer first.

