
Armor trims are a way to add some brand new detail to your metal armors.
While leather armor could be dyed in countless ways with colored dyes, giving you an entire rainbow of colors, armor pieces can only be the same color as the metal they were made from. To decorate metal, you will have to use ores.
This is exactly how you use armor trims; applying a different material to already existing armor.
In this article we will explain how you find armor trims and how to apply them to your armor.
Finding Armor Trims
Different armor trims can be found in different locations. They’re found as loot in loot chests in various structures throughout the world. Each place has its own pattern.
The following are locations where you can find trims:
- Shipwreck
- Pillager outpost
- Desert pyramid
- Jungle temple
- Ocean monument
- Woodland mansion
- Trail ruins
- Bastion remnant
- Nether fortress
- Stronghold
- Ancient city
- End city

In total there are 16 different armor trims that can be found.
You will also have to understand different ore levels, because ores are the way you’re going to be applying these trim patterns to your armor.
Minecraft Smithing Table Recipe
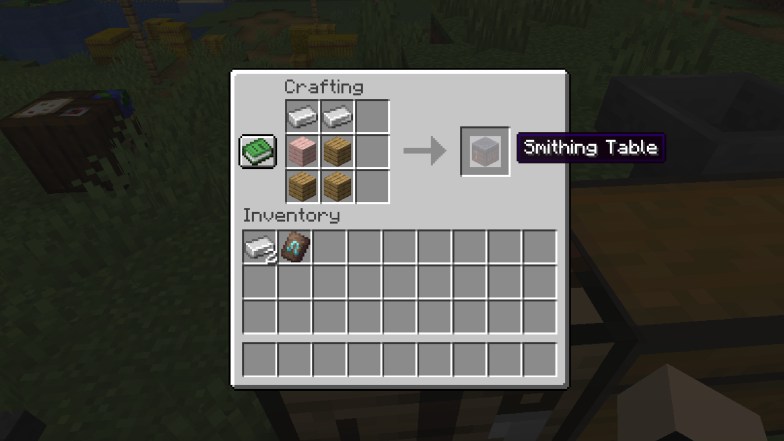
- 2 iron ingot
- 4 wooden plank blocks (any)
You will need a smithing table to apply armor trims to your armor. You can usually find one in some villages, but it’s easiest to craft one yourself.
This recipe is enough for a single table, which is all you need. Arrange your ingredients like in the image below:
How to Apply a Trim
Like we have said, there are a total of 16 patterns that can be found within 11 different structures in your Minecraft world.
Each of these trim patterns can be applied to armor with the use of different ores or crystals. The color of the applied pattern will completely depend on the color of the ore or crystal you are using.
The ores you can use for armor trims are:
- Iron
- Copper
- Gold
- Diamond
- Redstone
- Lapis lazuli
- Amethyst
- Quartz
- Netherite
All 16 patterns can be applied to each piece of your armor individually as well. This allows you all kinds of different pattern and color combinations to make your perfect armored look.
To apply an armor trim you need to interact with the smithing table.

In this hud you will see 3 slots. These are for your trim pattern, armor piece, and ore.
On the right of the hud you have a preview of an armor stand. Once all three slots have ingredients placed in them the smithing table will give you a preview of what that piece of armor will look like.
Clicking on the armor icon in the slot will give you that piece of armor.

What to do Next
Armor trims are a great way to customize your appearance in game without creating a complex custom skin. Though, this is not the only way you can show off and have some color on you.
If you’re in combat and you have to use a shield often, you can actually decorate your shield as well. Making a customized banner you can have a shield decoration that matches your armor and completes your look.


