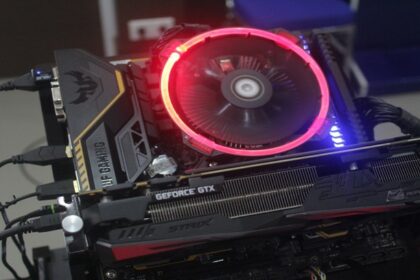
Some people believe that PC gaming is dying. However, that is not true. Live streaming, esports, and multiplayer gaming means that PC gaming will almost certainly never die. As such, selling your graphics card and buying a console instead may not be the best idea.
A problem that PC gamers do face, however, is the gradual reduction in performance over time. While this is more extreme in laptops, even desktop PCs suffer from this problem to an extent. Luckily, this is a problem that is easily reversible.
One of the reasons why PCs slow down over time is due to dust accumulation. The graphics card is one of the main parts that collect dust. However, cleaning it is not a straightforward process as you may risk damaging the GPU itself.
In this guide, we go through how to clean a graphics card. The first part goes through how to properly clean your card, while the second part explores why cleaning the GPU at regular intervals is important.
How to Clean a GPU
While your graphics card may feel sturdy and well-built in the hand, it is actually quite fragile. This is because even if a single part of it breaks, it could lead to the GPU not working properly.
Thankfully, you should not have any trouble cleaning your GPU as long as you are careful and you follow all the following steps to the letter.
Decide if You Will Remove the Graphics Card From the PC

You can clean your GPU with or without removing the graphics card from the PCI-e slot. If you decide not to remove the card, the cleaning process will be a lot simpler and quicker.
However, remember that not removing the card from the slot will not allow you to clean certain parts of the card. This will especially hamper your PC’s performance if you have not cleaned your GPU in a long time.
Our guide focuses on cleaning the card after you have removed the GPU from your PC.
What Cleaning Items do You Need?
The number of items required to clean your GPU will depend on which parts you intend to clean. Here, we have listed all the items required for a complete cleaning of your card.
- Microfiber cloths
- Isopropanol
- Can of compressed air
- Q-tips
- Appropriate screwdriver (consult your GPU’s manual, although most cards use a small-sized phillips head screwdriver)
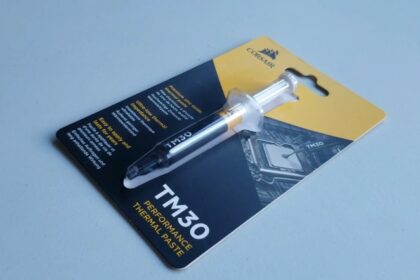
- Thermal paste (only if you plan to change the paste)
How to Clean GPU Fans
Once the card has been removed from the PC, use the screwdriver to remove the fans from the card. Most cards have between 2-4 screws holding them in place, and the fans should come off quite easily once the screws have been removed. However, remember to first disconnect the fans from the printed circuit board on the card itself. Cleaning the fans is incredibly simple, so let’s focus on it first.
Use the can of compressed to wipe away most of the dust. Any dust that is still left on the device can be wiped off with a clean and dry microfiber cloth. If your card hasn’t been cleaned in a while and the dust is not coming off, we recommend using the cloth with a small amount of Isopropanol. Lastly, use a Q-tip (you can dip it in Isopropanol) to clean any areas out of reach.
The heatsink is usually attached to the bottom of the fans and can be cleaned in a similar manner.
How to Clean the Graphics Card
First off, you should use the can of compressed air to remove the vast majority of the dust on the card. Remember that you do not need a lot of air to do this, and a single can should ideally last you multiple cleanings. After that, you can once again use the clean cloth and the Q-tips to wipe away any additional dust on the heatsink.
How to Replace the Thermal Paste on Your Graphic Card
The thermal paste is found on the bottom of the heatsink attached to the GPU fans. You can once again use the Q-tips dipped in Isopropanol to wipe off the thermal paste, before applying it again.
Make sure that you do not use too much thermal paste, as it may have a negative effect on your GPU instead of a positive one. A pea-sized drop is more than enough.
Also, there are certain GPUs that do not allow you to remove the fans (and thus the heatsink). In this case, you should never try to pry open the heatsink as it will almost certainly damage your card. Instead, simply use the can of compressed air and clean whatever parts of the cards you can with the cloth and Q-tips.
Reassemble and Install the GPU
Before reassembling, use compressed air one last time to make sure you have got all the dust out of your graphics card. After that, the reassembly process will be the exact reverse of the disassembly process.
Attach the fans to the PCB. Then, carefully and firmly screw the fans onto the card. Make sure that you screw them in the same orientation that they were unscrewed in. It might be a good idea to take a few photos of your card before disassembly to make sure you can reassemble it properly.
Finally, reinstall the card onto your PC. Make sure to do it in a deliberate manner, as yanking the card or putting too much pressure on any area may end up damaging it.
Why You Should Clean a Graphics Card
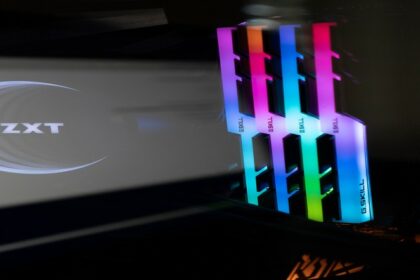
It is generally a good idea to clean your PC regularly. However, certain components are affected in a manner much worse when covered in dust compared to others. For example, there is no need to clean your RAM regularly, as the chips are usually plugged into the RAM slot on the motherboard and do not accumulate dust.
However, your graphics card will suffer a noticeable decrease in performance if it is not cleaned. Moreover, a GPU that is cleaned regularly will last a lot longer compared to one that is left caked in a layer of dust.
If you haven’t cleaned your graphics card in a while, we recommend benchmarking your GPU before and after you clean it in order to see just how much additional performance you managed to squeeze out of it. Testing a graphics card regularly is generally a good idea to make sure that it is performing at optimum levels.
Here are a couple of reasons why you should clean your GPU.
A Clean Graphics Card Does not Overheat
A lot of people wonder why their GPU is so hot. While there could be many reasons for this, dust is likely to be one of them.
The first reason why dust may cause a graphics card to overheat is the fact that it can get into vents and fans to block airflow.
Secondly, a layer of dust on the surface of the card can prevent the natural heat dissipation that all graphics cards are designed to do.
Lastly, it is a good idea to reapply the thermal paste on the GPU once in a blue moon. While the thermal paste is designed to last between 5-10 years, there is a small chance that it wears off earlier. As such, it is a good idea to reapply the thermal paste on your GPU once over 2-3 years. Without a proper amount of thermal paste, your GPU is surely going to overheat.
A Clean GPU is a Lot More Stable
Since your clean GPU is less likely to overheat, it stands to reason that it will also not thermally throttle. Thermal throttling usually occurs when a component is unable to cool itself to a suitable temperature and the system has no choice but to limit its power in order to cool it.
If you are experiencing random FPS drops when doing GPU-intensive tasks (such as playing most games), it is possible that your GPU is throttling. However, do remember that certain games are CPU-intensive (i.e. they require more CPU power and less GPU power). As such, it is possible that it is your CPU that is throttling.
A Clean GPU Lasts Longer
If you allow a dirty GPU to power your PC for longer periods, it is possible that the instability and thermal throttling will lead to your PC randomly shutting down. Eventually, it may damage the GPU (and even other components in your PC) itself and shorten its lifespan.
A dirty GPU is also more liable to short circuits that damage the card. Simply put, it is never a bad idea to clean your GPU regularly.
Conclusion
Cleaning your graphics card should allow you to squeeze every last drop of performance out of it. And as long as you do it in a deliberate and proper manner, there is no way your card will be damaged in the process.
However, what cleaning will not do is allow you to use your old graphics card to play modern AAA titles. If that is the case, it might be time to get a new card. Luckily, we know what to do with an old graphics card!

