Getting some of the best armor in the game is definitely an achievement, considering how far it can take to get that set. You don’t want to wear it out right away.
Sometimes you want to display it for others to see.
Making an armor stand will allow you to display your different armors and decorate your builds with them.
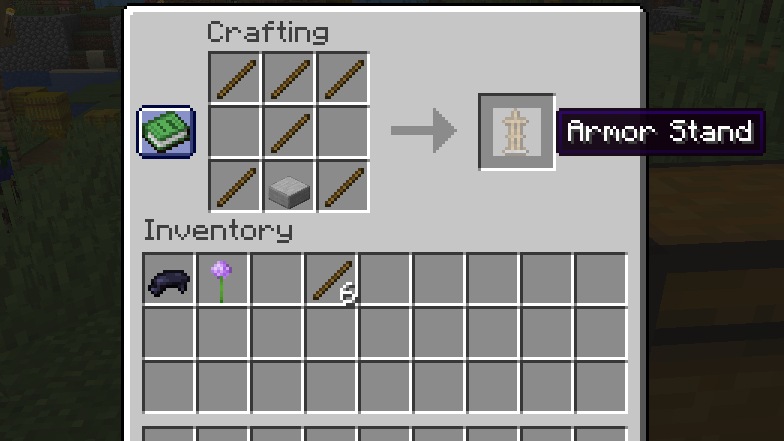
Minecraft Armor Stand Recipe
- 1 smooth stone slab
- 6 sticks
You can craft an armor stand on a crafting table and this recipe is enough to yield you a single one.
Luckily, the ingredients are pretty easy to get ahold of and you can make plenty to decorate your entire castle and base with it.
To make the armor stand just arrange the ingredients like they are in the image below:
Where to Find Armor Stands
Armor stands are items that are slightly rare to be found while exploring. You may still get lucky if you are near the taiga biome.
Every taiga village has 2 armor stands that can be found around the armory along with some armor on them.
How to Use
Now, the main usage of an armor stand is to hold your armor for you and display it. Any armor you put on it will appear as if worn by a mannequin, but that’s not all you can place.
You can place the following on an armor stand
- Armor
- Elytra
- Tools and weapons (Bedrock Edition only)
- Carved pumpkin head
- Mob heads
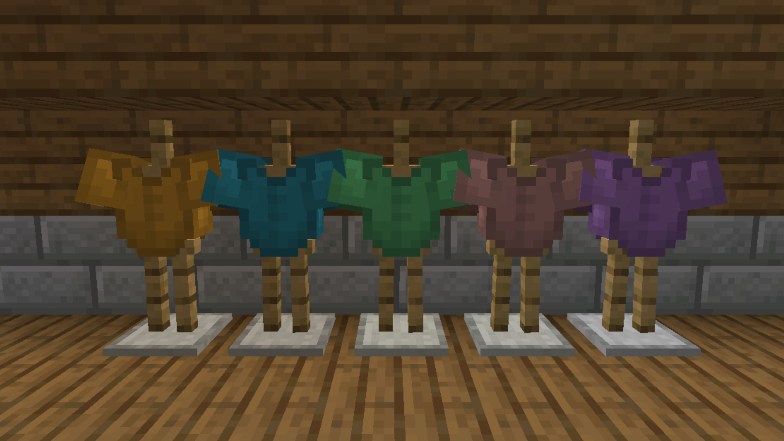
To place any of these items on the armor stand, stand in front of it and hold the armor piece or item you want to place on the stand. Then, simply right click on the stand.
The item will immediately go where it’s supposed to.
If there’s another item already there it will be replaced and the other item will appear in your hand or inventory.
To remove items from the stand simply right click on it with an empty hand.
How to Pose an Armor Stand (Bedrock and Pocket Edition Only)
Other than just placing armor and items on an armor stand, Bedrock and Pocket Edition allows you an additional feature with this block.
On these editions the armor stands look different: they have arms as part of their design.
Because of this in you can actually change the poses of the armor stands in both of these editions. In total there are 13 different poses you can assign to the item.
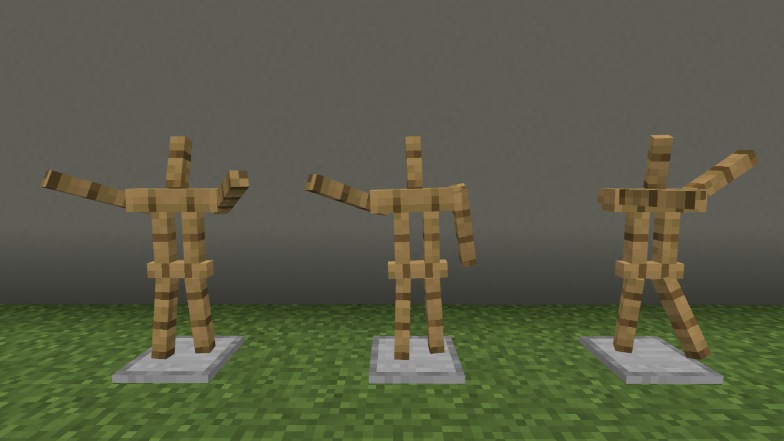
In Bedrock Edition Minecraft all that you need to do is sneak (crouch) and then press the use button on the stand. This is how you cycle through the poses.
On Pocket Edition, since it’s on mobile, you will have a ‘pose’ button available. Clicking on it will let you cycle through the same poses and assign them to the armor stand.
You can also change these poses using a redstone pulse.
What to do Next
If you have a particularly large build and don’t care for displaying your armor, you might be more interested in building a statue.
Statues are amazing decorative builds and you do not need to give up your armor for aesthetic purposes when building them.

