Stairs are climbable blocks in Minecraft that can be used to get up to certain places faster than by jumping up each individual block. Not only that, but they can be used as decoration in many different parts of a build.
Stairs are easy to build and come in many different colors and materials, from wood to different types of stone.
Most of us already know how to build your average staircase, but I can believe many of us have struggled with building a spiral staircase in the past. Making anything circular in Minecraft can be difficult.
So let’s look at how to build a spiral staircase the easy way.
Minecraft Stairs Recipe
- 6 Solid blocks (any)
To build stairs the recipe is simple.
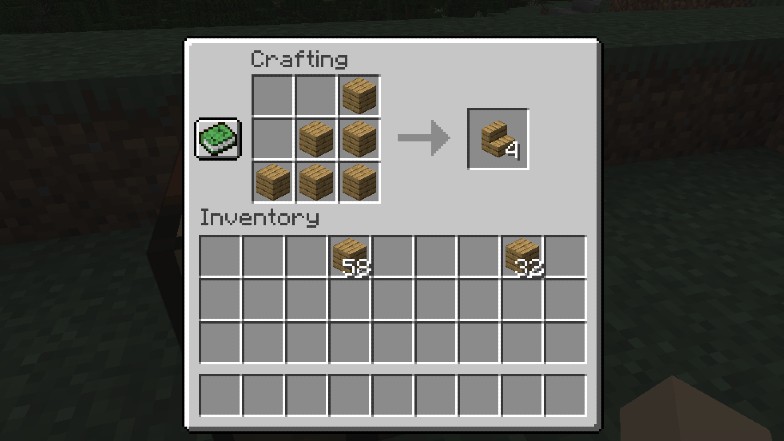
Arrange them in the shape of stairs on the crafting table as shown in the image above.
One of these will grant 4 stairs in total. A stack of 64 blocks grants 40 Stairs, with 4 blocks left over.
You can build Stairs from virtually any solid blocks within the game and each of them you build them the same way.
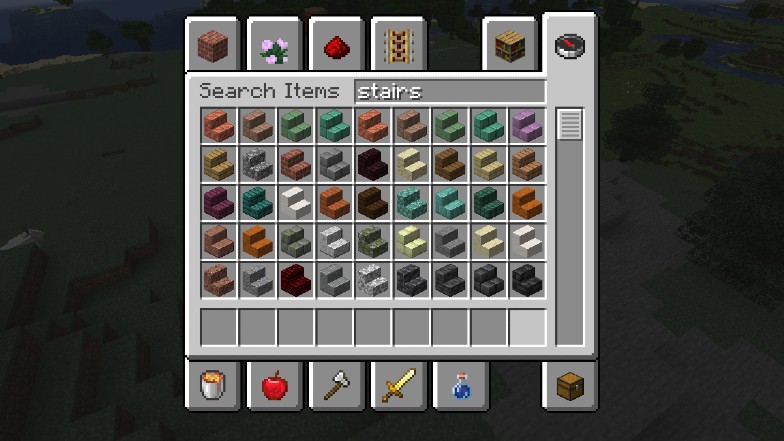
The list of materials you can use to make Stairs is extensive but I usually separate it all between wooden stairs and stone stairs.
Wooden Stairs can be made from all types of wood available in the game and that includes:
- Oak
- Dark Oak
- Spruce
- Jungle
- Acacia
- Birch
- Crimson Wood
- Warped Wood
For the stone ones the list is even longer, but I’ll cover the easier ones that you can get a hold of.
- Cobblestone
- Smooth Stone
- Andesite
- Diorite
- Granite
- Sandstone
- Brick
With each of these this includes all of their different variations. For cobblestone and stone it includes their mossy variations as well as stone Bricks.
Andesite, Diorite, and Granite have polished versions of their Stairs and so on and so forth.
Building With Stairs in Minecraft
Most building blocks when placed down are simply, well, placed. With stairs in Minecraft that’s not the case.
You see, depending how you place Stairs and if there are Stairs on the blocks adjacent to it, the Stairs may act differently. They’re also a type of building block that can be put upside down.
So allow me to explain how Stairs work when placed to make your building that much more easier.
When placing down a single Stair block it will always be turned to face your character. Placing it on top of a block will make it stand straight up as it usually would. Placing an additional Stair block next to the first one will make them connect.
However, if you place the adjacent Stair block while looking to the side the block will curve like so.
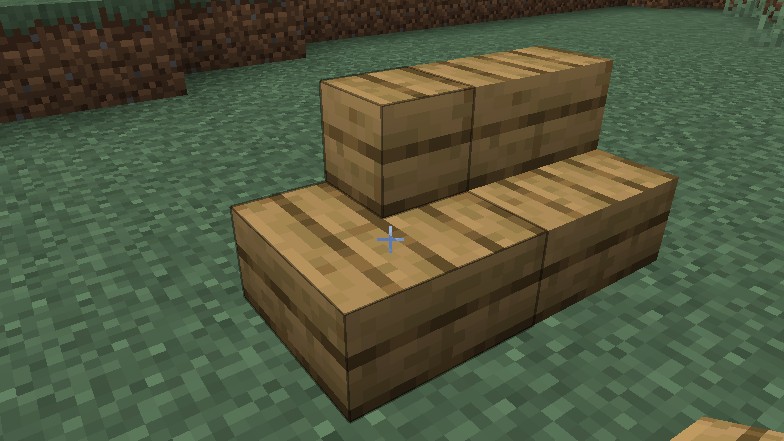
This may be a rather important mechanic for us when building our spiral staircase.
To place a Stair upside down you need to have a block that you can see the sides or bottom of. In a build think of a wall or the ceiling. If you are putting the Stair upside down on the bottom of a block all you have to do is click.
However, when putting a Stair on the side of blocks they can be placed either upright or upside down. The trick to this is knowing where your crosshair is pointing.
If it’s pointing at the bottom of a block the Stair will be upright. If you pointed at the top of the block it’ll be placed upside down.
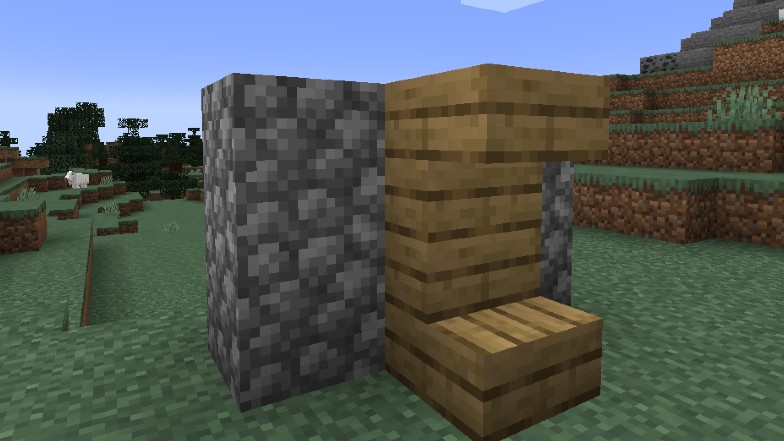
Regardless if placed upside down or upright, hanging off a block or on the side, the Stairs will still curve if placed next to each other and connect.
Even when not being used for staircases, these mechanics can come in handy when adding details to certain builds. I like using Stairs when building a horse stable in Minecraft to make it look a bit more rustic and give it volume.
How to Build a Small Spiral Staircase
Sometimes you need a small spiral staircase to save space. I sometimes like building semi-circular small builds, as I find them rather cozy.
In these builds having a whole side of the build taken up by a very visible staircase is not ideal. A spiral staircase, however, can make the perfect center piece I might want.
My first tip when building spiral staircases is to have a center. In the case of a smaller staircase it’ll be just a single block or a 2×2 square. I go with the smaller version so that way I’m working with a 3×3 square of space.
The trick here is that you always place a flat block (a solid block, a slab, or upside down stairs) at the corners where you’d usually make your turn, with the stairs connecting to them.
In this build I used upside down stairs to make the flat corners, because I could also use them to make the whole staircase have more volume.
For the sake of demonstration I replaced the upside down stairs with crimson stairs so you can see exactly where and how I placed them. If you’re short on space I suggest replacing these with slabs.
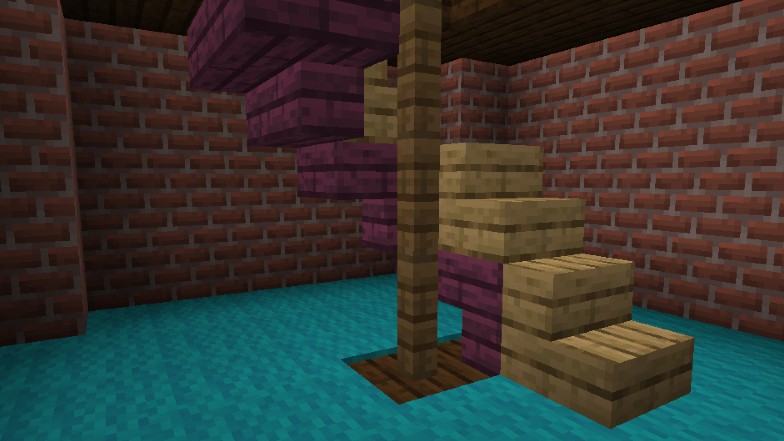
So to get it down, the basic schematic for this would be two stairs at the start and then simply alternating between stairs and slabs (or other flat blocks).
How to Build a Grand Spiral Staircase
I used to struggle so much when making large spiral staircases in my builds when I first started out. It was hard not to make them look clunky or easy to fall off of, so I’m more than happy to help you guys out.
Just like with smaller staircases, my biggest tip is to have a center of some kind. In my old builds I often ended up struggling because I made my staircases spiral too far off to one side, or the center would not be symmetrical.
A center is also good because you can make the staircase move around a different build. In one of my bases I had built a large aquarium and built a staircase spiraling around it.
The best kind of center for a spiral staircase may be a “circle”, however, rather than a square. That way you have corners around which you can round your staircase.
Next tip is to remember that slabs are your friend and will make the build much easier and your climb up a large staircase more fluent. In some cases you may find it easier to use slabs for the entire staircase instead of stairs.
For this build, however, I’ll show you how to work with both. Let’s start with stairs.
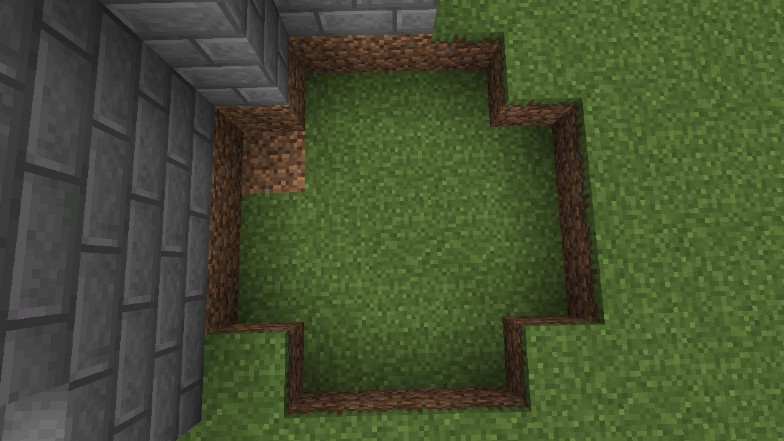
My center is small, a 5×5 circle.
For the first few blocks the building is relatively easy. I just place the stairs like I would regularly and move forward and up, for 4 blocks.
Unlike with the small staircase we won’t just make a flat platform for a turn. We are going to make these actually spiral in a fluent motion.
At the 5th block that’s when I reach the curve of my spiral staircase and will start to use slabs for a bit of help. This is just so that the transition seems a bit smoother. In the image below I have used a different color for the slabs so you can see where I placed them.
It may feel a bit clunky or the walk won’t be as smooth depending how you place them. The good thing is that you can play around with your options.
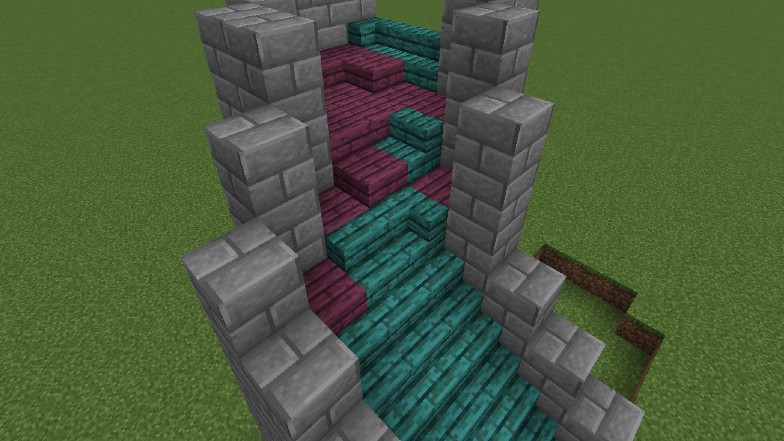
This kind of build works amazingly when building watchtowers.
Using Slabs to Build a Spiral Staircase
Since slabs are a bit easier to manipulate whilst building with them, you can also chose to build your staircase without the usage of actual stair blocks.
I’ll be following the same path I had for the previous staircase, but this time I’ll use only slabs.
A slight downside you may immediately notice when using slabs is that you aren’t climbing up as quickly as you would with stairs. That is because a slab is only half a block tall.
So when building with slabs make sure that your upper floors aren’t too high up or you might not be able to reach them. Additionally, make sure to count your blocks. Because you’re only moving half a block at a time, there might be a chance you end your staircase before reaching the next floor.
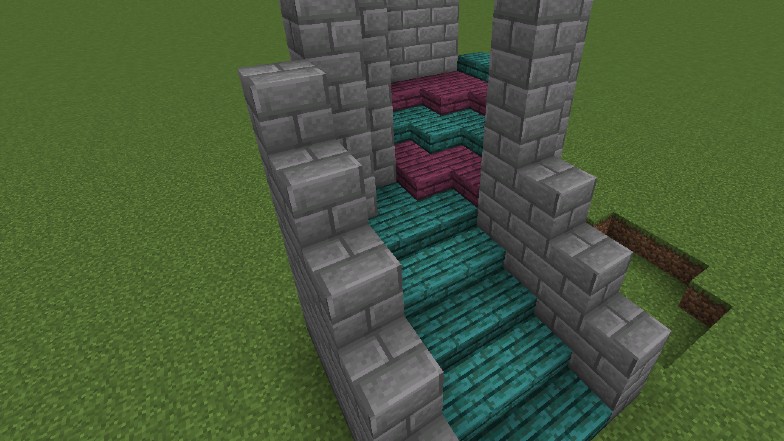
If your upper floor is built with slabs that are not on the top of the block, but instead on half of it, you won’t be able to place down items.
Like before, I use crimson slabs to show help show you how I was placing them. I find building with slabs easier as you can see I can easily make a pattern with them and keep the build looking much smoother.
Consider adding a staircase like this to your next castle build!

