The dome is a shape we often hear about in geometry class. A half circular structure, similar to a fruit cut in half.
And there is a reason we learn about this shape in geometry class; the dome is actually a very useful shape in real life architecture, and many kinds of buildings throughout history utilized the dome shape.
Of course, most importantly for us as Minecraft builders, a dome is aesthetically pleasing to look at.
Knowing how to make a dome in Minecraft, however, is hard because we have to sculpt a circular shape using square blocks – but it can be done! So, here’s how to build and use a dome in Minecraft.
How to Use a Dome
You’re probably wondering where would you use a near circle in such a blocky game? Well, you probably use circular shapes in Minecraft a lot already.
When building towers or spiral staircases, or certain fountain shapes. All of these use the circle for their shape.
Even in Vanilla Minecraft you can find naturally generated domes in certain builds, like an Igloo or a Pillager Outpost.
They become very useful when building different kinds of roofs. I love to include a dome when building churches, temples, certain towers, or even entire bases. Some people build whole bases Underwater using a dome made of Glass blocks.
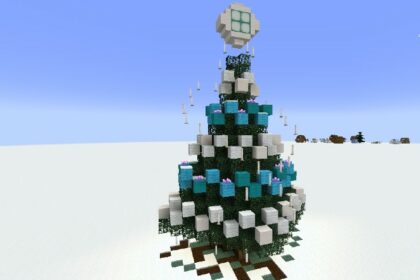
They can even come in handy when building custom Trees, for example.
Building a Dome
A dome may seem like a tricky shape to achieve in a blocky game like Minecraft, but there’s a few simple rules or guidelines we can set ourselves before we begin building:
- Have a center
- Symmetry
- One layer at a time
Before you begin building you want to have a clearly defined center. A single block, 2×2 blocks, 3×3, or 4×4. I highly suggest that the center is either a square, or if this is a particularly large build, a circle.
You will want the center itself to be a shape that is symmetrical on all sides. That way your dome will be identical on all “4 sides”.
This brings us to the symmetry. A circle or sphere is equal no matter how you turn it and because of this our aim is to make this easier on ourselves by having a symmetrical center.
Knowing where your center is also allows you to clearly see how much space the dome may take up depending on its size, rather than starting off from one side. Having a bigger dome will allow you to make its curve more subtle, but of course it is a lot more work.
Starting From the Center
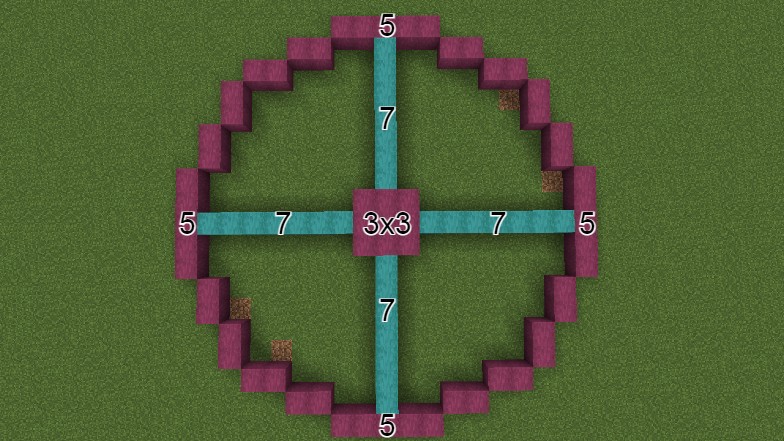
For this tutorial I will start from a 3×3 block center. I am simply using the first block I picked out.
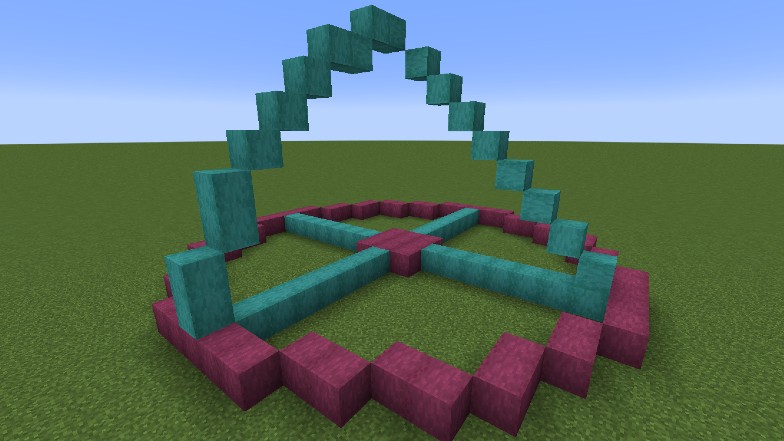
From the center of our center, aka the middle blocks, I make 4 different lines. This is how I decide the overall size of the dome, and for this build I decided to go with 7 blocks from the center.
At the tip of the “lines” I start building the outer layer of the dome. This is where you can easily mess yourself up, because it is very easy to simply make a “diamond” shape instead of a circle. The trick is to not connect the ends diagonally in a straight line.
In the image below you can see a diagonal line made from one line to another. Opposite from it is a side that has a bit of variation to it.
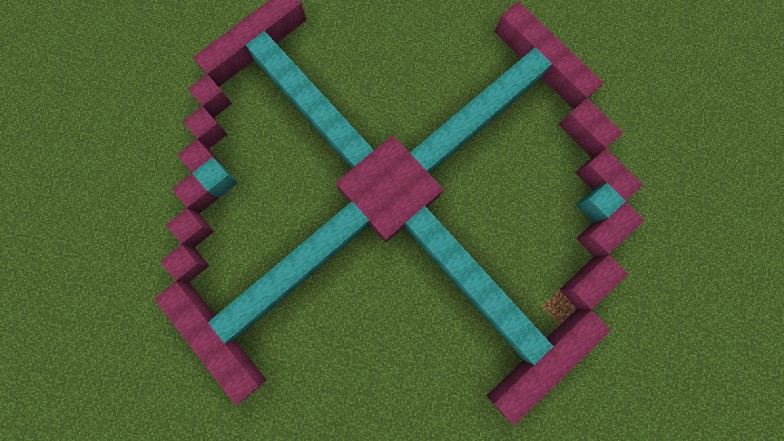
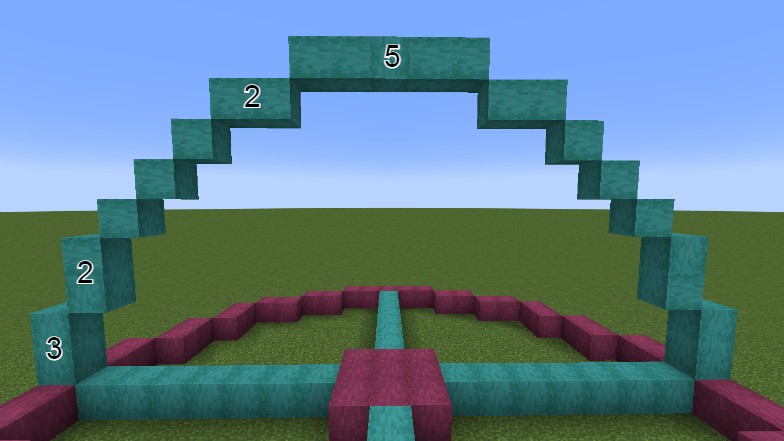
Depending on the overall size of your dome, you can make this variation greater and make it stand out more. You can alternate between using 2 and 1 block lines, to even using 3 block lines if the dome is big enough.
It is also important to know where two separate lines of the dome meet. It is important that on either side of it there is symmetry.
Using Arches
Whether you are following the exact measurements of this dome or not, I will suggest using arches.
Rather than building upwards from your center to decide on the height of your dome, you can build arches from your 4 different “sides” toward the center. These arches will make your time building much easier.
With them you will be able to predict the overall shape of your entire dome, but you will also be able to find the optimal height for it.
On top of that, if you feel like the shape isn’t right it is easier to redo an arch than the whole dome.
Once again, do not connect the arch with the center diagonally with single blocks. This will make it seem more like a pyramid. A bit of variation is very welcome.
In the image below you can see the side by side comparison of two different arches.
You will want the sides closest to the ground to be higher than the others, while the top you will want it to be flatter and longer.
Work in Layers
Once you have your arches ready, it’s time to build up the rest of the dome.
You will be doing so in layers, following the curve of your archway and coming closer to the center. Each layer will be the exact same height as its part of the arch.
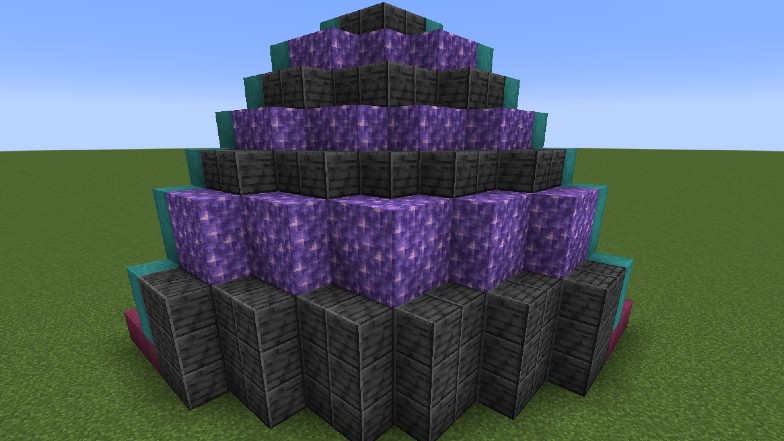
I separated each layer so you can tell them apart easier. However, we can see that the dome isn’t perfectly smooth here.
This can be counteracted by removing blocks in some spaces and adding more in other.
Finally, if this isn’t a simple glass dome, you can add even more shape to it using Slabs or Stairs.
Stairs will work better on smaller domes where just the blocks don’t help convey its shape. For a dome of this size and similar, Slabs are better because they are more subtle.
