When building villages and castles, or any kind of base for yourself, a watchtower is a must have addition.
Not only can they be useful for strategic fighting, but they also fit well in with the whole medieval aesthetic many of us go for in Minecraft. We can even find them naturally generating all throughout Minecraft, as Pillager Towers, but also in the Ancient City and in the Nether as parts of Nether Fortresses.
You can build all sorts of different kinds, small ones perfect for protecting your village or large ones as parts of your castle build.
We will show you the basics that you need in order to get a hang of building towers, along with tips that will help you when coming up with your very own unique designs.
The Basics
The main goal when building a watchtower or any sort of build in Minecraft is, ironically, to avoid making it look super blocky.
Minecraft builders are all experts in utilizing the many different blocks in Minecraft to create all kinds of shapes that make us forget that it is all practically built from small squares. The same applies when building a tower.
When you want to impress others with your build, you want to make something that isn’t just a tall rectangle. Online you will see all sorts of complex looking towers that leave you feeling like you were transported back in time.
That is exactly what we will work on here.
Towers can be built out of any materials or a mix of them. Stone, Wood, Amethyst, you name it. Any type of block that looks good and has Stairs and Slab versions of it will work well.
For the sake of the tutorial I will stick mostly to Cobblestone, Dark Oak, and Spruce Wood, because these are my materials of choice for any medieval type build.
Some Building Tips
Every tower should have a center to it. This will help you in the long run when deciding where to place your windows and doors, while building the roof and other things.
Regardless of tower size, a center will help you have a way to climb up to the multiple floors of the tower. Whether you place a single beam with a Ladder on leading up or have a tower big enough for a whole spiral staircase, a center helps a whole lot.
Secondly, try not to stick to a square shape.
Each tower I make I usually either make with a circular base or add beams on the exterior that break up the typical square shape. You can get really creative with this.
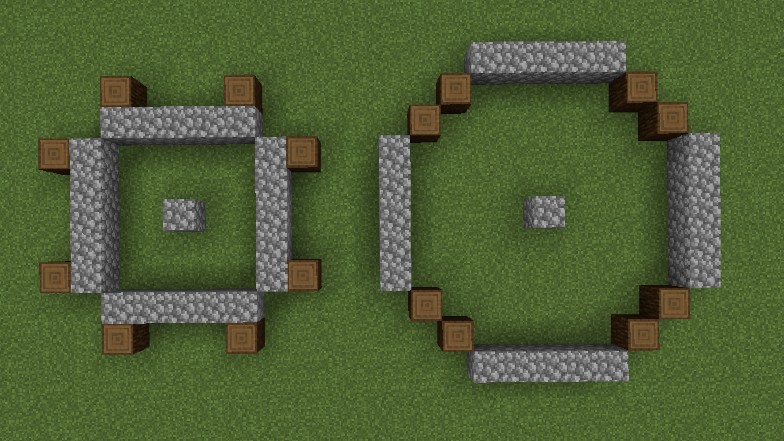
Regardless of size, use Slabs for each floor. Towers are usually pretty small when it comes to interior space, so Slabs will at least help in making it feel bigger between floors.
Building The Watchtower Base
The small watchtower that we will be working on will have a 7 by 7 block base, with a center in it. Its edges we will shorten so we can round them up at the corner as shown in the image below.
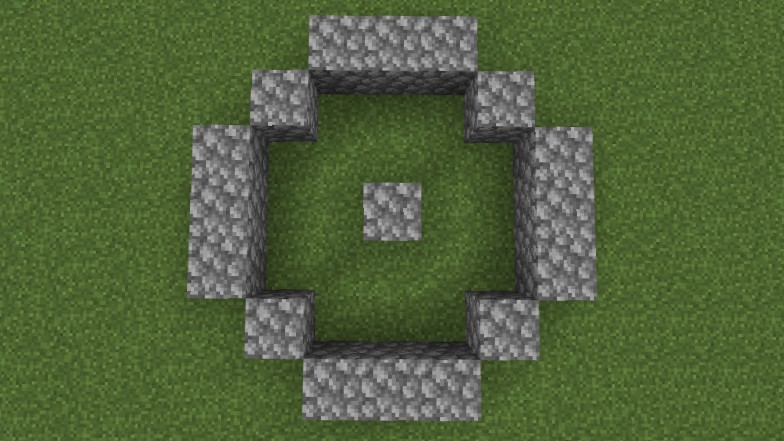
This is a straight forward shape for a watchtower and my usual go to when it comes to approaching any build.
The single block corners I will be replacing with Spruce Logs, raising them up to 6 blocks each. This will be enough for one additional floor other than the ground one.
The center beam will also be made with Spruce Logs with Ladders on one side leading up to the next floor. The floor will be placed at the top of the third block, made using Oak Slabs, simply to contrast the Spruce and Cobblestone.
Each floor will have a two block opening for the center beam and Ladders.
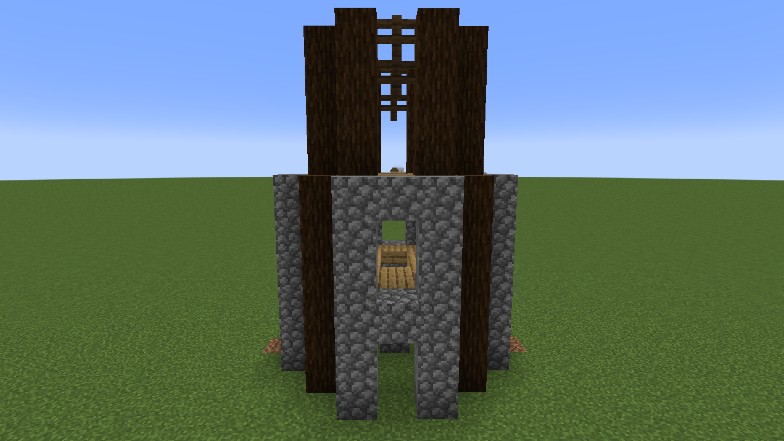
The third floor of the tower, which will be open and without walls, will have the base as shown in the image. However, it will look much smaller once completed.
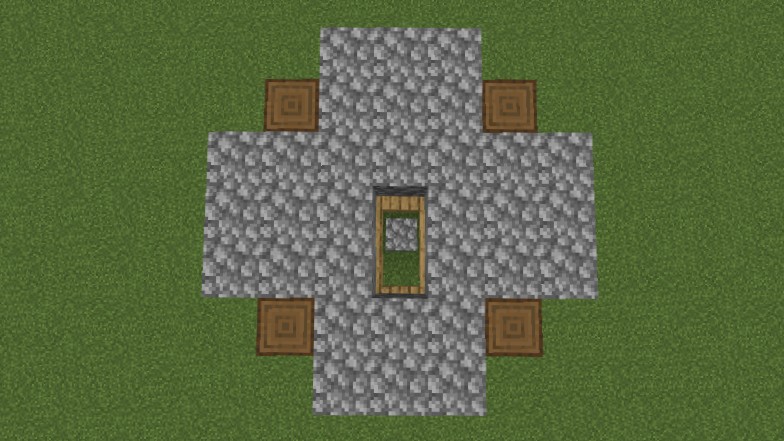
The walls, for which I will be using Cobblestone, I raise as high as the Spruce Logs.
On the bottom floor I leave a single opening for the entrance into the tower, while the second floor will have a 2 block opening in the center of each wall for a window, with the exception of the wall above the door.
This wall will come up to only a single block window later on when we add details using Stairs.
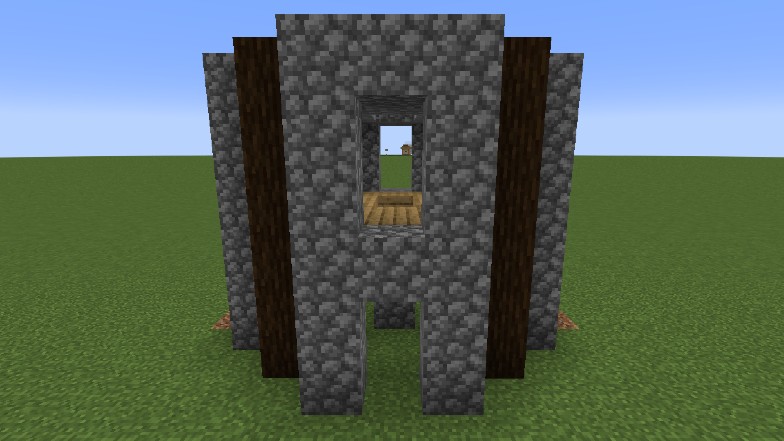
The third floor will also be the final floor of this tower, opening up to the roof.
For it we will divert a bit from the original shape, making it seem smaller and more narrow. This time we are placing Spruce Logs on the side of the original ones to make it seem smaller. These will be 4 blocks tall each.
Not much details will need to be added, other than some Spruce Fences on the upper part of the Logs to make the space feel closed in and safe.
This is the final shape of the tower before we get to building the roof and details.
Building a Watchtower Roof
Now it is time to work on the roof.
For the roof we will make a dome shape using a mix of Dark Oak Stairs and Dark Oak Slabs, so that they match with the dark color of the Spruce Logs.
From the center blocks of each wall we will put Stairs leading up toward the very center of the tower, connecting them in the end with a Slab just above them to make it look like the tip of the roof.
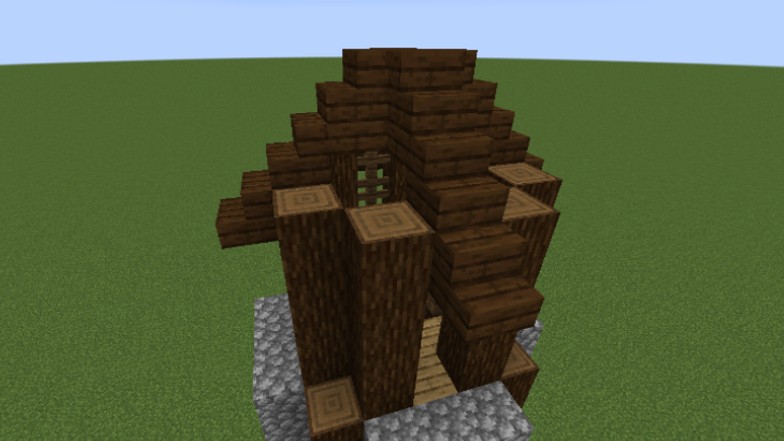
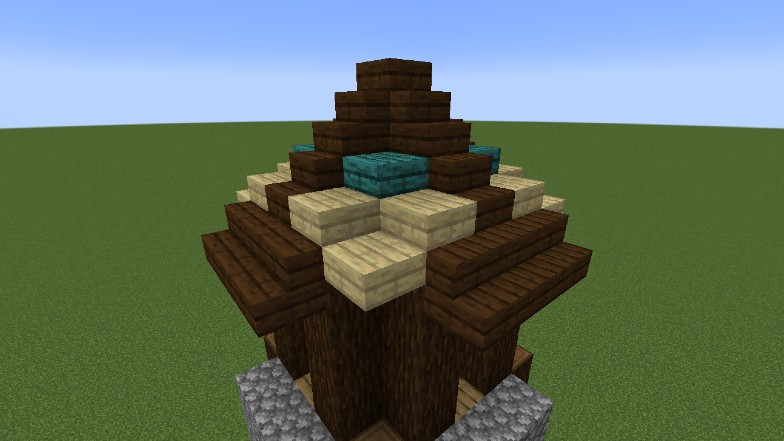
The area between them we will fill out partially with Slabs and some solid Dark Oak Blocks to make it look like a smooth curve. At best this roof should resemble a smaller version of the Pillager style.
For the sake of the tutorial I used different colored blocks to show exactly where I placed Slabs and where full blocks.
The Warped Wood is a full block, while the Birch Wood are Slabs. You can also see I added more Stairs for the roof overhang.
If the roundness of the roof is not to your taste, then try using mostly Stairs to make a much sharper roof. This is a type of style, however, I enjoy using on bigger towers more.
You can also play around with the way your roof looks, so feel free to experiment. The bigger your tower usually is the more space you have for fun designs.
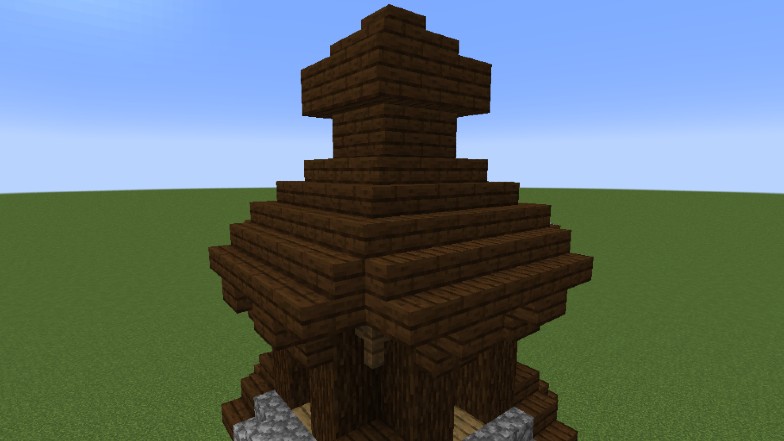
With your roof there the tower is basically done, however we do not need to stop there. We can make the tower much more detailed and add so much more to it to build up shape.
Adding Details to a Watchtower
Because the inside space is pretty limited, most of our details will have to be on the outside. Luckily, there we can do whatever we see fit.
Because we used Cobblestone for the main walls, the details we will be adding will be with the use of Mossy Cobblestone Blocks and other Cobblestone variants; Stairs, and Slabs.
The first thing is to add Cobblestone Stairs above the door and windows. You can also add them where your second floor ends to make it seem like the tower subtly curves in on itself.
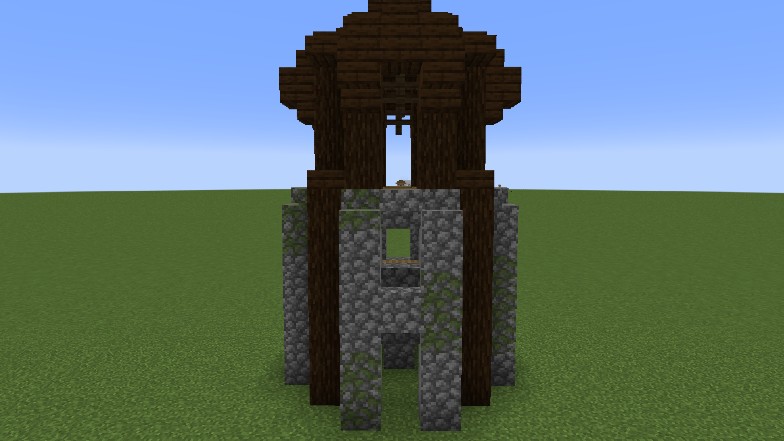
The next details we will actually add around the base of the watchtower. Using either Cobblestone Stairs or Stone Brick Stairs (whichever you like best), we make the base look thicker and bigger. At the door I extend it to make it seem like a bigger entrance.
The next details I add around the beams. At the line where the second floor begins I add Spruce Slabs with 2 Spruce Fences going up from each.
At the top of them I ended up adding some Dark Oak Stairs. All this together makes the tower seem bigger than what it is.
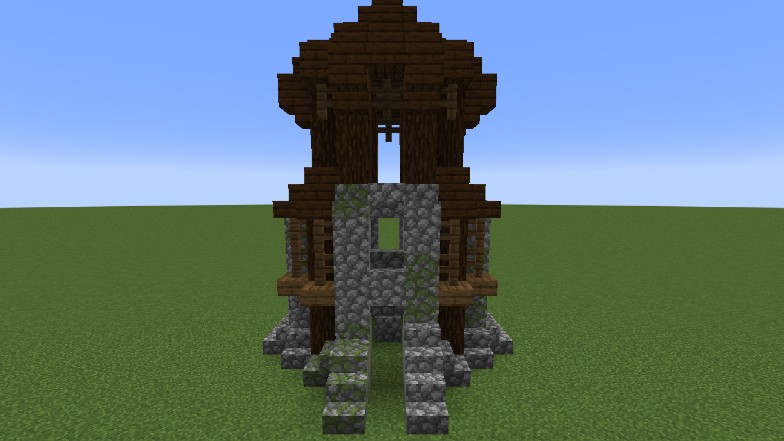
Under the roof I add more Spruce Fences and these I later use to put up Lanterns under them for lighting.
Finally, if you wish to make the tower seem old and worn, replace the Cobblestone with Mossy Cobblestone and add Cobwebs around the roof and insides.
Now you have a usable tower to shoot down enemies from.

