
Building is a core aspect of Minecraft.
Even when you’re already really skilled and can beat the game with ease, you’ll always want to return to Minecraft to build something. There’s always new ideas to be had and explored.
In this guide, we’ll show you how to get better at building and how to come up with your very own ideas and designs in Minecraft.
Before You Start
You’ll need to know a few things before starting to work on any build. Whether it’s a small house or a large base, you will need to make some preparations.
The first thing will be to plan out the different aspects of your build.
Knowing how a build is supposed to look before you start building it is very helpful in making a vision become a reality. You’ll need to pick a theme, outline where your build will be, and pick a palette.
There are reasons for doing all this preparation that we will explain in more detail.
Picking a Theme
Having a theme makes every part of preparation easier. With a theme, you can decide what kinds of palettes to choose from and what designs you’ll be making.
Every theme has something special that makes it unique.
There are many different themes to choose from, but many people who play the game like to stick to historical styles.
My personal favorites are Roman or Greek styles, and medieval builds. These themes are very easy to remake in Minecraft because a lot of the material is wood and textured stone; materials that were used a lot in ancient Greece and the medieval era too.
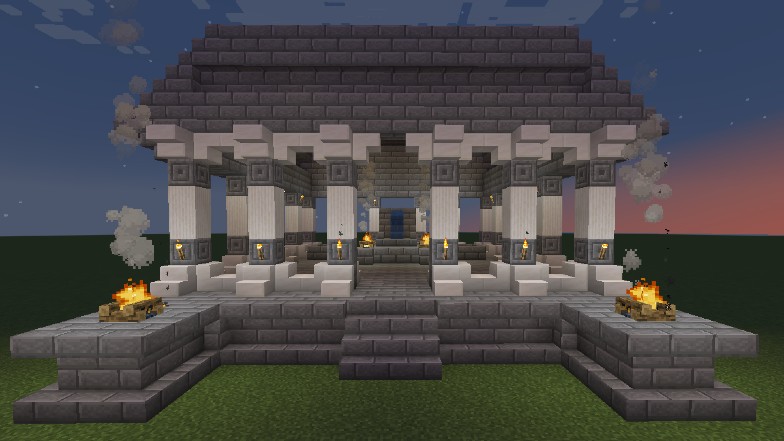
Not only is it important to pick a style for a build, but if you’re building other structures it looks very nice when they match. If you know what your theme is it’ll be easier easier to apply it to different builds.
Here are some themes for you to consider for your Minecraft builds:
- Medieval
- Viking
- Roman
- Greek
- Egyptian
- Oriental
- Futuristic/sci-fi
- Fantasy
- Steampunk

Picking a palette
Now that you have your theme, you can pick out a palette. This means picking out a set of blocks based on their colors and textures that you’ll be using to make the build.
You will know how the colors of the build will look ahead of time if you pick a palette, but you can also gather materials because you know what you’ll need.
I usually pick two or three colors that go well together and then one contrasting colored block to break up the pattern and stand out in the design.

Above you can see some of my own palettes that I use in builds. Feel free to copy and use them!
It’s good to pick a palette of blocks that you can easily get your hands on.
Creating a palette that has obsidian and prismarine blocks in it may look good, but getting those materials will be hard, especially because obsidian takes a long time to mine.
Keep this in mind when deciding what to use, especially if you’re in survival mode.
Making an Outline
Now that we have our blocks and our idea, it’s time to make the outline.
An outline allows you to see how big your build will be and what shape it will have in the end. You can also plan out where your rooms will be.
It’s also very easy to change it around if you see you’re not liking a certain look or shape.

When creating the outline, it’s best to use a type of block that’s easy to collect in large amounts and that is also easy to break once you start building. Dirt or cobblestone are best for this.
I use outlines in my builds to decide where I’ll place:
- Walls
- Doors and doorways
- Staircases
- Windows
- Towers

You can see an outline of a mansion I built in the picture above. This helped me see how big it’s going to be, decide its shape and where to place which room.
It’s a good way to also plan out where each room will be located. I usually use signs to mark them.
Building a Safe Base
Regardless of if you’re building a large castle, mansion or a small cozy build, you will need to make sure the build is safe, especially if you’re making it in survival.
Secondly, you need to make sure hostile mobs can’t easily enter it and attack you, especially creepers. A single creeper entering a base and exploding can destroy all of your hard work.

There’s also the risk of not having enough lighting in your build.
Not having enough light will allow hostile mobs to spawn inside and attack you. Even if you aren’t dealing with mobs, you’ll likely deal with a large number of bats flying around.
So these are some guidelines you want to keep in mind to make sure your space is safe and functional:
- Never use pressure plates for entrances
- More light is always better than less
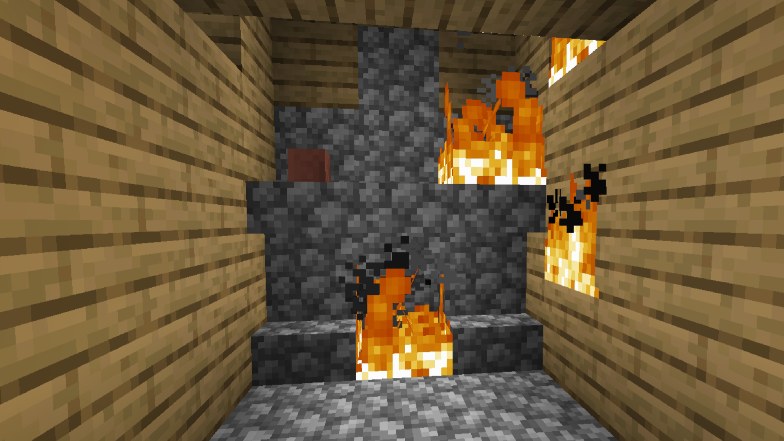
- Never use netherrack to make a fireplace, use a campfire instead
- Every room needs to be at least 2 blocks tall, unless it’s a crawl space
- Never place down iron doors without a way to open or destroy them

Pressure plates are very important to be avoided when you wish to automate your doors. A pressure plate can be stepped on by practically any mob, including zombies and creepers.
Having pressure plates outside your doors allows for them to open the door on their own. Using a button or a lever is much better, because mobs can’t interact with it.
Open fires with netherrack are very dangerous, especially if you have built your base out of wood.
The fire can easily spread and burn your entire base down.
The minimum height any of your builds should be is 2 blocks tall, because that is the height of your character.
However, if you go lower than that, then you can make a crawlspace by using the crawling glitch. This glitch forces your character down into a swimming animation with the use of trapdoors or other blocks.
It is a good way to make small tents or create a secret passage to a hidden room.

Defending Your Base
Even when you build the safest base you can, you will want to have different ways of keeping it safe in case mobs do come around.
The tip is to not fight for your base alone.
Using iron or snow golems is an amazing way to keep hostile mobs from overwhelming you. These guys are loyal and will fight for you, attacking hostile mobs on sight.
Wolves are also very well known for protection, but cats are just as valuable. Having cats around your base doesn’t just deter creepers.
If you’re on a multiplayer server, a cat prevents anyone from opening a chest and looting it if it’s sitting on it.

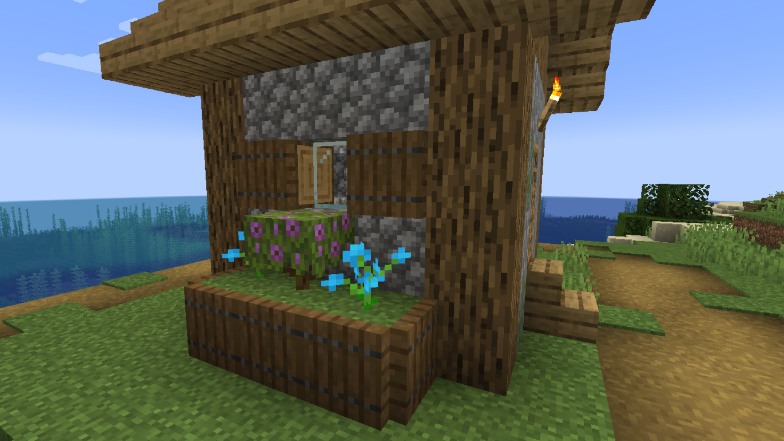
Decorating Exteriors
There are many ways to decorate the outsides of builds and add little details. Many builds look absolutely amazing surrounded by a garden or just nature in general.
Creating an environment that fits a build is essential.
Most builds greatly benefit from having nature around them. Adding custom trees and paths, with gardens is a great way to envelop an area.
You can create paths in dirt using a shovel, but you can also use a mix of gravel and cobblestone.
Different types of paths will fit different builds. Some will look good with a clean and orderly path, others with a very messy one.

Lighting is also very important.
Very few builds can look good at night in the dark. You can add hanging lanterns or full lamp posts surrounding your build. It also allows you to play with design.
Creating fencing or walls around a build is also very important to keep it protected, but it also closes makes your structures look like a single build.

A lot of decorating outside will also depend on you adding details to your build. Small things go a long way.
You can add pillars and shutters to the outside walls. If you have a build like a barn or shop you can place barrels or similar blocks around to make the area seem a bit more cluttered.
An example I can give are my stable builds, where I add plenty of mud around the stables.
I also include some stacks of hay around the corner and use stone buttons on the ground to create pebbles. There are many tricks to use.

The other way to decorate the outside of a build is simply having other builds to go along with it.
A building looks a lot better with other buildings beside it, along with some market stalls and a marketplace.
For a base you can build an entire village, with each building serving its purpose.
Decorating Interiors
Just as you can create a lot of detail outside, you can do just as much inside. It’s usually easier to decorate interiors with bigger builds, but don’t let small spaces limit you.
There are several blocks meant to be used for decorating in Minecraft, such as bookshelves, lecterns, jukeboxes and more.
These blocks can be crafted and placed around, but often times they can’t be used for a lot of detailed decorating.
That is why a lot of the time you will have to think of outside the box to decorate your interiors.
Making Furniture
Because decoration blocks for interiors are pretty limited, you will sometimes have to create furniture yourself. To do so you will have to improvise by using building blocks.
Furniture like tables, chairs, desks, and many other don’t exist in Minecraft, but you can create the illusion that you have them.
For example, chairs and couches are easily created by just placing down stairs.
Adding something like a sign or trapdoor to the side creates an arm rest. If you want a high chair you can add a door to the back of it to make it look fancy

There is a different trick for tables.
You can use slabs to make low little coffee tables or bedside shelves, but you can also use pistons or fences with either carpets or pressure plates on top.
You can also use slabs and stairs together to make bigger tables.
Another thing that is missing with decoration blocks is a kitchen. You don’t have a traditional sink or stove, or any other types of blocks, so you have to play pretend.

I often use a polished block like andesite or diorite to make kitchen countertops. I use a cauldron with a lever above it as a tap for a sink.
A smoker with a trapdoor and a wall above it makes it look like a modern stove.
Using Custom Heads
Custom heads are a slight cheat for some of the smaller details you can add in your interior, but also exterior decorating.
Just like you can collect heads of skeletons or zombies, you can collect player heads. The player heads you collect will always have the skin of the player on them when collected and placed.
Players have been creating head skins that look like certain household items in order to place them down and create the illusion of items.
Online you can find heads for items like bread, pumpkins, bowls, and other things.

How to Add Details
Adding details to builds is a lot easier when your build is much bigger in size. The bigger the build the more volume and small details you can add to it.
The first kind of details you can add are always on your wall designs.
Adding pillars on the outsides of walls, with stairs and slabs to create some kind of design between a pillar is a great way to add volume. It makes a wall thicker and better.
You can also add stairs and slabs instead of blocks to make a build look worn down.
A simple way to add details and volume to any build is around windows and doors. Simply putting stairs above doors, or above and below windows adds more dimension.
You can also add trapped doors on the sides of windows to create shutters.
Making a Build Look Old
A lot of people enjoy doing a historical type of aesthetic when making Minecraft builds. It fits the world and already existing structures better.
So when you’re trying to build a fort or castle, you may want to think of ways to make it look older.
Making a build look old adds character and it can help tell a story of time passing. There are several tricks and ways to do this.
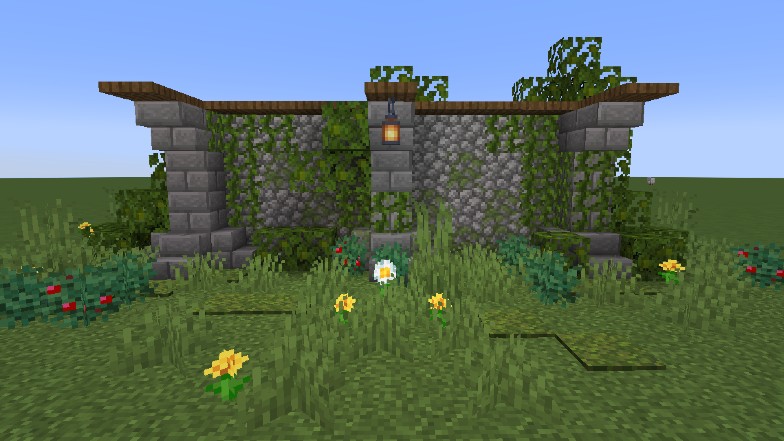
The first and easiest one is adding vines outside to the walls. In places where you can’t place vines, like the roof, use leaves instead to make it look like moss.
The more consumed by nature the building is the older it looks.
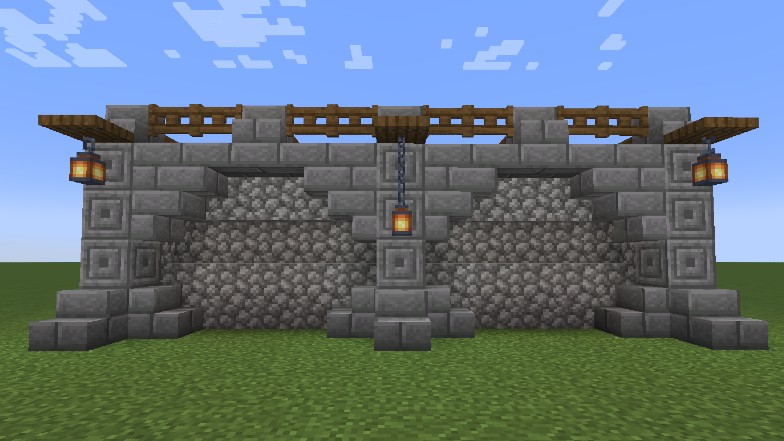
The next thing you can do is simply leave out blocks in parts of the build, or replace blocks with slabs and stairs.

Like you can see in the image above, doing that leaves holes inside the wall.
Cobblestone and stone brick blocks are best for this. They have stair and slab versions of themselves, but both also have a mossy version of the block.
Stone bricks also have a cracked version.
Using different textures of the same color can also help add that look of the wall being worn down. If you used cobblestone or something similar, having andesite and similar blocks adds more detail
On the inside the same thing applies, with the addition of using cobwebs on the ceilings and walls.
Building Tips
There are a lot of different ways to get better at building, but a lot of it revolves around actually figuring out your style and copying already existing things.
Whether you’re trying to mimic things other players did or things you see in real life, all of it is a valid way to practice building.
Here are some tips to help you feel more comfortable while you practice:
- Don’t be afraid to look at real-life blueprints
- Don’t hesitate to follow online guides or find inspiration online from other players
- Smaller is better
- Try using the Schematica mod
What to do Next
Eventually you may get bored of building and that is ok, because Minecraft offers a whole array of different things to do.
To spice things up, considering joining some minigame or PVP multiplayer servers that are out there. You will find a new challenge to conquer and when you get good at PVP you will be able to impress all your friends.


