A base or a farm is nothing without its stables. A stable is where you can leave your mounts and animals to rest in a safe area and its where you keep their food and gear.
In Minecraft you can have several different types of mounts:
- Horses
- Llamas
- Pigs
Regardless of what your favorite way of transportation is, knowing how to build a stable in Minecraft can be a perfect way to keep your dear mount safe and pampered.
Building a Simple Stable
A stable doesn’t have to be some grand build, unless you want it to be. If you have just a single Horse or Llama that you prefer to ride around you can build them a simple little home.
Like with most builds you can choose the color and material scheme. For stables I always prefer to use a mix of regular oak wood and spruce wood, with some dark oak wood for accents.
The horse will need enough space. If the stable is too small for the horse there’s chances that it won’t be able to enter it. If the roof of the stable is too low it can also cause issues for the Player, because once you mount your horse there’s a chance you can suffocate in the roof.
A horse in Minecraft is just over 1 and a half blocks tall and a llama is around 1.8 blocks tall. This means that when either is mounted the Player reaches about 2 blocks of height.
Ideally you will want at least 3 or more blocks of space above your animal.
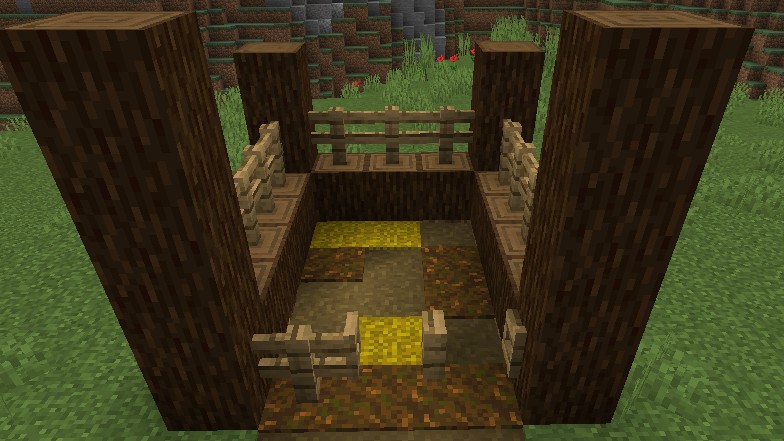
I start by using two Spruce Logs as the main beams of the stable. I make them 4 blocks tall. That is my starting point. The area I’m working with is going to be 5×6. I surround 3 sides with the spruce logs with an oak fence on top.
One side I leave open for an oak fence and the two oak fence gates. You will need two gates because a single one is too small for a horse to walk through.
The roof can look however you want it. It can be flat, A-shaped, or as I prefer it, slanted.
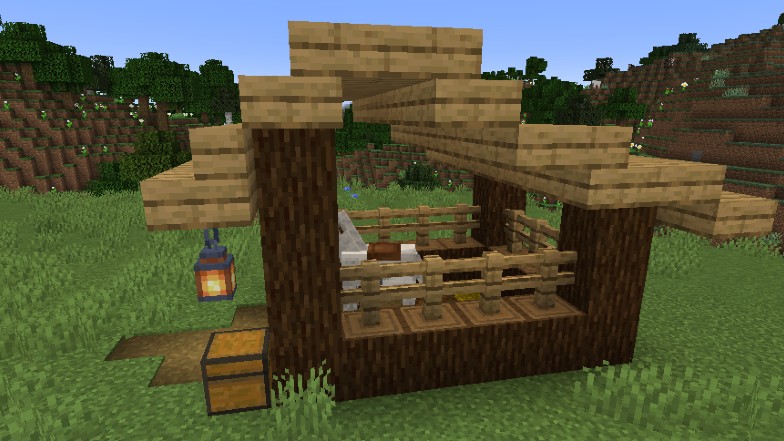
The last thing left is the floor. I replace the grass blocks with dirt paths, podzol, and hay or with mud.
Once that is all done I just ride my horse inside to make sure that my character doesn’t hit anything while doing so and doesn’t suffocate. When I see everything is alright I simply decorate outside and around the stable.
You can also make a row of these smaller stables, connecting them via the roof as you get more horses or other mounts.
Building a Large Stable in Minecraft
There’s many different horses to tame in Minecraft, but also llamas and pigs which you can ride. So, sometimes a small stable won’t cut it nor fit them all in together.
For the large stable I will follow a similar color and material scheme like I did with the small one.
For this it’s useful to know how to save your Toolbar in Minecraft because it helped me to not forget any materials between my builds.
Like before I first outline the area I wish to work with. I have 5 horses and 1 llama that I wish to house here, but not just that. I also want to store their armor, saddles, and the wheat that I feed them with.
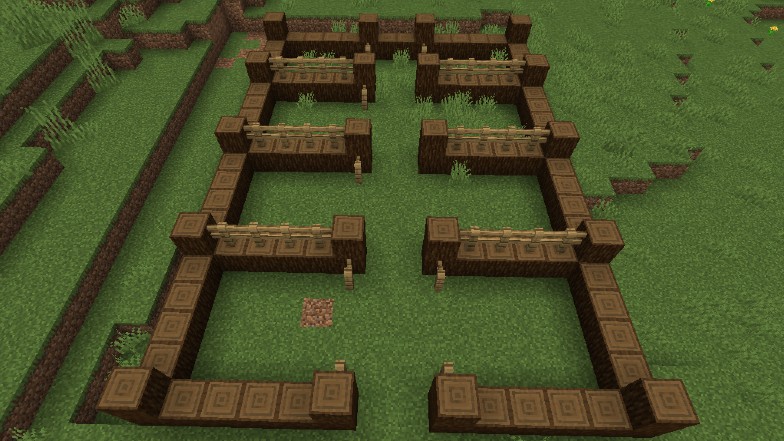
I outline a 14×20 block area using spruce logs. I make sure there’s enough space for both the pens and a 2 block wide path between them.
I build the pens the same as I did on my smaller stable, using spruce logs and oak fences on top.
Since I am using spruce logs I would have needed to do a lot of chopping to get all of it. If you don’t feel like doing all of that manual work it might be useful to try some of the item duping techniques in Minecraft.
In total the middle pillars are 7 blocks tall. In the back of the stable, at 3 blocks of height I placed oak slabs to build a loft. This is where I’ll put down hay blocks, but also chests with the wheat and gear.
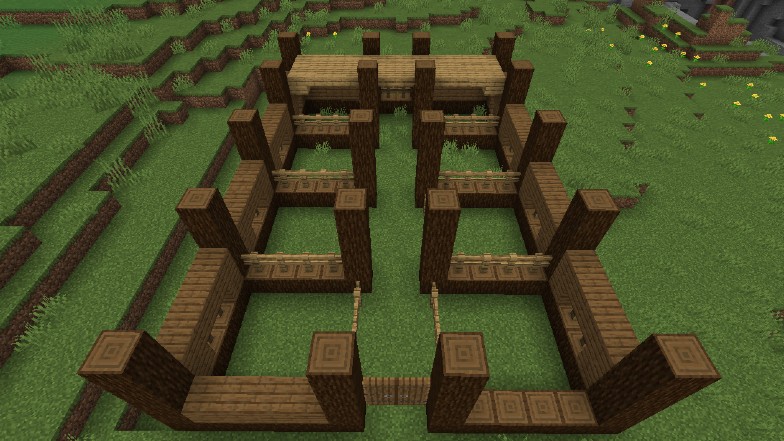
The loft itself is a minimal of 2 blocks tall at the sides where it connects with the roof, that way the player can fit inside.
The overall space doesn’t need to be large since it’ll only house a few barrels and chests.
The pillars directly connected to the loft will be lined with Ladders on the side of each of them so the loft can be accessed that way. The pens under the loft are a bit smaller and intended for the llama mounts.
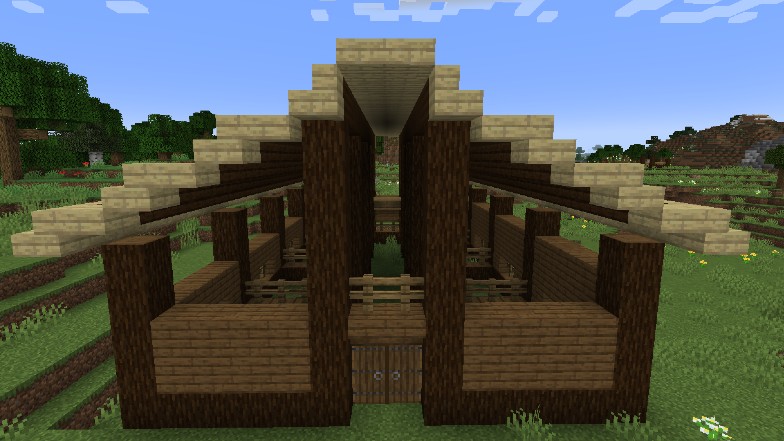
After this I work on the roof, using birch stairs and birch slabs to make an outline and help me figure out the general shape of the roof. I don’t want the roof to be too steep and I want to make sure that it reaches from the center past the side walls.
When that outline is done I fill in the middle using dark oak stairs and dark oak slabs inside the outline, following the already set layout.
Once that is done all that is left is building the walls using spruce planks.
For decoration I use various things. From barrels and chests, to lanterns and vines around the outside. Make sure everything is well lit so you don’t have to worry about hostile Mobs.
Adding Details
Sometimes a large build like this one can seem rather cube-like. Adding some details to a build can help break that shape and add more life and volume to a build.
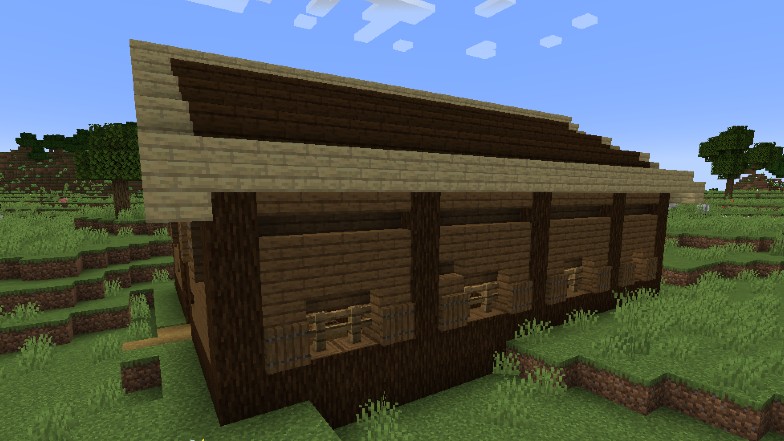
My favorite way to add detail is usually to make a build look a little rustic or worn down. This is pretty easily achieved using stairs. Replacing some of the plank blocks with stairs makes it look like there’s holes and dents in a wall.
Another way to use stairs is to make it seem like the windows have depth.
Using some trap doors or oak fences I close up the windows and make shutters.
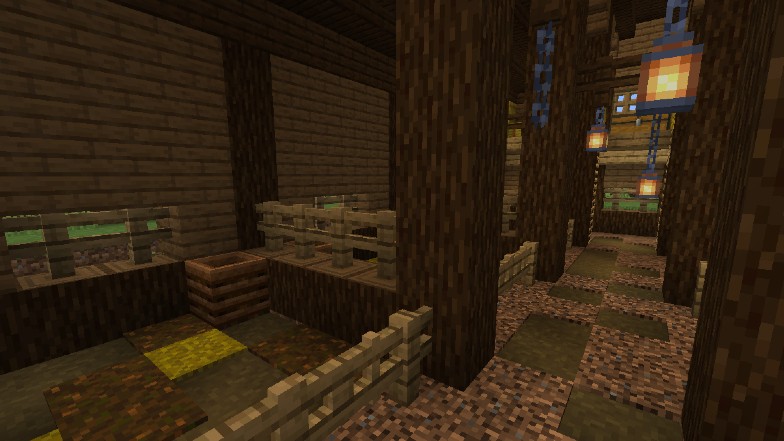
On the inside I use composters as pretend troughs for food. The floors I line with dirt path, podzol, coarse dirt, and hay to add texture.
You can even put down buttons to make it seem like the dirt is stirred around or there’s pebbles.
On the outside you can add additional pens for the animals. Something like an area where the horses and llamas can walk around freely may be good.
Additionally you can have a pig pen for your pig mounts if you have any.
The closer the stable is to the rest of your farm the better. This way you can incorporate different builds together.

