
Sellen’s quest will take you on a journey to restore a primitive form of glintstone sorcery in Elden Ring. At the same time, players will learn more about Sorceress Sellen and her place in the Lands Between.
As usual from FromSoftware, NPC quest lines are obscure and often fragile. Obscure because NPCs will sometimes give vague hints about their following goals and whereabouts on a good day. Fragile because entire quest lines can break from a seemingly unrelated decision, or even just through the game’s natural progression.
While the narrative structure is best for immersion, it also runs the risk of leaving players frustrated. For the most part, Sorceress Sellen’s quest isn’t as egregious as some notorious examples; however, there are a few moments that could leave players genuinely confused.
Don’t let that deter you from experiencing Sorceress Sellen’s quest. It’s a reasonably lengthy quest that imparts rich lore and plenty of top tier rewards, especially for sorcerers.
This guide will show you a complete walkthrough of Sellen’s quest, as well as provide additional context to better understand her story arc.
Starting Sellen’s Quest
Before starting Sorceress Sellen’s quest in Elden Ring, you first have to meet and get acquainted in her cellar in Waypoint Ruins, Limgrave. Afterward, she will take you as an apprentice and offer to teach you sorceries in exchange for runes.
Aside from her starting inventory of sorceries, you can also give her scrolls to purchase new sorceries in Elden Ring. There are a total of three sorcery scrolls that teach up to six new spells.
Eventually, she’ll play a small part in Lunar Princess Ranni’s quest. Upon the request of Preceptor Seluvius, Sorceress Sellen will tell the tarnished the location of the Conquerer of the Stars.
Additionally, she’ll also explain how General Radahn keeps the stars from moving and why it is crucial to defeat Starscourge Radahn in order to free them.
Vanquishing Starscourge Radahn is also important for Sellen’s quest. Castellan Jerren, the crier at the Radahn Festival, has a vital role to play in completing Sorceress Sellen’s story. Make surte to exhaust his dialogue after the festival to send him on his personal quest.
But, Sorceress Sellen’s quest formally starts when you get Comet Azur from Primeval Sorcerer Azur at Mt. Gelmir. Only after finding the spell can you begin the exiled sorceress’ quest.
Meeting Sorceress Sellen
First and foremost, you have to meet Sorceress Sellen in Waypoint Ruins, Limgrave. It’s a good idea to meet her early in the game, especially if you’re interested in Elden Ring’s magic system.

Start from the Gatefront Ruins Site of Grace in Limgrave. It’s right in front of Stormgate and near the bandit camp where you find Limgrave’s map fragment.
Then, follow the road southeast. After passing the bridge, there’s a fork in the road; take the path leading south.
When you reach the moving caravan hauled by two enemy trolls and guarded by a lot of enemies, you’re near Waypoint Ruins. Go and investigate the nearby ruins to the east of the road.
Be careful of the Miranda flower and the Miranda sprouts accompanying it. The small ones can quickly spread poisonous gas, while the big ones can conjure lightning bolts for some reason.
Look for the entrance to a cellar and prepare for a boss fight against Mad Pumpkin Head. Even though the battle is relatively simple, the cramped space could pose significant issues.
Defeating Mad Pumpkin Head lets you access the previously locked door in the cellar. Inside you’ll finally meet Sorceress Sellen.
She’ll introduce herself as the Graven Witch and offer to teach you sorceries. Choosing “Study Sorcery” lets you purchase a spell with runes.
Additionally, she’ll also accept sorcery scrolls you’ve found in the Lands Between. These scrolls will allow you to purchase additional spells from her shop. There are a total of three sorcery scrolls that teach up to six spells in Elden Ring.
The first sorcery scroll is the Royal House Scroll. It is found in a bandit camp south of Waypoint Ruins, Limgrave.
It teaches the Glintblade Phalanx and Carian Slicer—the latter is a very potent spell and scales well into the late game.
The second sorcery scroll is the Academy Scroll. Start from the Church of Irith in Liurnia of the Lakes, then find the big gravestone in the graveyard.
The Academy Scroll teaches the Great Glintstone Shard and Swift Glintstone Shard sorceries. The Swift Glintstone Shard is a must for any wizard looking to duke it out in PvP, as the quick cast and travel time tend to catch enemies by surprise.
The last sorcery scroll is named the Conspectus Scroll. It’s found on a corpse in Raya Lucaria Academy, near the Schoolhouse Classroom Site of Grace.
The Conspectus Scroll teaches the Glintstone Cometshard and Star Shower sorceries. Glintstone Cometshard is a decent power spike for mages, especially if you haven’t found some of Elden Ring’s best spells yet.
It’s a reliable spell because it deals a good amount of damage for a reasonable amount of FP. Additionally, it can be charged to dish out even more damage, and it even deals splash damage in a small area upon impact.
Alternatively, you can also give sorcery scrolls and prayerbooks to Miriel, Pastor of Vows, in the Church of Vows at Liurnia of the Lakes. This is particularly useful because Miriel does not leave the area; thus, you don’t need to go searching for Sorceress Sellen or Brother Corhyn every time they progress their personal quest.

Finding Comet Azur
To formally start Sorceress Sellen’s quest in Elden Ring, you have to find and get Comet Azur from Primeval Sorcerer Azur in Mt. Gelmir.

Before doing so, it is recommended to progress through Lunar Princess Ranni’s quest first to avoid any conflicts. It’s also important to free Witch-Hunter Jerren from the Radahn Festival, as he is a pivotal character in completing Sellen’s quest.
First, you have to meet and serve Lunar Princess Ranni. Venture to the Three Sisters region in the northwestern Liurnia of the Lakes area.
Before accessing that area, you must defeat Royal Knight Loretta on top of Caria Manor. While you’re there, don’t forget to get the Sword of Night and Flame, one of the legendary armaments in Elden Ring.
Proceed through Ranni’s quest until Blaidd the Half-Wolf tells you to meet Preceptor Seluvis. He will draft a letter of introduction to give to Sorceress Sellen.
While Sorceress Sellen isn’t too happy to hear from Preceptor Seluvis, she will assist you nonetheless. She explains that the suspended stars hold the fate of the Carian Royal Family because General Radahn challenged the stars and won.

Sorceress Sellen then suggests that for the stars to resume their movement, General Radahn needs to die. Only after will Lunar Princess Ranni’s destiny continue.
After defeating Starscourge Radahn and setting the stars in motion, talk to Castellan Jerren at the church in Redmane Castle. He is sitting before the altar, north of the Redmane Castle Plaza Site of Grace.
Because of their oath, Castellan Jerren was bound to General Radahn and Redmane Castle. Completing the Radahn Festival frees him from his commitment, and he can take care of old business.
As usual with FromSoftware NPCs, you have to exhaust his dialogue to trigger him to move. You’ll encounter him later in Sellen’s quest, now known as Witch-Hunter Jerren.
Now that the pieces are in place, you can now begin Sorceress Sellen’s quest in Elden Ring.
Start from the Grand Lift of Dectus in Altus Plateau. You can reach Altus Plateau by finding the two halves of the dectus medallion and activating the Grand Lift of Dectus. Or, you can take the “coward’s path” by scaling Ruin-Strewn Precipice, found by following the river north of Liurnia of the Lakes.
Either way, make your way to Lux Ruins, northwest of the Grand Lift of Dectus. Then, go down the east cliff and rest at the Erdtree-Gazing Hill Site of Grace.

From there, climb up the rocky path north to reach Wyndham Ruins. You’ll automatically trigger a boss fight against Tibia Mariner if it’s your first time here.
As usual with field bosses in Elden Ring, the fight is optional. However, defeating Tibia Mariner rewards a Deathroot, a valuable item you can exchange for beast incantations at the Bestial Sanctum, north of Dragonbarrow.
Gallop towards Seethewater River, and begin the relatively long trek to get Comet Azur in Elden Ring. The path is dangerous because of both enemies and environmental hazards. Make sure to rest at any Site of Grace on the path.
Eventually, you’ll reach a heavily guarded fortress called Fort Laiedd. Then, go south and cross the magma pool where another Magma Wyrm resides.
Keep following the linear path until you reach Hermit Village. At the very end of the village, there’s a giant field boss called Demi-Human Queen Maggie. For some reason, she’s also accompanied by several Raya Lucaria Academy wizards.
After defeating the group, scale the natural protruding rock formation. Keep an eye out for the Primeval Sorcerer Azur Site of Grace on the west.
Then, go rest at that Site of Grace and find Primeval Sorcerer Azur hiding on the south side of the cliff. Interact with his crystal-filled body to receive the Comet Azur sorcery.

Finally, fast travel back to Waypoint Ruins in Limgrave. Talk to her and choose the option “Show Azur’s Sorcery” to begin Sorceress Sellen’s quest in Elden Ring.
The Search for Master Lusat
Showing Sorceress Sellen the Comet Azur sorcery rekindles her former goal. She’ll ask your help to restore the primeval current of Glintstone Sorcery.
To do so, she needs to bring Master Azur’s and Master Lusat’s magical essence back into Raya Lucaria Academy. As you already have Master Azur’s essence, she sends you to search for Master Lusat’s body.
Her lead about Master Lusat’s whereabouts takes you to a hidden cave called Sellia Hideaway in Caelid. You’ll find Master Lusat’s body sealed behind a magical barrier, which you break using a key given by Sorceress Sellen.
Hidden Cave Location
After showing Sorceress Sellen the sorcery you received from Master Azur, you can ask more about her past.

She reveals that Primeval Sorcerer Azur was actually her first teacher. Because of their influence, she also shares the same goal as her former mentors, which is to uncover the secrets of Glintstone Sorceries without any taboos and restrictions.
Sorceress Sellen despises the current rulers of the Raya Lucaria Academy, the Carian royal family, because of their pedantic rules on the study and practice of Glintstone Sorceries.
In fact, they went as far as to banish both Master Lusat and Master Azur, despite their contributions as founding Glintstone sorcerers. Master Lusat received an even greater punishment, as he is currently imprisoned in an unknown location.
Sorceress Sellen requires the essence of her former masters to take back Raya Lucaria Academy and restore primeval Glintstone Sorcery. You already have Master Azur’s; thus, you have to find Master Lusat’s to progress Sorceress Sellen’s quest.
Continue talking to Sorceress Sellen until she gives you a Glintstone Key. You can break the magical barrier imprisoning Master Lusat’s body with that item.
Master Lusat’s exact location is unknown. However, she gives you a lead to search in eastern Caelid wilds. Additionally, she also comments that she received the Glintstone Key from a Sellian sorcerer, and infers that his body is near the area.
There’s a note you can purchase from an isolated merchant west of Dragonbarrow. To get there, interact with the waygate north of the Third Church of Marika in Limgrave. The waygate will teleport you straight to Bestial Sanctum in Dragonbarrow.
From there, follow the path south and cross the bridge. Then continue west, past the Divine Tower of Caelid.
Eventually, you’ll find a lone shack with a merchant by the campfire. Don’t approach at night, or else you’ll come across a high-leveled Bell Bearing Hunter.
Purchase the item “Note: Hidden Cave” for 1200 runes to learn more about the whereabouts of Master Lusat’s body. The note reads, “There is a hidden cave in the town of Sellia. Look beyond the graveyard at the precipice.”
To continue with Sorceress Sellen’s quest, go to Sellia, Town of Sorcery, west of Caelid. You can travel there by simply following the road in Caelid. You’ll pass by a large structure called Sellia Gateway before arriving at the ghost town.

Once there, you have to unlock the magic seal at Sellia, Town of Sorcery, to pass through. The sage at the shack reveals how to solve the puzzle if you retrieve an item for him.
You have to light the three candles on various rooftops in the town. Once done, you may proceed through the town of sorcery.
The Church of Plague is on top of the hill after Sellia. You can cure Millicent, the scarlet rot-blighted NPC, if you follow the aforementioned sage’s request.
Proceed further uphill to the north and pass the arch made of wood. Once you’re in the graveyard, look for the battlemage guarding a grave.

Go directly behind that tall grave and proceed to the cliff. Hit or roll through the illusory wall to reveal Sellia Hideaway.
Sellia Hideaway Guide
Sellia Hideaway is a confusing cave system filled with illusory walls, branching paths, and small jumping puzzles across the large crystals.

However, there are great rewards here for any sorcerer. In fact, there are three obtainable sorceries in this cave alone. Not to mention Master Lusat’s body is hidden somewhere, an important objective to complete Sorceress Sellen’s quest.
After resting at the Site of Grace, follow the linear path until you reach a dead-end near two large crystals and the Golden Rune [3] item. The dead-end is actually an illusory wall that you have to hit to proceed.
There’s another illusory wall right after the first. Dispel it and proceed to the cave proper.
Immediately, you’ll see a large crystal formation that branches off to different paths. Drop down to the purple crystal on the left (west). Grab the Golden Rune [5] near the Sorcerer Miner before proceeding below the crystal.
Before dropping down, you may want to use any ranged attacks to deal with the screeching monster on the bottom. The Royal Revenant is a notoriously tricky enemy who attacks fast and mercilessly. Therefore, it’s in your best interest to avoid a melee encounter with this particular mob.
After dealing with the Royal Revenant, make sure to collect the various loot on the ground. Among those items is the Lost Ashes of War, a valuable item used to duplicate Ashes of War.
Then, proceed northwest and look for the opening. The tunnel will lead you back up to another purple crystal.
Climb on top of it and drop down to return to the top. Be ready to fight the group of Crystal Snails after the drop.
Jump over the gap and then venture eastward. Look down and drop to the two purple crystals to safely reach the bottom.

From here, follow the path north to find a blue barrier guarded by a battlemage. Use the Glintstone Key to break the barrier and find Master Lusat’s body.

Interact with Master Lusat’s body and wait for him to drop the Stars of Ruin sorcery. The spell is ridiculously powerful and is almost impossible to deal with during PvP battles.
Turn around and follow the path south. Climb up the wide crystal formation and drop down at the opening near the Royal Revenant. Then, you can simply climb up again to reach the top.
At this point, you can safely leave Sellia Hideaway to continue with Sorceress Sellen’s quest. However, that is an unsatisfying way to explore, so you should continue investigating the cave further.
Return to the area on top of Master Lusat’s body, but don’t jump down this time. Instead, follow the tunnel until you reach a wider part of the cave, complete with even larger crystal formations.
After the opening, stick to the rocky path on the right (north) until you reach the base of the crystal. Climb on top of it, then drop to the crystal below it.
Once more, drop to another crystal below the second one and follow it to the end. Then, carefully drop down and open the treasure chest to receive Crystalian Ashes.
Proceed through the tunnel and fall to a lower area. The area to the left leads to the boss of the cavern.
But before that, turn to the right (east) to return to the area with all the crystals.
Return to the opening of that area to reorient yourself. This time, follow the rocky path north, then go to the left (west) when the path forks.
Past the corpse with the item, there’s another illusory wall. Dispel it to reveal a treasure chest containing the Crystal Spear.
Used by the Crystalians, it’s a neat-looking spear that scales off intelligence and dexterity. Unfortunately, it’s weaker compared to other spears, and you can’t even replace its lackluster Ashes of War.
Finally, return to the tunnel and proceed to the boss room. You’ll be up against three Crystalians at the same time. They’ll be wielding a spear, a ringblade, and a staff. Prepare some Preserving Boluses or the Flame, Cleanse Me incantation to cure their Scarlet Rot status effect.

Defeat the three Crystalians to receive the Crystal Torrent spell. The Crystal Torrent spell fires several crystal shards at once, and it’s deadly when used point-blank, like a Glintstone shotgun.
After defeating the boss of the area, interact with the faded grace to teleport back to the entrance. Afterward, fast travel back to Waypoint Ruins and speak to Sorceress Sellen.
When speaking to Sorceress Sellen, choose the “Lusat’s Location” option to fulfill her request. She’ll offer you a Starlight Shard as a token of her thanks.
Now that you’ve found Master Azur and Master Lusat’s location and collected their essence, you’re one step closer to completing Sorceress Sellen’s quest.
The bodies of her former masters can now be readmitted to Raya Lucaria Academy. However, there’s just one issue.
You’re merely talking to a projection of Sorceress Sellen. Her real body is locked away somewhere else.
How to Free Sorceress Sellen
The Sorceress Sellen at Waypoint Ruins in Limgrave is merely a projection. Her real body is locked away in Witchbane Ruins at the south of Weeping Peninsula.
Upon her request, you have to find her real body and retrieve her essence. After that, you have to search for a new body because Witch-Hunter Jerren disposed of her old one.
There’s a fresh husk located in Seluvis’ Secret Room at the Three Sisters, Liurnia of the Lakes. Afterward, she can finally proceed with the last phase of Sorceress Sellen’s quest at the Raya Lucaria Academy.
Sellen’s Real Body and Witch-Hunter Jerren
After talking with Master Lusat in Sellia Hideaway, return to Sorceress Sellen in Waypoint Ruins. She’ll ask you to give her a moment because she has a favor to request.

Talk to her again and choose the “About the Request” option. She’ll give you directions to find her real body imprisoned at the southern tip of the Weeping Peninsula.
The real Sorceress Sellen is located under a cellar at Witchbane Ruins, south of the Fourth Church of Marika, past the Wandering Mausoleum.

Fast travel to the Fourth Church of Marika and look for the green pools scattered across ruined structures.
Several enemies are patrolling the area, including a sphere of graven mages blocking the cellar. Make sure that you eliminate them before visiting Sorceress Sellen, as some of them can follow you down the basement and hurt her.
Additionally, many players tend to explore this basement early in the game. If you accidentally hurt Sellen and drew her ire, you can always request absolution in the Church of Vows to reset NPC hostilities. However, take note that this doesn’t revive dead NPCs.
Talk to the shackled Sorceress Sellen about her request. She wants you to take her primal glintstone, her very essence, because she thinks someone is coming to take her life.

Interact with Sellen to receive Sellen’s Primal Glintstone key item. Then, leave the area and reset the world at any Site of Grace. Afterward, return to the cellar in Witchbane Ruins.
If you successfully exhausted Witch-Hunter Jerren’s dialogue back in Redmane Castle, he’ll be standing near Sorceress Sellen’s lifeless body. Talking to Jerren reveals a little more about why Sellen was exiled.
He says that Sorceress Sellen was known as the graven witch obsessed by the primeval current, and she took the lives of countless sorcerers. He even goes so far as to call her the most dangerous mage in the entire history of Raya Lucaria’s Academy.
A New Body for Sellen’s Primal Glintstone
With Witch-Hunter Jerren victoriously dealing with old business, it isn’t clear how to proceed with Sorceress Sellen’s quest. Fortunately, Jerren gives a slight hint when you’re talking to him in Witchbane Ruins.

Jerren mentions that killing Sorceress Sellen was worrisome because she was a husk. He also suspects that she’ll show up in another body. This is also verified by the item description on Sellen’s Primal Glintstone, stating that you can transplant the item to a compatible new body to revive the sorcerer.
All evidence points towards your next step: you have to find a new body for Sorceress Sellen.
Fast travel to Ranni’s Rise Site of Grace in Three Sisters, Liurnia of the Lakes. Travel to the unmarked ruins to the east of the tower and look for the lone enemy.

Try rolling or using jump and area of effect attacks to find the illusory floor; it should be between several pillars. If you’re connected to Elden Ring’s online servers, there should be some messages from other players pointing out the secret.
Go to the end of the room and dispel the illusory wall to reveal Seluvis’s private room. There’s a bed inside along with some puppets, and that’s enough information to ascertain what Preceptor Seluvis does with those who drink his potion.

Give Sellen’s Primal Glintstone to the puppet that looks like Sorceress Sellen. By doing so, you would have successfully revived her and can proceed to the final phase of Sellen’s quest.
Sellen or Jerren
Assuming you’ve already defeated Rennala, Queen of the Full Moon, you can move on to the last leg of Sorceress Sellen’s quest.
Fast travel to the Raya Lucaria Grand Library Site of Grace in Liurnia of the Lakes. From there, move to the only exit and inspect the two summoning signs near the door.

For the final decision of the quest, you have to side with either Sorceress Sellen or Witch-Hunter Jerren—the choice is entirely up to you. The impact of your decision is self-contained to this quest, and it doesn’t impact Elden Ring’s overarching story; however, it will change the rewards you receive at the end.
To help you choose between Sellen or Jerren, here are the rewards for siding with either character:
You’ll earn overall fewer rewards by siding with Witch-Hunter Jerren. You’ll receive the Witch’s Glintstone Crown, the iconic stone crown that Sellen wears. It increases the intelligence and arcane attributes, but it reduces stamina.
You’ll also take Sellen’s Bell Bearing. Offering her Bell Bearing to the Twin Maiden Husks in Roundtable Hold will let you purchase her current inventory of spells.
Lastly, Jerren will hand you an Ancient Dragon Smithing Stone. It is a very rare crafting material that can reinforce armaments to +25.
Additionally, you can also kill Witch-Hunter to loot his Eccentric Set. While some may find the set goofy, Dark Souls 3 fans noticed that the armor resembles Slave Knight Gael. Plus, the beard comes with the headpiece.
If you choose to side with Sorceress Sellen, you’ll immediately receive the Eccentric Set after defeating Witch-Hunter Jerren. Sellen will also give you the Glintstone Kris weapon.
Glintstone Kris is an intelligence-scaling dagger with the Glintstone Dart Ashes of War. Glintstone Dart is downright one of the best Ashes of War in Elden Ring.
Deceptively simple, use the weapon skill to fire a Glintstone Pebble or charge it to release a Glintstone Dart. You can even follow up with a strong attack to execute a lunge with ludicrous range. Glintstone Dart is fast, efficient, and practical, perfect for PvP scenarios.
Siding with Sellen also nets you Azur’s Glintstone Set and Lusat’s Set, alongside the Witch’s Glintstone Crown. And she’ll also sell a new sorcery called Shard Spiral for 8000 runes. It is an absolute beast of a spell, and it hits like a truck; plus, casting it uses no stamina.
Once you’re ready to side with either Sellen or Jerren, move close to the summon sign and interact with it. The gold sign allows you to assist Sellen, while the red sign lets you side with Jerren and challenge Sellen.
After picking, you’ll be summoned to assist and fight the opposing character. Siding with Jerren prematurely ends Sellen’s quest. He’ll be waiting near the door to give your reward next to his summon sign.
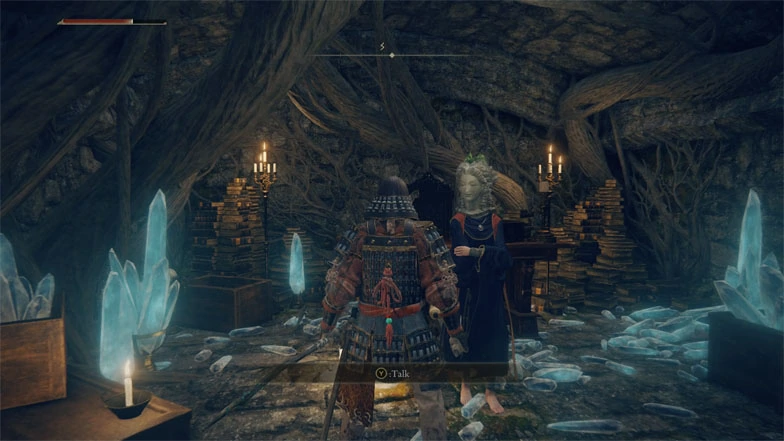
If you do side with Sellen and defeat Jerren, Sorceress Sellen will be at the center of the Grand Library, replacing Rennala. She will thank you, and now she can continue to hone the primeval current of Glintstone Sorcery. Exhaust her dialogue to receive your reward.
If you’re wondering where Queen Rennala is, she is safe in the corner of the Grand Library. Upon reloading the area, she’ll be back in the center, ready to respec your character.
Sorceress Sellen has turned into a grotesque amalgam of wizards, just like the sphere of wizard heads encountered throughout the Lands Between. You can talk to her to buy sorcery spells, including the new Shard Spiral.

While it is sad to see Sellen’s quest end in tragedy, one can’t help but think she wanted that result. After all, the Graven-School Talisman states, “The primeval current is a forbidden tradition of glintstone sorcery. To those who cleave to its teachings, the act of collecting sorcerers to fashion them into the seeds of stars is but another path of scientific inquiry.”


