For the past two decades, the NBA has become more perimeter shot-oriented. Many players have had to become adept at shooting from the mid-range or beyond the arc.
Even most power forwards and centers, who were expected to rule inside the paint in the past, spend more time now behind the 3-point line.
In NBA 2K22, the perimeter shot is also an important offensive weapon to have. More so if your player archetype’s strengths lean towards outside scoring.
If you are struggling to convert jumpshots or have the goal of becoming the best shooter in the league, you need to learn how to create the most ideal jumpshot animation.
In this guide, I’ll show you the three best jumpshots in NBA 2K22. These are based on my personal experience after having grinded hours in the game.
I also researched builds made by other users online and have tested them for myself to find the best 2K22 jumpshot for different playstyles, whether you’re on current-gen or next-gen.
Jumpshot Animation Basics
First things first, we will discuss why you need to customize your jumpshot. After all, you can always just use the animation of some of the best shooters in history, like Stephen Curry, Ray Allen, and Kyrie Irving.
However, those jumpshot animations might not fit your playing style and player archetype. You will then have to adjust how you shoot the ball to the build you chose instead of finding a build that perfectly works for you.
To elaborate that point further, if you equip Curry’s jumpshot animation, then you will have less time to hit the zone in the shot meter. This is because the two-time MVP is known for his quick release.
It is better then to customize the shooting style animation to suit your preferred shot meter timing.
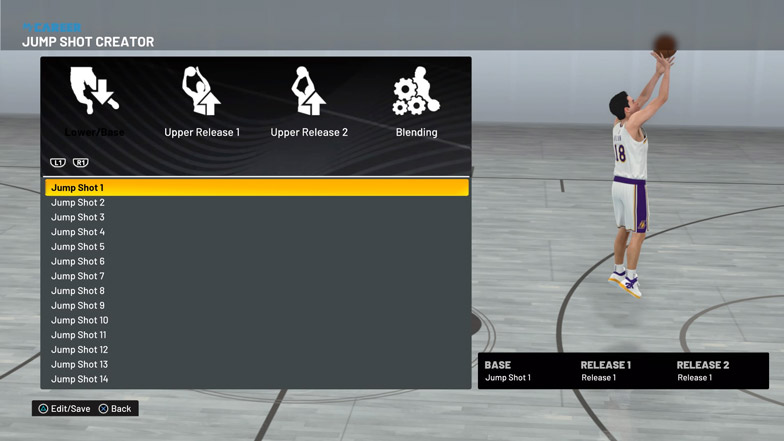
To help guide you on how to make a jumpshot, the following explains each section of the Jump Shot Creator.
- Lower/Base – This determines the angle of the player’s body when attempting a shot, shot timing, pre-jump motion, and the height and direction of the jump.
- Upper Release 1 – This determines how and where the ball is released from the hand and the follow through after the shot.
- Upper Release 2 – This allows for the combination of shot release animations. By selecting the same Upper Release 1 and 2, no blending of release styles is made.
- Blending – This allows you to change the speed of the release of the ball during the shot and how much of each upper release style is incorporated in the combined animation.
Best Jumpshot for Any Player Build
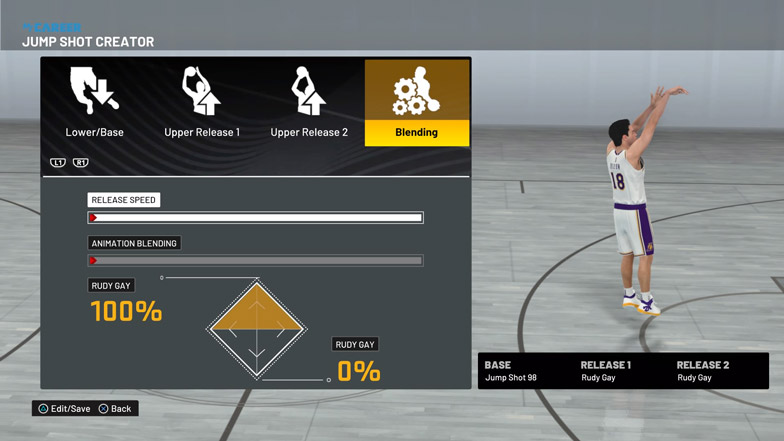
- Lower base = Jump Shot 98
- Upper release 1 = Rudy Gay
- Upper release 2 = Rudy Gay
- Blend = N/A
- Release Speed = 0%
One of the favorite lower bases among users through the various iterations of NBA 2K is the Jump Shot 98. It works great with low or high jumpshots, as well as for any position.
To complete the most ideal jumpshot for any player archetype, I suggest using the Rudy Gay style. Not only is the animation easy to master, it is also the best one for when you want to make a quick stop. You can select a different Upper Release 2. The LaMarcus Aldridge or Kobe Bryant animations are great, but you can also just settle for Rudy Gay’s.
As for the release speed, I go for 0% so there is no need to hurriedly let go of the shoot button. If you prefer a quick release, though, you can also increase the speed.
Best Jumpshot for Easiest Green Shots
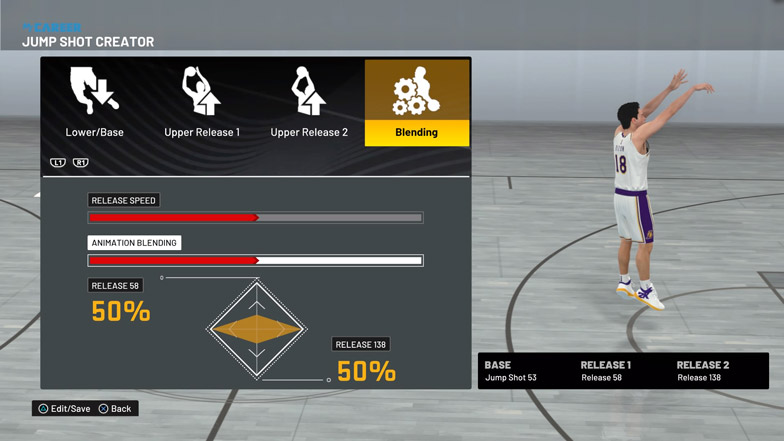
- Lower base = Jump Shot 53
- Upper release 1 = Release 58
- Upper release 2 = Release 138
- Blend = 50/50
- Release Speed = 50%
You can take advantage of the jump shot creator by using it to make an animation that will help you hit the shot meter accurately.
To create the easiest jumpshot to green, assign Jump Shot 53 to the lower base, Release 58 to upper release 1, and Release 138 to upper release 2. The resulting jumpshot may not be the aesthetically pleasing, but these styles create visual glitches in the shot animation that will let you easily track when to release the ball accurately.
Best Jumpshot for Quick Release
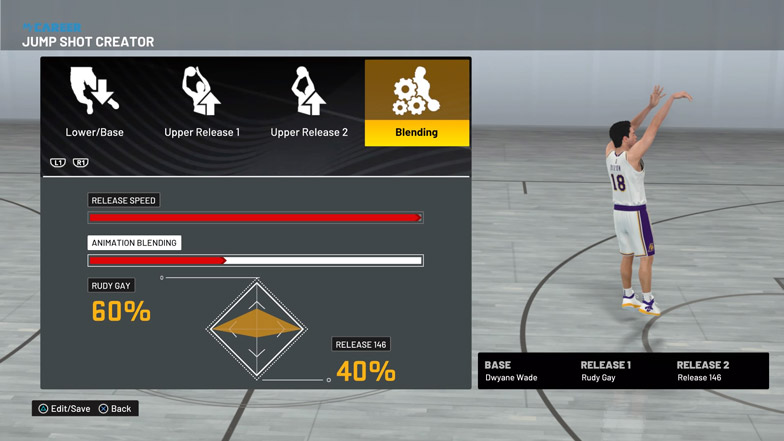
- Lower base = Dwyane Wade
- Upper release 1 = Rudy Gay
- Upper release 2 = Release 146
- Blend = 60/40
- Release Speed = 100%
There are several upsides to creating a jumpshot with a quick release. It is less likely to get blocked by opponents or have the shot percentage penalized when defenders are given the chance to close out.
The Dwyane Wade lower base is one of the jump shot animations with the fastest release. You can then use the Rudy Gay and Release 146 for the upper release 1 and upper release 2 with a 60/40 blend. The resulting jumper will have a low jump and quick execution.
Tips for Making Jumpshots in NBA 2K22
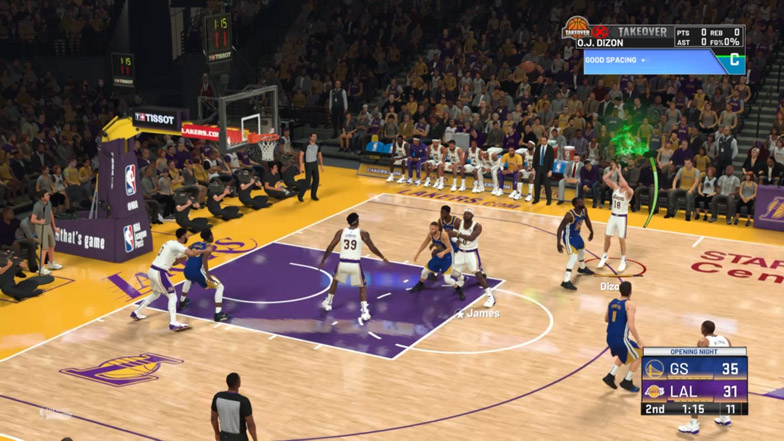
Successfully making jumpshots in NBA 2K22 can be difficult at first. More so if your shooting attributes are not yet levelled up. However, there are several ways to improve your accuracy from the field.
Before anything else, you will have to master the timing of your chosen jumpshot. You can head to the Team Practice facility to try as many jumpers as possible with no fear of long-term penalty for a lot of misses.
During games, make sure to attempt only good shot selections as much as possible. This means shooting when there is enough space between your player and the opponent.
It also helps to prioritize shooting from your hot zones. Learning how to get hot zones in NBA 2K22 is helpful in making you one of the best shooters in the game.
The right shooting badges is also beneficial. Be sure to study on the fastest way to unlock badges and use the points on the appropriate badges, such as Deadeye and Volume Shooter.
What to Do Next?
Your next step is surely improving your player more. That is the goal of any MyCareer player, and getting that elusive 99 overall rating is what puts your player at the top.

