
Minecraft Legends is a rich and vibrant game. Whether you’re a dedicated strategy game fan, an open world explorer, or a competitive gamer, there’s bound to be something in this game that you’ll fall in love with.
One of the most vital things to get to grips with in the game is the different biomes.
The overworld is procedurally generated (which adds a lot of replay value) but the biomes remain roughly the same. They’re all incredibly different from one another when it comes to spawns, visuals, mobs, treasure, and horde outposts.
To help you hit the ground running, here’s a complete guide to biomes in Minecraft Legends.
Badlands
| Visual description | A barren desert zone with tall stone structures, valleys, and tar pits |
| Resources | Mostly Wood, Coal, and Stone |
| Common hazards | Easy to take fall damage in the valleys |
| Mounts | None |
| Useful for | Stocking up on core resources and Coal |
This is one of the most visually striking biomes in the game, and it’s a great place to farm resources like Wood, Coal, and Stone.
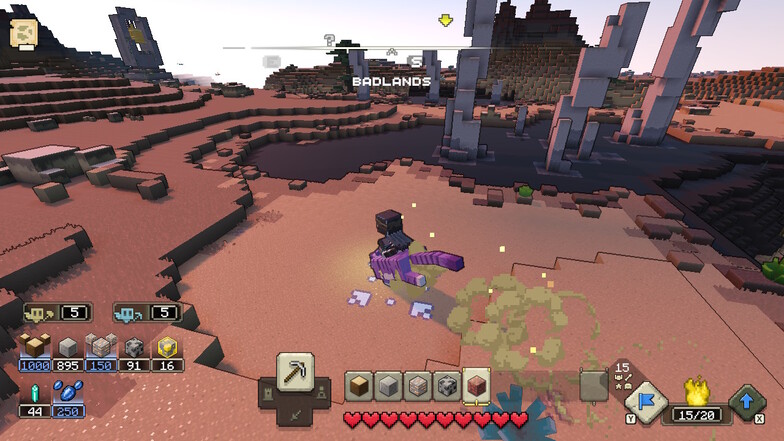
If you decide to explore any of the taller areas of this zone, make sure to watch your step as it’s quite easy to fall and take damage here.
Thanks to the vastness of the zone and generally flat ground, this is quite a good spot to build a Wellhouse in.
Dry Savanna
| Visual description | This desert zone feels expansive, with lots of speed wheat, stone structures, and hills to climb |
| Resources | Lots of Iron, some Stone and Wood |
| Common hazards | None |
| Mounts | Regal Tiger |
| Useful for | Stocking up on Iron and finding the best mount in the game |
The Dry Savanna zone is worth exploring for the Regal Tiger alone. This zone is where the best mount in the game spawns, so make sure to check it out if you haven’t already.

Other than the Regal Tiger mount, you can find plenty of Iron in this zone. There are a fair few Wood and Stone spawns, too.
Fatelands
| Visual description | This is the first zone you’ll end up in the game. It’s very grassy and full of Stone structures |
| Resources | Lots of Stone |
| Common hazards | None |
| Mounts | None |
| Useful for | Accessing safe zones like the Well of Fate and farming Stone |
The Fatelands is the first zone you’ll see, and it’s incredibly useful.
In a similar fashion to the Nether biome, this biome automatically envelops any safe zones in your game. You’ll notice that your map reads ‘Fatelands’ whenever you fast travel to a safe Village Fountain or the Well of Fate.

There aren’t many notable points about the Fatelands, but there are plenty of Stone structures to mine, so make sure to pick those up whenever you’re nearby.
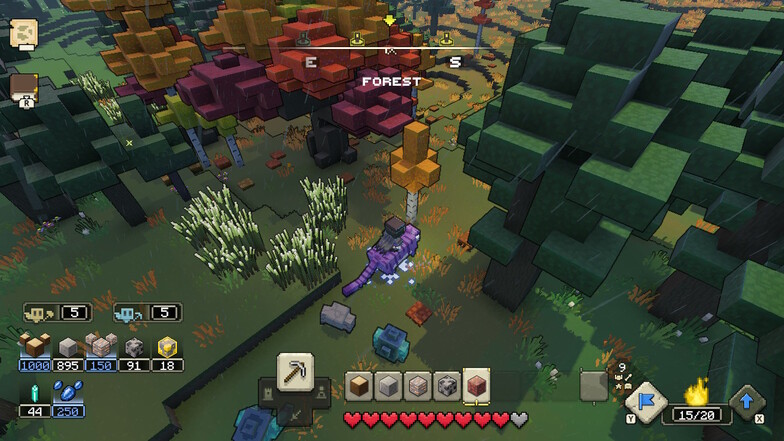
Forest
| Visual description | This biome is lush with foliage, flowers, muddy puddles, and rivers |
| Resources | Lots of Wood, some Stone and Iron |
| Common hazards | The muddy puddles can slow your character down |
| Mounts | None |
| Useful for | Finding core resources and Iron |
This is one of the prettiest biomes in the game, in my opinion.
It’s full of trees and flowers, making it a fantastic place to farm Wood. There are plenty of speed wheat clumps to help make you go faster, too.
Alongside the plentiful Wood supplies, there’s plenty of Stone to pick up as well. There are also some Iron spawns in the area.
Watch out for muddy puddles, as these can slow your character down significantly.
Jagged Peaks
| Visual description | The Jagged Peaks biome is stacked with tall mountains and grassy cliffs |
| Resources | Lots of Stone and Diamond |
| Common hazards | It’s easy to take fall damage due to the mountains |
| Mounts | Big Beak |
| Useful for | Finding Big Beak, surveying the surrounding zones from high up (remember to increase your view distance), and getting Stone and Diamond |
The Jagged Peaks biome can be a little hard to traverse (especially without the Brilliant Beetle mount) but it’s worth the effort.

This zone is absolutely packed with Stone and Diamond, making it a great place to farm if you’re looking to stock up on resources.
Watch out for fall damage, though.
I was convinced that the game didn’t have fall damage until I came across this zone. I can now confirm that it does, and it’s a pain recalling your mobs if you lose them.

This zone is also home to the Big Beak mount, which has a boosted jump ability.
Jungle
| Visual description | The Jungle is packed with thick trees and foliage, dangerous plants, and plenty of bouncecap mushrooms too |
| Resources | Lots of Wood and Redstone |
| Common hazards | Thorns and poison |
| Mounts | Brilliant Beetle |
| Useful for | Finding the Brilliant Beetle mount and farming Redstone and Wood |
The Jungle is one of the most dangerous biomes in the game, but it’s also one of the most lucrative ones for resource farming and mounts.

This is the location of the Big Beetle mount, which is the ideal mount for climbing up any steep cliffs or mountains that you need to traverse.
It’s also possible to farm Wood and Redstone here effectively, too. Just keep an eye out for any thorn bushes or poisonous plants as you explore.
Meadow
| Visual description | This biome is peaceful, with mostly flat grassland, sparsely dotted trees, and a few bundles of wildflowers and speed wheat |
| Resources | Lots of Wood and some Coal and Stone, too |
| Common hazards | None |
| Mounts | None |
| Useful for | Finding core resources and Coal |
The Meadow biome is incredibly peaceful, and aside from any Village or horde outpost spawns, there aren’t many reasons to visit it.

There are a few trees and rocky patches throughout this zone, which means that it’s good for picking up a few core resources. There are several Coal spawns, too.
The flat, open area means that this is quite a good location to build a Wellhouse if you haven’t built any nearby. It’s easier to defend than, say, a Wellhouse in the Swamp or Jungle biome.
Other than that, the best thing about this zone is the combination of the abundant speed wheat and flat surfaces. It’s ideal for testing out the various mounts in the game and seeing how fast you can go.
Nether
| Visual description | This is the biome that Piglin outposts spawn into. They’re intimidating, with rivers of lava. It’s possible to cure the Nether in order to build on it |
| Resources | Lots of Redstone |
| Common hazards | Piglin horde outposts and wandering enemy packs |
| Mounts | None |
| Useful for | Finding Redstone and farming Piglins for items like Piglin Keys |
The Nether is a unique Minecraft Legends biome as it’s one that spawns in alongside Piglin horde outposts and bases.
It’s one of the most treacherous biomes in the game, as it’s full of dangerous mobs and a number of lava rivers and pools, too.

It is one of the best biomes to check if you’re looking to get more Redstone quickly, though, as it can be found all over.
You can also farm other items like Piglin Keys in this biome, but it’s important to make sure that you’re fully healed and that you’ve got strong troops with you.
Ocean
| Visual description | The ocean is vast and surrounds the entire map |
| Resources | None |
| Common hazards | Losing sight of the shore |
| Mounts | None |
| Useful for | Swimming and having a nice time with your troops |
The Minecraft overworld is an island, so naturally, it’s surrounded by a huge ocean.
It’s possible to swim quite far out in the ocean, although I wouldn’t recommend it as it’s quite easy to lose track of where the shore is.

It doesn’t appear to be possible to drown in Minecraft Legends, and swimming doesn’t appear to kill your troops, either.
If you were hoping to lose a few troops and clear your army, though, it is possible to do so by sending them to swim in lava. It feels a little mean but it is efficient.

There doesn’t appear to be anything to battle, loot, or explore in the Minecraft Legends ocean, although it would be a fantastic way to expand the overworld for DLC.
Swamp
| Visual description | This soggy biome is packed with pools and puddles, tall trees, bouncecap mushrooms, and plenty of dangerous flora |
| Resources | Lots of Wood and some Redstone |
| Common hazards | Wandering Piglin packs often spawn here, and there are thorns and slowing mud puddles to contend with too |
| Mounts | None |
| Useful for | Finding Wood and Redstone, farming Piglins for items |
The Swamp biome is one of the riskier biomes to explore in Minecraft Legends, as it has a handful of environmental hazards to navigate and Piglin packs can be found here, too.
It’s worth contending with, though, as there are some useful spawns.

Alongside the bouncecaps and puddles, you’ll be able to take down some hefty trees in order to farm Wood quickly.
Make sure to upgrade your Allays so you can do this more efficiently.

It’s possible to find a decent number of Redstone spawns here, too. Make sure to keep an eye out for any wandering foes while you’re farming.
Tundra
| Visual description | This chilly biome is similar to the Meadow in layout, except much more snowy. There are a few tall cliffs and mountains in places |
| Resources | Lots of Diamond (it’s quite well hidden) and some Wood and Stone |
| Common hazards | None |
| Mounts | None |
| Useful for | Finding Diamond in large amounts and farming core resources too |

If you’re hoping to spawn some Skeletons in your next battle, this is the first biome that you need to be heading to.
There’s a huge supply of Diamond in the Tundra biome, although it can be a little hard to find at first. It’s worth the effort, though, as Diamond is one of the key resources needed to get Skeletons and it can be used for other upgrades as well.
Other than that, the Tundra isn’t a particularly interesting biome. It’s possible to find some Wood and Stone here, but it’s easier to farm these in other zones.
What to Do Next
Now that you know where to find the most important resources and troops in the game, why not spend some time getting the First Golems to join your army? They’re very powerful.
They can be quite expensive to spawn (especially in terms of gold) but having one or two First Golems on your side can make all the difference when trying to take down a particularly tough enemy or horde outpost.
If you need further clarification on which resources are essential in the game, read up on all the ore veins that you can find in the game, too. It’s not immediately obvious which resources are the most valuable in the game, so it’s worth your time to check this out.


